That one is definitely scary. Cool head sculpt!!
Thanks, D.
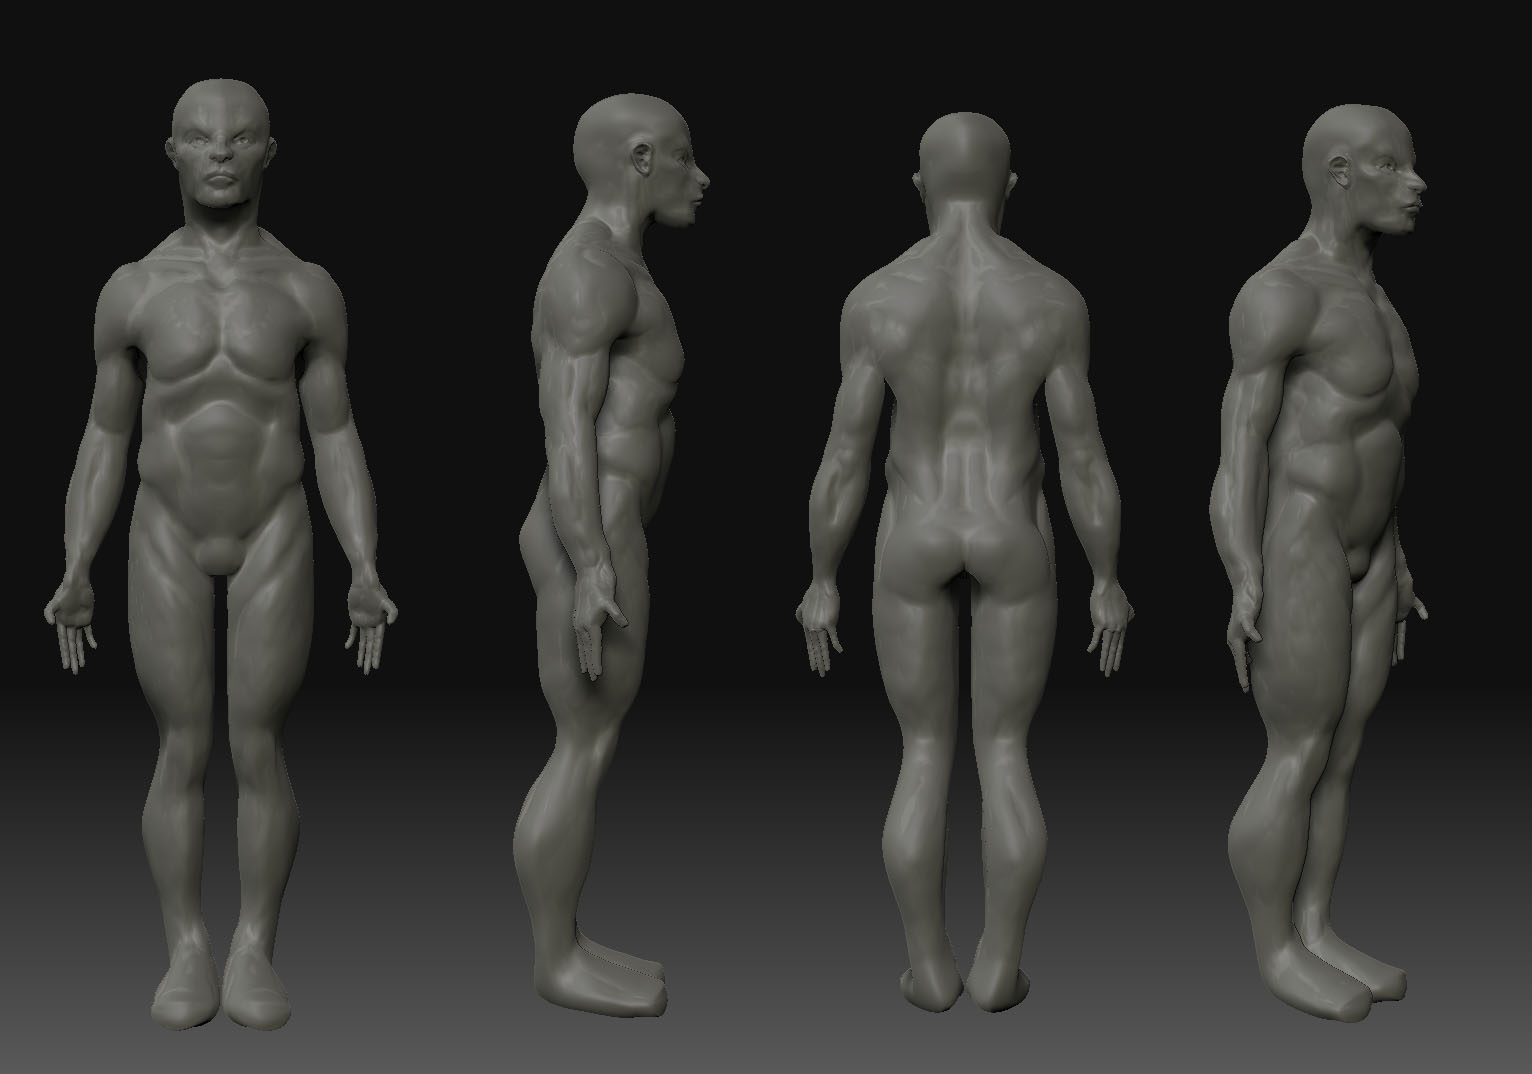
Well, I got back from the sculpting workshop. 12 long hours of sculpting over 2 days, but I really think I learned a good bit. I wasn’t able to keep the model, as I didn’t have a storage device and Gnomon has a fairly slow internet connection, so sending the ztool to myself wasn’t really possible. Still, I had enough good sense to take a screencap before I left.
Hopefully Ryan doesn’t come by this thread, as having him peering through my veil of anonymity and being able to place my name to my face is just a bit voyeuristic for my taste. However, if you are here, feel free to comment, and sorry for missing the group picture, my ride was waiting and I needed to get out of there.
[attach=109000]blaaaghxc1.jpg[/attach]
Attachments
Well, here’s tonight’s sketch. I was going to be painting tonight, but PS decided to not work, so Zbrush it was. I actually kind of like this one. It went through a lot of stages, but I think that ultimately I’m pretty pleased with the result, at least for a few hours work:
[ ](javascript:zb_insimg(‘109551’,‘Saturdaysketch.jpg’,1,0))
WOW!!!
That is by far the best head sculpt you have done so far. Clean and crisp. That sculpting class really helped you out huh?
Thanks, D. Yeah, I think it did. We only worked on the head for maybe an hour or two, but there was a focus on the planes of the face, which I initially overemphasized to get a stylized look, but I think still show through in the finished product. Also, Ryan showed us how he does eyes and mouths. His mouth creating method has proved very effective, though I’m still struggling with creating eyes without subtools.
Once again, thanks for the comment.
I sculpted a basic…well…I’m calling it a plasmoid cannon (everyone loves pseudoscience gibberish). It looks alright:
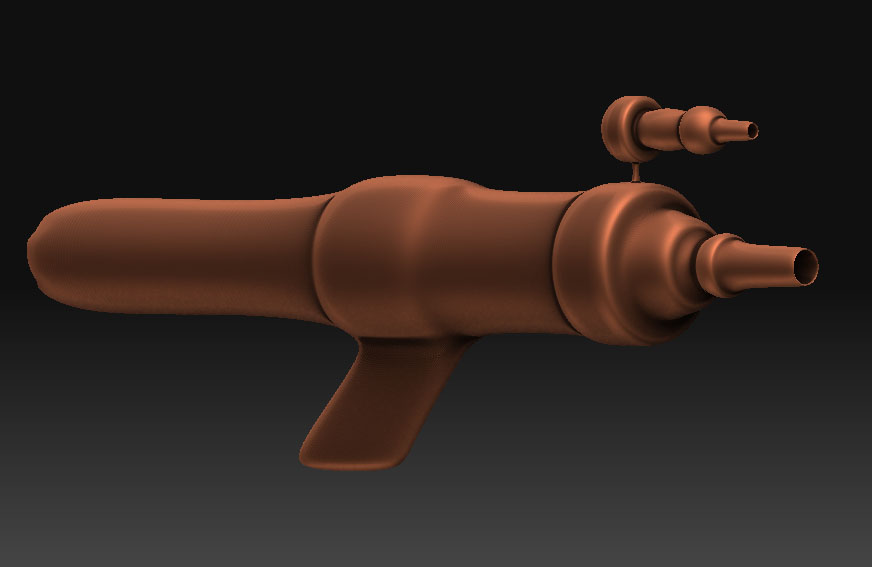
But unfortunately the symmetry in Zbrush isn’t working properly with the imported .obj:
[attach=111016]plasmoidcannon2io6.jpg[/attach]
I know it’s a pretty basic question, but can anyone help me with this?
Attachments
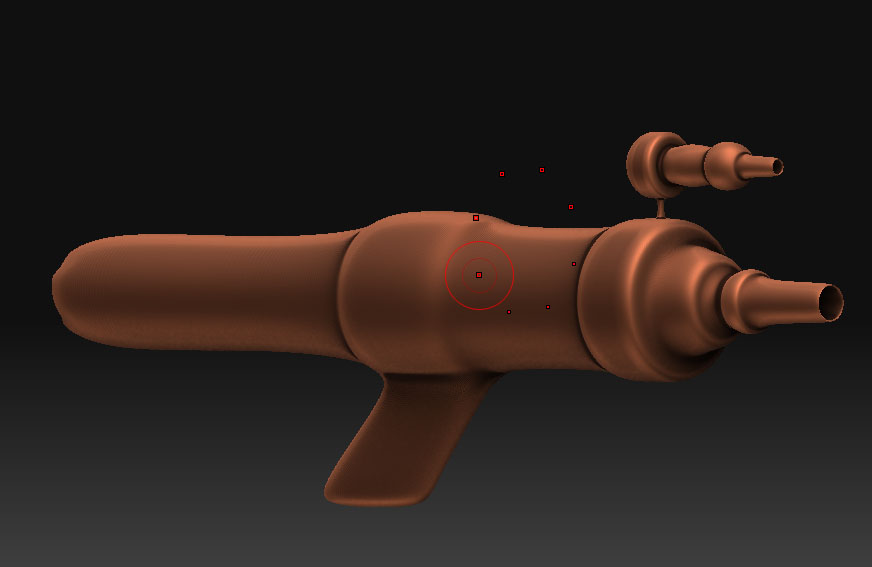
Looks like basic scaling issues, if that canon is a single piece hit unify from your deformations menu. But be mindful this changes the scale of the object itself.
Thanks for the help. Unfortunately, while symmetry is working better, you can see it is still not quite right:
[attach=111017]plasmoidcannon3zf8.jpg[/attach]
This isn’t a major issue except when I get into the smaller areas of the barrel, where any symmetry issues cause it to become quickly misshapen. It is a single piece, by the way.
Attachments

I really work too fast for my own good, I made this one in 1 1/2 hours from zspheres, but I honestly didn’t know where to go with this sculpt, maybe you guys have some ideas:
[ ](javascript:zb_insimg(‘110312’,‘Vulture.jpg’,1,0))
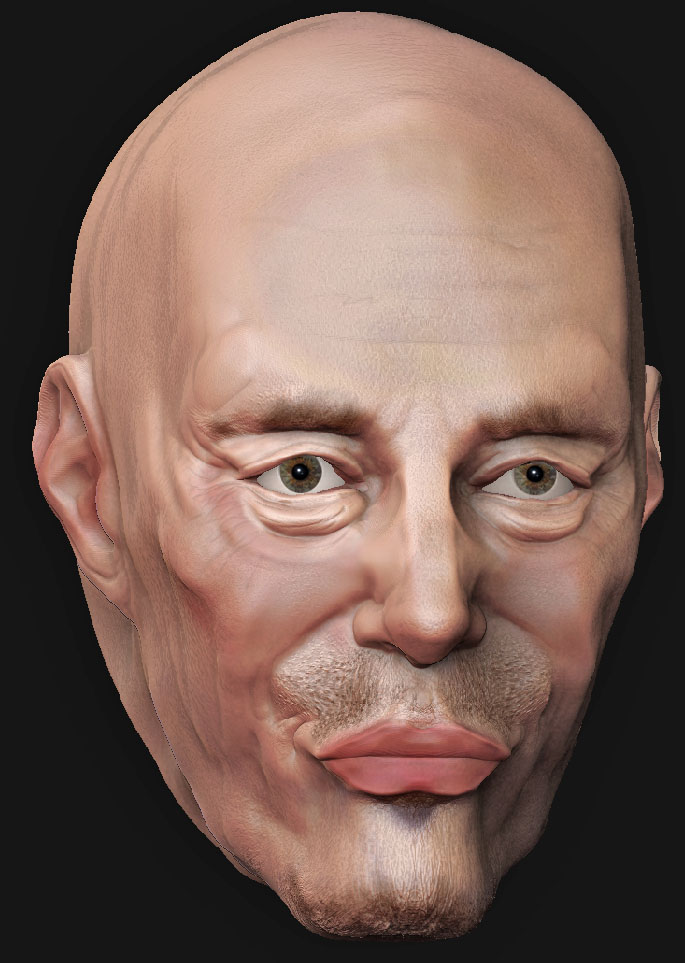
I’ve tried to create a likeness of Steve Buscemi. Unfortunately, the eye ztool I have causes everything to go haywire when I append it as a subtool, so I borrowed Steve’s actual eyes for a mock-up:
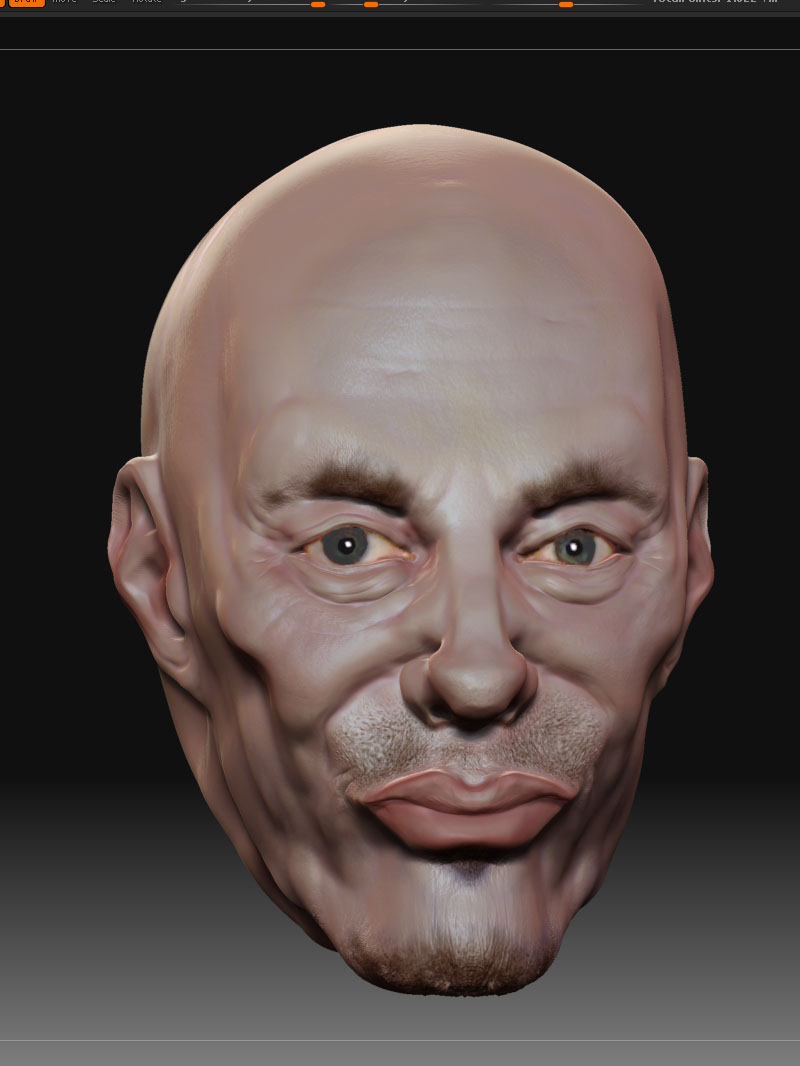
Without eyes:
[attach=111018]busceminoeyesfm2.jpg[/attach]
I think it looks more like Mike Patton really, but I’ve had enough tonight. Critiques more than welcome.
Attachments

What class did you take again Twitch? Cause you have jumped in skill.
Doesnt really look like buscemi to me but its still a much better head sculpt than your earlier works.
KEEP IT GOING!
Thanks D. Yeah, likenesses are hard, but I’m glad you like the basic sculpt. I took a 3 day Zbrush sculpting workshop taught by Ryan Kingslien. Not sure when and if it will be offered again, but he does teach a longer sculpting class (I think it’s a 10 week class).
A lot of what made my last sculpt as successful as it may have been was simply due to careful reference of real human anatomy, but there were definitely things I learned from the workshop that have lead to quicker, more accurate results.
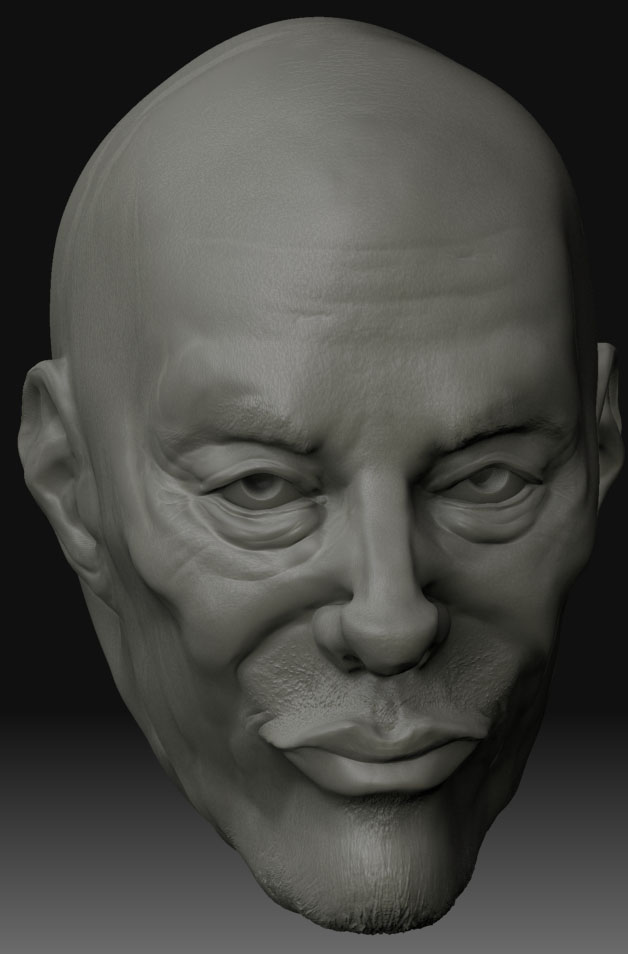
Edit: Here is a render using the green clay material. I just can’t help but make a version of every model using that material. It also helps show the detail of the sculpt better:
[attach=111019]buscemiclaygt7.jpg[/attach]
Attachments
I reworked the head with some critiques I received. I also changed the material and added in the irises as well as making some color correction in photoshop:
I think the resemblance is a bit stronger with this one, but it’s hard to capture Buscemi properly without hair and (of course) teeth.
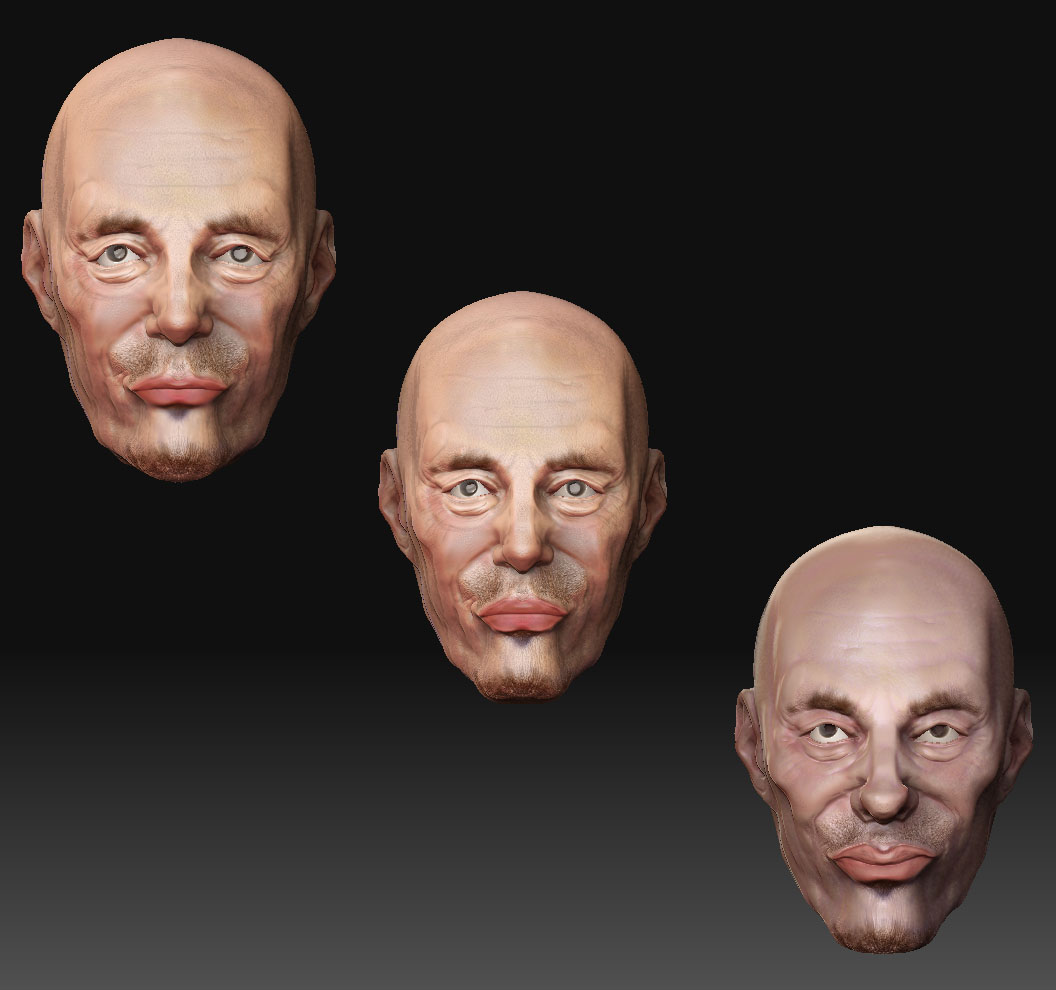
Edit: One more before bed. I’ve been receiving copious critiques from people I know, and I think I’m making some real progress towards a decent likeness. I’ve made this comparison to show my progress. The bottom right is the first sculpt I showed, the middle is the one I last posted, and the top left reflects the edits made since then:
[attach=111020]buscemicomparisonug3.jpg[/attach]
Of course, critiques from the rest of you here are always welcome. My family has only so much skill in that department.
Attachments
Well, in a vain attempt to imbue this thread with some more life, I post what I think will be my final draft of Buscemi. This one has hair and teeth. I spent some time on the hair, but I simply hate making hair in Zbrush (doubt I’m alone on that). The teeth were a bit of a rush job, but I just could never sell the sculpt to myself without Buscemi’s signature teeth:
[ ](javascript:zb_insimg(‘111007’,‘Buscemisculpt4.jpg’,1,0))
I would have made something new yesterday, but my block had an excruciating 14-hour blackout, so I suppose that gets me out of my Zbrush duty.
That’s a little disturbing – he has veins in his hair.
Looking back through the thread, there’s some really nice stuff going on. Good skin details on Steve and the demon. I do think this model got over-worked, though. It was cleaner a few drafts ago.
(I do that myself a lot.)
Yeah, I tried to get rid of the veins, but they just wouldn’t go away. I agree the model was cleaner before, but it just didn’t have the resemblance I wanted. It still doesn’t, but I think I got it a little closer. Thanks for the crits and thanks for coming by.
Edit: One final revision. Went up in subdivision level to get rid of the veins in the hair and gave the teeth some dimensionality. Used the green clay material to rid the sculpt of anything that would distract from the form:
[attach=111229]buscemisculpt5zz1.jpg[/attach]
Attachments

brother twitch…
i guess…u shuld alos practise implementing face planes on ur face sculpts…thats is the ony thing that ur face is lacking…i hope…
but u know i m noob…but wil obviously try to help u in ur march to grreatness!!!
Yes, the planes are of much importance, aren’t they? I think I had them to a greater degree, but then I lost them in an attempt to create a better likeness. If I wanted to improve it further, I could probably go back in there and add that planarity back in there. Thanks, neo.
Here, the new sculpt. It’s supposed to be a likeness of Bruce Lee:
[attach=111142]Brucesculpt1.jpg[/attach]
Still a lot of work to do, but hopefully it looks alright, and hopefully someone has some ideas on how I might go about improving it.
Edit: And a bonus. Not really sure what this is, it was a quick sculpt:
[attach=111230]warsomethinsb1.jpg[/attach]
Attachments


Hey Twitch, you have come a long way from your first post, and I did’nt count but it looks like you have done about 10 pieces in the year. The only crit that I can give is to keep going,… more.
Yesterday I found Rodion Vlasov’s thread and saw how much progress can be made by making mistakes, but improving everytime you attempt a new head. He has done about 100 heads, so you have about 90 to go.
One last thing that I have found helpful to remember when trying to be as good as the amazing people on this site, and not getting even close (thats me), is that its much better if you are enjoying it, have fun…lots…its easy with zbrush.
Rodion Vlasov’s thread
http://209.132.96.165/zbc/showthread.php?t=57939&goto=newpost
Some ideas for that “finding a better likeness” stage:
- Many who started in traditional polygon modeling will tell you that you have to get all your forms right at the lowest possible subdivision level and refine them as you go, only subdividing when the mesh looks as close as possible at the current level. There’s much wisdom in that approach, and it will save a lot of time in the long run, but it’s not always possible and we don’t always have the patience.
As an alternative, I find it useful to pretend I’d been more conscientious about that, and treat my subd hotkeys as a time machine.
What this means is if my brush size is big enough to affect more than a handful of polygons, I need to hit ‘Shift-D’ until the polygons are bigger. I make my adjustments as though this were hours ago and I’m thinking ahead like I should have originally. When I press ‘D’ again, I’ve effectively changed history.
Put another way… Aim for your likeness at a lower subdivision level, whether or not you’re long past that stage.
- Experiment with changing form under an already-detailed model by using the “Displace” brush. Keep Z pressure very low, and use a relatively small brush. If you push an area too far or influence more than you meant to, even it out by drawing with the ALT key ('cause hitting SHIFT for your smooth brush would defeat the purpose).
That explanation won’t make a lot of sense until you try it, but I think this could quickly become a favorite toy.
(I never messed with that brush before today myself. But I’m reading Wayne’s book, and he touched on it’s usefulness early in. He suggested this would be brilliant for adding folds to a pre-textured fabric. Tried it. He’s right.)
Anyway, Bruce Lee’s lookin’ good. Keep at it!