Andreseloy- It does take a big of assuming one knows where everything is located. Took me a moment to figure out clone is at the top of the tools menu and the append is in the subtool menu since i’ve not used those features yet. Just been working with transpose and how to rig so far in ZB3. Other than that I think it went ok, there is a couple of things that made me wonder if it had to be done that way though did it to stay consistent with the way it was layed out by Dargelos. No clue if that helps you I’m afraid.
OK, I see what this is for.
Not bad.
Dargelos is going to be the toplogy-rigging-master.
A little further explanation for all who didn’t come through with that.
The purpose of his method is to rigg a highly-subdivided mesh-model via a topology-micro-zsphere-rigg.
As it is not possible to do that directly with your original mesh-model, you first need to make a clone (press ‘Clone’ at the top of the Tool-menue) in the high-subdivision-level you like to pose.
For the use in the topology-mode, you must furthermore create a clone in the lowest subd-level, which is Level 1. (see Steps 1-3)
Now comes the clever thing.:lol:
He appends a ZSphere (Root for the later rigg) as a subtool to the original mesh-model and selects it in the subtool-panel to get access to the rigging and topology-menues.
Hint to step 5: He means hide the mesh-model by clicking on the eye-symbol in the SubTool-menue.
In the rigging-menue, he selects the high-poly-clone and in the topology-menue the level-1-clone.
Clever boy.
Step 7 is essential, you must press the Delete-buttons in both menues, rigging and topology so that you only see your Root-ZSphere and the yellow-ghost-mesh on the canvas, otherwise the micro-zspheres you want to create now will not be located inside your yellow mesh, but dislocated to world-Z-Null (see my hidden-features tutorial)
Now its easy to set up your rigg with microspheres.
When you now reload and bind your high-poly clone into the rigging menue, you can pose now the high-detailed Model-clone as you like. (note: the original high-poly-mesh is not displayed in the selection-dialogue, so you always have to work with two clones !)
Clever thing, respect.
@Dargelos:
I can include that into my hidden-secrets-tutorial if you like, but why not trying it yourself ?
All you need is a graphik-programm that offers screen-snapshots (I use PSP) and the free downloadable Office.org 2.2. There you write your text, include the pictures (.jpg) by drag-drop and export all to a .pdf-file.
Very easy.
OK, I included it in my ‘Hidden secrets’-Tutorial, but only as a Quote with my remarks (no pictures), so you can do a deeper Tutorial with pics by your own.
Ok friends here is a link video and i will appreciate you give me lights about what you are doing and what im doing wrong.
http://download.yousendit.com/971E3ECB43B6C73A
Andreseloy
I would really like to see your video, but do you have another source ?
This server demands to register before downloading, what I will not do.
Andreseloy, the method has some bugs.
It’s not always possible to create the rigg by this way.
Not problem, i stoped to post because in some step i become very confused about the rigging and topology results, that is the reason added to my barrier language that i prefer if possible to see zscript.
But anyway i will take a dept breath and wait:D
Thanks for your time to answer
Andreseloy
Hey Guys!
Cool to see everyone working together 
Plakkie, I guess you won’t need that newbee t-shirt anymore 
Take care buddy
Rasta has explained perfectly well… well done!!! I always miss things… Andreseloy, I couldnt see your video… dont think this is a PANACEA but it might be usefull… if you need any explanation and you speak spanish i can send a private message
here is an exercise with the zscript, still doing some misterious wrong things.
Andreseloy
Guys- I gotta agree with Elarcano, pretty neat with all the team work. Good to see this is all going to help everone!!
Andreseloy- Ok took a look at your vid, will check out the zscript to see if I can catch more for you. The first thing I noticed after you loaded the tool with the rig and you began moving the rig outside of the topology glow structure. Reason for this is because before you move the rig you need to bind in the rigging menu. Also to get view your pose without the glow structure have to hit preview under adaptive skin menu. I had not had the chance to play with the rig Dargelos uploaded so to be sure we on the same page I uploaded the tool he posted. Dargelos made a nice rig, though its pretty basic so it poses for basic movements. If you want to do more complex movements need to edit the rig structure in draw mode and add more zspheres. Jason Belec’s Zsphere thread has a lot of good info for zsphere knowledge. Once you edit and add more zspheres in the joint areas mainly( at least 3 zspheres seems to work). You can do more complex posing with good deformations for a mesh, though seems to work better to use for pre-poseing before you sculpt massive details at least that i’ve found so far.
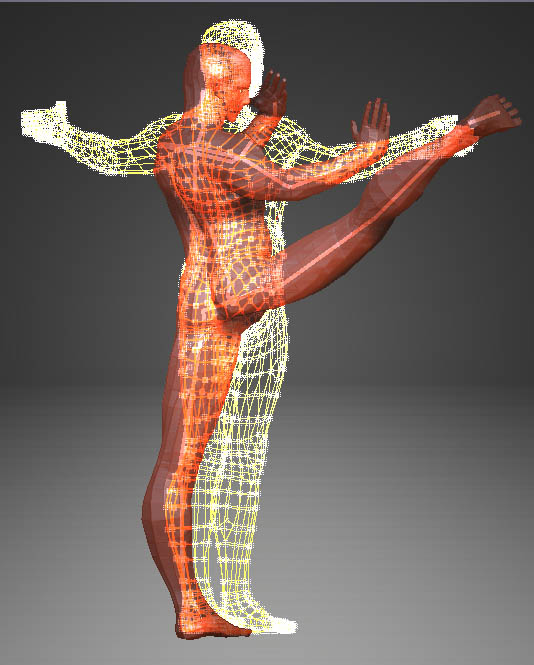
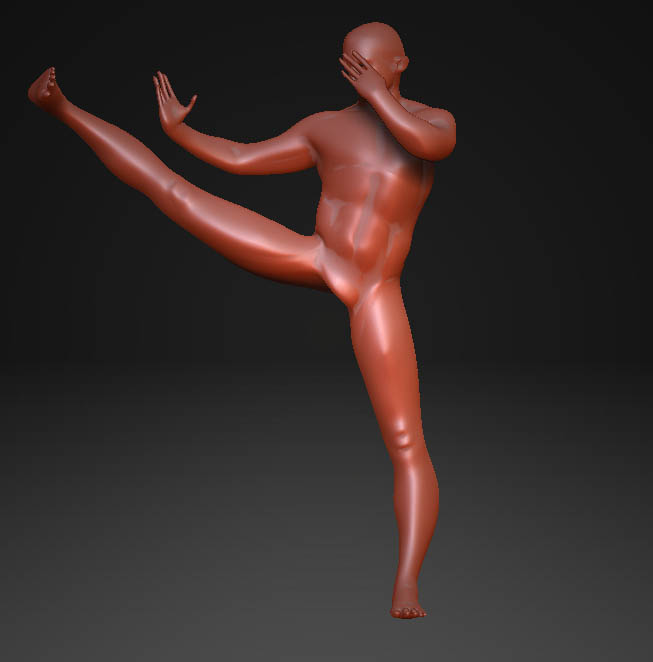
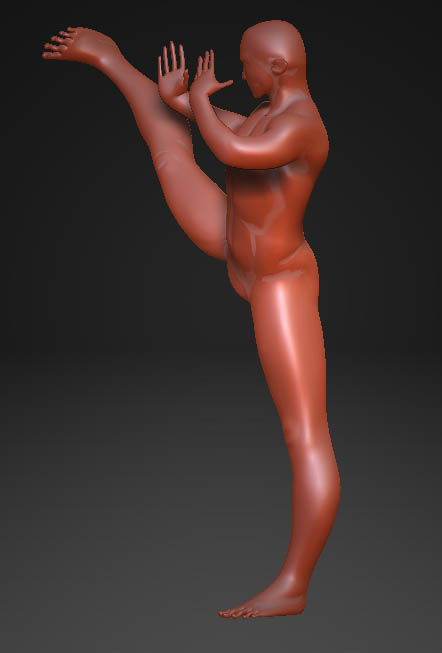
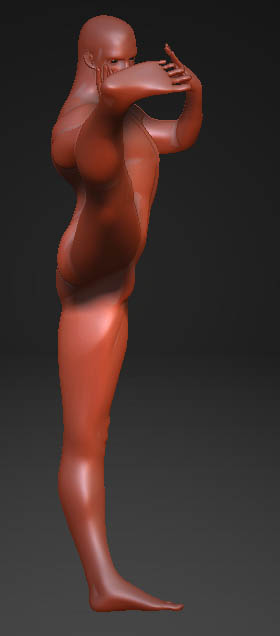
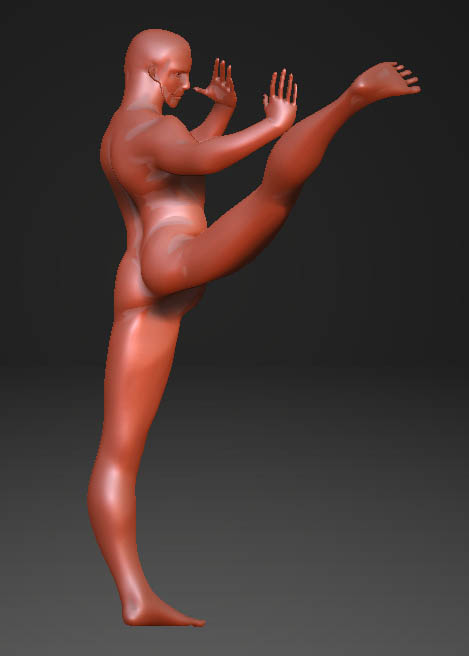
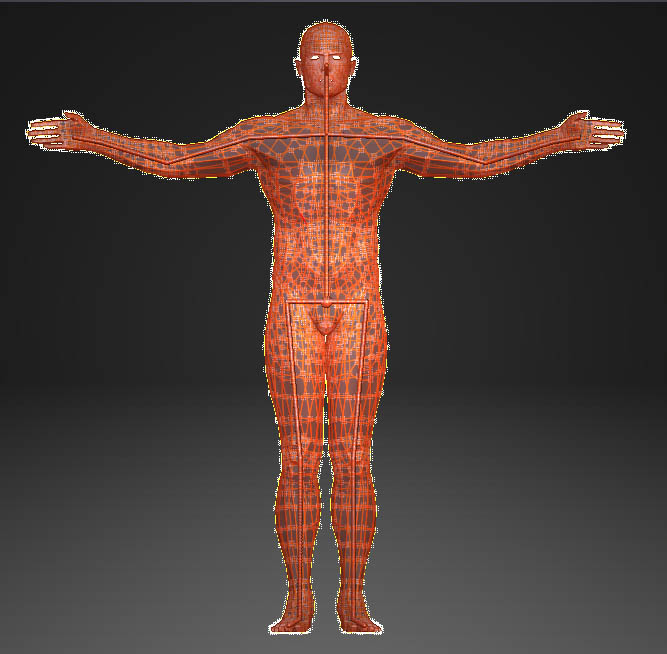
I used the same model and rig that was provided and added more zspheres in edit-draw mode. Here’s a couple of pics:
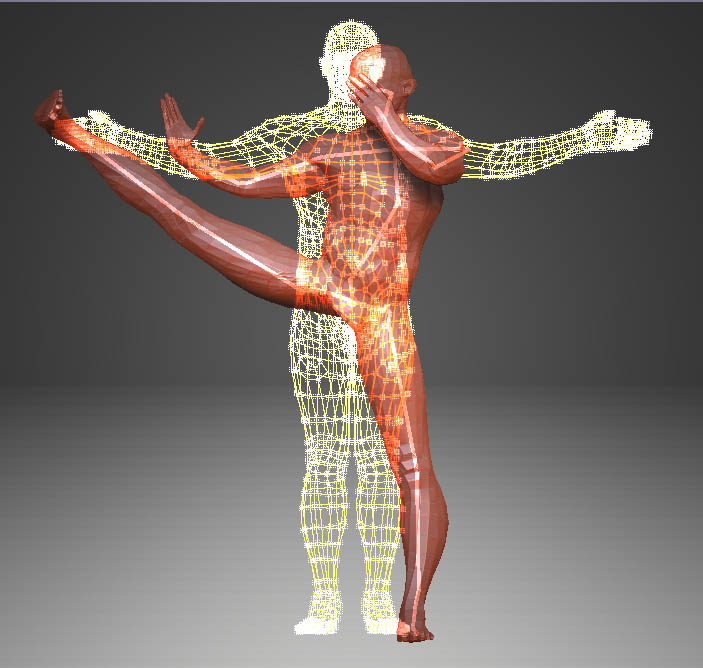
I uploaded the model+rig that I added zspheres for more movement, its the one Dargelos uploaded just edited more zspheres in the rig. Not saying this is the best by any means just what I did. I hope this helps someone. Big kudos Rastaman, Dargelos, Plakkie and everyone involved helping!!
Attachments
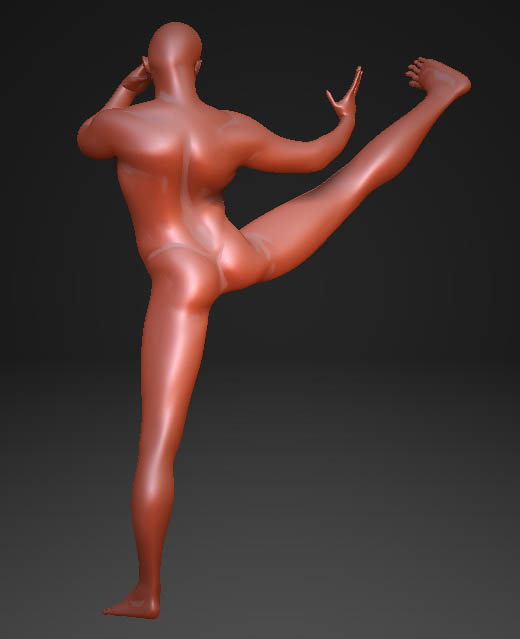
Look great the choy lee fa pose
Thanks for the advice
Andreseloy
Andreseloy- You zscript seems to stop right before you select your rig under rigging mode. Is this your problem? If so be sure that you have the zsphere tool selected in your subtool menu to be able to access the rigging and topology menu’s. Also be sure you cloned your models as Dargelos stated before you append your zsphere tool so you have them ready to use.
AngelJ: Now that is the weirdest side-kick I have ever seen. I dont think that kind of movement is anatomically possible, it hurts me in the hips just looking at it. Turn the supporting leg/foot backwards, rotate hip and upper body forward/down, then lean the upper body backwards and then to the side away from the leg. Leg and upper body should form a solid line from head to toe pointing towards the target and the hips must be rotated forwards and the body leaned back and twisted towards the rear a bit for balance.
A bit off-topic and not really that important in this very informative thread, but hey, details make the difference!
Highlander_72- Good observations, yep I agree the hips need to rotate and the the supporting leg could be adjusted. Though was mainly trying to get good deformations in a pretty fast manner with the rig, maybe I’ll take another look at it and try to make some adjustments, try to make folks happy.
I also noticed that just today. But there’s a shorter way to clone a subtool anyway: extract without mask and zero thickness. No need to append then and being confused which icon in the tool list pop up is the clone.
this is an awesome thread! thanks a lot, really helpfull! 
That’s much faster!
Thanks, Andrea
Hey Elarcano! Good to have you back buddy! I was wondering were you had gone. You may consider me a newbee on everything not concerned with topology, but that’s a bit long for a T-shirt eh? 
All the best,
Plakkie
Sire, that is SO handy! Thanks for the tip.