ZBrushCentral

Topology & Flow Lab

Plakkie and others have made this page such a nice tutorial that I’ve moved it to the wiki:

http://www.zbrush.info/wiki/index.php/Topology_and_Reflow_Lab .

I still have a number of links to put in, and cleaning up to do, but I wanted people to be aware that it’s there.

Given the amount of interest in this page, if you edit the wiki page, there’s a significant possibility that when you save your changes, you’ll get a page telling you you need to reconcile your changes with the changes someone else made while you were editing. This isn’t too difficult, but it’s a bit annoying. The best way to avoid it is:

  1. Copy the text you want to edit into your favorite text editor and edit it there.
  2. Reload the page to see if others have changed that section of text since the last time you looked at it. If they have, it’s usually fairly easy to copy their markup and integrate it with your own in your text editor.
  3. Copy your edited text back over top of the section you changed.
  4. Don’t forget to preview the page before you save! You’d be surprised at the errors that creep in :slight_smile:

Many thanks to all of you for your contributions,
Ken (docguy)

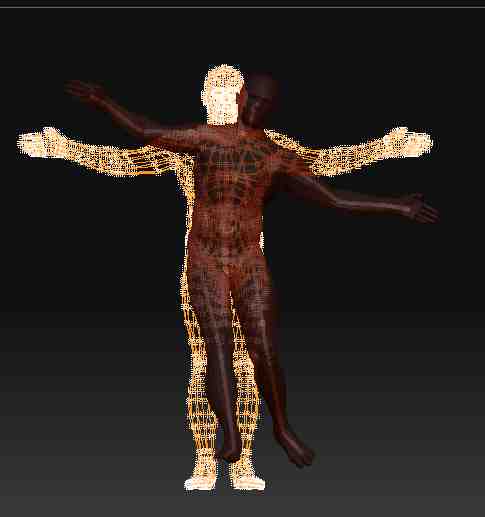
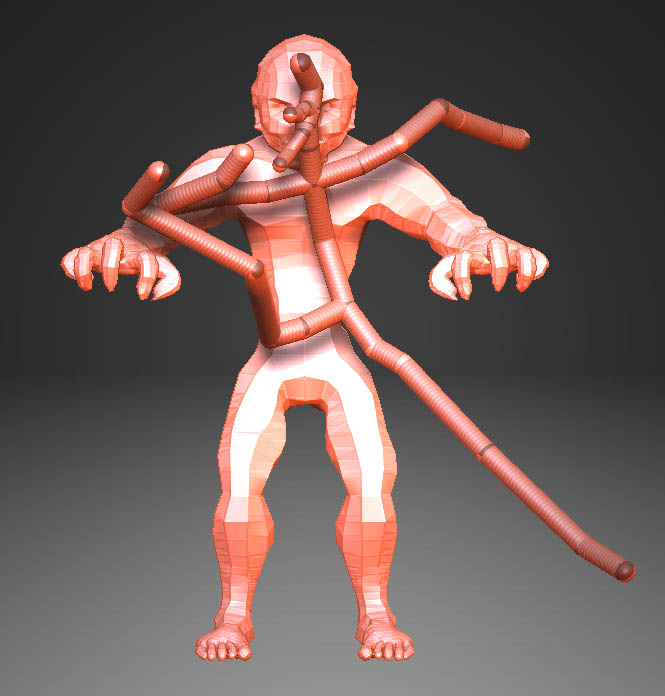
Rastaman & Dargelos- This thread seems packed full of information so many thanks for all those that contributed. I’ve briefly went through it but alas I decided to try the rigging info you both provided on this page 15. Been playing with transpose and I enjoy it but figure i’d mess with this some. Went with the the Dargelos method but with orange glow tried to see if I could get rid of it somehow and poof ZB3 crashed. So I went about doing the rig going straight into rigging mode and loaded my mesh. Worked pretty decently for my first test. Though was in a bit of a surprise when I loaded the mesh it was at the 2nd subdivision and I didn’t increase to max subdivisions before making the rig. Unfortunately I found out, once you make a rig and bind it you can’t go up in subdivions. Tried to see if going up in density would work since the morph target was stored but nope. Aww well was good learning fun, just wish I did it right from the get go ;).

Humanoid 2 rig test-2.jpg

For some reason when I play the zscript I recorded it makes weird things… can I just upload the tool I saved? its a very simple bones structure for the average man… I did in 30 seconds

jeje The yellow soul is a bother but you can still do whatever you want with the posed figure…

Untitled-1.jpg

Attachments

Untitled-2.jpg

The Topology Lab made it to the Wiki! It’s the joined effort of dedicated users that is making this thread such a great source of information. :+1:small_orange_diamond:+1:small_orange_diamond:+1:
Thanks also to Docguy, who transformed the front page into a Wiki. I’ll go on trying to keep up with you guys and update the front page and now the Wiki too.

Happy topologizing!
Plakkie

Dargelos, Rastaman and AngelJ: this looks promising! Topology Rigging would be another great heading on front page and Wiki. I’ll try it out first thing tomorrow. From first glance, you can pose your model and show it without the Yellow soul? If so, it would be a usefull function right? Would it give better deformation then (sloppy) transposing? I haven’t got into rigging & transposing much yet.

Dargelos, go upload you model so we can try it out. :+1:

Crusoe: I would welcome every tutorial you might make. :slight_smile:

Plakkie. I dont think its better than transposing but its very fast it depends of how precise you are chosing where the joints would be…the yellow soul only appear when you are posing; when you press A you can see the posed figure and use transpose, or draw , etc…
i have uploaded the tool… you should be able to pose the average man just be clicking rigging: bind … you can also add more points or move them…

I made a ‘Conclusion’-Tutorial that shows all secret features we have found so far that are not yet officially supported by the Wiki. :cool:

EDIT 25.5.07: The tutorial has been updated.

EDIT 26.5.07: The tutorial has a further update.

You find my Tutorials here:

http://www.zbrushcentral.com/zbc/showthread.php?p=360566#post360566

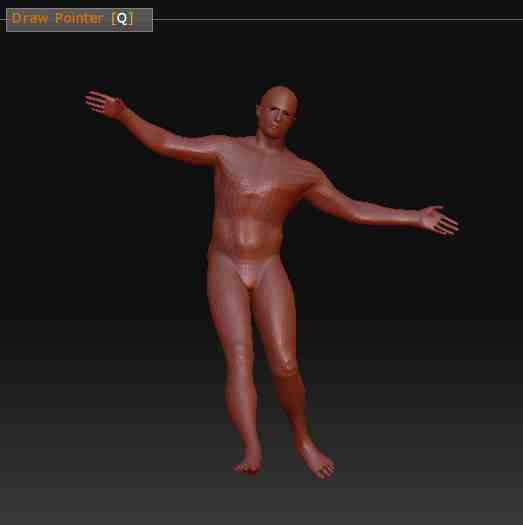
The best results posing with this kind of “bones” rigging are achieved by chosing rotate but you can also scale and move as you can see in the picture…

Untitled-3.jpg

Plakkie- Yeah you can pose without the yellow topology soul like thing, as long as you just use rigging mode to select your mesh(be sure its the subdivision you want to rig since you can’t go up and down in subdivision once its made!!). Its been pretty interesting. You can do very decent poses and I suppose depending how good the rig is would be how versatile it would be but then might as well just use transpose in conjunction and that should cover most stuff I’d imagine.

Here’s a couple of pics of messing around posing the rig. Humanoid 2 rig pose test-1.jpg
Just re-hit bind once and you’ll get the pose back to what you last had. Though if you hit bind twice it will re-home the rig to the mesh original form as well. Going to try to do a quick rig of a subdivision 7 model and see how that goes.

Attachments

Humanoid 2 rig pose test-2.jpg

Humanoid 2 rig pose test-3.jpg

Angel, I think you are using a zsphere structure “rigging metod” or mother-
-child and not the topology “micro zspheres” "click -click mode … with this second mode you pose with the yellow ghost and you can select a cloned mesh with any subdivision … (well i tried with level 3).

Weird problem.

When skinning a zsphere rig, using the shift-click method to quickly build patches, there seems to be a lot of gaps, even when there doesn’t need to be. I will see if I can find a workaround

Dargelos- Hows it going, yep thats a zsphere structure type method seems to do decently. The first time I tried a rig I did the zsphere-topology-select mesh get the orange yellow topology structure and then went about building the rig inside the glowing structure. Though after I got done wasn’t sure how to get rid of the orange structure and found out yeah couldn’t go up in subdivisions once I binded the rig. Didn’t try the cloned mesh. Will give that a try next test around, thanks much. Did try the zsphere structure method with a subdivsion 7 model, lot of fun though that method doesn’t do well for that high of a poly count. Transpose works good though for those. Have to admit experimenting with these methods is fun in its own way. :wink:

Has anybody tried rigging fingers yet?

Womball- Yeah just with the zsphere rig structure, appeares to work ok. I was hoping you could rig a high poly count model with zsphere rig, can but just takes a lot of pc resources. Will mess with it some more and try the other method to see how that works with higher subdivision sculpted meshes. Otherwise, will stick with Transpose for those higher poly models.

this is what I have done, probably not the only way to do it but this is very fast for both, making the rig bones and posing them…
1- open your you model
2- clone with any subdivision level
3- clone with subdivision level 1
4- apend a zsphere as a subtool to your original model tool and resize it.
5- select the zsphere so you can see the topology and rigging submenus and hide the model subtool
6- select a clon in rigging menu and the unsubdivided clon in topology
7- delete your selections so you can only see the yellow soul
8- click onthe zsphere and draw new microspheres just clicking in your desired places they won´t go to the infinite or the surface they should stay inside the mesh
9- when you have finished your structure select the subdivided clon in rigging menu and press bind to start posing.
10- you can move scale or rotate. the best results are achieved by selecting the “bone” line betwen 2 microspheres and rotate it.

Dargelos- Thanks for the breakdown looks like a good step by step :+1: :+1: , gonna try this and test how it works out for me.

I’m sure that many of you have seen the screenshots in Ralph Stumph’s beta testing thread that show him doing topology over a set of subtools… That would be an invaluable technique if we could just get it to work. He recently posted a workaround that should give us an approximation:

huan80: You can read in Pixolator’s “release post” that topology and projection are still under development. As a workaround in the moment you can export the second subTool as “obj” and import back with “import” “add”. For this the active subTools can’t have levels. Then you have only one tool and topology works.
I’ve been able to get this technique to work despite a couple of glitches with the skin projecting to the wrong surface and with some hidden scaling factor in my original tool.

Thanks Ralph!

I cant follow you, will be more easy to run a zscript with some of the models at startup, please!
Thanks in advance
Andreseloy

Dargelos- Gave it a shot, worked good. Takes a few extra steps to set up but there’s a couple of benefits. Both ways though don’t work well with a high poly sculpted mesh which i was curious about, wanted to see how it compared to transpose in this regard. Think I prefer the zsphere structure rig at this moment. Both rigging methods good for setting up a non-sculpted mesh to set up a pose for sculpting.