Thanks for the files Pixolator. Here are my results for Cinema4D 8.5. Pretty much followed cornel steps ( thx for the instructions ).
The only thing I did differently was, I loaded the displacement map in Photoshop and saved it out again as 16bit, because Cinema was reading it as 8bit before.
quote:Posted by Matthew
I was able to almost completely eliminate the banding caused by C4D's insistence on reading it as an 8 bit image.
Hi Matthew,
did you try to convert the displacement map to RGB. If you then load it into C4D it shows up as 24bit. Don’t know whether it will make a difference though.
Also I tried your suggestions to use the blur settings, but it blurs out the finer displacement details too much I think.
Hopefully we can eliminate the banding soon and achieve the same displacement quality as Pixolator’s image
squeige could I trouble you to post some screen shots of the process using default render in Maya that is similar to the ones cornel did for C4D 8.5 on the first page of this thread?
Import .obj into Maya. Select mesh.
Liquid>Attributes>Add Subdivision Surface
Set up render preferences with Liquid>Render Globals, position camera, add light(s) and render.
Open .RIB that was created in text editor and add:
This determines the dicing rate for true displacement. The smaller the number the higher the micropolygon count.
GeometricApproximation “flatness” [.2]
This turns on true displacement
Attribute “render” “integer truedisplacement” [1]
This is the displacement bound giving the maximum distance the surface will be displaced. It seems that the ZBrush displacement gain # works nicely here.
This applies Olivier’s displacement shader to your object. Km is the displacement multiplier which you need to experiment with. I think I may have jacked it up a little too high.
Some more AIR tests revealed persistent banding issues, particularly around the neck.
I seem to remember having some trouble with Olivier’s shader in the past. I think it works better with a displacement AND normal map. Zendoftheworld, do you mind sharing what shader you are using and your settings? Is your shader capable of more detail? There are subtle details washed out in the render you posted.
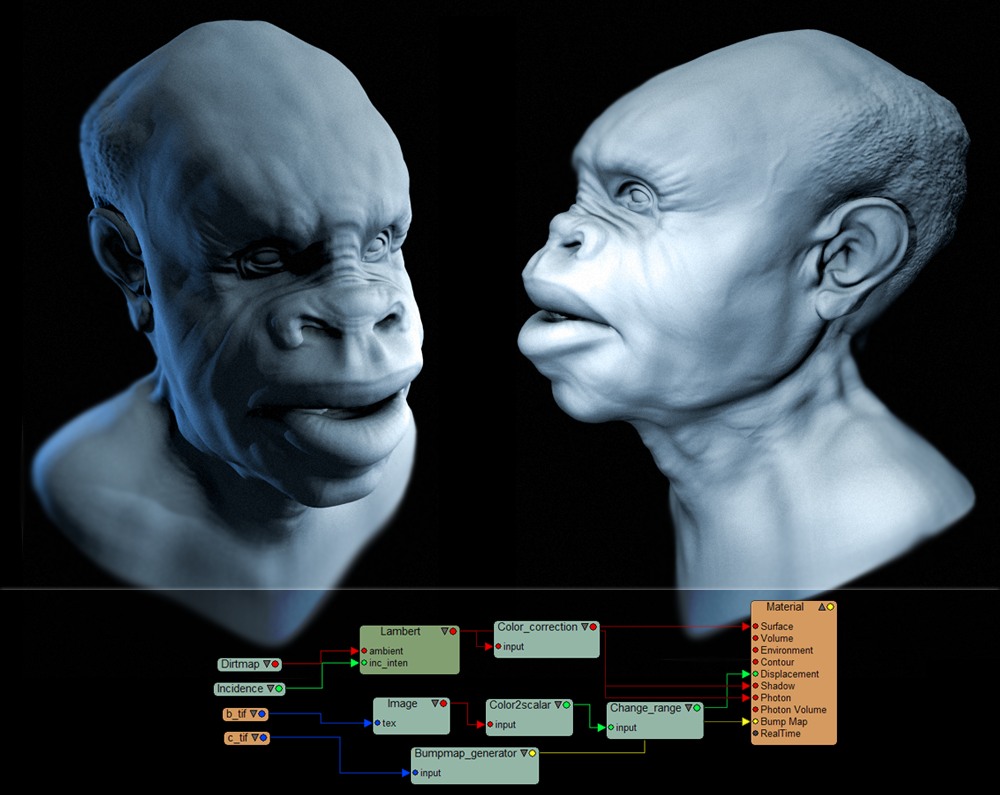
mondeo30, can you tell a little bit more about your setting, and specificaly the render tree ? i simply can’t manage to get a good looking displacement in xsi (are you putting any intensity node ? change range ? wich value and were frome they wer derivated). Thanx a lot.
1.convert map to 16bit PSD
2.create Surface_Geometry shader(see pic)
set Bump Height to 1(important)
refit it to range -1 t0 1
adjust with linear vsl object
3.set Max. Displacement(for sds) to 0.17(max value in this map)
Ok, now I’m getting good renders with Mental Ray in Max without too much banding. I don’t know what the problem was yesterday. I kept converting the 16-bit greyscale image to 16-bit RGB, and then resaving under a new name with no compression and no embeded profile. Yet Mental Ray would keep yelling at me that the format wasn’t supported, convert it to RAW, and promptly render the model with lot’s of banding. I decided to try it one more time today before giving up, since moob managed to get good results. And here it is:
Not quite as good as my Vray renders, but passable I think. Still looks like there may be some banding around the neck area like others have seen in their renders using other apps. I’m still wondering if the ability to get Mental Ray to obey the blur setting in Max may help with this. Oh well…
Here’s one done in Animation Master. It only accepts 8 bit images and doesn’t have subpixel displacements yet. You also have to up the strength of the displacement to see it as in Zbrush.
OBJ file to Editable Mesh.
Meshsmooth, 1 Iteration
Collapse to EMesh
Set Sub-D Displacement, Medium Preset (High Kills it, on my box)
Set material Bump and Displace same map (instanced). Set level to 100, and instead, change output to remap iamge from -.5 to .5. Set overall output to taste (I did the reciprocal of .834, 1.2 approx).
Saved displacement map to 8 bit not compressed and flipped vertically!
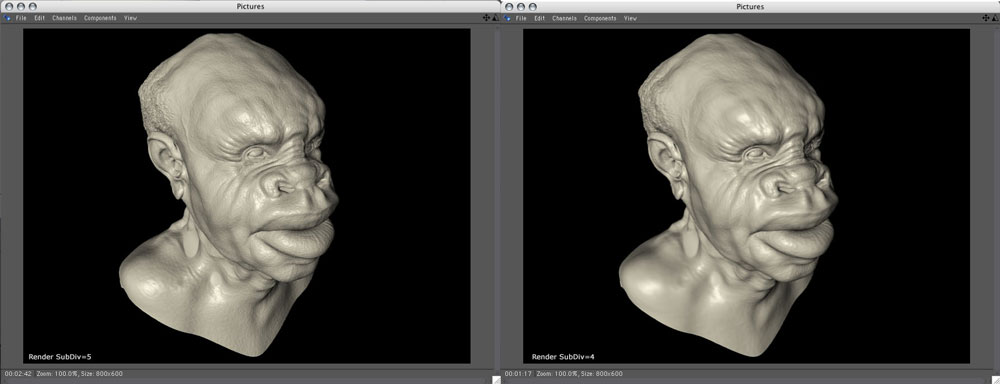
Hypernurbs render level 5.
Displacement Height 0.5 m
Texture Filter with SAT sampling
Blur Offset 2.5%
Blur Scale 2%. (Tnx Aurick)
Contrast is set to 94%
3 point light and shadow.