Ok now its crushed nicely with Jpeging, but it will give you the idea.

Attachments
Ok now its crushed nicely with Jpeging, but it will give you the idea.
Victory at last! You will be practicing this thing again for a little while still, I’m sure.
And now on to solve the next problem in my ever ending quest to squeeze the most out of ZB.
Like all of us, I have great aspirations ( and very little experience ) and have lots to learn in this field, so I might not know
where I’m going from here but I’m on my way!
Dealing with you has tickled me to death:D:D:D
Ying & Yang (couldn’t resist). 
You guys/gals are really jammin’ like Adele & Zalem!
I can only marvel at your creativity, and try to wrap my head around it and the convoluted path of steps you take to get there.
I fully intend to try to follow both of your paths, and hope to see the logic, or at create something
interesting that I can export to e.g. a scene in a Martian landscape using VUE.
mealea,
Im glad you find this stuff useful, but seriously its not the actual point of ZBrush, its just one of the things that can be done with it.
The reason it got as much attention as it did was it presented a method that was comparatively easy for taking a simple object and making it insanely complex, both geometrically and visually.
This is peachy if that something you need to do, and it can, in a few seconds , make a sphere look like you spent months meticulously sculpting it. Its just a trick, and if you need it a good trick.
It will not teach anyone to sculpt an ear, or a hand or the hardest for me so far a good foot. Knowing how to sculpt, and knowing things like what 2.5D can do, and understanding how Pixologic designed ZBrush and why is a FAR better task than memorizing a bunch of steps to make something have detail.
That’s cool, I’m not into ears anyway, but I like (fascinated by) the details you create on objects. Tricks are good…they save me a huge amount of brain power (which I don’t have) and time, which is very precious to me. 
paleo3d,
I want to understand your simplified method…you’re doing amazing work for a newcomer! Great detailing on the UFO. 
I did something similar in Blender, but it’s not anywhere near as interesting…I have to learn how in ZB!
Skip your steps 5 through 8 and :
Just import the Disp. Map by clicking the Texture icon to the left ( above the Material icon ) and press Mrgb.
But make sure that you are at the highest subdivision level ( into the millions of polys) BEFORE hitting Mrgb or RGB.
Its really that simple… NO Texture Map Pallet. and NO PolyPaint Palette.
mealea,
this is “water under the bridge”, and forgive the dumb question, but re: legos, why use ZBrush to create a simple object like a lego, when Blender can easily do it? (and does have spheres last time I looked)…searched Blenderartists.org, but didn’t find the thread.
I guess you used Blender because the thread is at BA (?) I.e., forget about Blender…it’s not necessary. 
After you created the lego,
LOOOK! You have a lego! Now lets mess it up.
Can you post the image? Would love to see the outcome after
getting put through the ZBrush blender.
Megacal, The UFO thing is EASY to do in ZB. I think yours looks fantastic with the clouds and all…
First you need to look and master this : https://www.youtube.com/watch?v=-6NX6AnvbzA
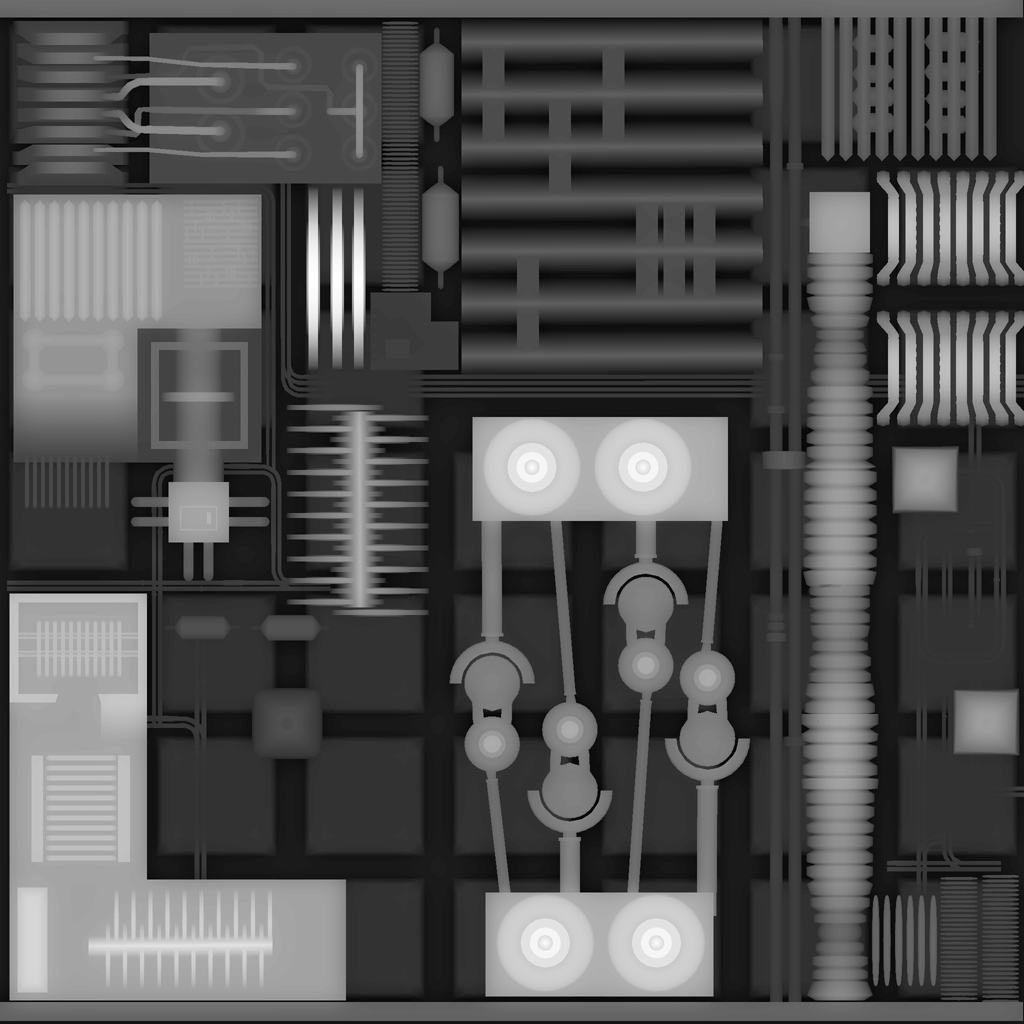
Once you’ve done this in ZB go to Suface/noise and click as in attached image. Choose ANY Alpha or Dispalcement image.
Then play around with the Strength and Scale and voila!
I found and applied the attached displacement file on BlenderArtist (I think ) ( Many thanx to the author )
Your mesh need not have a high number of polys for this step.
(In order to "Aply to mesh " you will need to bring your mesh up to a high resolution first)
Hope this helps.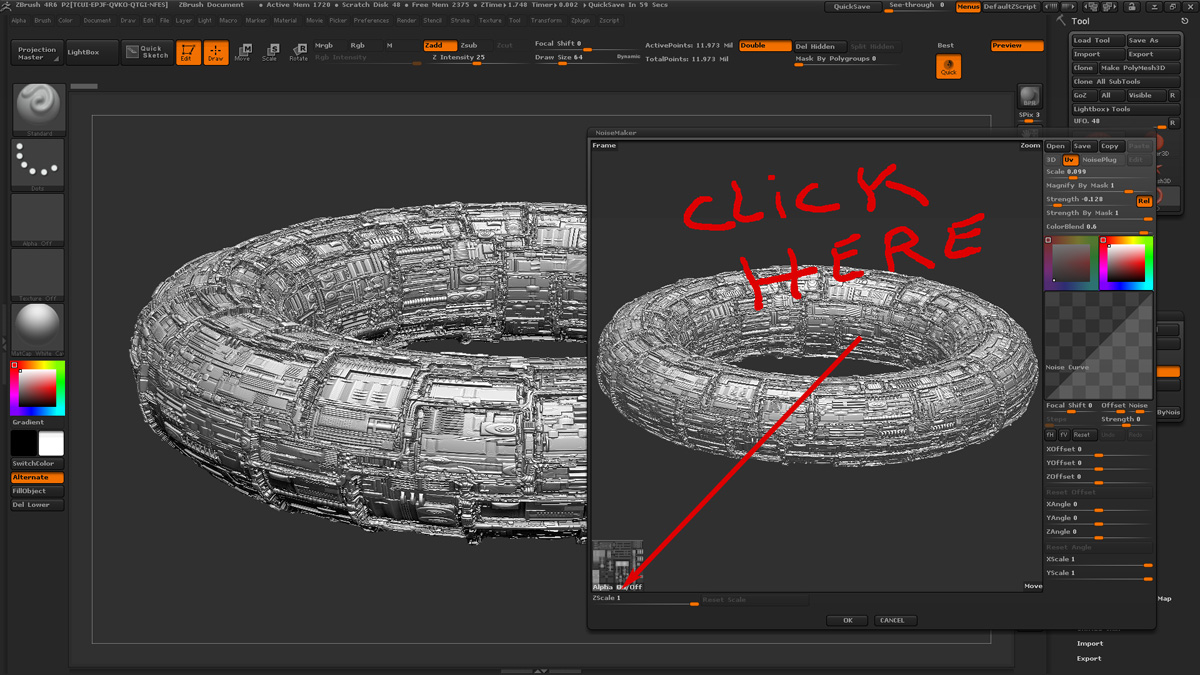
Because of the complex nature of displaced meshes, at times I find them quite difficult to look at in spite of the simplicity of the base mesh.
My brain isn’t always sure what its looking at …How can I make these easier to see in spite of their complexities.
Hints anyone?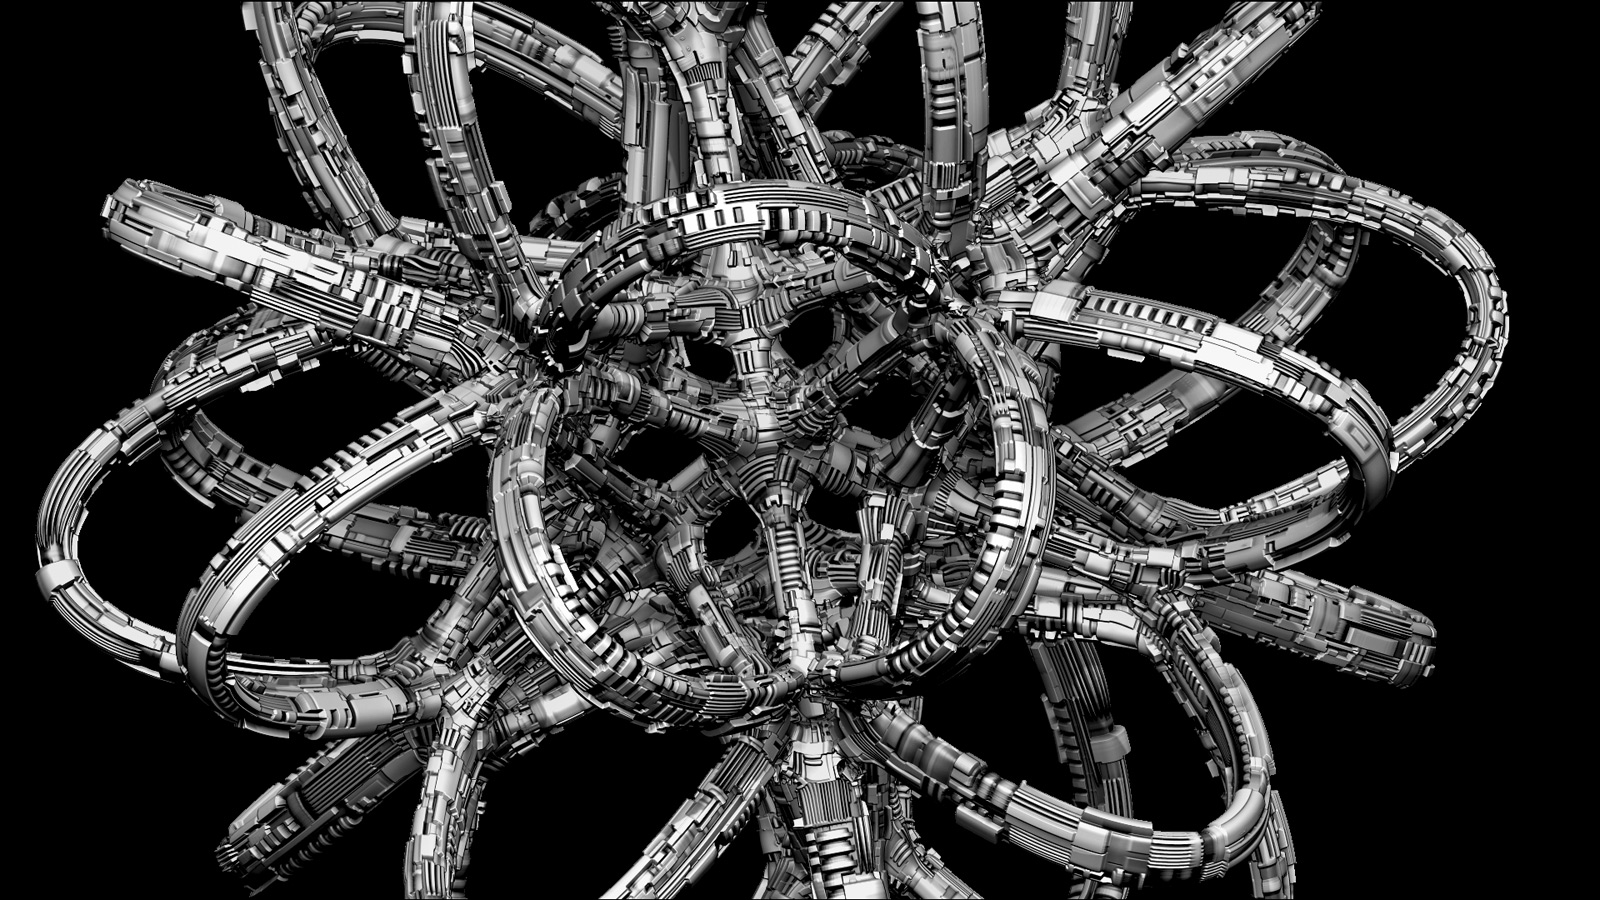
paleo3d,
Thanks! I’ll give that a try asap. 
Because of the complex nature of displaced meshes, at times I find them quite difficult to look at in spite of the simplicity of the base mesh. My brain isn’t always sure what its looking at …How can I make these easier to see in spite of their complexities.
Hints anyone?
You’re right…I didn’t realize it, but it IS very intensive visually. I think putting it in a more
familiar scene, e.g. the clouds, gives the brain a reference, and it doesn’t have to decide what every little detail might mean.
It attenuates the effect, and mutes it so the brain (at least mine) can process it easier.
mealea,
I only have Blender still because I am too lazy to uninstall it.
Well, I can empathize, and once felt the same way,
though love Blender now, mostly for physics animations.
“Whatever does it” for you, and you play ZBrush like it’s a part of you.
BTW, I’m working more with TopMod, too, and will download 2.5…thanks for the lego tut, and the link.
David Brennen creates some amazing objects in Wings3D, too…also free.
Wings is another one I never enjoyed, its UI reminds me of Blenders and that stops me cold.
Wow, This fog thing I like, I like!..I’m learning something new here by the minute.
Yes the mesh was composed in Topmod a while back and I’ll be darn if I could do it again…can’t remember how I did this!!! just doodling around…
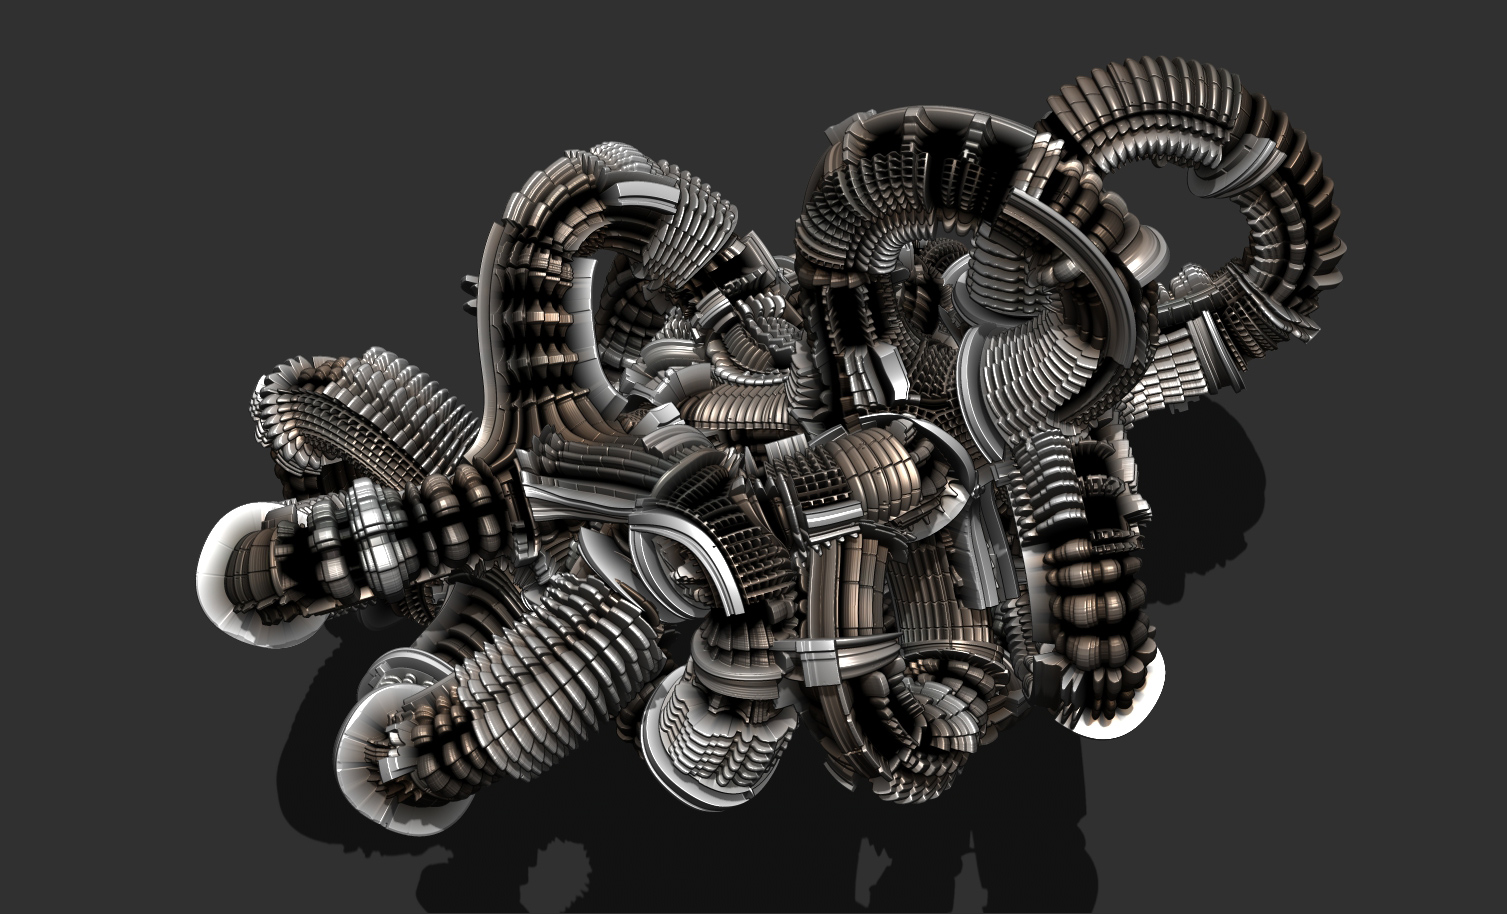
Wings3D isn’t bad, good for base meshes…second image base mash from wings3d.
small_orange_diamondsmall_orange_diamond
@mealea,
Yeah, I avoided it (Wings) in the past for that reason, but when I see what can be done with it (or Blender, or ZBrush), I see what the big ta-doo is and keep going if I can do something the other apps can’t.
ZBrush’s GUI is still the most difficult & frustrating for me to grasp. It’s only awesome work like yours and others
that keep me trying to get somewhere with it.
I wish they’d make Blender more intuitive, e.g. C4D or Carrara, but “it is what it is”, BUT waaaay better than 2.49, and doubt it will see any significant makeover any time soon, though Andrew Price pushed for some cool changes at the conference last year.
So I just go with the flow and do what I can with each app. They’re all fun for me. If I hit the wall in one, I open another and do something else. I have a relatively short attention span, so will bang my head on something till it hurts, then move on.
You must either have a high pain threshold, or have the ZBrush chromosome. 
paleo3d,
Great things! Excellent…I will try it asap.
Hexagon is another great modeler for making the base mesh.
Did you check page 100 or 115 here? Keeps me wanting more.
mealea,
I hope you never start a new thread…there is so much great info and
art here…it only gets better with age. :)small_orange_diamondsmall_orange_diamond
Yo Meg, I’m not sur if the above comments were adressed to me but in my case I find that what I do with ZB is a no-brainer…
The receipe is simple and always the same : make some base mesh then apply a displacement map and that’s it (plus some finagling)
The thing that facinates me the most about ZB so far is 2.5D. This 2.5D has to be the most underated and powerful too in ZB’s arsenal so far.
One sees very little art done in this medium.Francesco Mai is a guru at this and is worth looking up ( of course there are many more artists using 2.5d but he’s one of my favorites)
The attached image is 2.5D ( wich included jpeg artifacts for sure )
*** Again , thank you so much for introducing me to FOG…works magic…
Thank you for your all of your encouragements.
Is this the way one makes seamless textures with this tilde character?
Again, thank you so much for taking some of your precious time to share your wonderful toughts on these issues.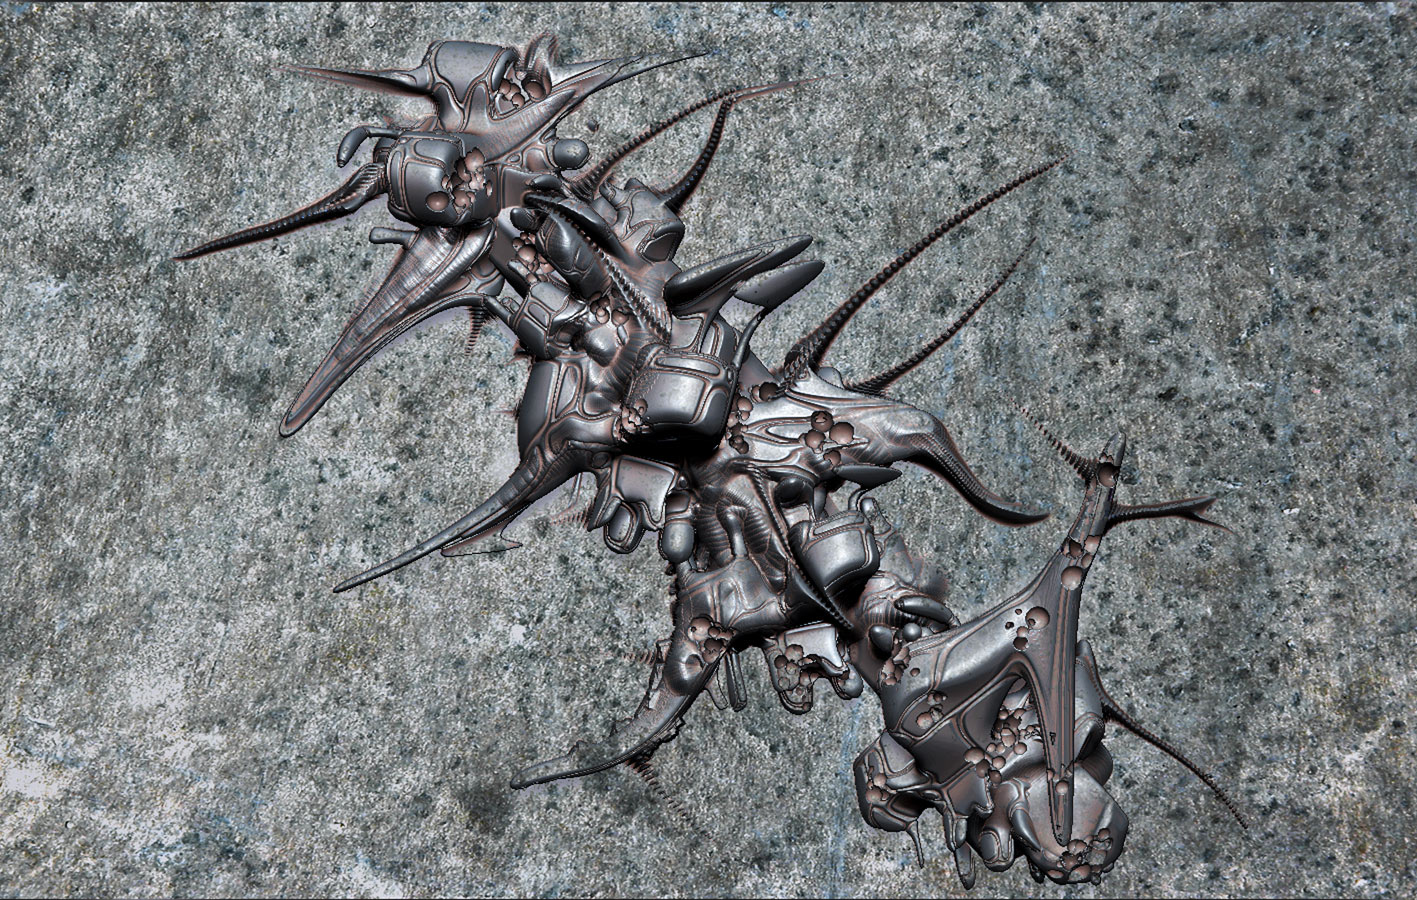
paleo3d,
Awesome UFO!! I gotta have one of those!!! =O
When I made my very modest version, I found that ZB exported the mesh
obj as many sub-parts, which is great as I can give each one a different
material.
I’d love to see yours rendered in C4D or Blender with lights and/or glowing hyper drive in a
SciFi scene. (animated if possible)
mealea,
I’m going to focus on ZB for at least the next month to get comfortable with the GUI…no more 'scuses!
Actually, of all the awesomely detailed and shaped Prometheus/mechalis-Class ships I’ve seen,
yours on page 100, #1489 & #1492 is the Mother of All Motherships!!!
Here’s a great book I using, too. I need more basics as well, but can follow it pretty well as is.
MealeaYing, paleo3d, megacal :
Good to see “Now Im having fun” thread has awoken or come alive in anticipation of Zbrush 4r7 !
fog is tricky stuff
it makes driving hazardous
Yet fog is a excellent asset for artists.
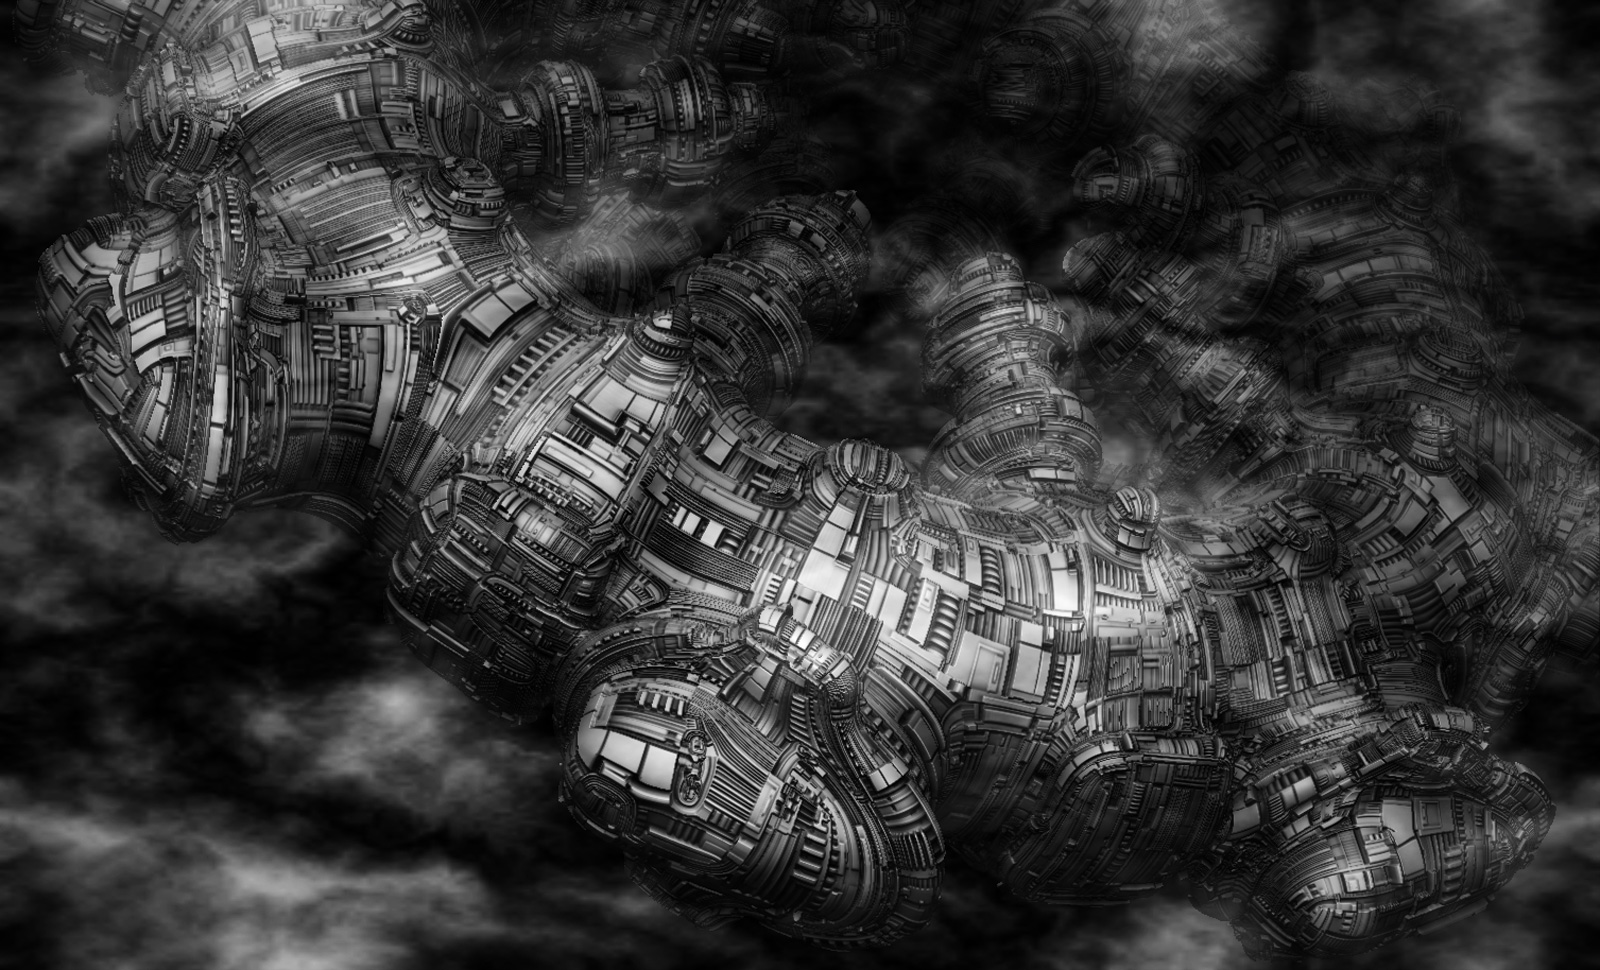
Here is a zonk thing modeled from a zbrush primitive.
Subsequently, using the michalis displacement texture modified by MealeaYing.
And a zbrush material created by MealeaYing.
After playing with the fog feature in zbrush render pallete.
The fog effect was readily visible while adjusting settings.
In the BPR render it was very dark.
And in the best render fog returned with slight lose of highlights on the model.
@megacal
Unfortunately, I got Blender just a short while ago and I’m not sufficiently familiar with it
to grant your ( and my ) wish : to import my “UFO” in it and get a killer render out of it.
Maybe some day…
On the other hand the bridge to KeyShot is about to make its appearance with R7 and that might influence
whether I’ll stick with Blender or not. Actually if this bridge to KeyShot is only a rendering window
(with materials and lighting) where a full scene cannot be erected, then I don’t think I’ll be interested.
I’m waiting to get more info on this to make a decision…
@cgmystic
I like your unique style of UFOing…
I don’t think that Fog is available through BPR…nada.
Also have you tried Fog with a texture? I think its worth looking into…
@everybody
I’m considering taking a course here :https://www.uartsy.com/course/illustration-in-zbrush
Its a course on ZB given by a fellow by the name Meats Meier that seem to have some reputation.
Unfortunately the course description is quite vague and I’m not 100% sure about its quality
and relevancy to my asperations…
Anybody know Mr. Meier and/or his ZB course?
Thanx again for the HeadsUp on the BPR fog…I had not noticed that part of the documentation…this should be fun.
Glad we woke you up…Coffee? ( no rhum ).
With your enthusiastic referral I will take Meats Meier’s course. Thanx for this.
@paleo3d,
.
re: 2.5d …will check it out asap. Sounds great…still not sure how it’s used for modeling.
re: Keyshot…I like it, but probably will pass, as I have Octane which works great with
my graphics card (GTX 580) for realtime GPU renders. But I like the gui, and the materials that come with it.
Here’s a basic form I created in Hexagon (I know, should do it in ZBrush, too), that I want to import to ZB for detailing.
I tried to use your displacement method, but am sketchy on it. But will also check out the displacement section
in the Tips book I cited earlier, and other tuts to see the workflow.
Also need to create some assymetric ships.
BTW, sent you a PM.
mealea,
did you ever take art in school or college? Where do you get your ideas?
Does living on the boat help? Rock n Roll.
@megacal
With 2.5D, what you do is produce 3D objects in edit mode then drop these objects
on the canvas ( by getting out of edit mode )where you can still manipulate them
using 2.5D tools. Also keep in mind that the possibilities here are enormous and
that awesome images have been produced using this technique. Mealea discusses 2.5D
here and there in this thread…worth looking at.
I tried to use your displacement method, but am sketchy on it.
Well… you know the old cliché : practice makes perfect
Also I’ve recently bumped onto this page
and it just blew me away…I just gotta have me one of those!
I think I know how this was UVed and I’m working on a similar but very small project.
Time will tell…
( I tried replying to your PM but I keep on getting this message ( after pressing the reply button)
“The following users were not found”…please send instructions - I don’t mind sharing UFO)
paleo3d,
thanks for the link to Roland’s massive UFOs! =O
I’m trying to piece it together, i.e. the steps in the workflow. I will practice it if I can get through it at least once!
You, mealea, michalis, & Roland are on the same wavelength…you understand it well, and are creating mind-bending objects.
I’m still scratching my head, “Whaaaaaaaaa???” -The Interview
So you said on page 120, #1795,
Paleo3d’ method for displacements.Hey There,… Thanx a mil for your toughts on ZB.
I would like you to try out Paleo3D’s method of displacement and see if it suits you well.Create some fancy geometry
Apply Uvs with as many repeats you heart desires
Create loops if you wish
Divide, divide, divide into the mils
Apply your Displ. Map as a TEXTURE! (Mrgb) ( the simple 1x map, not the multiple ones you created)
( this can be used as a PREVIEW to your displacement)
Create mask : MASKING : color/INTENSITY
Transformation : INFLATE at will
Clear mask and texture
Apply color (/texture) ( optional)
And there you be!!! You get out of this THE SAME AS IF YOU HAD USED APPLY DISP. IN THE DISPLACEMENT PALETTE !!!
No PhotoShop, no ex/importing and enjoy the simplicity…
After using the disp. Palette, Zbrush’s arteries ( read : memory ) seem to clog up and render time is usually impossibly LOOOOOOOOONG.
An added advantage with this method, is that when done, you can can Render immediatly with very short render time! No more waiting!
I made the attached image in less than 1/2 hour using this method. Here undos are simple
and you can quickly try out different Displ. Maps…etc
Again, thank you ( and Michalis ) so much for your insperations.
You may not know what you are doing, but at least you are doing it well…
Then, you said on page 120, #1799,
You don’t need to deal with with the PolyPaint subPalette at all…
Just import the Disp. Map by clicking the Texture icon to the left ( above the Material icon ) and press Mrgb.
And that’s it…simplicity at its best…
This method is so elegant and simple I think it should be used universally from anybody disiring to displace anything.
Notice how fast the render is after using this method, unlike when using the Displacement Palette…
Please tell me that things are OK now with this… ( As a rebel you can also Inflate as many times as you wish!)
You (mealea) mentioned something about displacement through the Suface/Noise Palette .
Then mealea replied, #1800,
What I do is this:
- Make an object.
>- Subdivide it.
>- Give it UV's, either Guv or Puv in the case of what Im doing it to at the moment.
>- Set them to whatever I want for repetition.
>- Import the texture, like you said (though I do it in the texture palette since I need to apply it from there in a sense anyway).
>- Turn on the texture in the Texture Map Pallet.
>- Turn on MRGB, I find that RGB works too.
>- In the PolyPaint Pallet I hit the PolyPaint From Texture button.
>- Under Color in the Masking Pallet I then hit By Intensity.
>- And in the Deformation Pallet I can inflate or deflate how I like.
>
Then you replied, page 121, #1802,
Skip your steps 5 through 8 and :
Just import the Disp. Map by clicking the Texture icon to the left ( above the Material icon ) and press Mrgb.
But make sure that you are at the highest subdivision level ( into the millions of polys) BEFORE hitting Mrgb or RGB.
Its really that simple… NO Texture Map Pallet. and NO PolyPaint Palette.
As you press Mrgb the Map ( as an ordinary TEXTURE ) will appear on you mesh. Then Mask…etc
I know you will get this;)
If I live long enough!
There is so much here to learn & do. I’m hoping it will come into focus as I bang my head on it.
Kind of like starting with Blender! :lol:
I’ll copy/paste this into an rtf, and print it out. It helps me grok it better.
“Never give up! Never give up! Never give up! Never give up! Never give up! Never give up! Never give up!” -Winston Churchill
@megacal
You seem to think that this is much more complicated than it really is.
Just follow my INITIAL recipe and things should fall into place.
@Mealea
In one of the last replies in Kaiser’s thread Michalis says :
" have you tried to apply an AO map the same time? I don’t mean on real displacements but as a second bump mapping - hi freq details "
Have you any idea what this “second bump mapping” means?
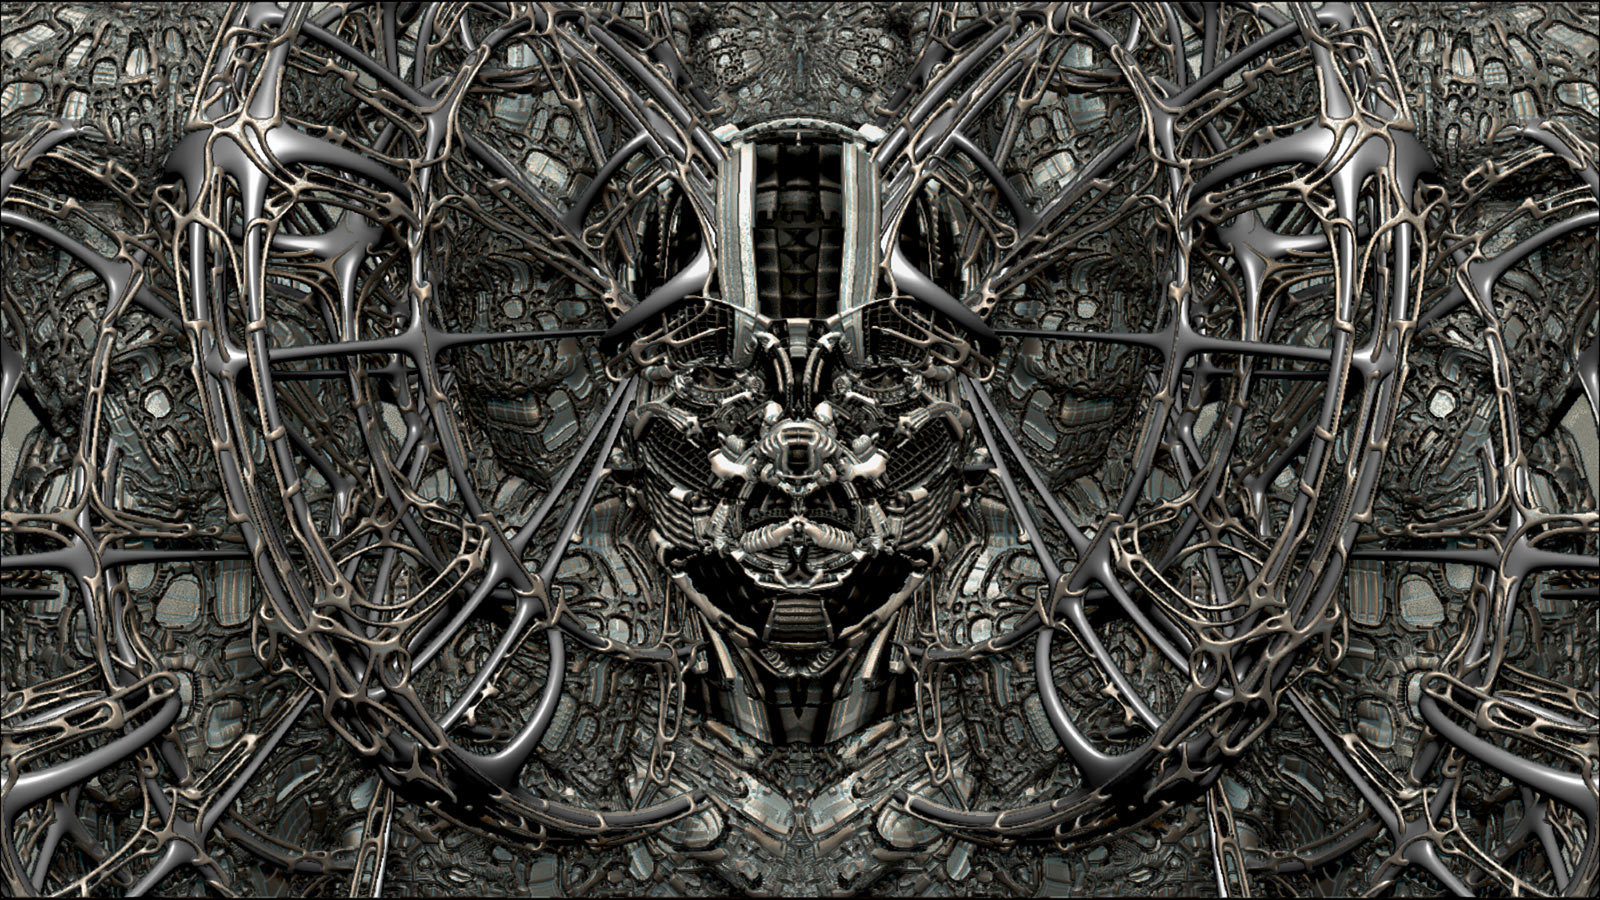
@Mealea
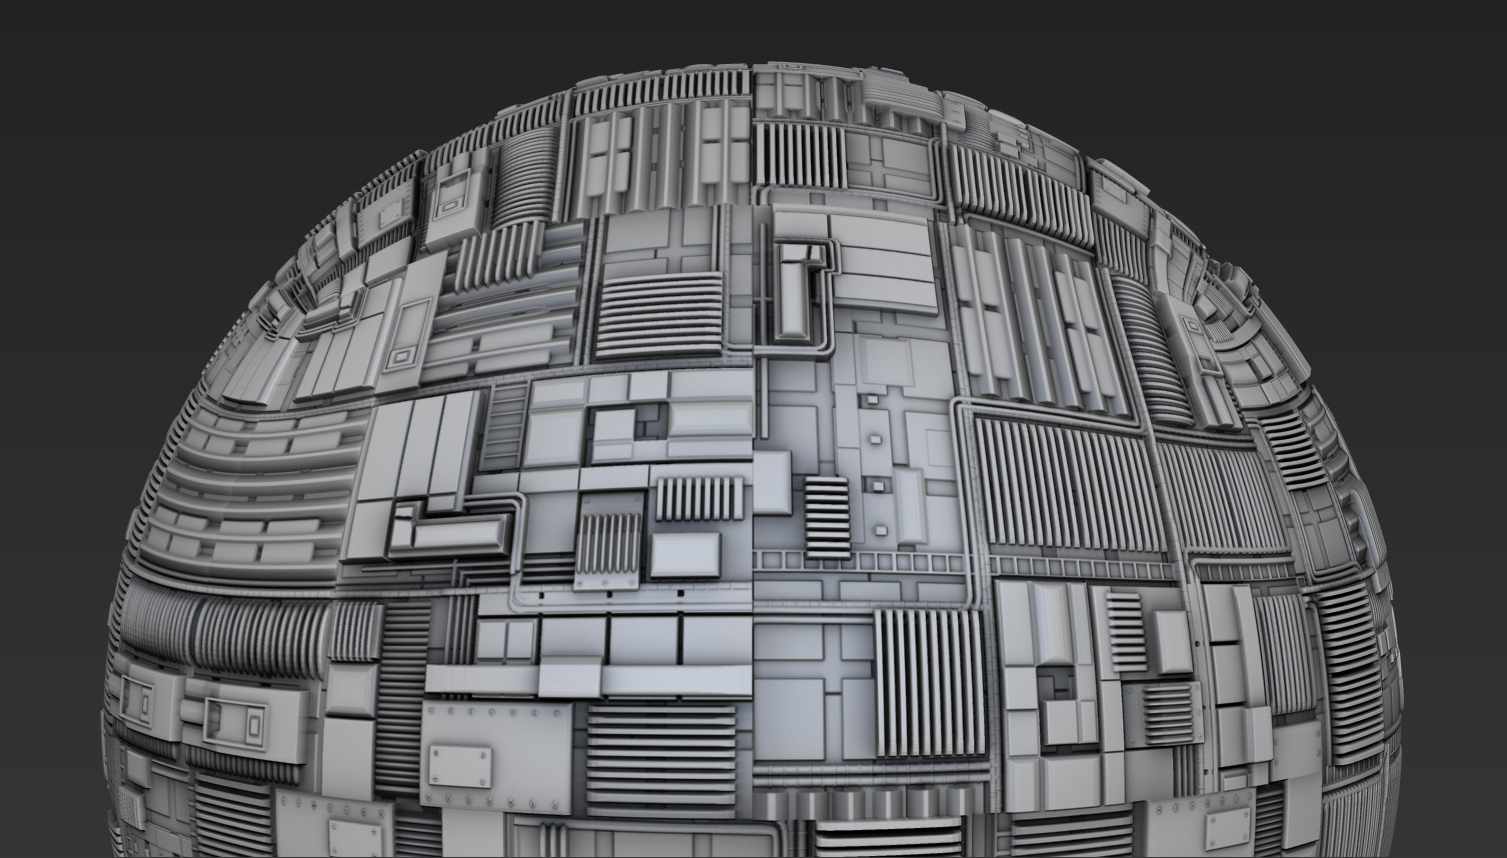
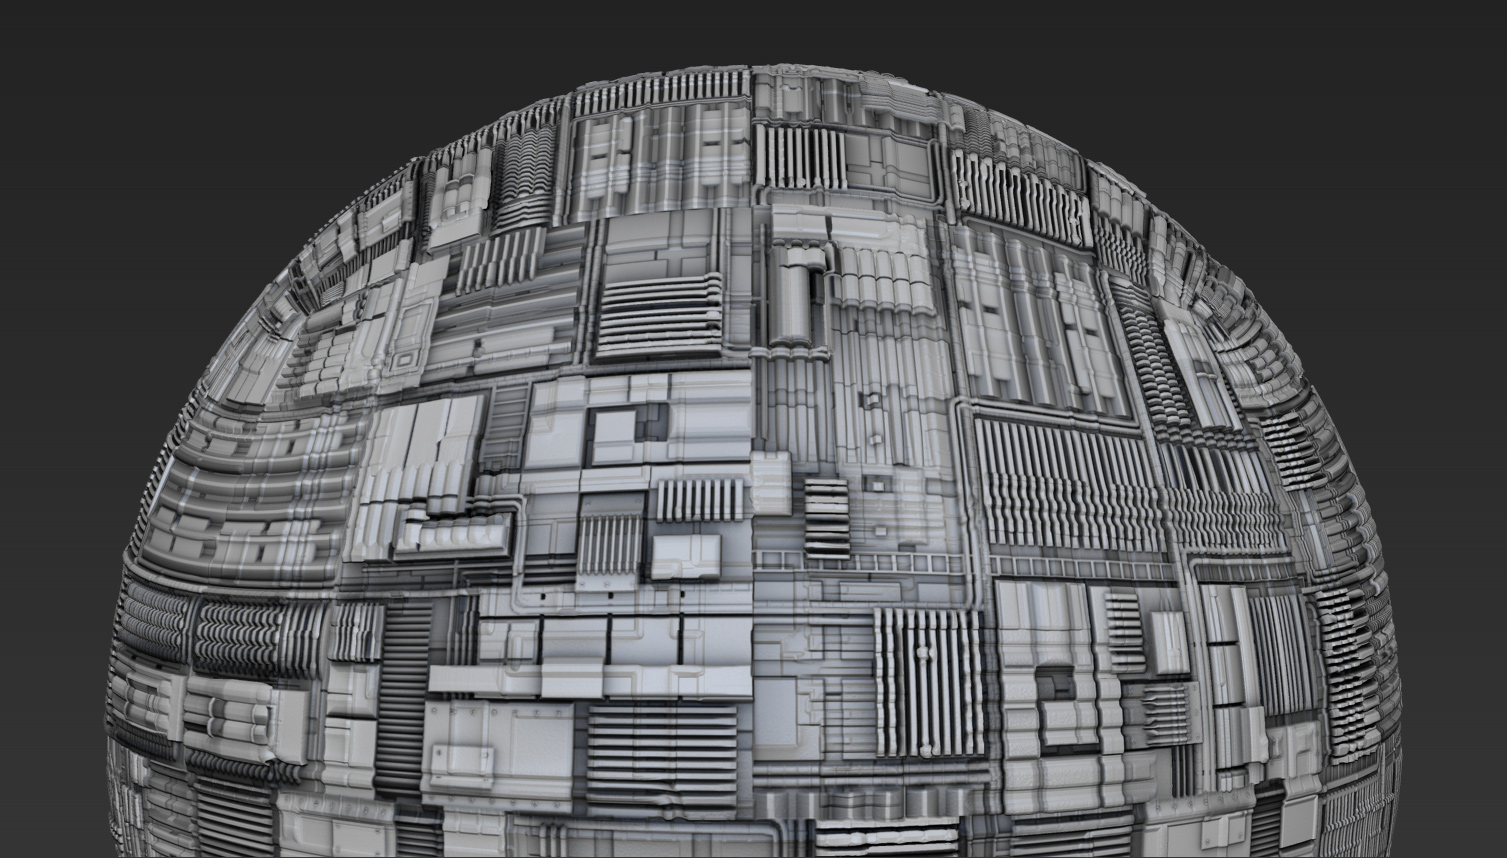
OK, I think I got this “second bump mapping” thing figured out. In Primary.jpg a simple Disp. Map was applied.
In the Secondary.jpg image a higher frequency ( in this case at half scale ) was applied as a bump OVER the simple displacement,
giving this second image a more complex looking final displacement. All this with a single Disp. Map!
Et voila! ( You probably knew this)