Never tried 2.5 , I Know shame on me 
Nah, most people don’t use it, its nothing to be ashamed of.
However if you like detail its the way to go, you can add detail FOREVER.
Heres another, it would be a few hundred million polygons in 3D.
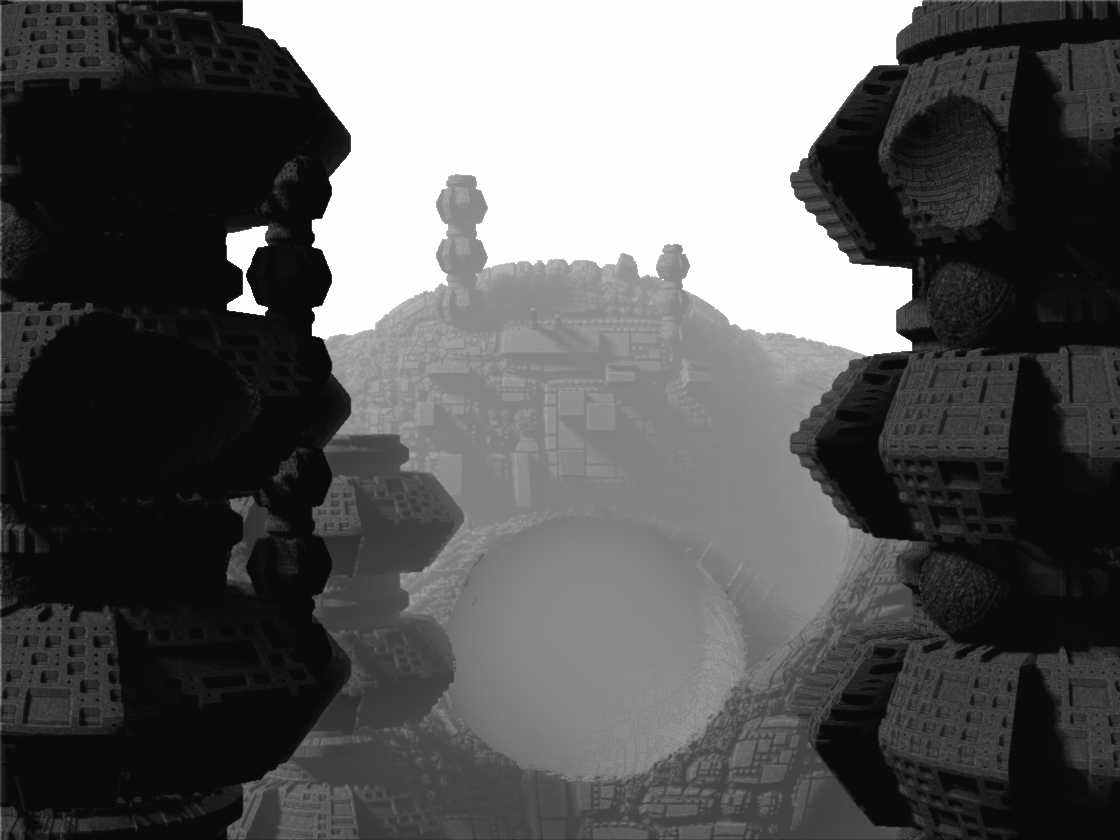
Attachments
hummm… sound like very interresting , i’ll have a look later, thanks 
This might be a bit overdone… I need a dodge and burn tool in ZBrush.
Attachments
VisuallyExciting 
Luvin those closeup compositions posted above…Beautiful… small_orange_diamond:)
On the last one posted…Maybe an indication of something in the shadowed side panels…maybe even something protruding out into the light…starting from the deepest shadowed area…and emerging into the light that is cast upon it from afar…Just a passing thought that may or may not be useful to you…Who Kows…
Great as always to see you exploring and experimenting, and creating some beautiful art along the way Mealea…small_orange_diamond:)
Glenn
Thanks Glenn!
I don’t know if I can do that or not, I think I forgot to save the file I was working on, but that’s ok this was just a test of something else.
Anyhow I see what you mean, it would sort of make the depth seem … I don’t know, more obvious and less um… I don’t know the word. unempty isn’t right and its not even a word…
GRIN!!!
This is cooler then it looks:
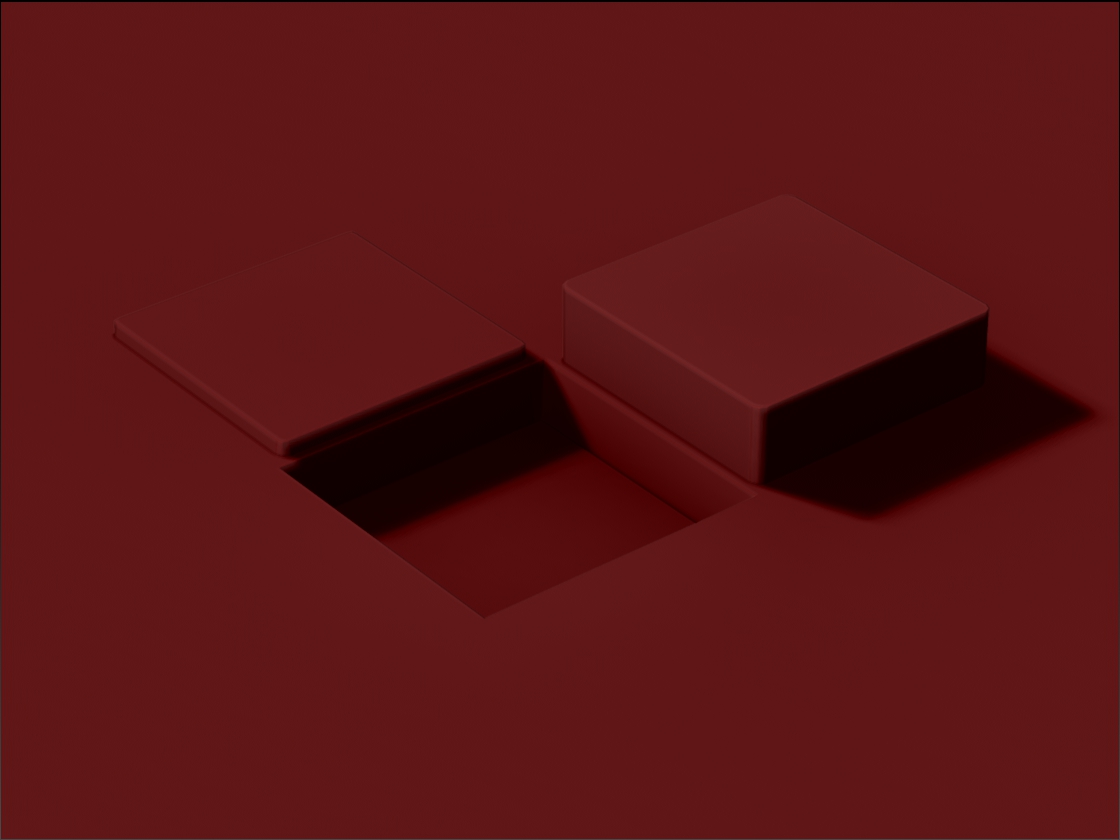
Attachments
Hey Wow This entire page is just WOW ! greetings from one of your biggest fans…
Have been studying more about 2.5 d, but have gotten lost in light caps and making brushes and everyonce in a while producing a an image…
Deke …
Hya Blue!!
Thank you!!!
I know about being distracted by all the new stuff, its VERY VERY COOL!
I’m just as distracted I think, I cant get anything done cause there is always some new button screaming PUSH ME!!!
I’m about to pop up another tutorial sort of thing, not about 2.5D (that one is still coming along) but about using UV’s to distort models in interesting ways…
Its how I made those last things but with a bit of box modeling tossed in.
Cheers Blue!
Mealea
EDIT: I forgot something important, I would not have included the box modeling stuff in this with out ZBer’s help, I was having a bunch of problems with it and he sorted them out and at the same time taught me a lot of new stuff, most importantly a better way of looking at the process.
Thank you ZBer!
There is this guy here on ZBC who makes some astounding things, at least they astound me and a lot of other people, his name is Gutalin and he was nice enough to provide some hints and a very clear but highly compressed (jpeg’d) quickly tutorial about how he was doing some of the basics in his work.
Thank you Gutalin!!!
What I am doing here is taking that tutorial and assorted hints and making them as easy to read as possible.
Ok here we go:
- Make a Cube3D on the Canvas.
- Turn on Edit Mode.
- Turn on Frame so you can see better (we need to be able to see polygons and polygroups).
- You turned on Edit Mode right? If not see step 2.
- Hit the Make PolyMesh3d buttton in the Tool Pallet.
- In the Unified Skin Pallet set Resolution to 16 and Smooth to 0.
- Hit the Make Unified Skin button (this is to make a nice simple box with nice simple polygons).
- In the Tool Pallet select your new object (tool) It should be at the bottom and have the word "skin" in its name.
- In the UV Map Pallet under Create hit the PUVTiles button (there are others you can use for even more interesting stuff but that is for later).
- In the PolyGroups Pallet hit the AutoGroups With Uv button, You should now see that your model is divided up in random chunks of different colors (polygroups).
- In the Geometry Pallet hit the Divide button once or twice.
- Again in the Geometry Pallet hit the Del Lower button. (this gives you some more polygons and lets you keep going, GroupLoops hate subdivision for some reason, more on that in the next step).
- In the Geometry Pallet under Edge Loop and in the GroupLoop section set: Loops to 1 and GPolish to 0.
- Now hit the GroupLoops button. See the little path thingy between all the squares? This is what we are after.
- Hold down Shift and Control and click on that little path thing.
- All the other stuff vanishes and you have a weird grid thingy in the shape of a cube (I hope).
- In the Deformation Pallet set Inflate to something like say 8. Any number or negative number will do but this is good for now.
- Hold down Shift and Control again and click OUTSIDE your object.
- Turn off Frame.
See how that works?
Neat huh? Try the same thing with a torus distorted using the deformation pallet and a different Uv map type like GuvTiles. On the original box GUVTiles will make each of your polygons a polygroup and with that you can do some seriously cool and strange things.
You can Shift Control Click on the polygroups as well to make them visible or not as needed and you can do large selections as well by holding control and shift and draging over your object.
Different objects react differently and different types of UV mapping cause different effects.
I have found that not all of them are useful, but you can always see the result if you try one, hit AutoGroups With Uv and have Frame turned on.
Also you can do the UV mapping thing more then once and use one type, screw around and then do another type and cause further mayhem.
Note that when you do AutoGroups With UV on a large polygon model it can seem that Zbrush has frozen as it does not provide a progress bar, its NOT frozen, just wait it will work eventually, I have had it take over an hour.
Now for the next bit; something I think is called Box Modeling (I’m not sure this is what its called but if its not it is now, I’m sleepy and I forget).
This stuff is weird and fun and you can make some cool stuff with it.
Ok…
- Turn Frame back on.
- Up at the top select Move.
- Control click on one of the Polygroups in your box thingy, that bright purple one is good, not that one, the other one.
- You should see the Transpose Lines (most likely end-on so maybe just circles), also and more importantly you should see that the rest of the object is masked off.
- Left click on your Polygroup (if there is room, if not one nearby will do fine, or you can zoom in more).
- The Transpose Line should now be sticking straight up from the surface.
- Hold down Control and Shift and drag the middle circle of the Transpose Line a little way out from the surface.
- Do the exact same thing again, see how each time you do that it makes a new edge loop (and a ring of polygons)?
- You should now have a little tower like thing.
- Pour a nice strong drink.
- Consume everything created in step 10.
- Return to step 10.
That is a good example of Box Modeling (actually its totally excessive place to start learning this but why start small right?).
From here you can do all sorts of stuff, for example:
You can Control Shift and click one of the polygroups, now you can subdivide that polygroup and sculpt on it all by it self.
You can Control Shift and click a polygroup and tell ZBrush to EdgeLoop it and that will make a sharper edge when doing the box modeling stuff.
You can use the Deformation Pallet to move chunks either with masking or just moving the Polygroups them selves (be careful, the Deformation Pallet is very unstable at times).
This is a very good thing: In the Visibility Pallet you can grow or shrink your the stuff you hide with Control Shift clicking, this is good and you should play with it some.
And there is also THIS:
Another thing you can do that is insanely great is that you can Control Click on a PolyGroup and then do a mesh extract on it creating a new SubTool and work on that as an individual segment, this allows insane amounts of flexibility as you can make all sorts of adjustments and even extract the same spot as many times as you like, so for example you could use a first extract as a a wall with all sorts of sculpting the second as a Door frame with all sorts of sculpting and a third for a door, which you can even move around independently of the rest of the objects allowing it to open or close.
I’m sure that I have left stuff out and in some cases I have done so deliberately because it makes little or no difference, if you have problems or additions to this please let me know and I will add them.
And now Im off to try #10
Cheers!
Oh yah, here is something made with this process:
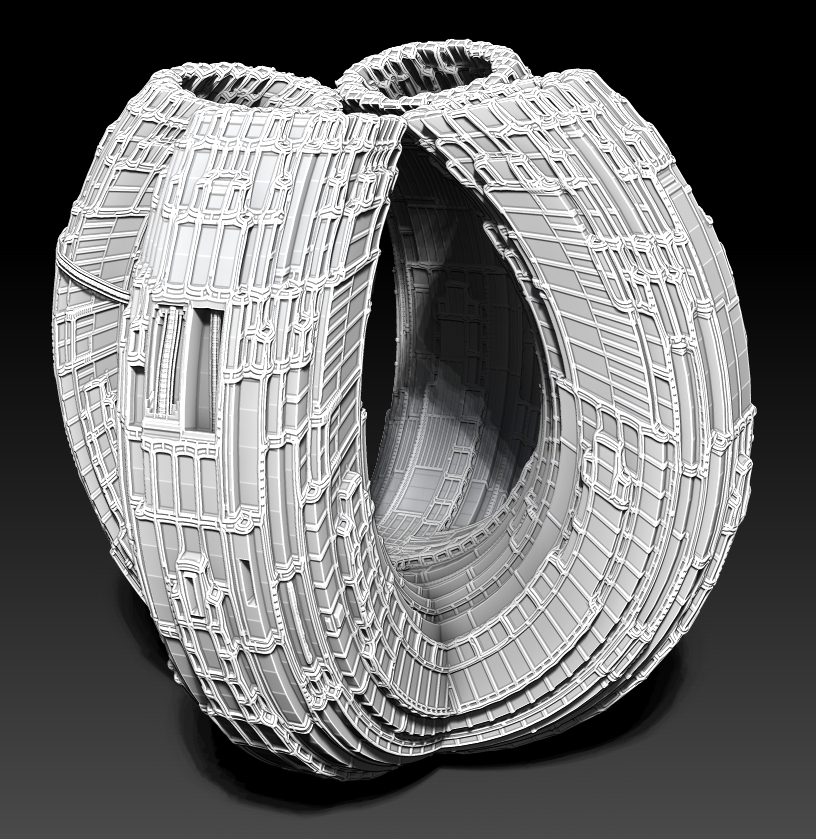
Its not done but its too many polygons so I’m going to make something else.
EDIT:
Looking at that after posting it it seems to me that it would be neat to have those little html check boxes next to step by step instructions for things, it would be especially useful on long stuff like this. You could mark where you have gotten to. Perpetual editing of something tagged as “tutorial” would be good too.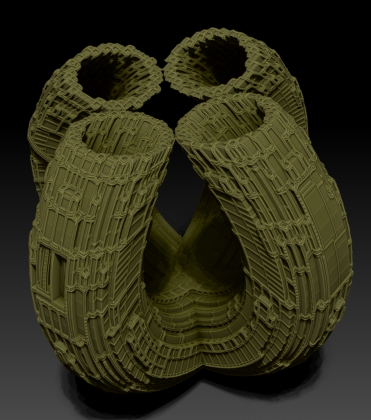
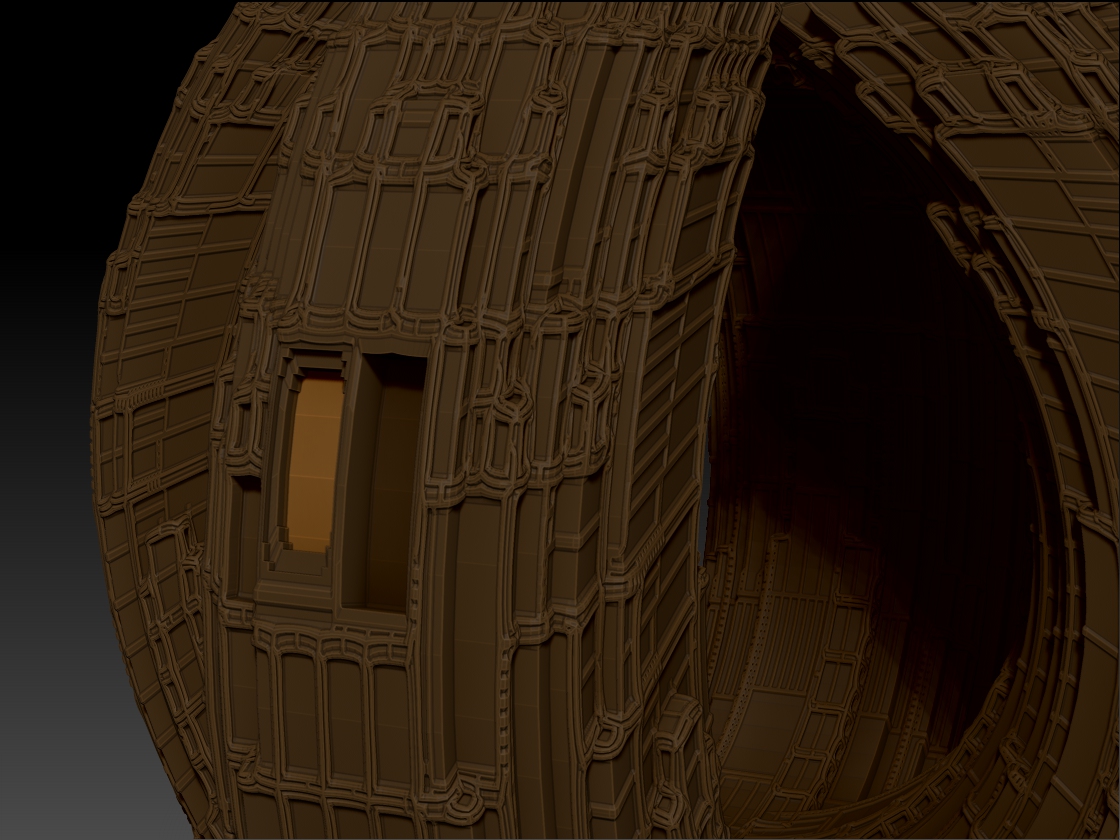
Attachments
Thanks for taking the time to shear that with us MealeaYing. Very fun stuff. I gave it a try-out.

Ezra
Sorry about putting the large photo in your thread I was hoping to drop in the little attached image. I guess I don’t know how to get those small thumbnails into here.
You are very welcome Ezra! and the image is is just as welcome, this way I get to look at it and its giving me ideas already!
Its very cool did you do the coloring before or after?
I need to try that…
Hmmm… here I go again!
GRIN!!!
Great MealeaYing! Gutalin, he is a real master…those things are similar to what i’m exploring too - this has surprised me a lot
Have a good night and keep on posting!
Hi MealeaYing thanks for the post, have you got reference to the link where Gutalin posted this process? not that I currently have the time, but would like to look into it…
Thanks Ziggy
Sorry just saw it now… thanks…
@Lvxifer:
Thanks!
This is funny, it was your images at the beginning of your thread that got me into overdrive to get this down and make a tutorial.
The addition of the “box modeling” enhancements in Zbrush (Which I was never able to do much of anything with before) were the final straw, they are such an amazing thing to me.
I put your work in with a group of other people (the list is incomplete annoyingly) who manage to convey a sense of either vast amounts of time or size or both, when I saw your first image I was instantly reminded of Gutalin but about a million years younger, your people are still alive even.
Anyhow the list is short but it will be at the bottom of this post.
@Ziggy:
You are very welcome, and thank you.
I wondered if I should make the links more obvious, like with the word “LINK:” or something as I have missed things like that too.
Here are four of the people I mentioned above, I have linked to their galleries as some of their work spans more than one thread:
Gutalin: http://www.zbrushcentral.com/zbc-user-gallery.php?uid=53867
Grot: http://www.zbrushcentral.com/zbc-user-gallery.php?uid=145883
Lvxifer: http://www.zbrushcentral.com/zbc-user-gallery.php?uid=116327
Tomstrzal: http://www.zbrushcentral.com/zbc-user-gallery.php?uid=151115
Cheers you guys!
Mealea
There is another thing you can do that is insanely great, you can Control Click on a PolyGroup and then do a mesh extract on it creating a new SubTool and work on that as an individual segment, this allows insane amounts of flexibility as you can make all sorts of adjustments and even extract the same spot as many times as you like, so for example you could use a first extract as a a wall with all sorts of sculpting the second as a Door frame with all sorts of sculpting and a third for a door, which you can even move around independently of the rest of the objects allowing it to open or close.
I’m popping this into the tutorial thingy while I still can, I think there is a time limit of about six days or something but I forget.
Also ZBer pointed out that in the tutorial I said Right Click when I meant Left Click on #5 in the box modeling part, this is now fixed.
I’m an idiot, if you ask me for directions I will tell you to take a left at Albuquerque, this is ALWAYS disastrous.
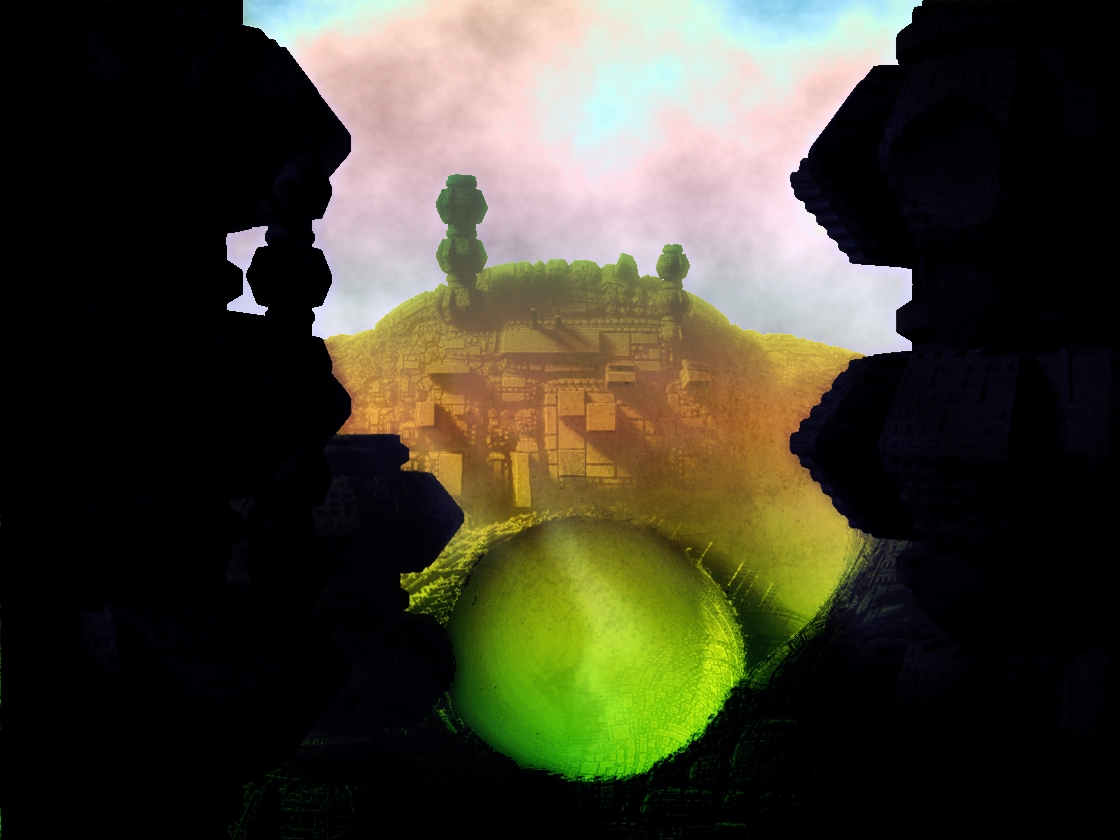
This is also fantastic:
FANCY COLORS!!!
hI MealeaYing, you are doing a great job with this thread with lots of followers. I’m glad and honoured u mentioned me together with the artists i appreciate the most , i mean masters like Gutalin, Grot, Tomstrzal and of course i should add Meats Meyer and Almacan too - they are all great.
I’m thinking about there is a sort of a new movement (artistically speaking) that starts from traditional art (Giger, Beksinski etc) to 3D digital art … al those mentioned above have something in common at the end…maybe the same influences and tastes but expanding and practising with different tecniques to find each own style if you know what i mean (my english ****s being an italian ahah)
I’ll answer you on my thread for the other things
have a good work