ZBrushCentral

my sketchbook

hello,

haven’t posted anything for a while now. This is mainly because I’m taking part in Ryan Kingslien’s “Anatomy 2.0” master class.
It’s still at the beginning, but I’ve already learned a lot and it’s also a hell lot of fun! So, I thought I should post a couple images
of my progress in that class.

It started out with Module 0. This was the pre-module in which we were supposed to create a base mesh from zspheres of
a female figure, which will later be used as base to get the bones and muscles in position. As you might notice, it’s missing
the face and the breast, but since the focus was on the muscles of the body, I didn’t bother with them. Although, I might add
them later on and also go into a bit more detail.

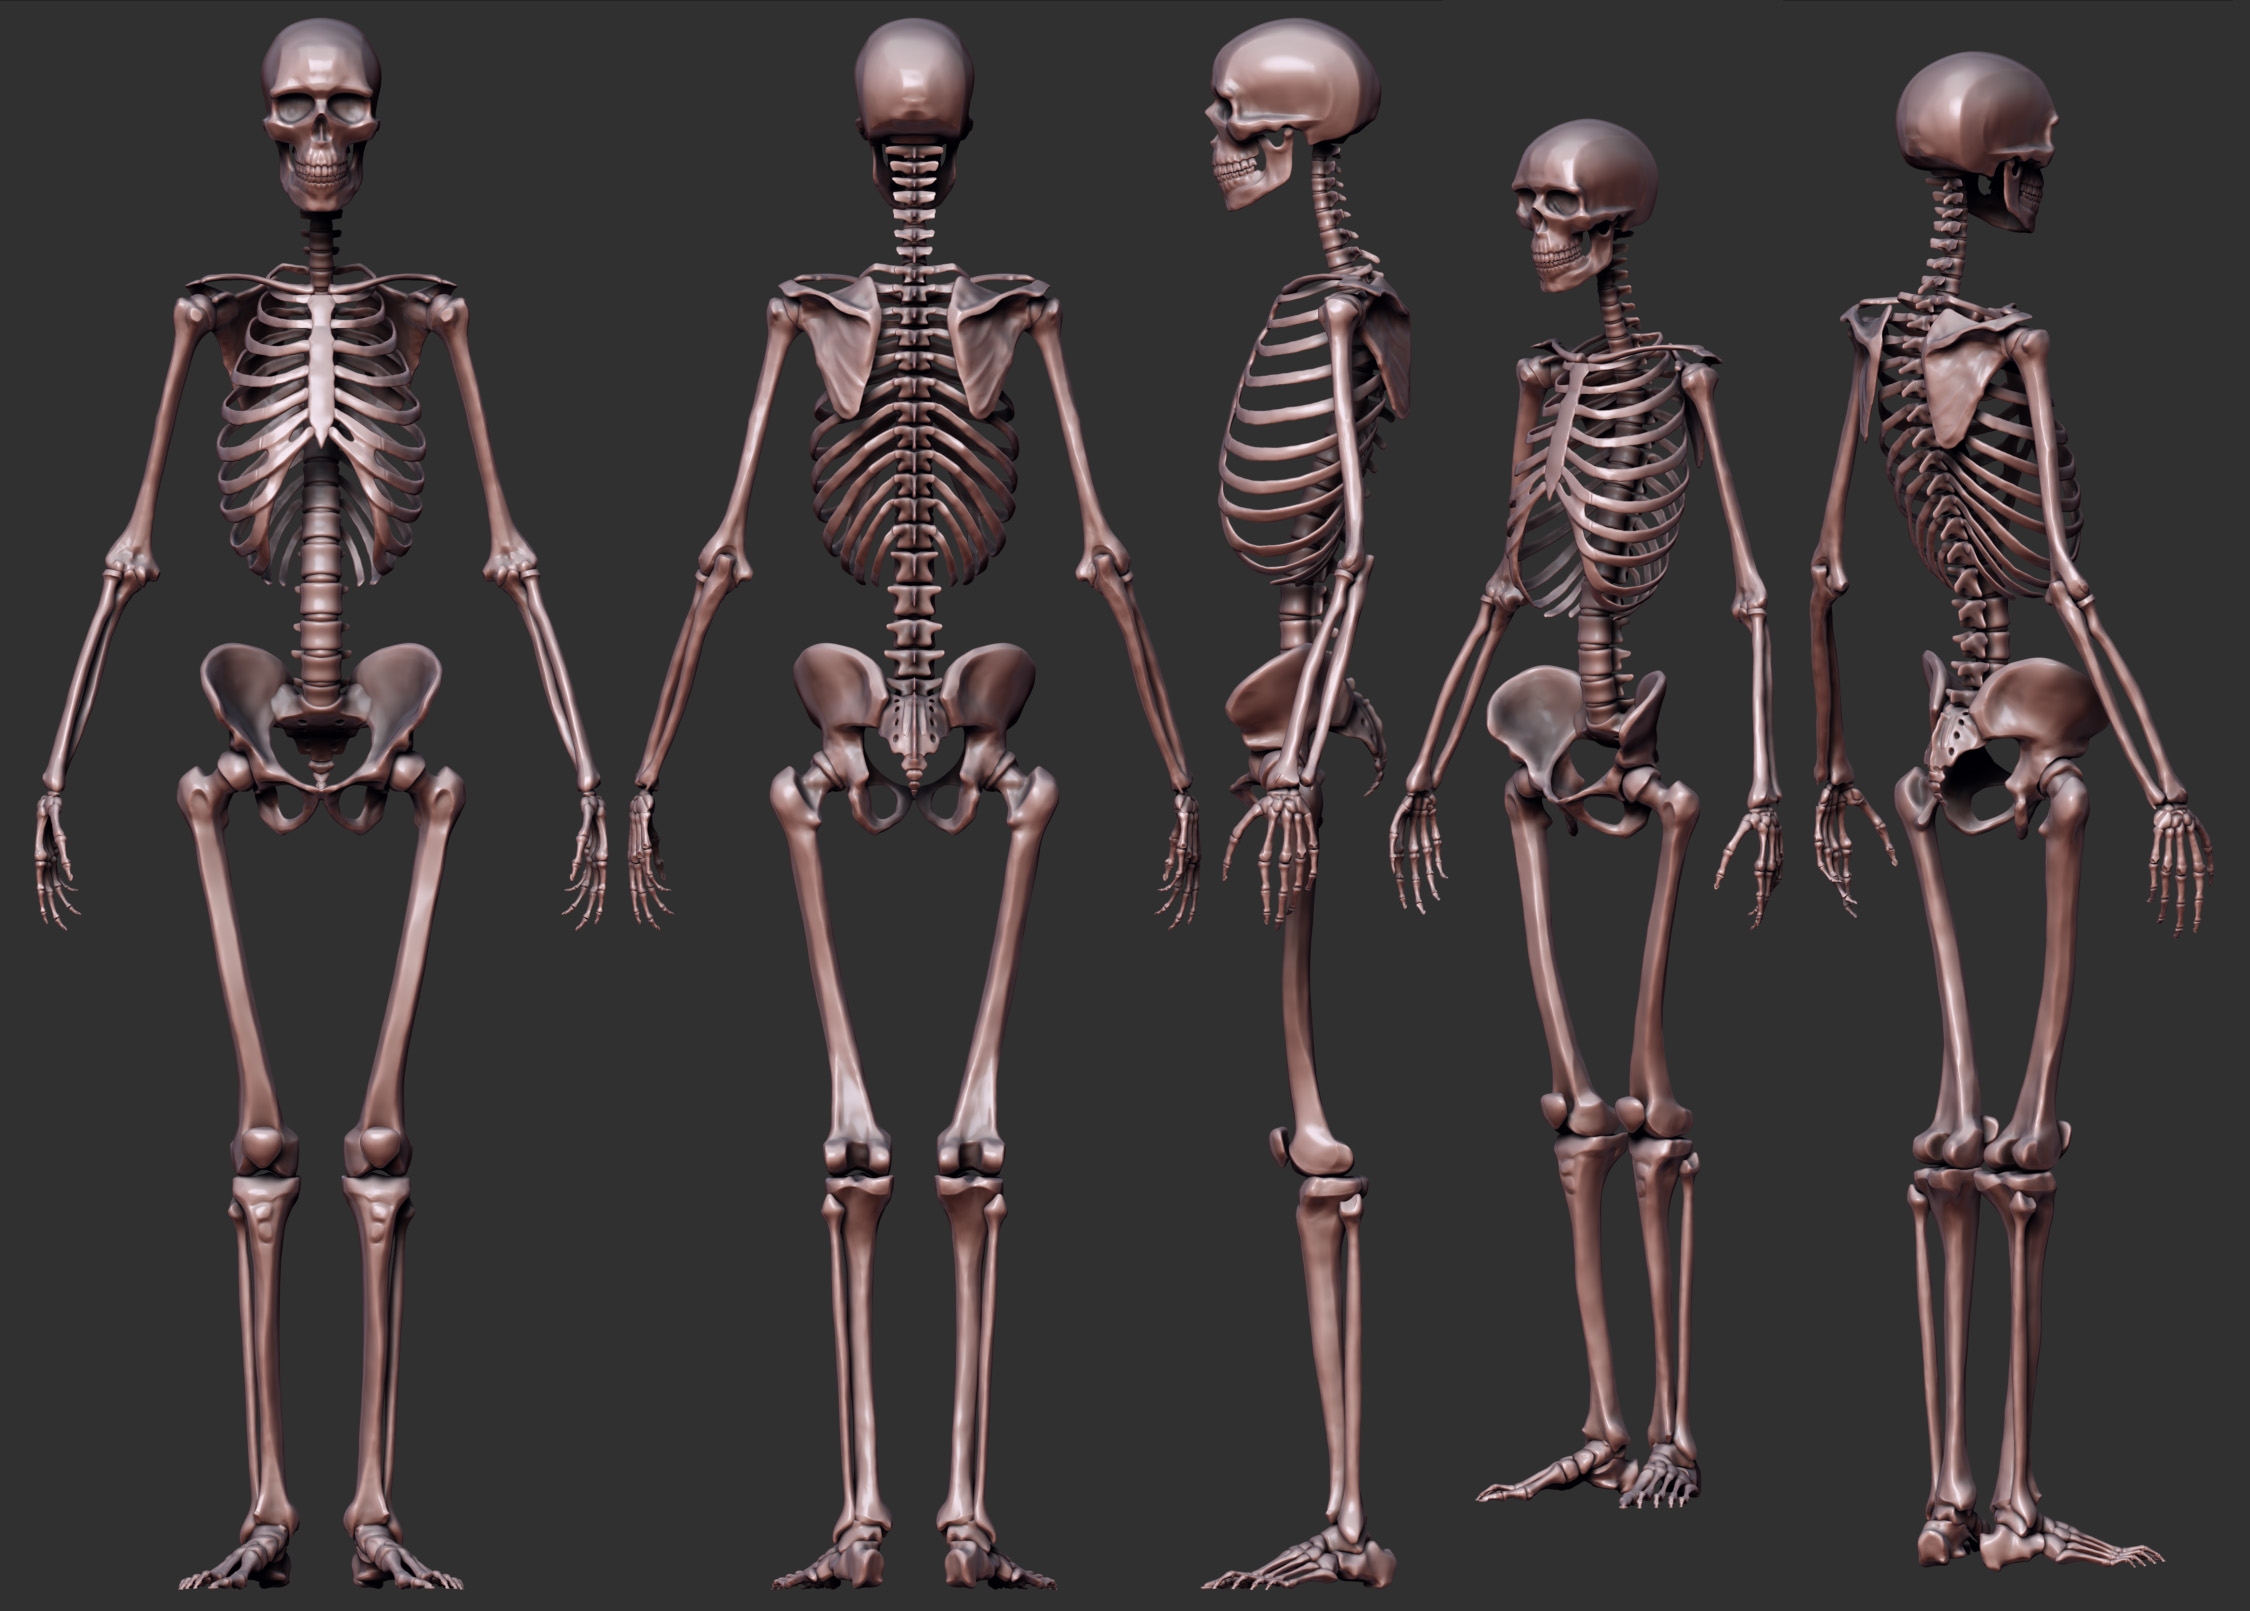
Module 1 was about sculpting the bones. All of them were sculpted from scratch using shadowbox.

C&C welcome.

thanks for looking!:slight_smile:

thumb
Skeleton_Big_thumb.jpg

Attachments

Module0-Results.jpg

Skeleton_Big.jpg

Nice work, your renderings are awesome, fishing-guy beautiful!
(I agree he deserves top row)

Skelet is nice, however the clavicles looks way to thin at the connection to the brest-bone. I would think they are almost twice as thick.
I can’t really just the other proportions as the image doesn’t fit my screen(and it’s a 22 inch) but from what I can see it looks all right.
Also the fishing-guy doesn’t fit my screen, it’s nice you show such detailed version, but it would be nice if you could also upload smaller versions. I think most people are too lazy/busy to save and open in a picture viewer.

Looking forward to more great stuff!

hey thanks for your comment! You’re right, I should upload smaller pictures. I guess, I always want to show all the
details at once. but I suppose it’s better to have one normal sized picture of the whole piece and then detail pictures.

Here is a smaller one :slight_smile:

Oh and, the clavicles could indeed be a bit thicker in the end. Or maybe I just have to lift the ends a little, cause they
are somewhat thick. maybe it’s just the render… I will look into that later. but thanks for pointing that out, anyway :slight_smile:

played around with the skeleton a little and it resulted in this. I was inspired by my girlfriend who sometimes
spends a bit too much time worrying and overthinking… thought I should share :wink:

Thinker.jpg

The rest are great,…but I love that last one…:smiley: :+1:

Great Job. I enjoyed reviewing your work. You made my day. Thanks for sharing :wink:

thanks guys! I really appreciate your comments :slight_smile:

here is a little sculpt in between. made this from a polyshere…
It’s not entirely accurate, but I just wanted to see how far I could take it. I’m still learning :slight_smile:

TorsoStudy.jpg

I think you need to work on form before starting on the muscle details.
Get some good references to work off and just tweak it at a lower subdivision level.
here is a tip with your Serratus muscles.
http://depts.washington.edu/msatlas/images/shserant.jpg
I would advise to work of real human references first to get your form right, then proceed to get the anatomy correct.
Your pectoralis are way to big by the way.

thanks for your comment. I actually didn’t use any reference on purpose. It was just a little exercise to see if I remember all the muscle with their origins and insertions… and since I’ve only been studying the female anatomy so far, I went a bit overboard with this one :wink:
It was also supposed to be more of an écorché, that’s why the details. tho the striations are more a byproduct from the clay buildup brush :wink:

anyway, I do appreciate the advise. I’ll keep that in mind next time. after all, this was the first time I’ve ever tried this…

Here is also my progress from the anatomy class. the task in this module was to get the muscles in order. the forearm and lower leg muscles will be part of the following modules.
It still has to be tweaked in a lot of area, but haven’t had much time the past few days. If you’re wondering why the trapezius is under the latissimus dorsi, it’s just temporary and will be adjusted soon. It’s part of the class…

cheers!

Module2-Results.jpg

made a Zbrush render from the thinker skeleton. hope you like it :slight_smile:

Thinker.jpg

Such Awesome Anatomy Sculpting :smiley:

I thought I should give this guy a proper background. So, after a couple of hours
of Photoshopping, I came up with this…

hope you like it :slight_smile:

Edit: did a little more tweaking and removed the noise

Why the spikes on a red eyed tree frog?

That rendering engine used.

I used the BPR for rendering and Photoshop for compositing. the background is a just picture.

Here is a little side project I did for my little nephew’s first birthday.
The concept was made by a friend of mine.

I used Zbrush for modeling, coloring and rendering and Photoshop for composition.

Thanks for looking :slight_smile:

Robot_thumb.jpg

Attachments

Robot_Comp.jpg

I like it a lot! Really nice!
How did you modeled such clean surfaces in zbrush?

Thanks for sharing!

thanks man! I’m glad you like it :slight_smile:

I really like your stuff too. awesome renders! I still have to learn how to produce nice renders outside of Zbrush…

to your question: I made each part in Shadowbox and cleaned them up with the clipping brushes and also hPolish and Trim Dynamic. I also use Group Loops a lot for making the indentations for the joints. Group Loops are great for hard clean edges and for “extrusions”.

Uhm, i should learn something regarding grouploops… i heard a lot about them but never used them!

here is quick two-hour sculpt from last night…

Flower.jpg