mmh fibermeshing hair aint easy hehe, i admit it!
eyes, lids and skin, etc are still upgradable too i think -.-
anyway…
thy allmighty unicorn!

Attachments
mmh fibermeshing hair aint easy hehe, i admit it!
eyes, lids and skin, etc are still upgradable too i think -.-
anyway…
thy allmighty unicorn!
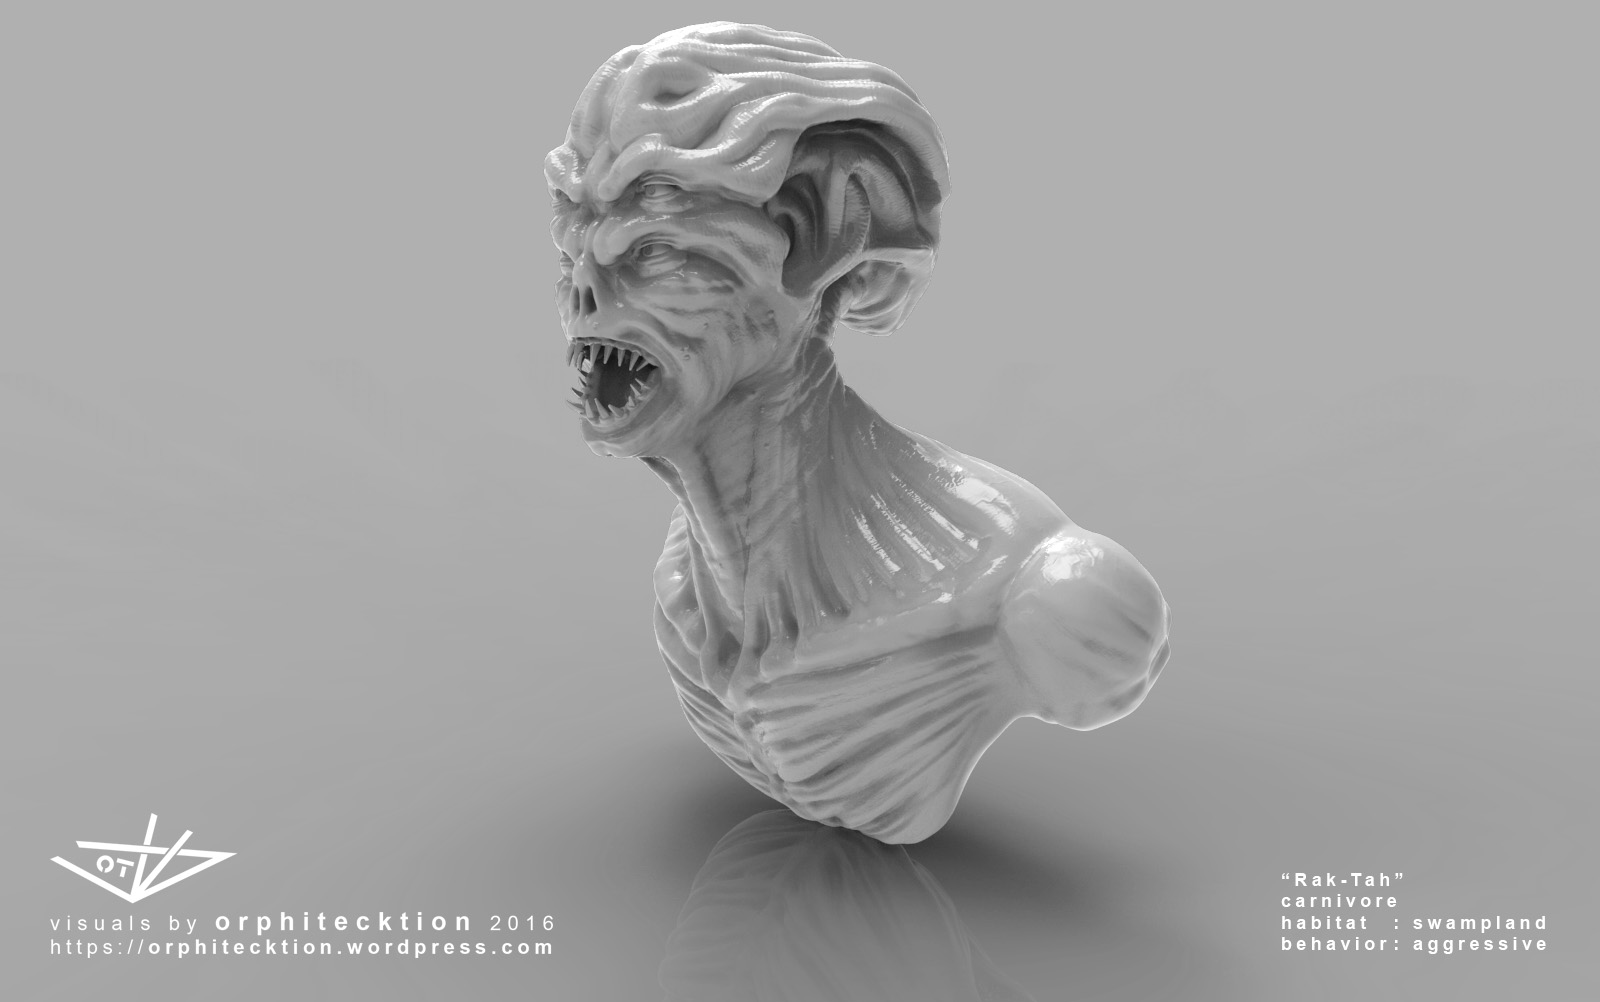
since it was easter, now its april with its funky weather, bunnies, fibermeshes and all…
beware “the Cyclope Of April”

edit:
uhm, hes not wearing pants, but hes quite furry, i hope that ok to not mark as mature content 
hes known to be an indescent one but id hate having to force him into pants, just lemme know if he snatches your panties or something else sinister
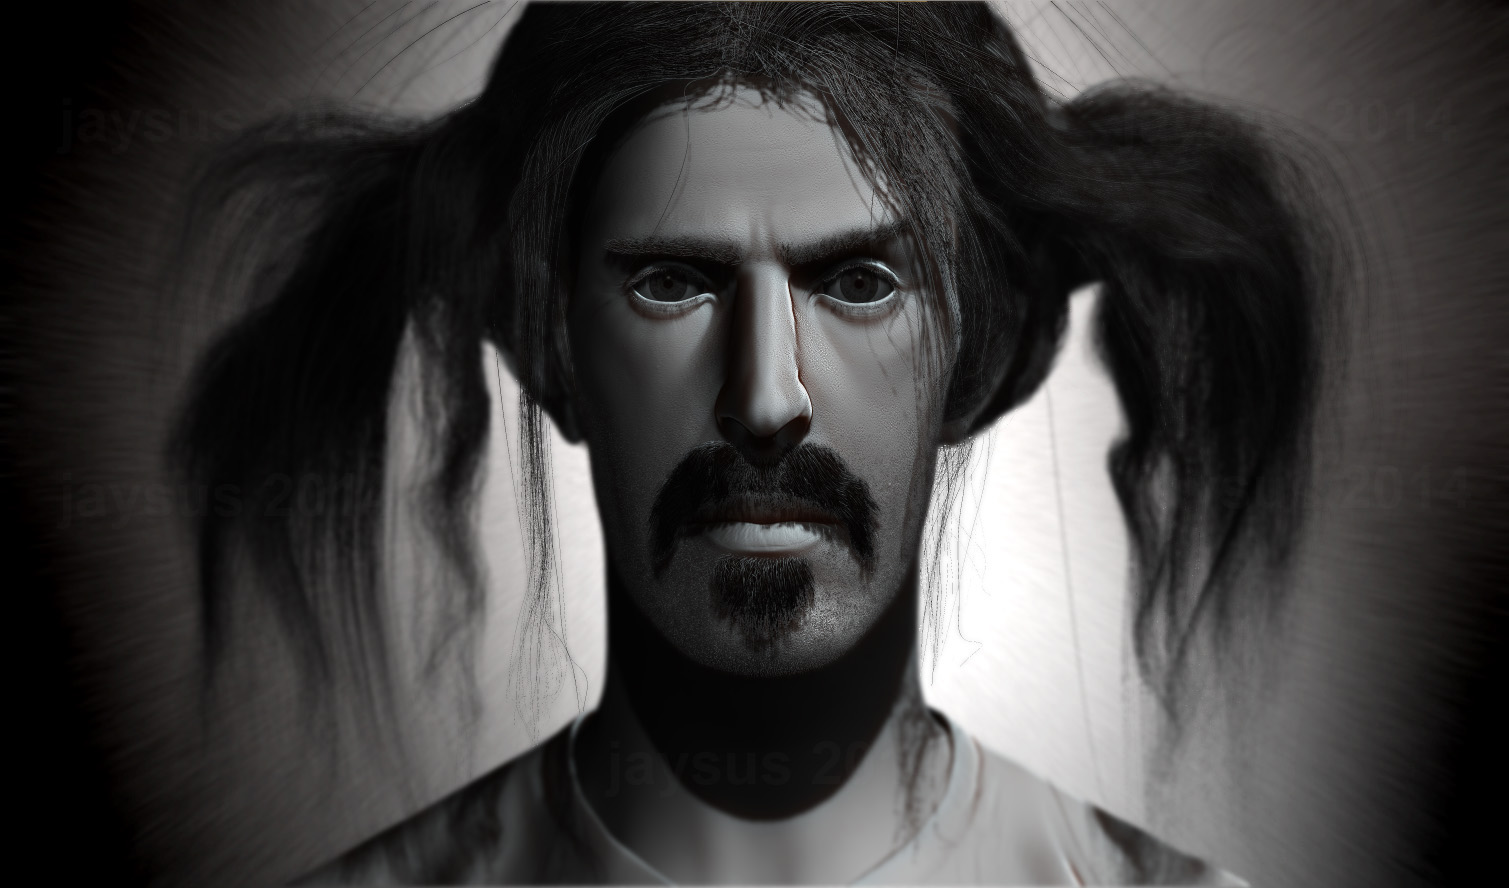
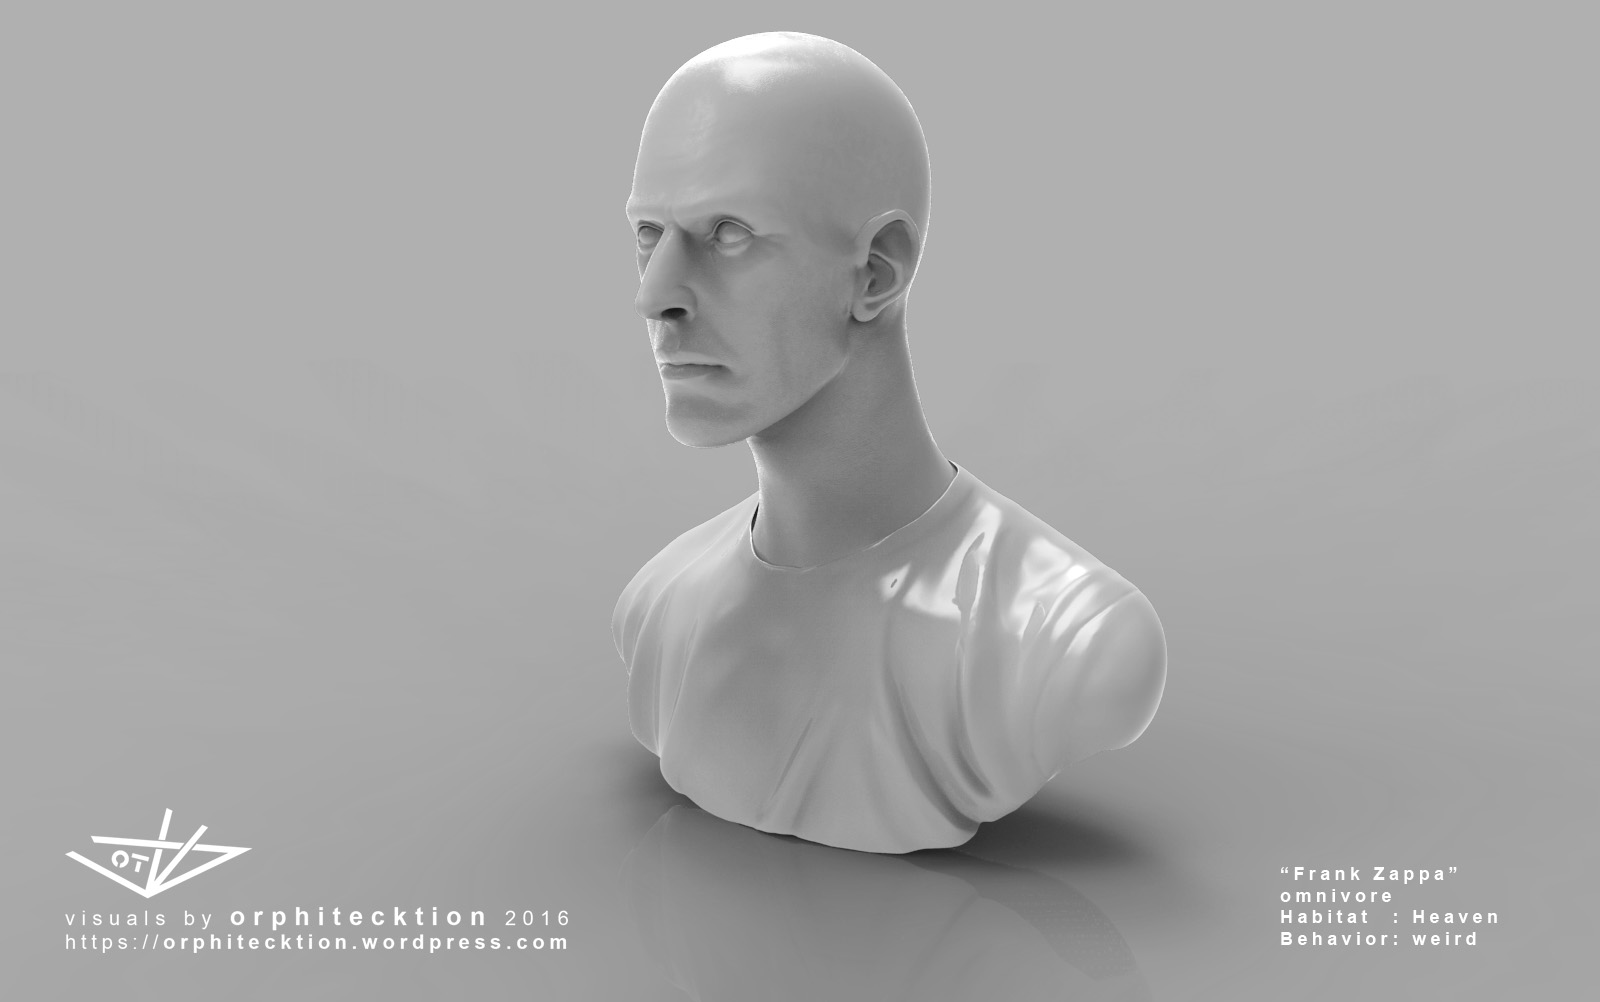
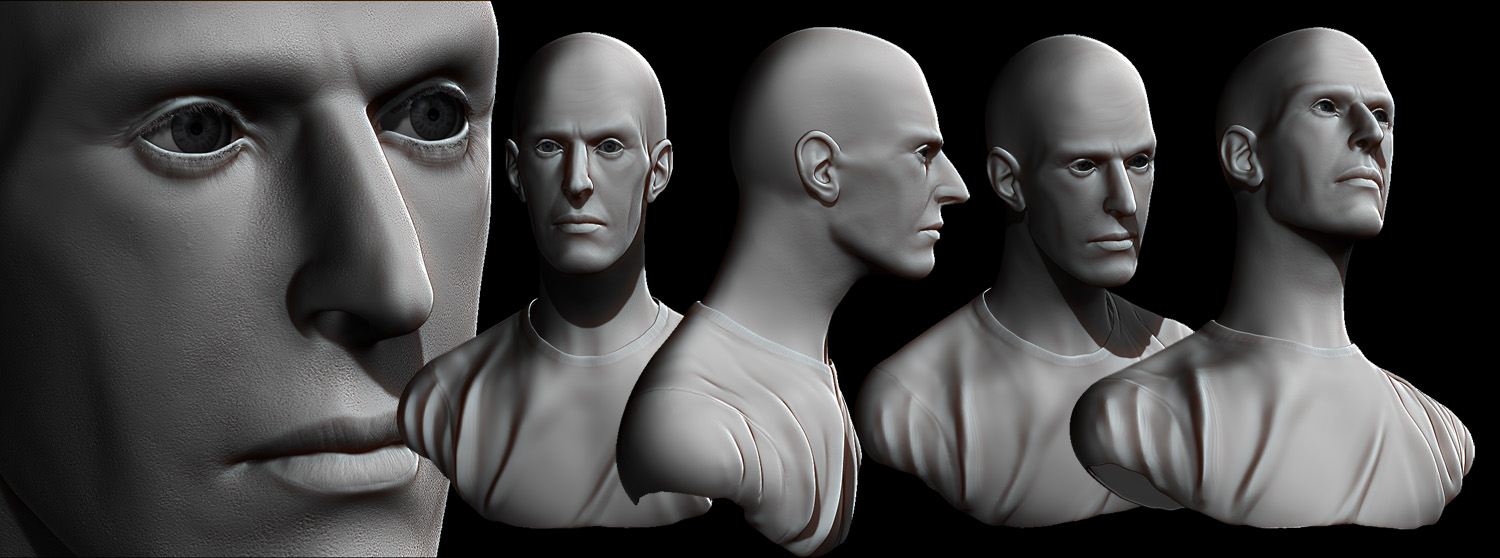
been working on my head sculpting skills a bit and this one aint done yet by far, but thought i post a basic comp, standard light and all
current thoughts:
-i think the iris is still a bit large maybe, and eyes in general still feel a bit artificial
-the hair… ouch… were supposed to be locks lol, not that easy to style,
i divided it into polygroups like sidebuns,pony,etc to make it a bit easier but the nice twisting i get from the fibermesh modifier sadly gets lost after a few strong groom brushes to form the tails
-maybe shouldnt use Zappa as a reference, he has such a weirdly elongated face that looks like a madly laughing figure from a weird dream, but a great moustache and fancy hair!
-skin feels too clean still even tho he’s young and doesnt have many wrinkles yet mmmh, looks good really close up tho -.- maybe the polypaint will fix that a bit but i doubt it will be enough
-fibermeshes seem to produce bad shadows on standard render settings if thin and lonely, see underneath right eye, could be due to resolution tho (1500p)
-i like the moustache and eyelashes, eyelids and lips have improved too i think
turntables of some of my more rescent models:

experimenting with the creation of Wallpanels from alpha pictures created as vector graphics
A02
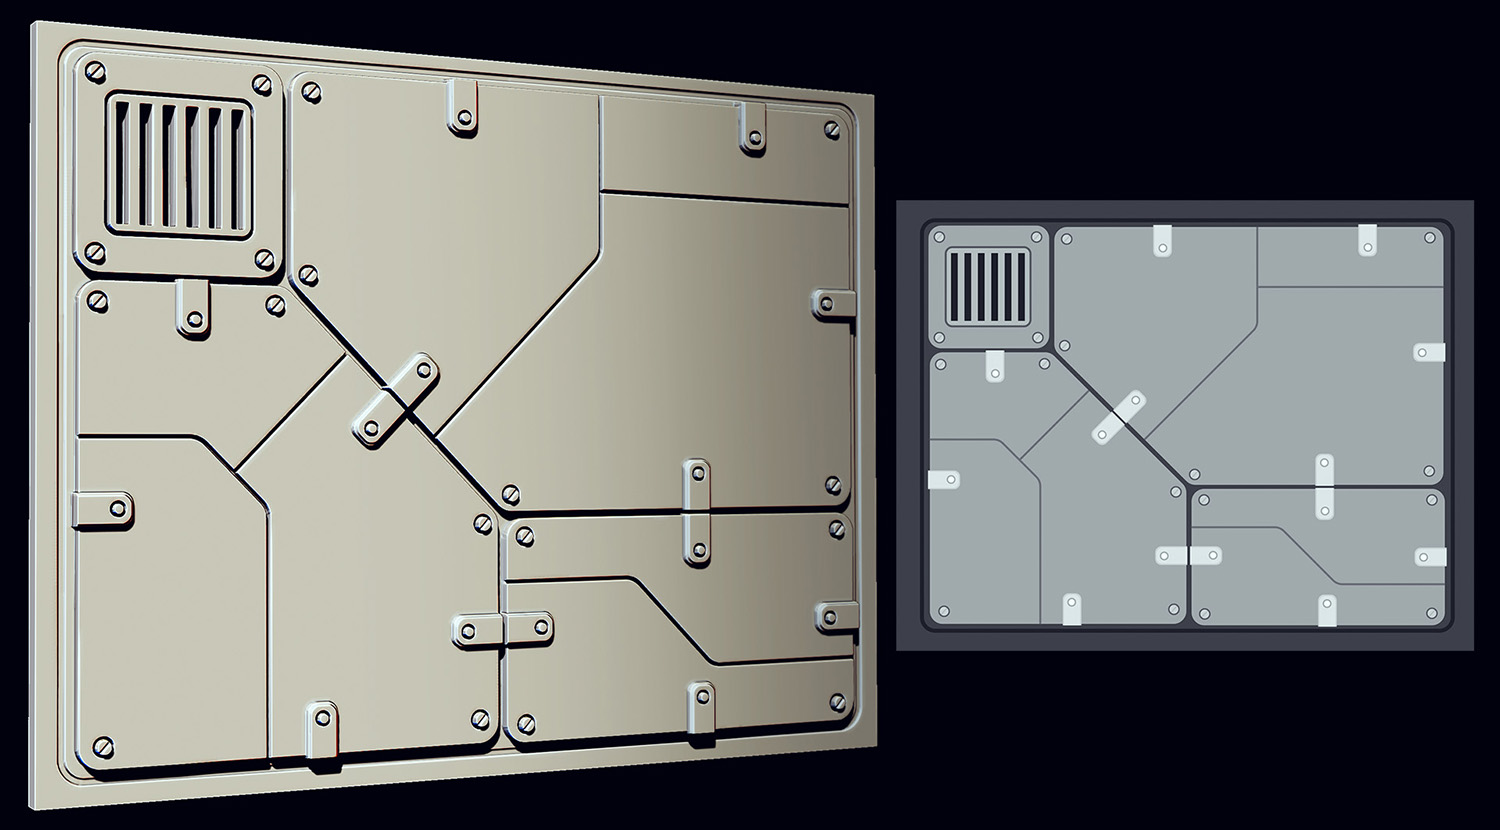
so i made more wallpanels by simply using marvellously sophisticated vector graphics as masks,
and used them to create a box, is that sweet or what?
everyone needs boxes,
to put stuff in them,
or ontop of them,
you can stack boxes,
they wont roll away and have sexy 90° angles,
boxes rule dont you dare say otherwise.
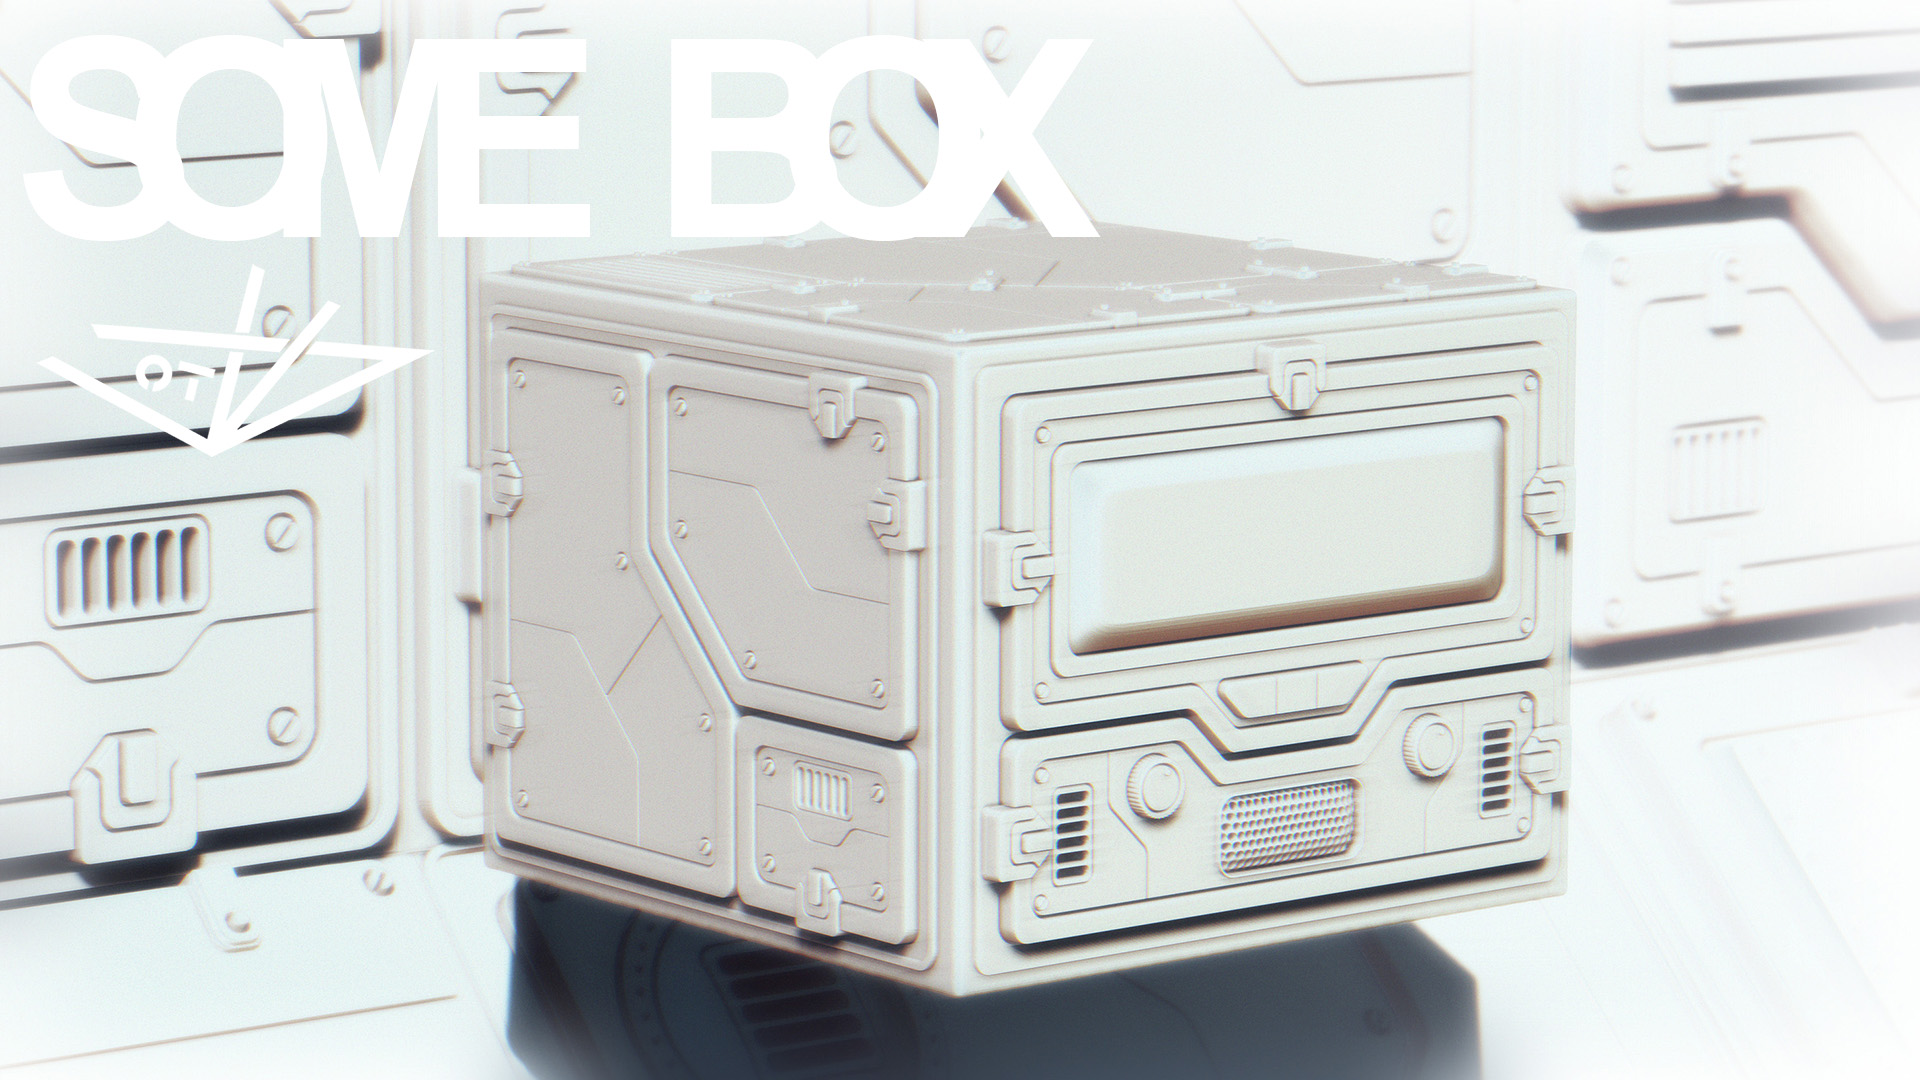
Very nice! Definitely saves a ton of time from having to poly model such complex details. 
And yes, I’m a big fan of boxes myself. 
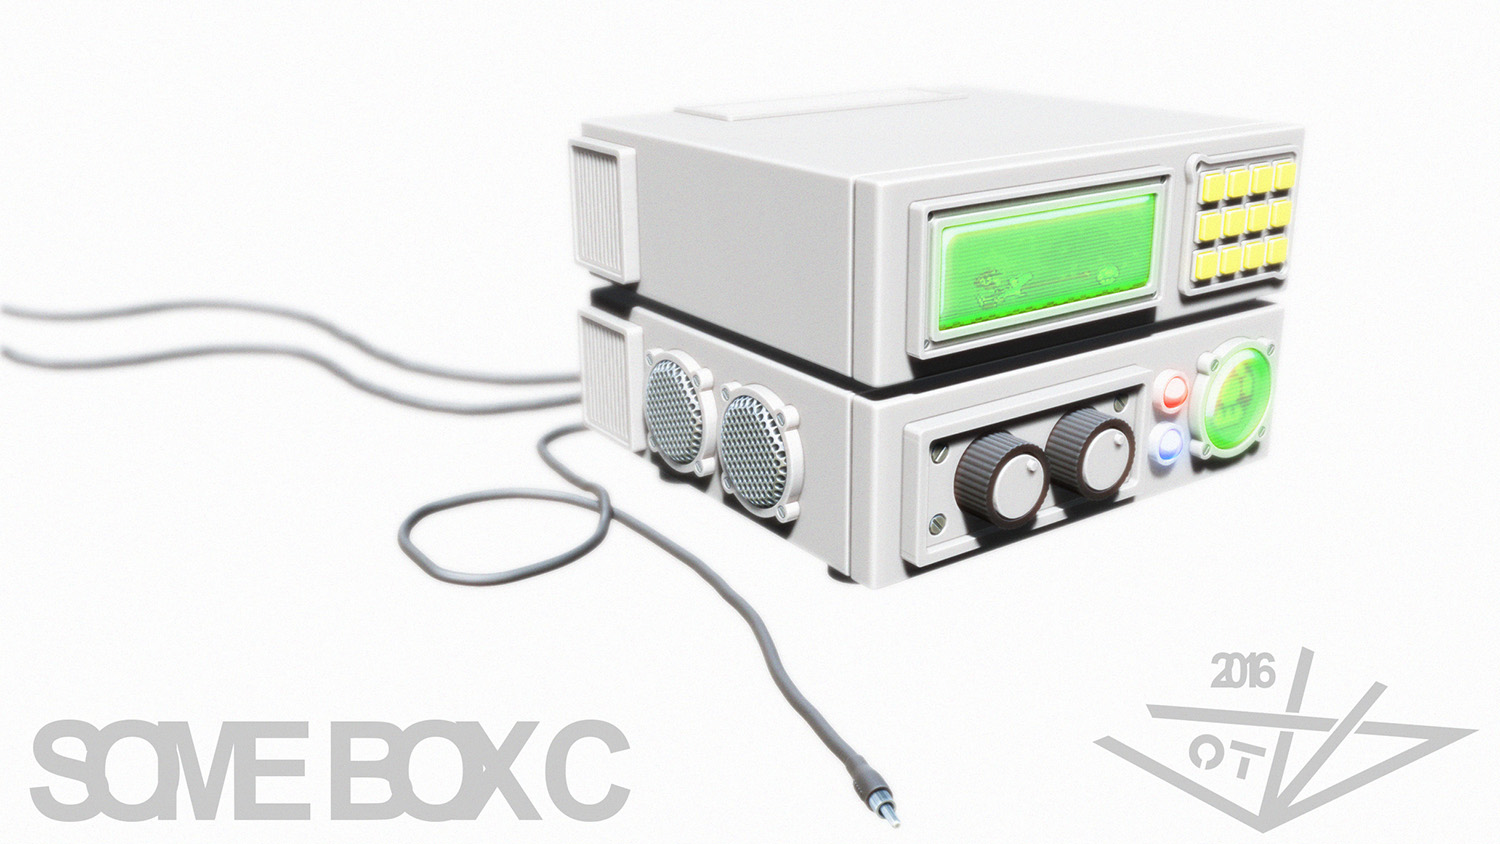
Impractical High Tech Gaming Multimedia Boxes

After alot of sweaty scientist’s work in the Orphitecktion Labs, here it is, the first prototype for the turbodrone, gone are the days of boring minicopters, jet engines are all the hype now.
And to be organicly responsible we added solar cells instead of fuel cells, why burn oil if you can just harvest the sun’s fiery powers directly.
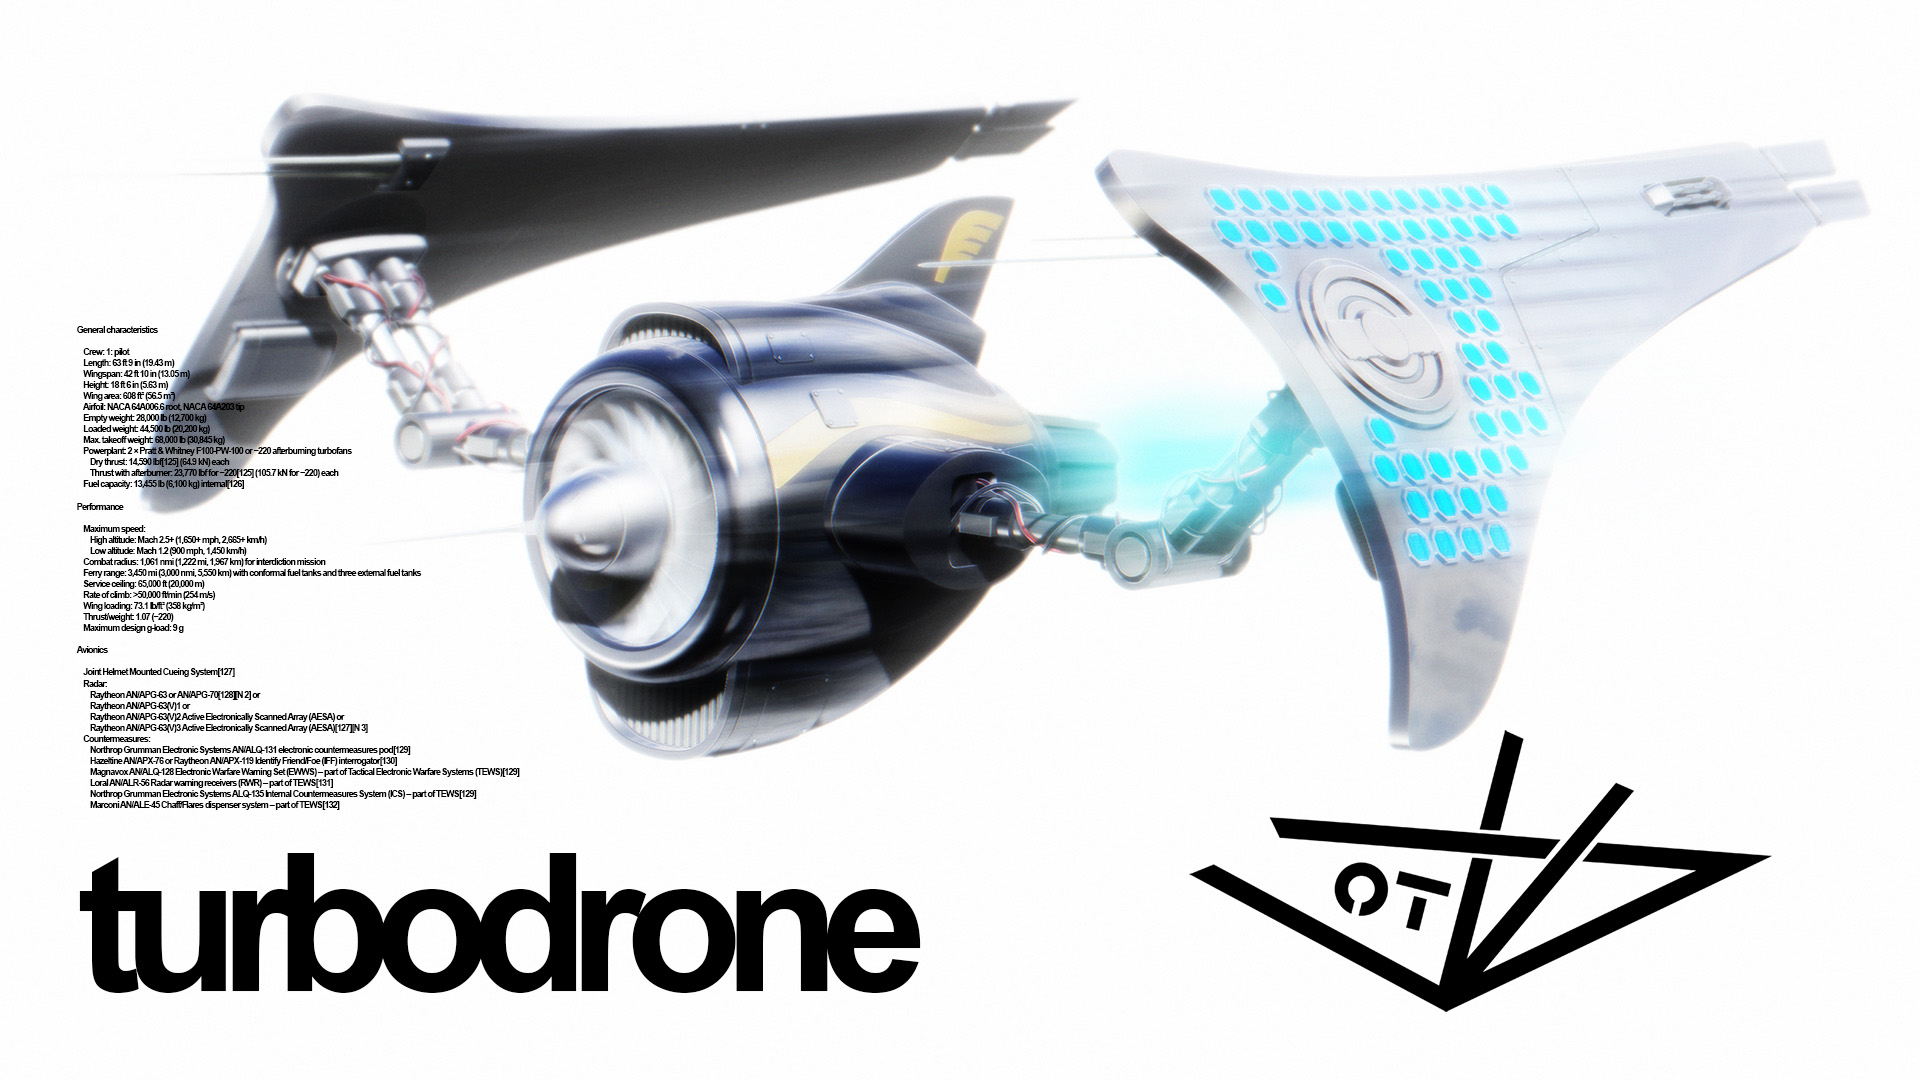
full ZBrush model and render with some photoshop layer magic
primitives, slice brushes, polygroup vodoo, low poly work
a very simple sculpt, “Duality”

i’m mostly busy doing photography and graphics atm but oh look, i found an old helmet model!
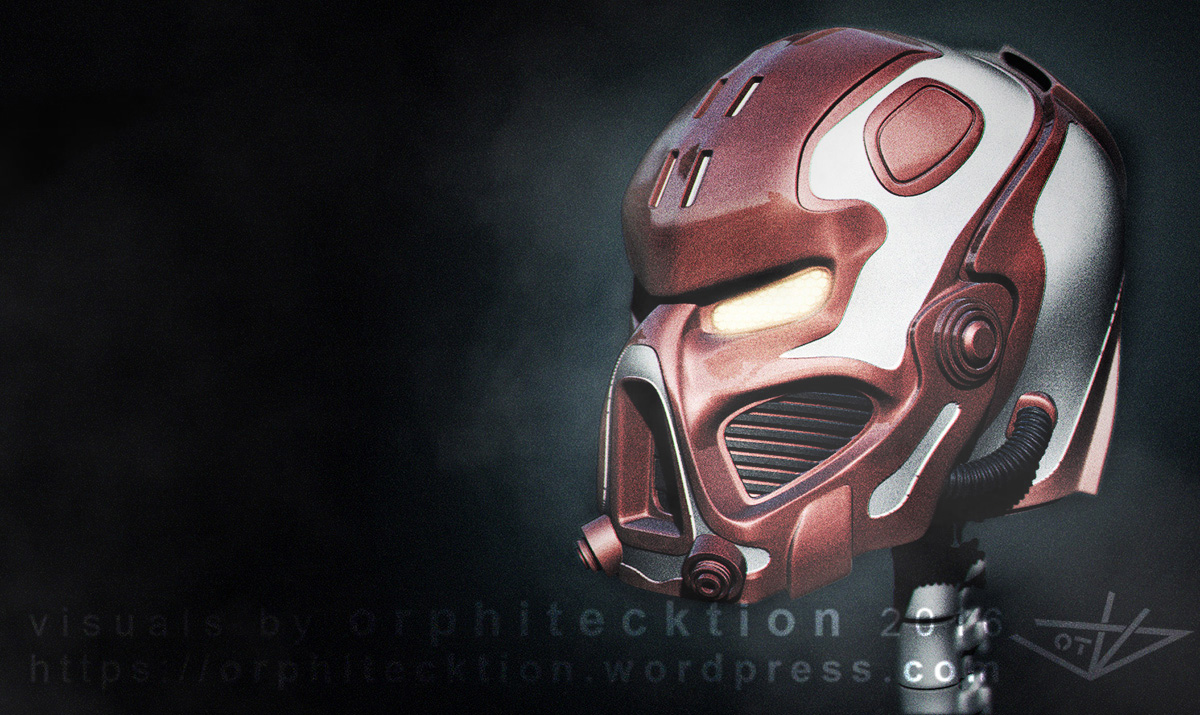
ZModeler and geometrical, quadrificational, meditation practice,
in the context of protective head armorfication for use on the famous Hyperbike tracks on Helios-9F.
thought helmets are cubical enough to do some high detail sculpting finally, but oh dear…
no way… at 14mil polies its still jagged and pixely, next step undoable for my mashine obviously, so ya… ZModeler saves the day
one continuous mesh done by: Dynamesh - Retopo to very low poly - ZModeller - Polygroups/creased edges/points - subD - uncrease all for final subD
finer detail like srewholes done in a higher subD but still ZModelled
must admit it was starting to get confusing thou, its really annoying to spend half an hour on some corner of the model just to realize later,
that you accidently clicked the wrong poly at some point and deleted the other end of the model.
certain shapes, like hard edged extrusions also create problems for the subD algorythm,
it tries to smooth the non hard edges surface and slowly pushes it underneath (or over) the corners of the hard edged object,
if you dont crease its corner points which then leads to a hard crease on the edges connected to that point.
i also missed a feature to select a few edges directly without polygrouping/masking/hiding,
like for example i can select stuff with the curve function, which however seems rather pointless tbh,
so i may apply changes directly only to certain edges and not full loops or single edges,
most of the time i had to add full loops and delete what i didnt need
edit:
it would also be nice to be able to have different states of polygrouping, one for modelling where sides of hard egded objects are seperate groups and another state for polypainting where all parts of one object could be one group
edit 2:
and i still miss a feature very much which lets me remove all polypaint and material info and reset the polypainting state of the model back to default where i can just change colour and material and see whats happening without having to click “fill all”…
and no, the flat material just removes material info not polypainting
(the flat mat actually is what i use for glowing stuff etc since it doesnt get affected by light, flat white and the rest fully black works well)
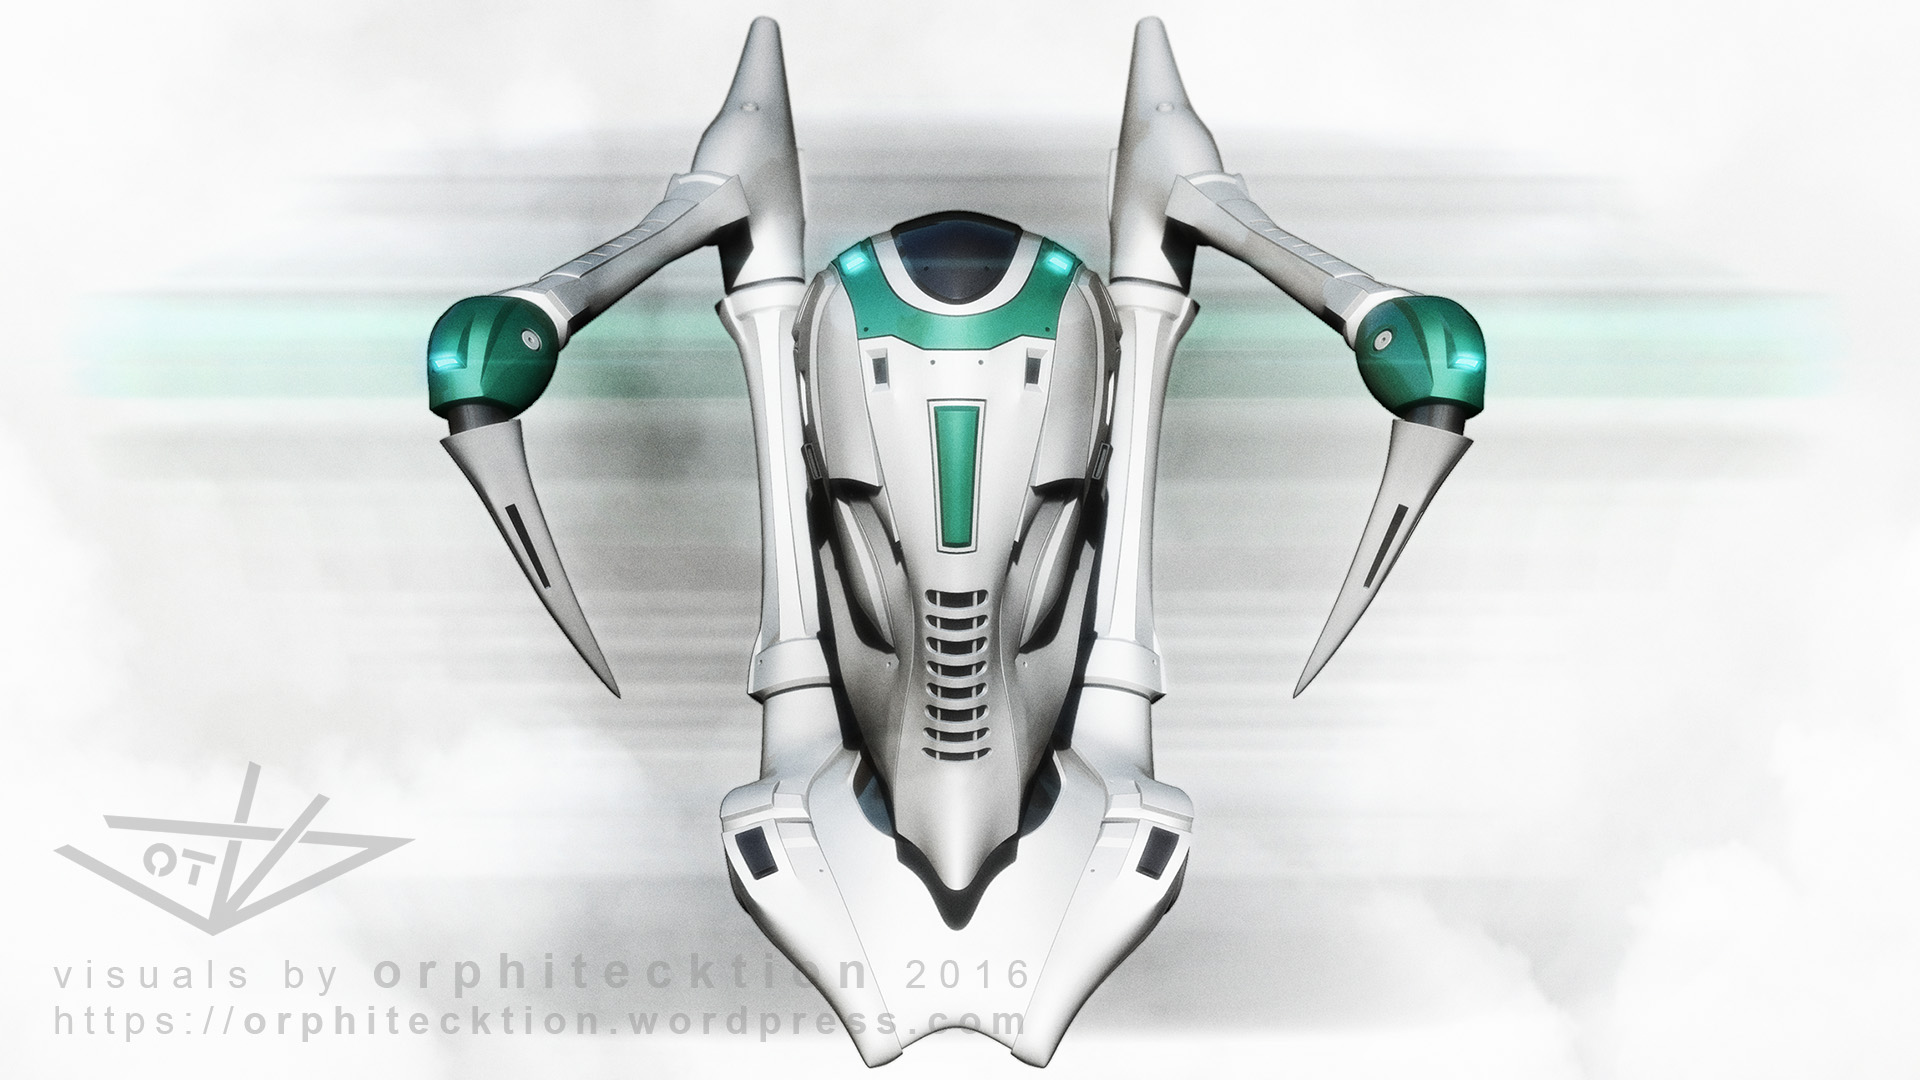
anyway, new helmet:
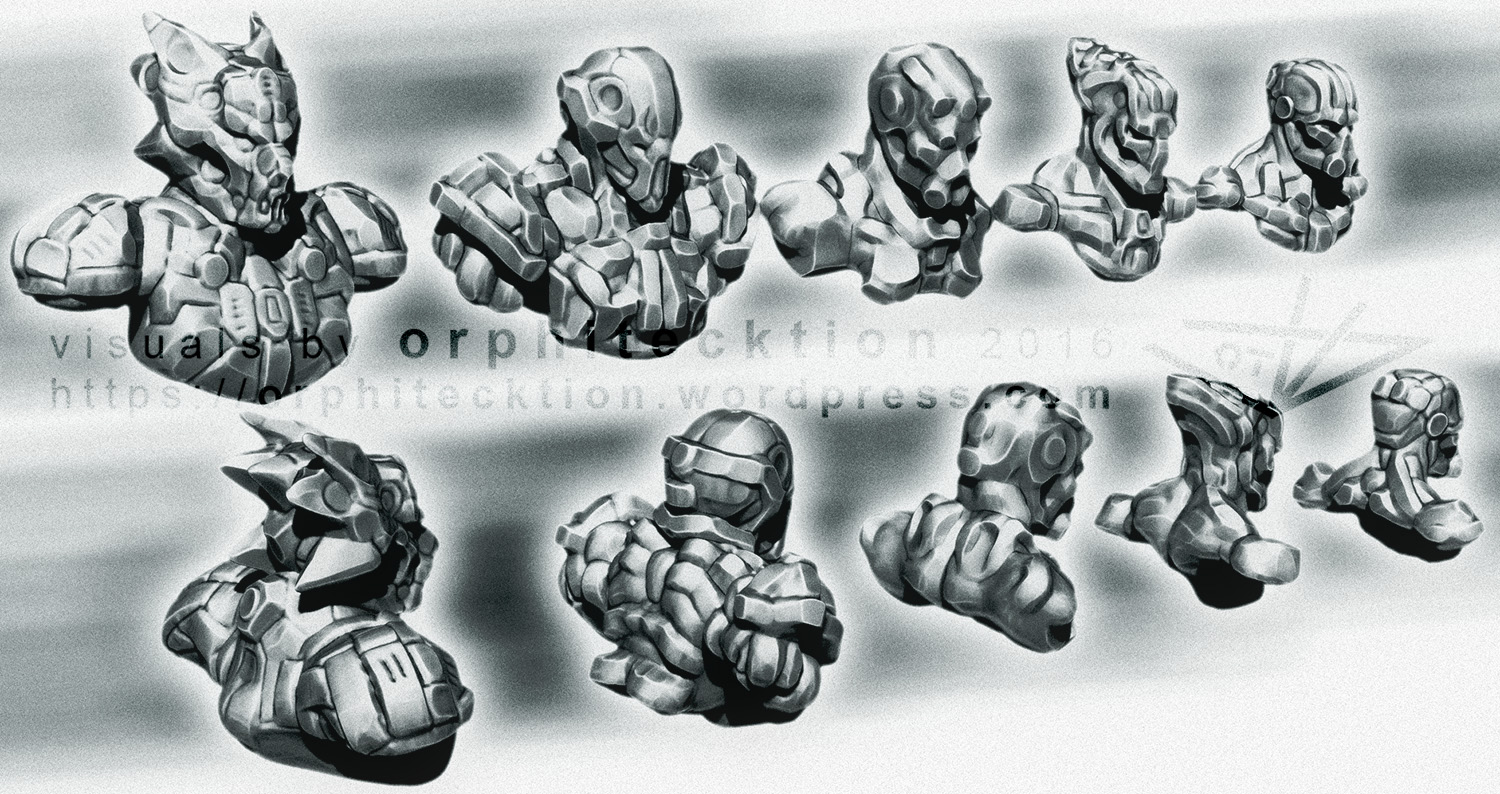
a bunch of 30 minutes or so concepting sketches to find shapes, volumes and nice ideas,
plain brainstorming in 3d rather than 2d on paper
“the pen subconciously follows your dreams for the most part until you see a shape or form, a line or edge that you like”
make a basemodel,
duplicate a few times,
go back and forth between them and change some drastic things
dynamesh, roughly 30-50k polies each
MoveTopo, ClayBuildup, hPolish, DamStandard, Inflate (to fix holes mostly)
this is one possible workflow to get a clean model from a clay style drafting sketch like those in my last post:
not every model needs this kind of approach but it can help with very mechanical features to properly seperate areas,
this usually applies for man made objects which are very primitive in design due to our limited mind and hence more like symbolic representations of nature,
hence need to be much cleaner and less naturally flowing the way our hands do sculpt, therefore should be created with precision and not belief in ones ability like nature allows us.
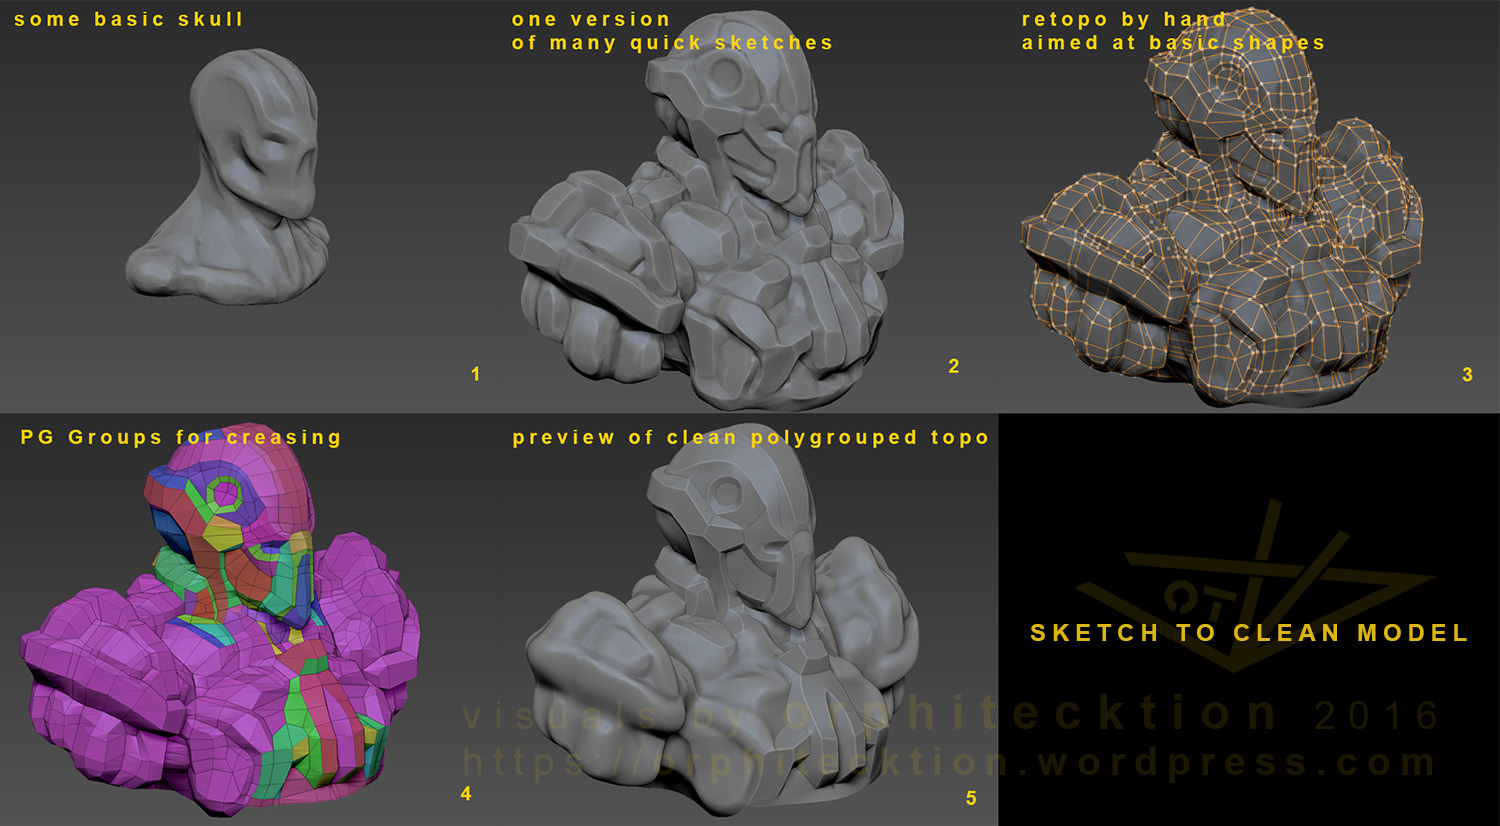
RETOPO:
-manual retopo took about 2h, polygrouping edgeflow for crease action will take about 1h
-retopo can be done automaticly by 3DCoat quite well too usually but not as accurate, even tho my retopos are weak they still trascend automatic ones usually
-ZBrush ZRemesher gets nice clean topo but also smoothes a bit and the result has too many faces you wont need or want,
-removing unnecessary edgeloops might be more annoying than retopo
-all retopos will need manual fixing due to your sculpting, the better the sketch the easier the fixing of straight lines and so on
-there are three different kinds of retopos,
POLYGROUPS:
-do a polygroup for each flat surface to begin with to get nicely creased edges
-auto polygrouping by normal is a hit and miss but can help on very primitive shapes like cubes, or as a base for further refinement
-later, for polypainting, regroup your polygroups according to material instead of the creased edgeflow
regarding hard on surface sculpting
just watched the 2016 ZB summit ID presentation… (https://www.youtube.com/watch?v=duj01hm3FTE)
regarding the hard surface sculpting at the end,
guys, just do that stuff in lower poly… mic drop… no seriously, you wont have that much noise and time off waiting for your mashine,
you can always smooth it later once you got the basic shapes down and the geometry will actually be clean and not just appear clean.
as for options to keep hard edges during subDividing:

keep fixing polygroups for edges, straighten out lines, flatten surfaces, add detail here and there, ridges, rims, extrusions, subtractions, etc
ZModeler, Transpose, Clipping, Move are common brushes/tools used
i tend to use ZModeler alot now, the bike a few pages back was done with only transpose, move and “insert edgeloop” in the geometry tab which was alot more complicated.
But again, if you want clean geometry, work with less, the less you have to worry about, the fewer points you have to keep in line, the cleaner your mesh will become.
Polygrouping and creasing is a good way to keep exactly the detail you want to keep on higher subDs for sculpting the detail
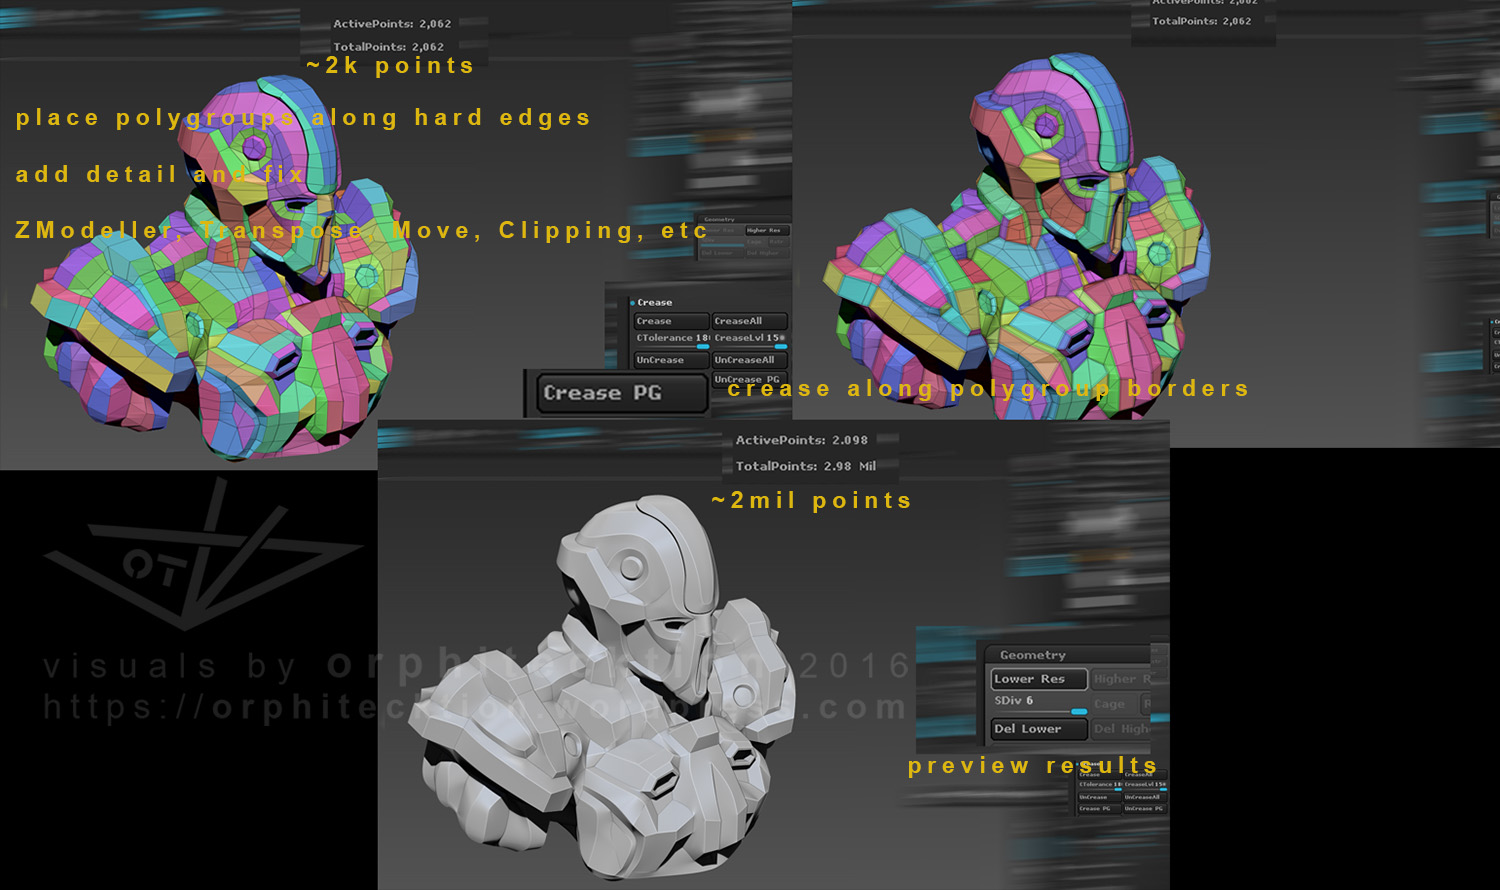
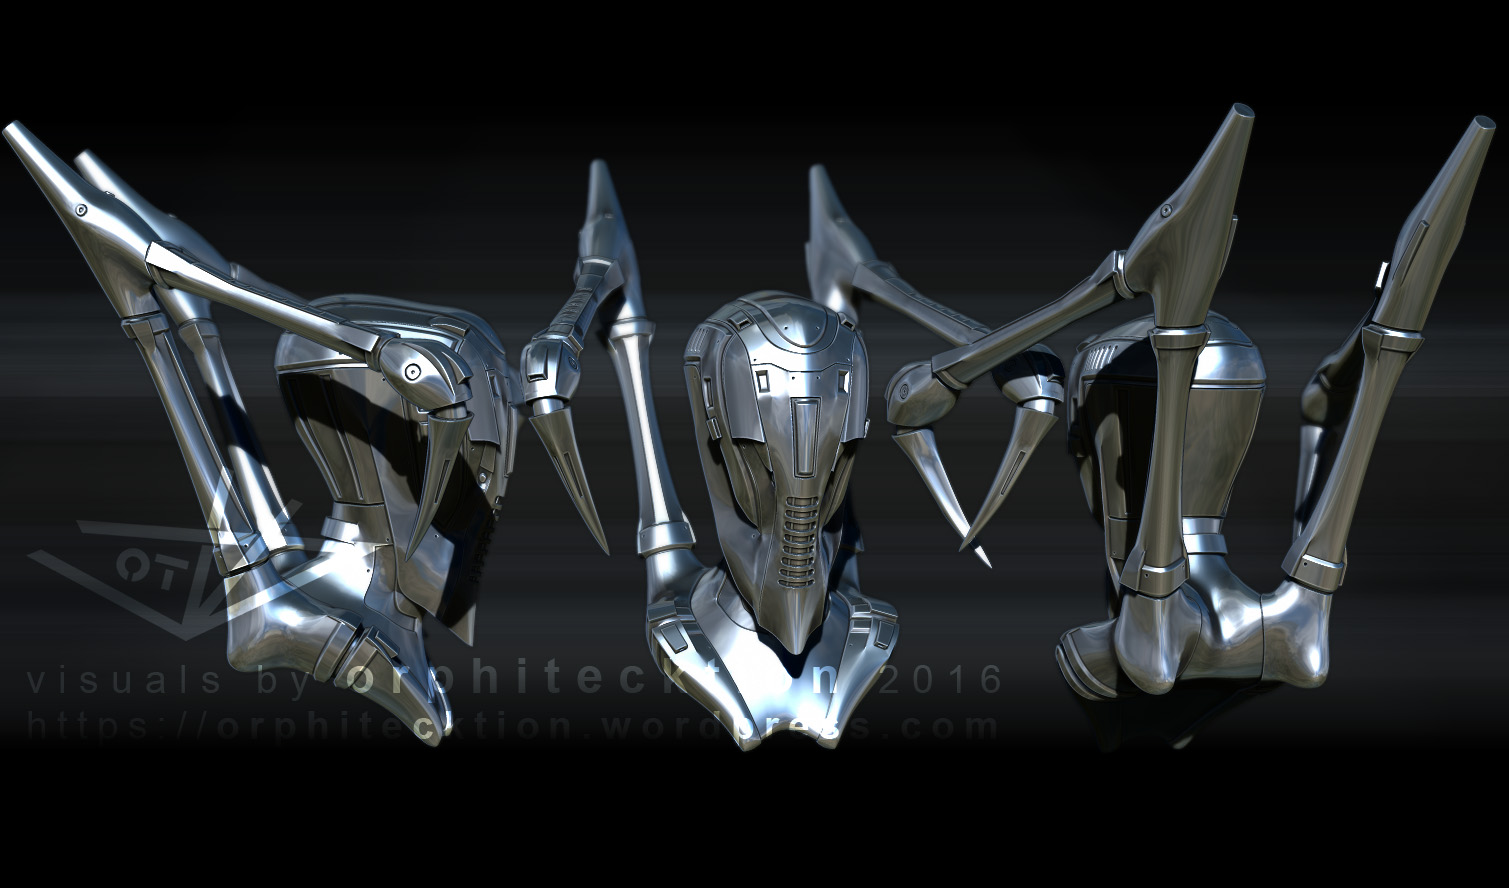
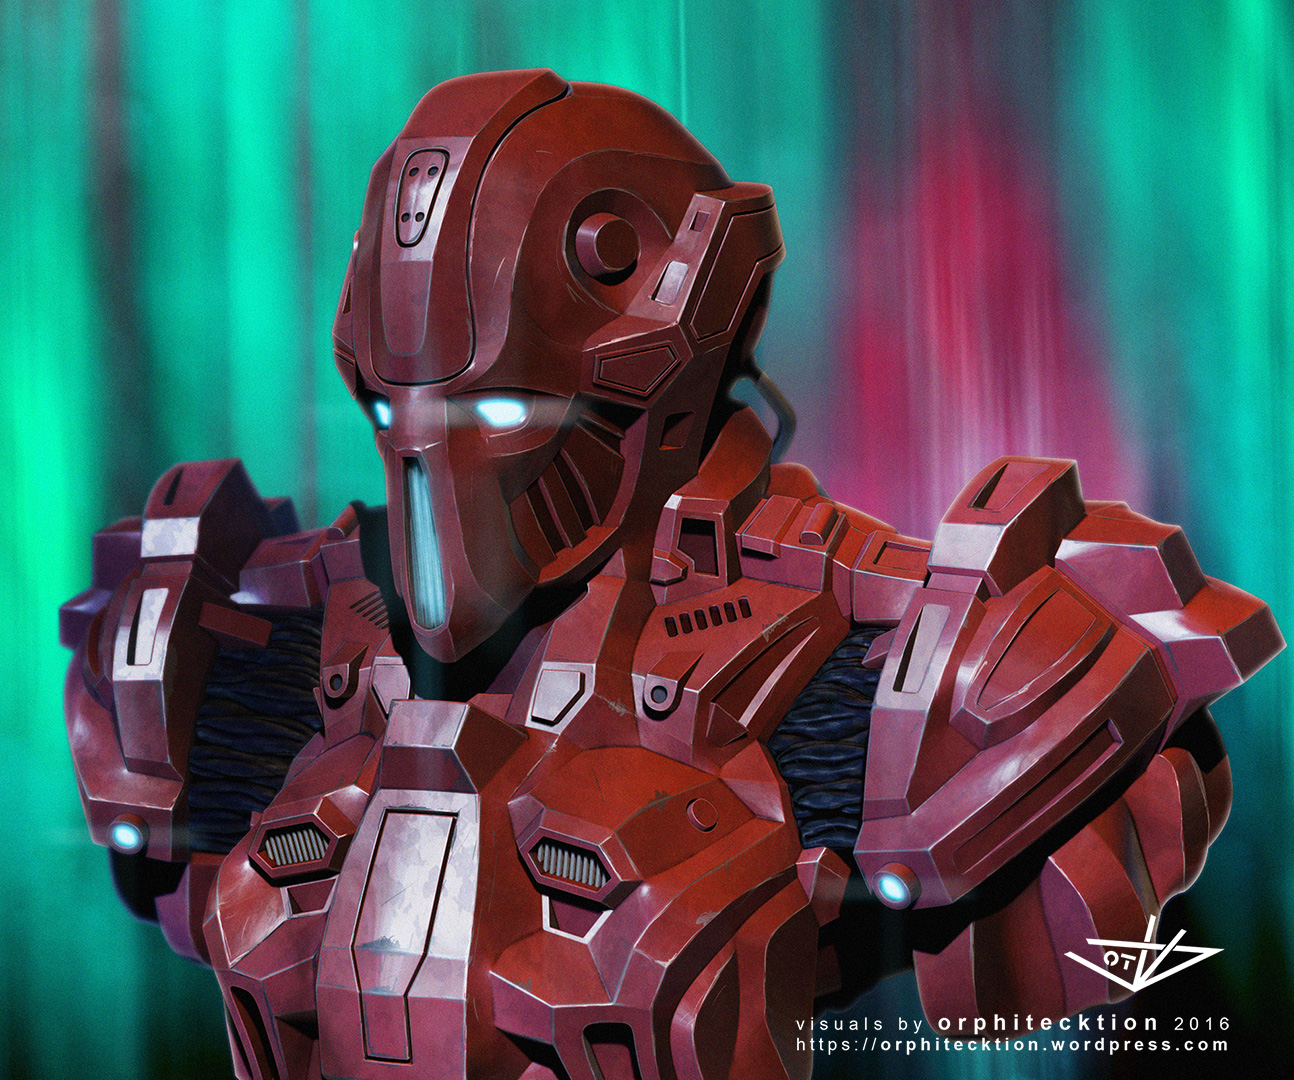
went on adding a few more details to that last helmet,
all done at around 2k points until i screwed it up to 12mil points for the finishing touch,
the vent holes on the clavicle area are the only sculpt so far,
would like to add more fine detail
12mil points are sadly too many to subD again yet not enough for clean sculpting of unorganic shapes,
12mil points is too much to work smoothly on my mashine too,
which means that i should probably split up the model into parts next time and try to linger around 6mil active points until final render
its one, single object apart from the wire/pipe at the back and those vent grills on the chest
made a few design mistakes too,
just took my free sculpt which didnt pay too much attention to practicability,
head probably cant move much,
shoulder joints are bogus
and surface obviously doesnt deflect as well as a 16th century gothic armor suit
and ya, just doodeling around in photoshop, not sure i like that composition
but hey, its just to demonstrate the low poly approach
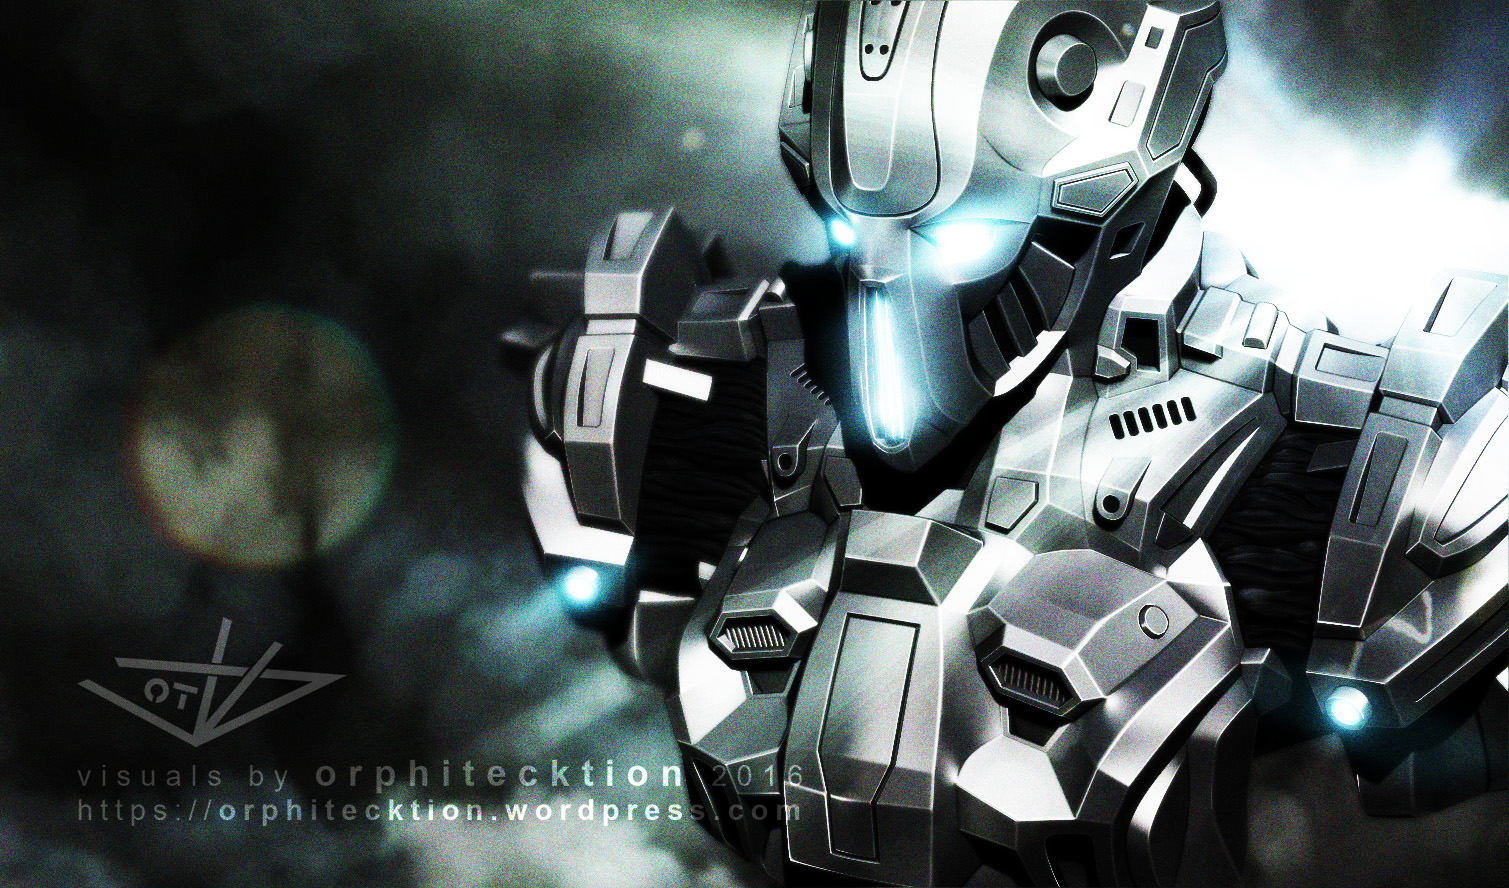
i really didnt like the last render and couldnt leave it at that,
so ya fizzeling around with this and that, too many polies to have fun, just waiting for my computer which is boring,
then watched the ZB summit 2016 with Paul Konig and tada, problem solved,
i simply added some detail in photoshop with this wonderful method P. Konig mentions in the summit video:
render in metal material, render in paint material, overlay in PS, scratch away paint
not necessarily happy with it yet either but for plain BPR rendering id say its def better than before
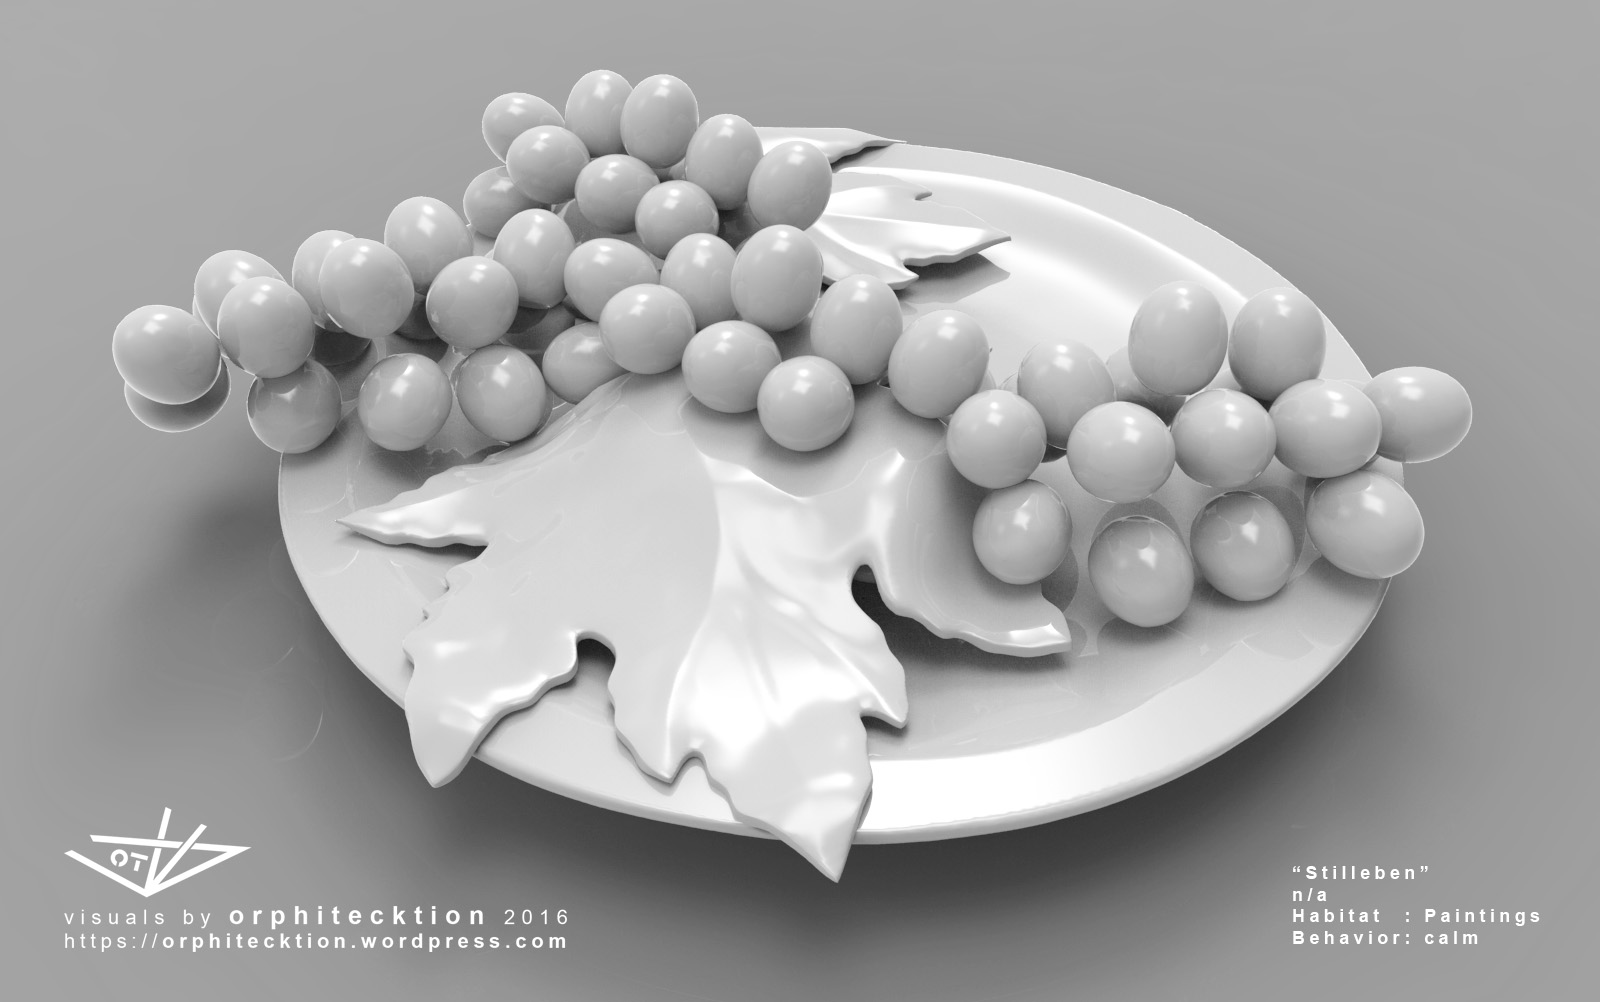
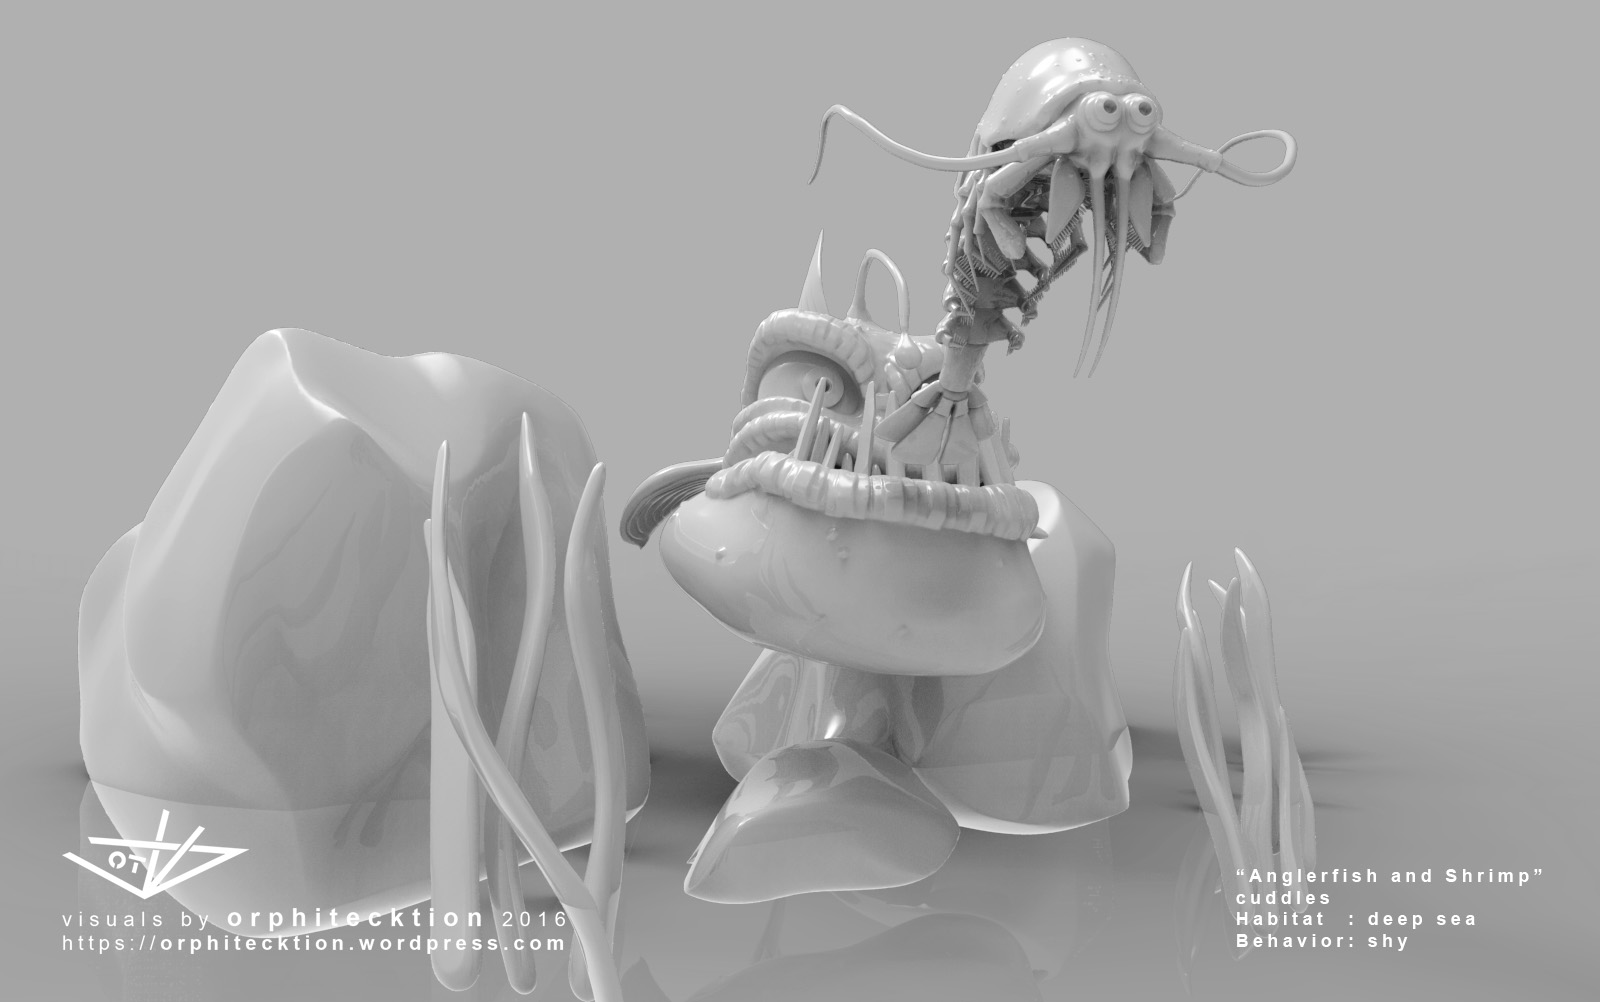
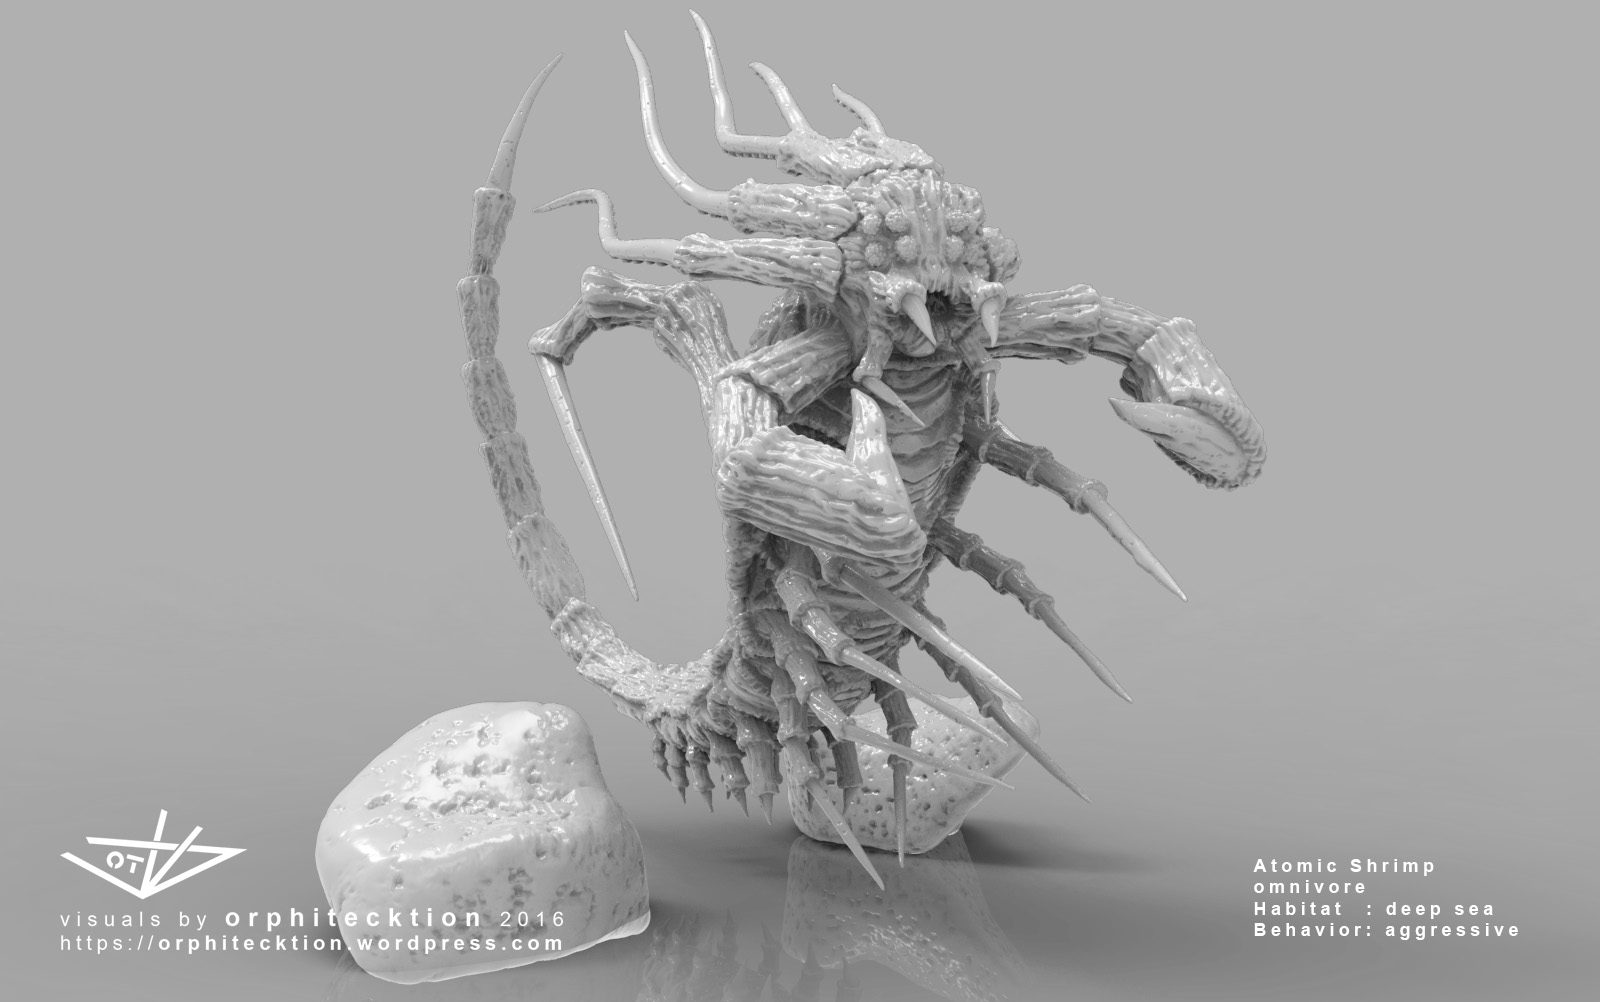
tried out a new renderer… gave it some snacks in form of models i found on my current harddrive… and am pleased 
looks so classy 
Batch 1
Organic Shapes