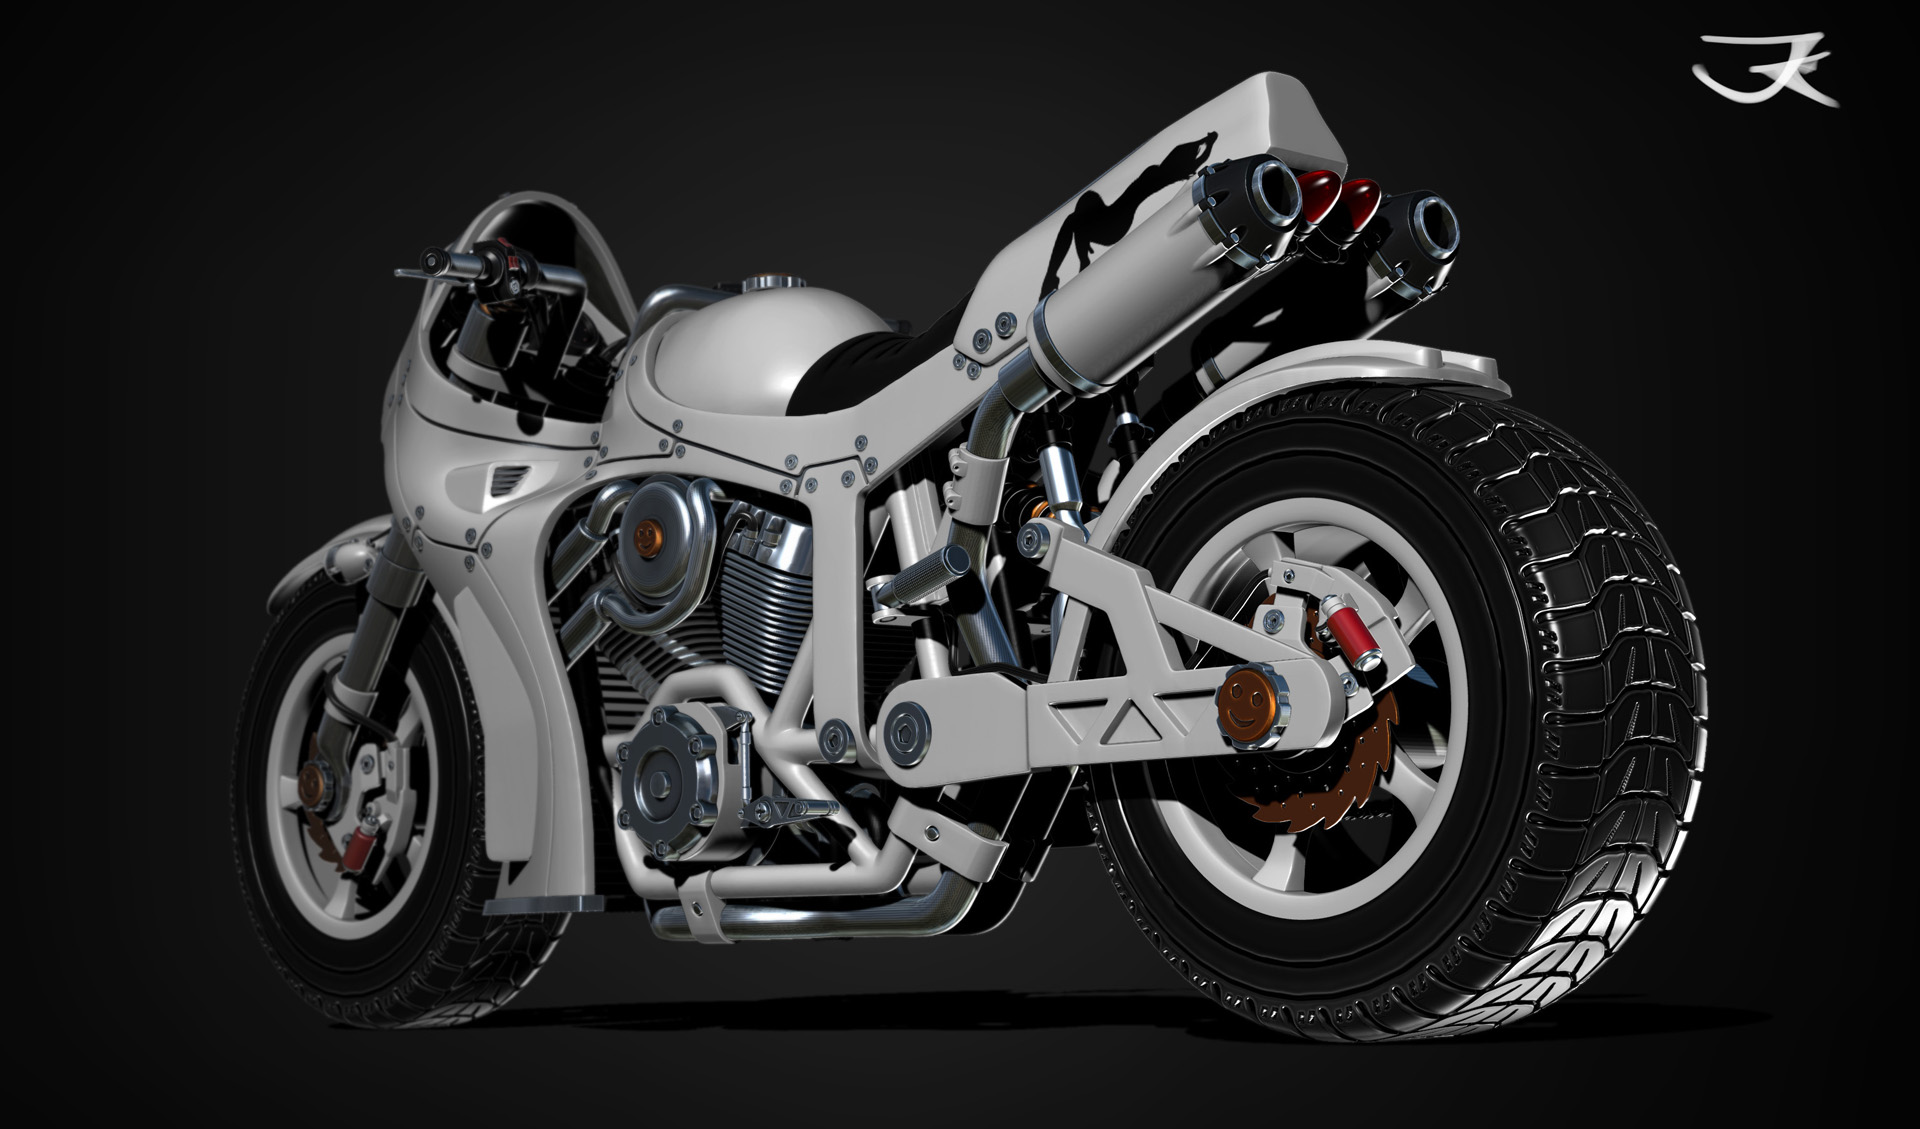
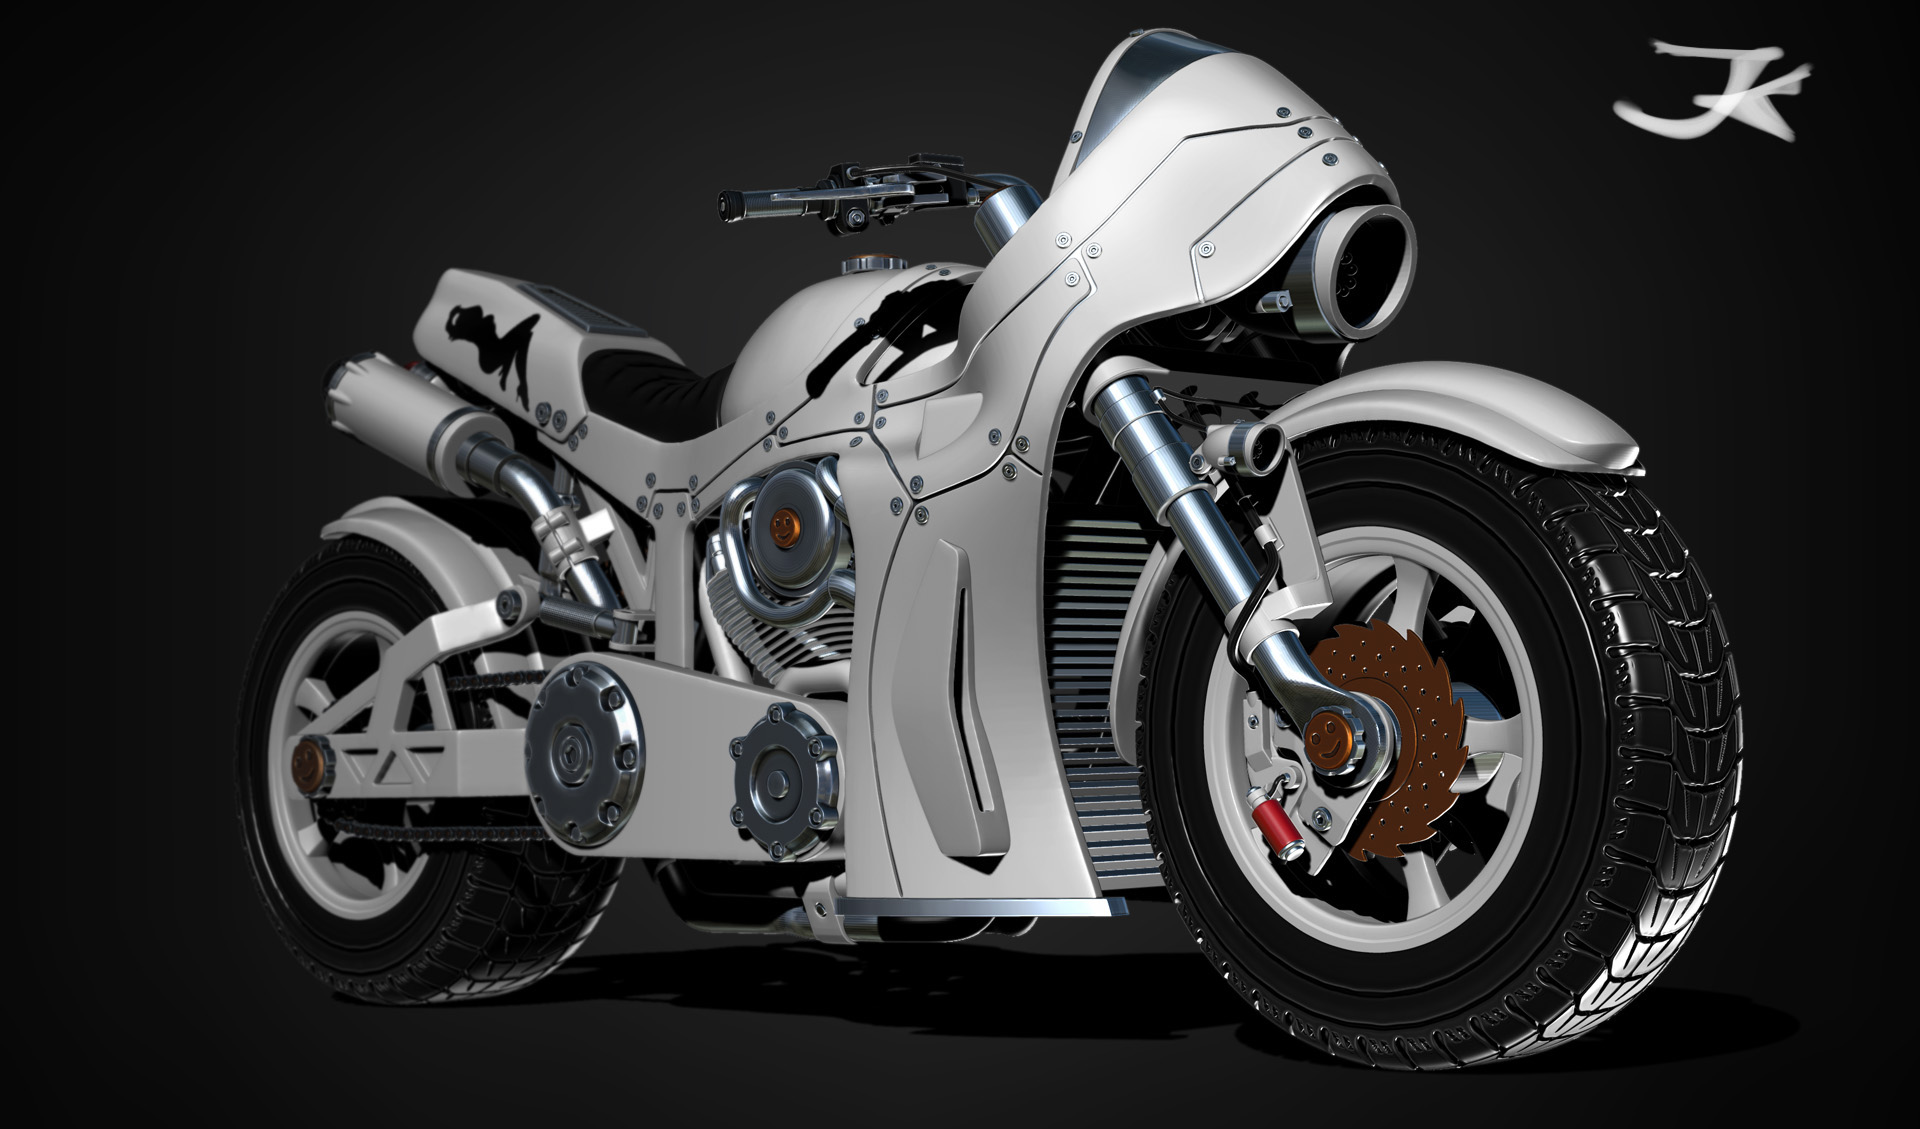
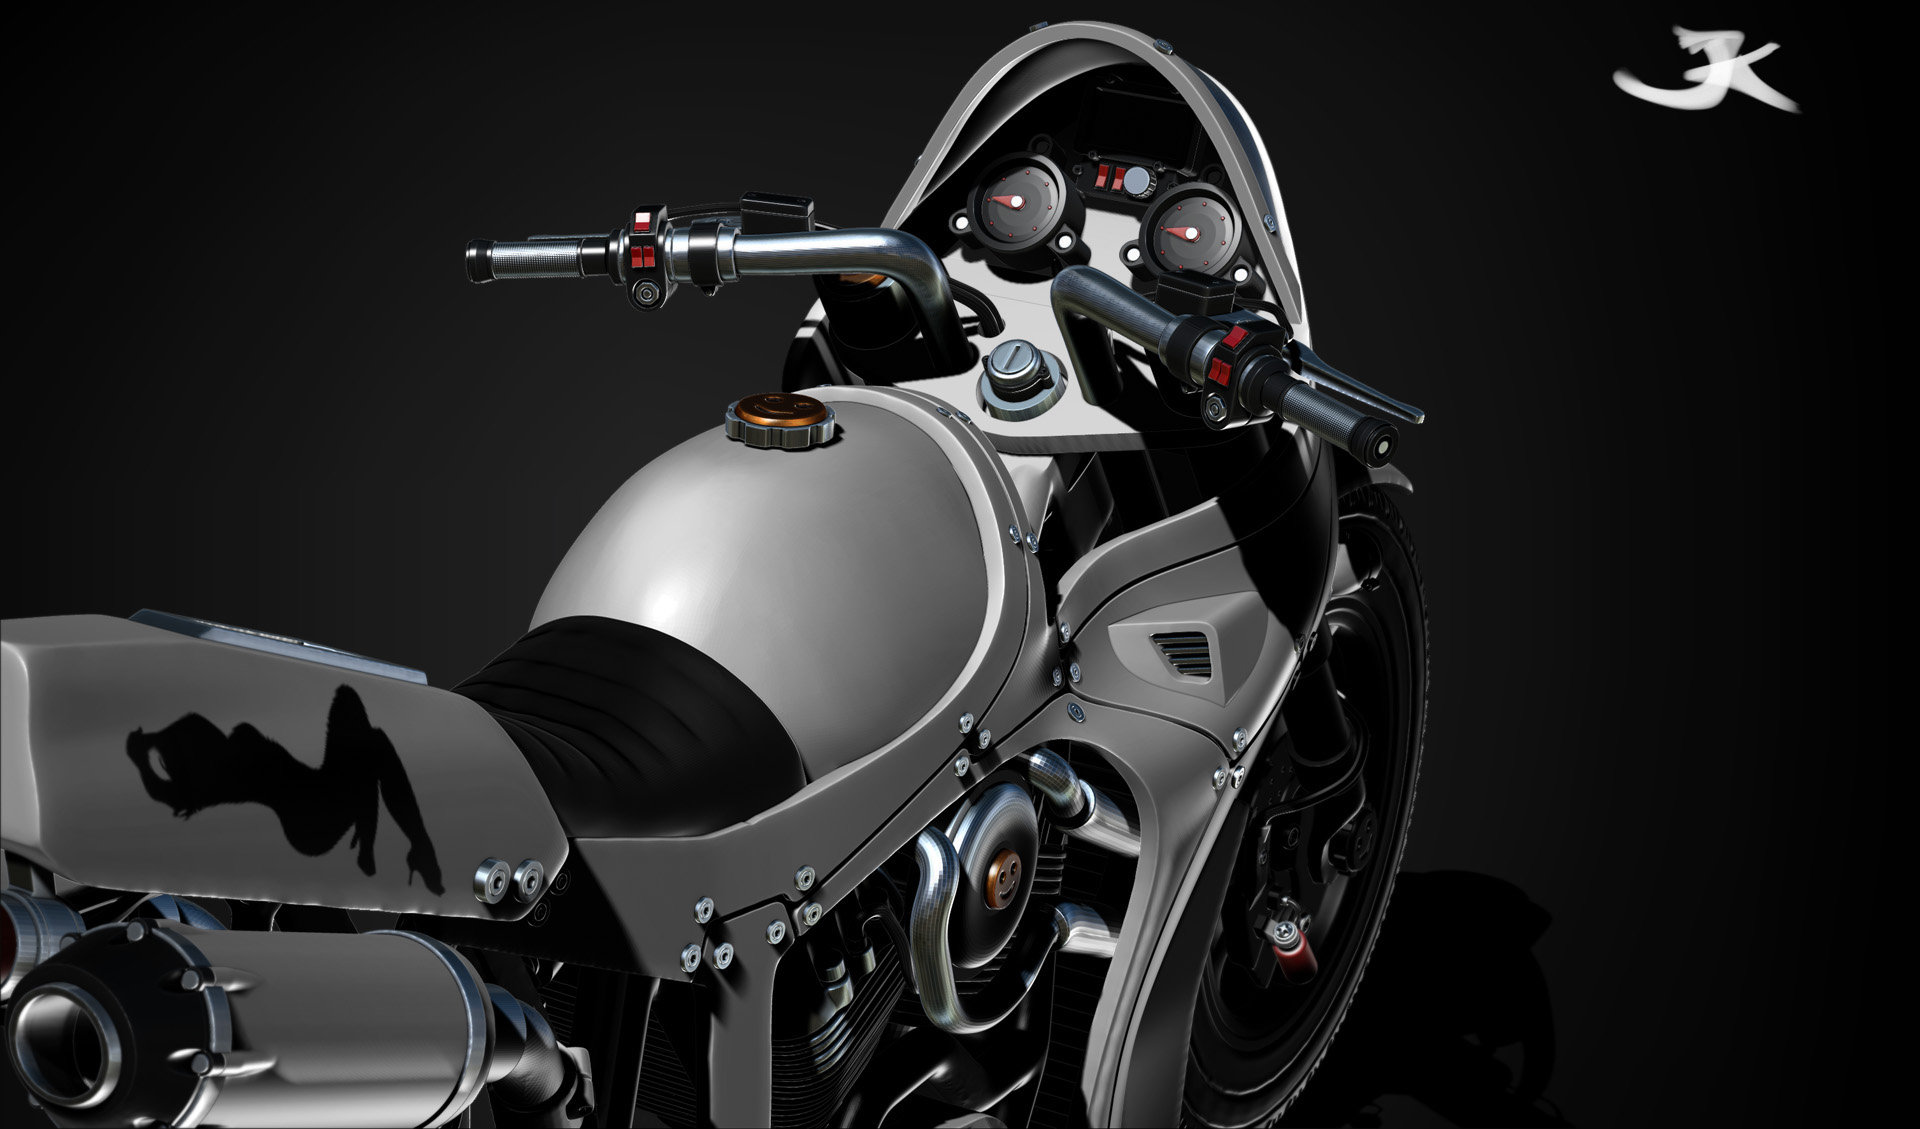
I love it. Great job on the bike.
Ezra
I love it. Great job on the bike.
Ezra
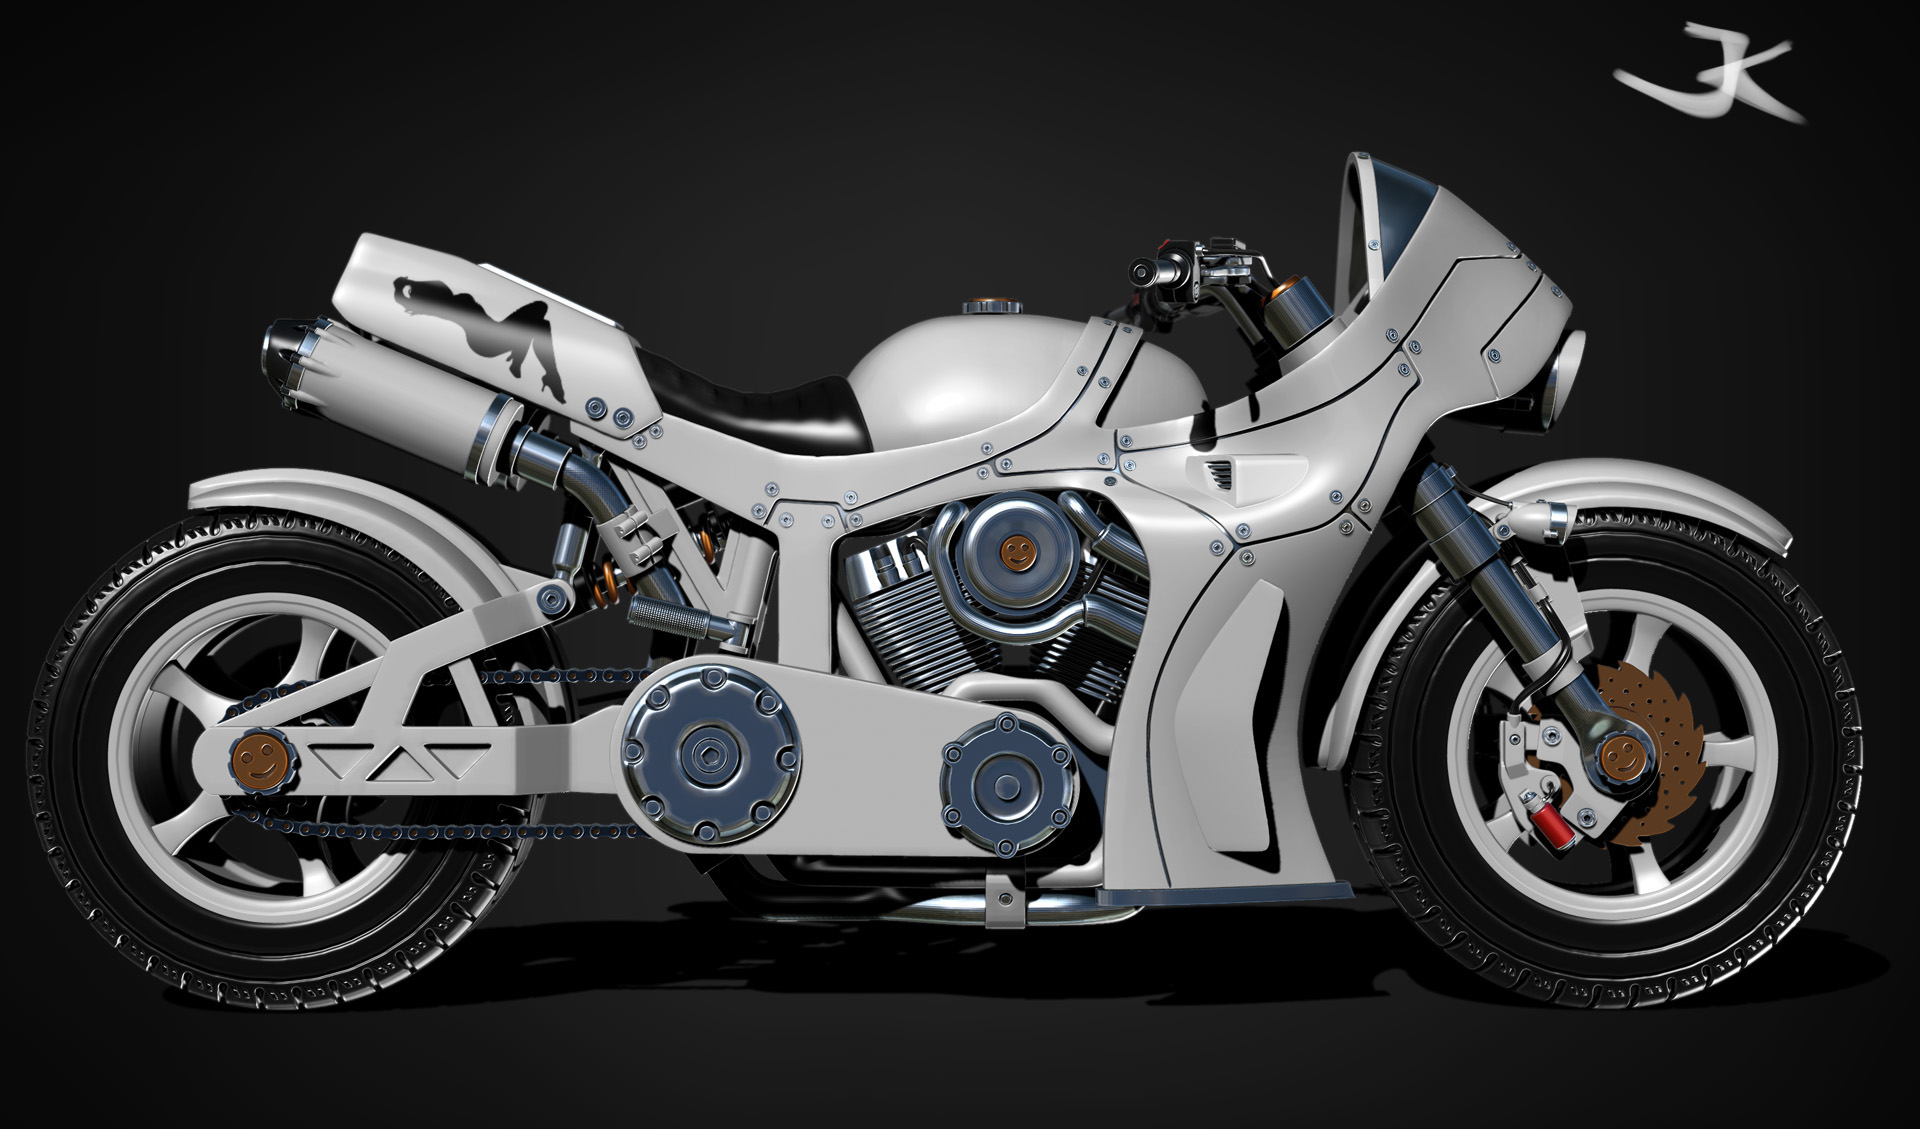
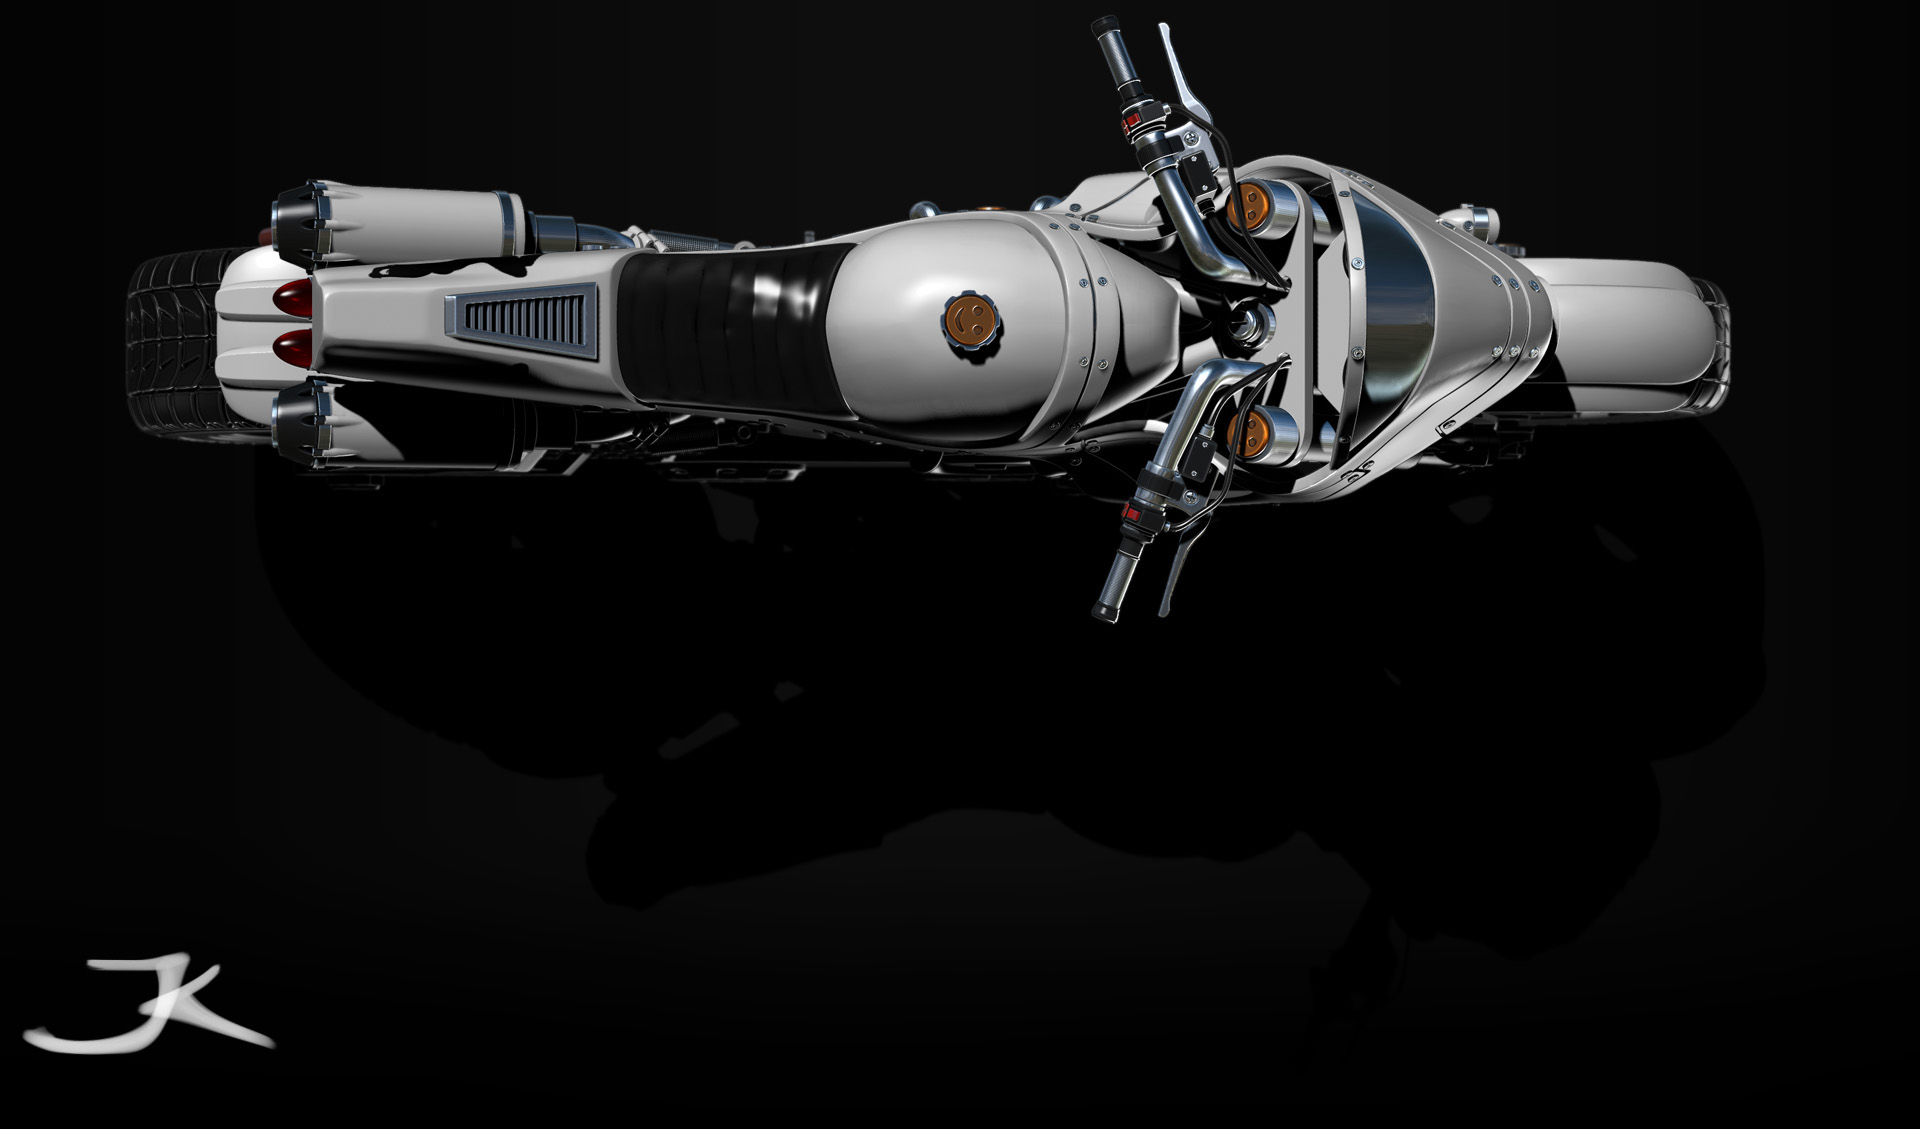
sadly lost the above material information after adding new mats to ZBRush and well, now its white  kinda pretty too in my opinion
fuxxxxing awesome! can you share some tip for hardsurface modeling
uhm, i can certainly try over this very coffee thats smelling so wonderful… mmjam
hard surface tipps:
work as low poly as possible, the more polies the harder to keep them “in line”
only dynamesh if really necessary and do it rather at the end of creating an object, decide wether to keep polygroups or merge them
work with many individual objects that you assemble later
use primitive objects alot instead of freehand tools
be as accurate as you can be, this is still ZBrush but its possible to work accurately
insert mesh brushes are cool but watch out you dont overdo it like me with those screws on the frame lol
hold shift while rotating objects into place to get accurate 45° angles and so on and to be able to rotate back and change parameters bound to the 3 axis (resize, inflate, etc)
i use a mix between transpose, resize, hide and clipping brushes, sometimes rotate to get points to where i want them
use the frame view alot to see where edges are
ok, guess thats quite chaotic and prolly wont do much good ha, well, the idea is simply:
understand the geometry and build it as simple, clean with as few polygons as possible
things consist of quaders or cylinders, rarely spheres,
you can use primitives that you weld up or not for everything, Zspheres for bend pipes and wires, insert mesh brushes for chains and bolts, symmetry settings like radial together with insert mesh brushes are good for objetcs like brake discs,
if its a really weird shape use shadowbox or sculpt something and retopo it (my race bike outer frame is a retopo of a sculpt for example, then got extruded using panelloops)
things are attached to one another somehow
sometimes this means welding things up, if theyre welded up in real life, sometimes it means creating an object that holds them together (duct tape lol)
mmh what else,
-ah ya, keep the objects seperated which would be seperated in real life and weld what would be welded in real life
-find a detail level you want to achieve and try to keep it (for example the bumps on my handlebar, all details should then follow this level of detail and go down to this level at least if in view later in renders or whatever, not saying i achieved this goal here)
-really, work low poly, use wireframe view to see edges and move points like you would in a CAD application
-and again, work accurately…
-and then, just get in mental line with ZBrush… it offers so many ways to achieve the same thing, you just gotta find the best way for your current problem that needs solving… dont try to follow any rules or workflows you might have learned, just feel the force dude!
i personally use polygroups, subtools, plugins, edgeloops, hidden geometry, symmetry, transpose, ZSphere-Retopo and clipping brushes in a wild criss cross and they all work for all kinds of situations, but also wont work for a whole lot, just gotta uderstand how they work to make proper use of them i guess
i think i never touched a graphics tablet or any of the sculpting brushes except for the insert and move topology ones for the whole bike btw, thats the stuff you might need later when adding a wear and tear texture but not for technical shapes.
i started with just one wheel that i originally wanted to create and kinda had all the modelling techniques down after that, maybe just try to create one of the objects that make up your whole idea and then see how you go from there.
well sorry again for this being kinda chaotic but maybe some of those tips help 
im just too lazy atm to shape it into a coherrent tutorial hehe
thank you again is awesome;)
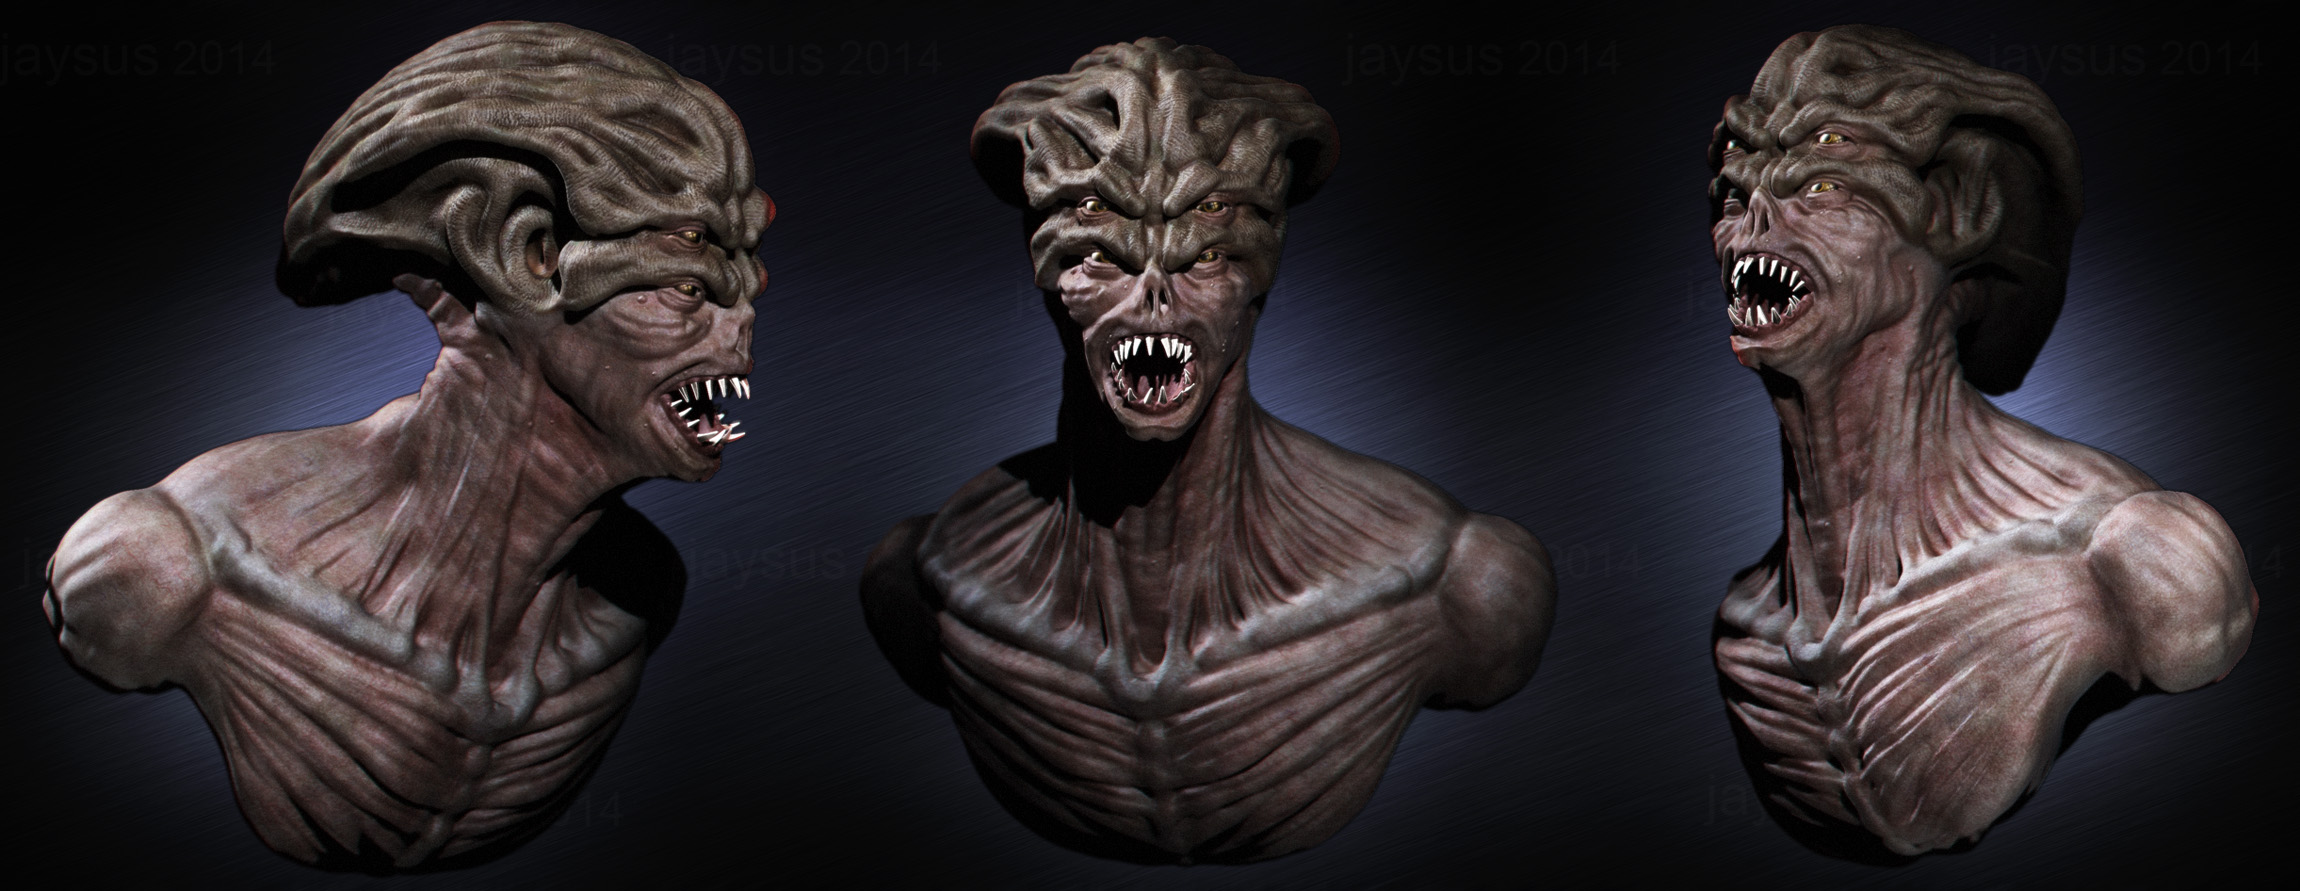
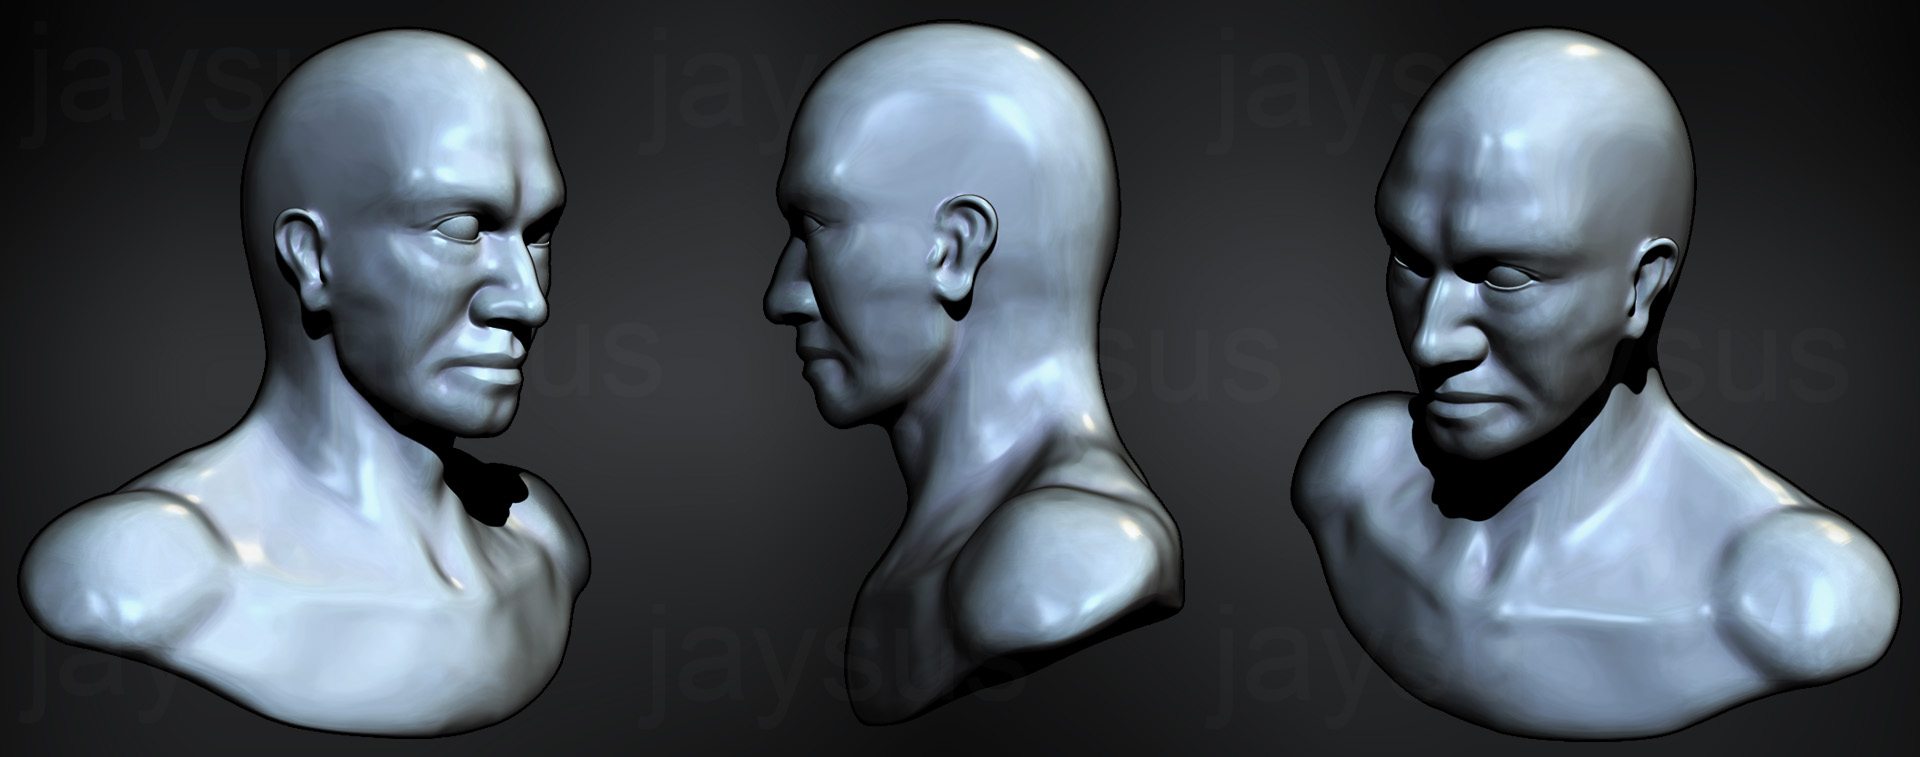
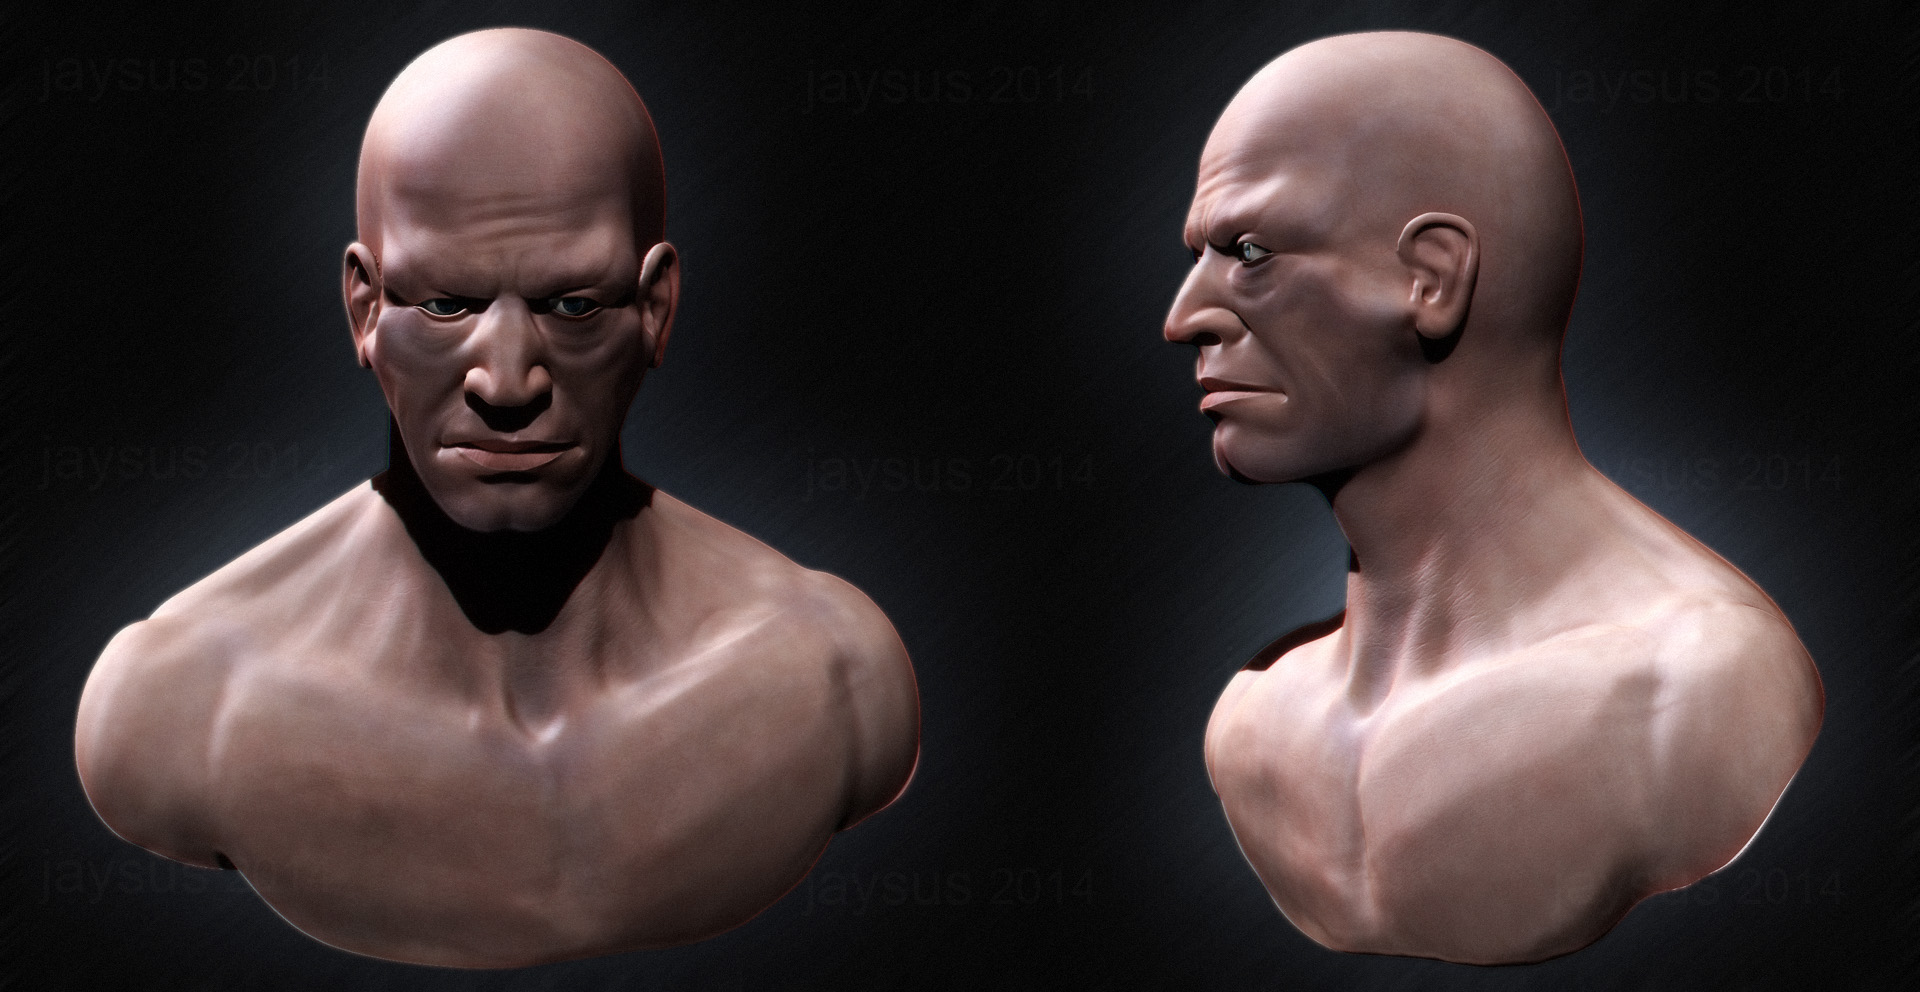
just a quick bust doodle to stay in shape

another bust to stay in shape and keep advancing, and weee, its always surprising how bad ones old models look once you make a new one haha

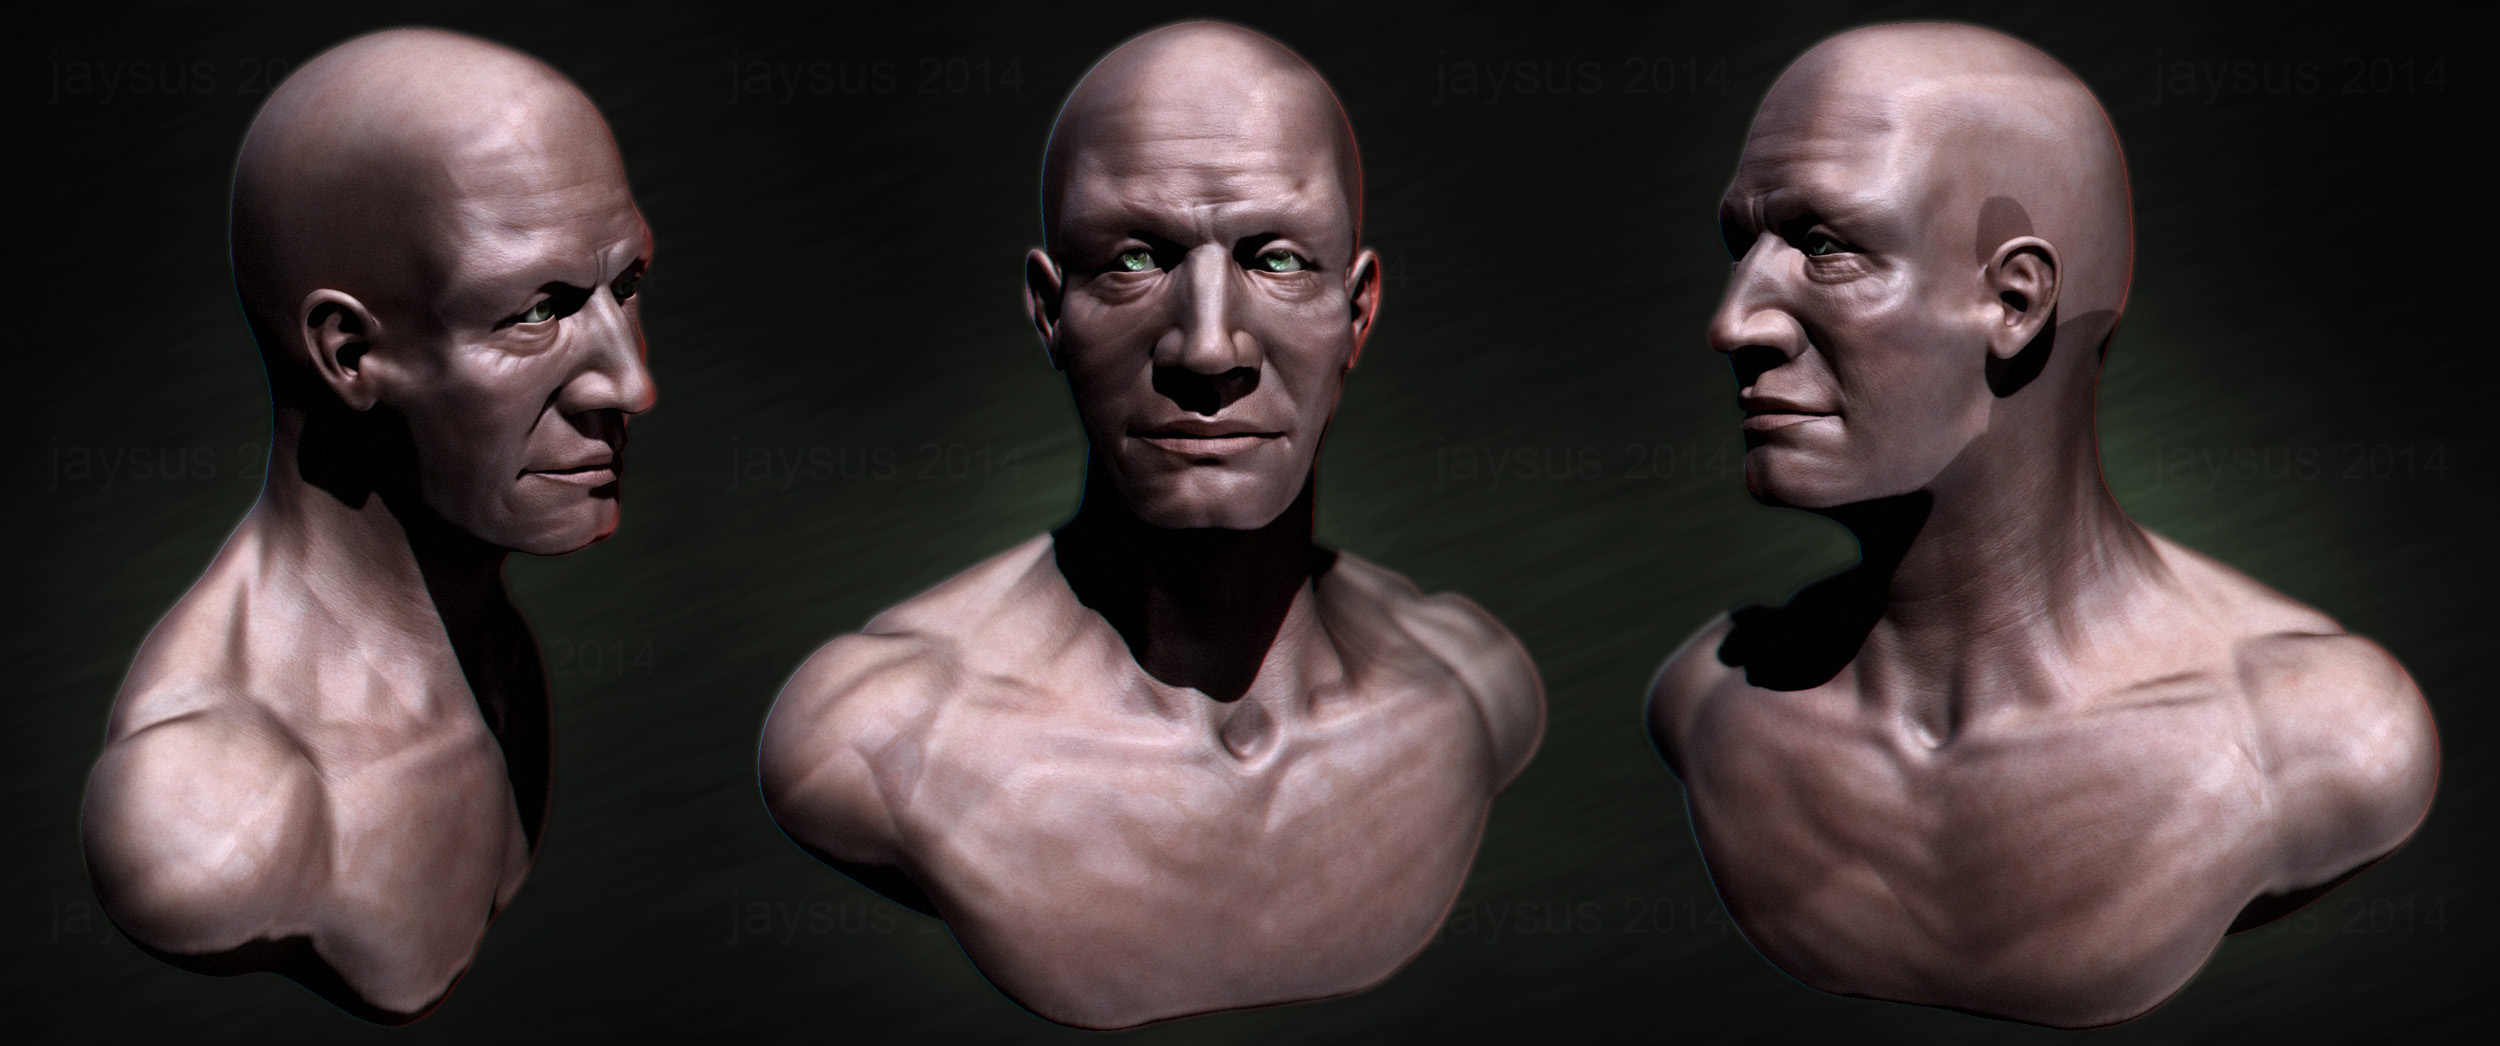
and more bust making, think i got the neck, throat and cheeks down a tad more naturalistic in this one
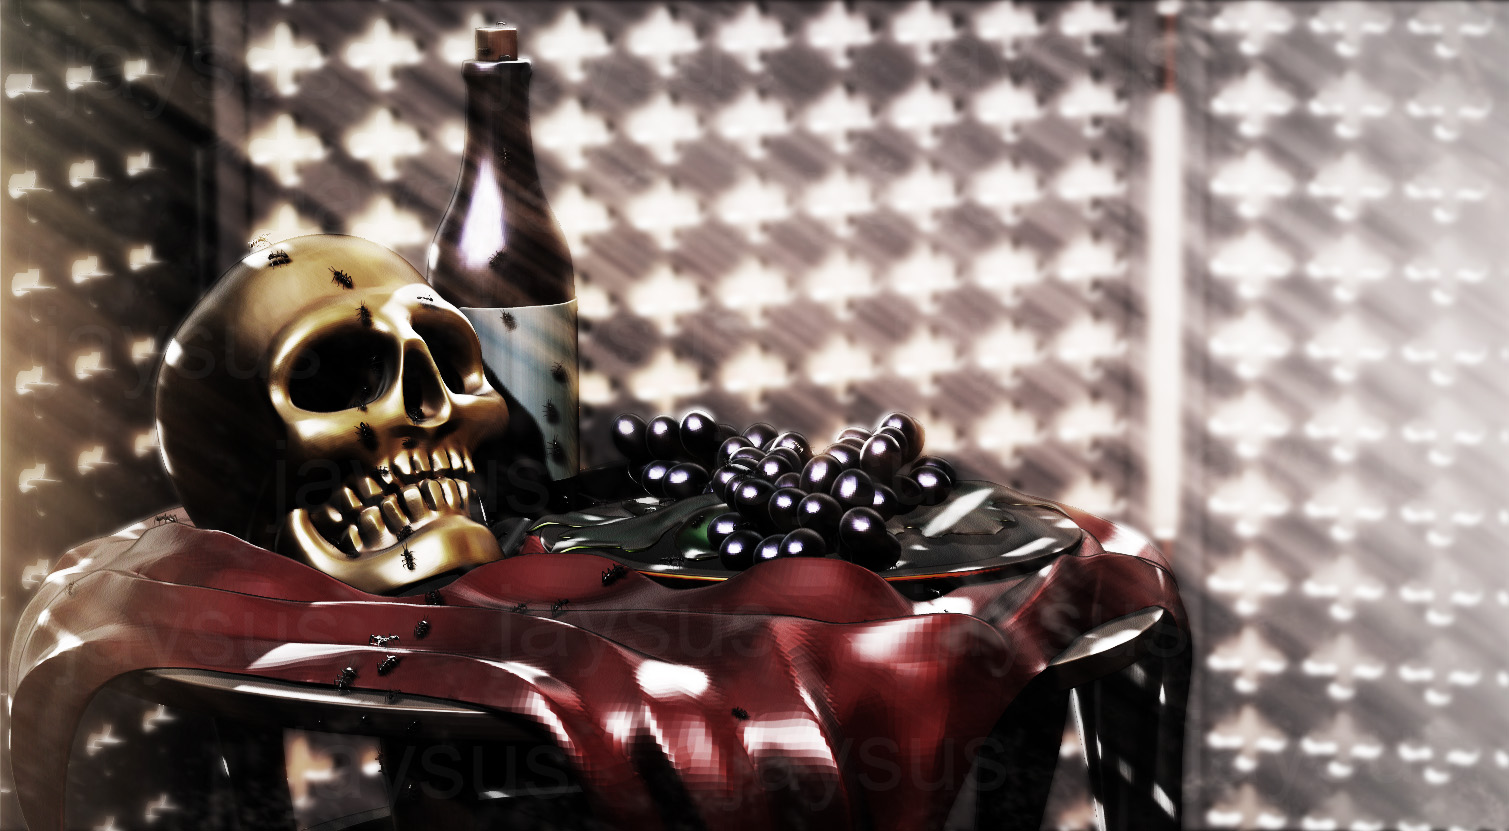
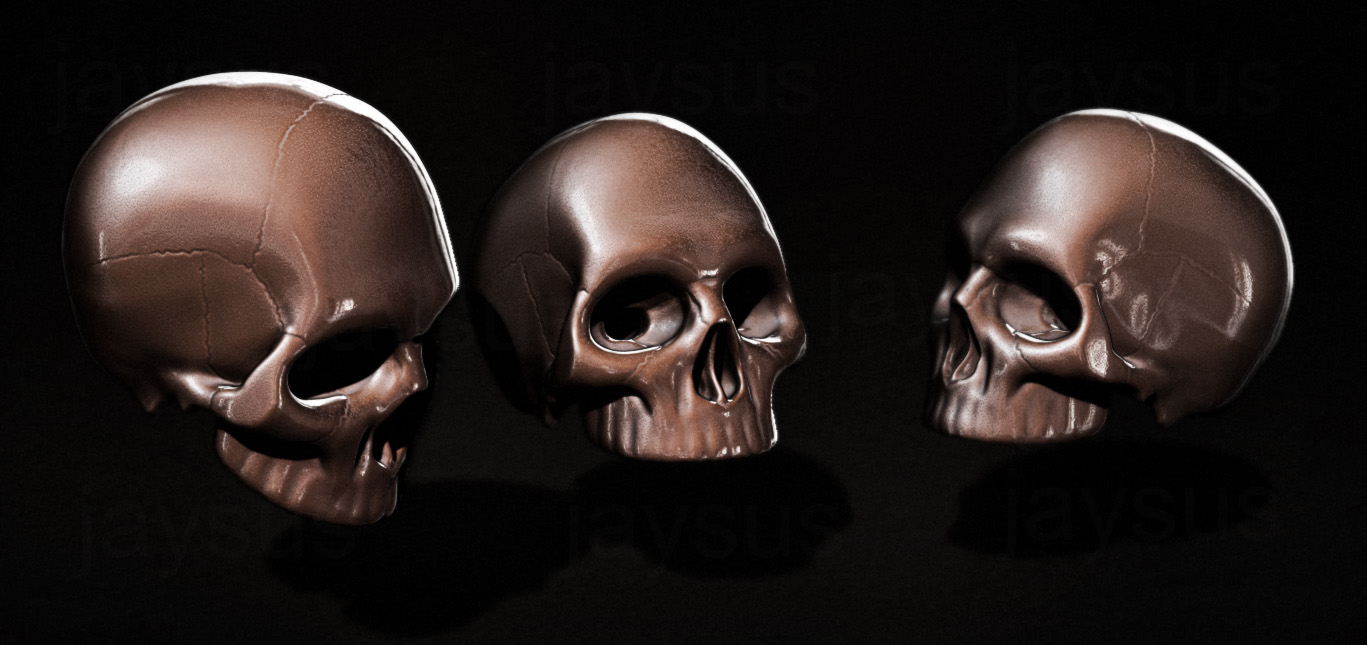
just some fun with a skull doodle

been doodeling a bit more with that cute skull 

still toying with the skull
but mmmh… dunno… something went wrong… not sure what atm… i kinda detest the colours and all… dont like the composition much, but i like it a little and its todays WIP so well…
another skull study im playing with right now
and more skullery… slowly slowly…
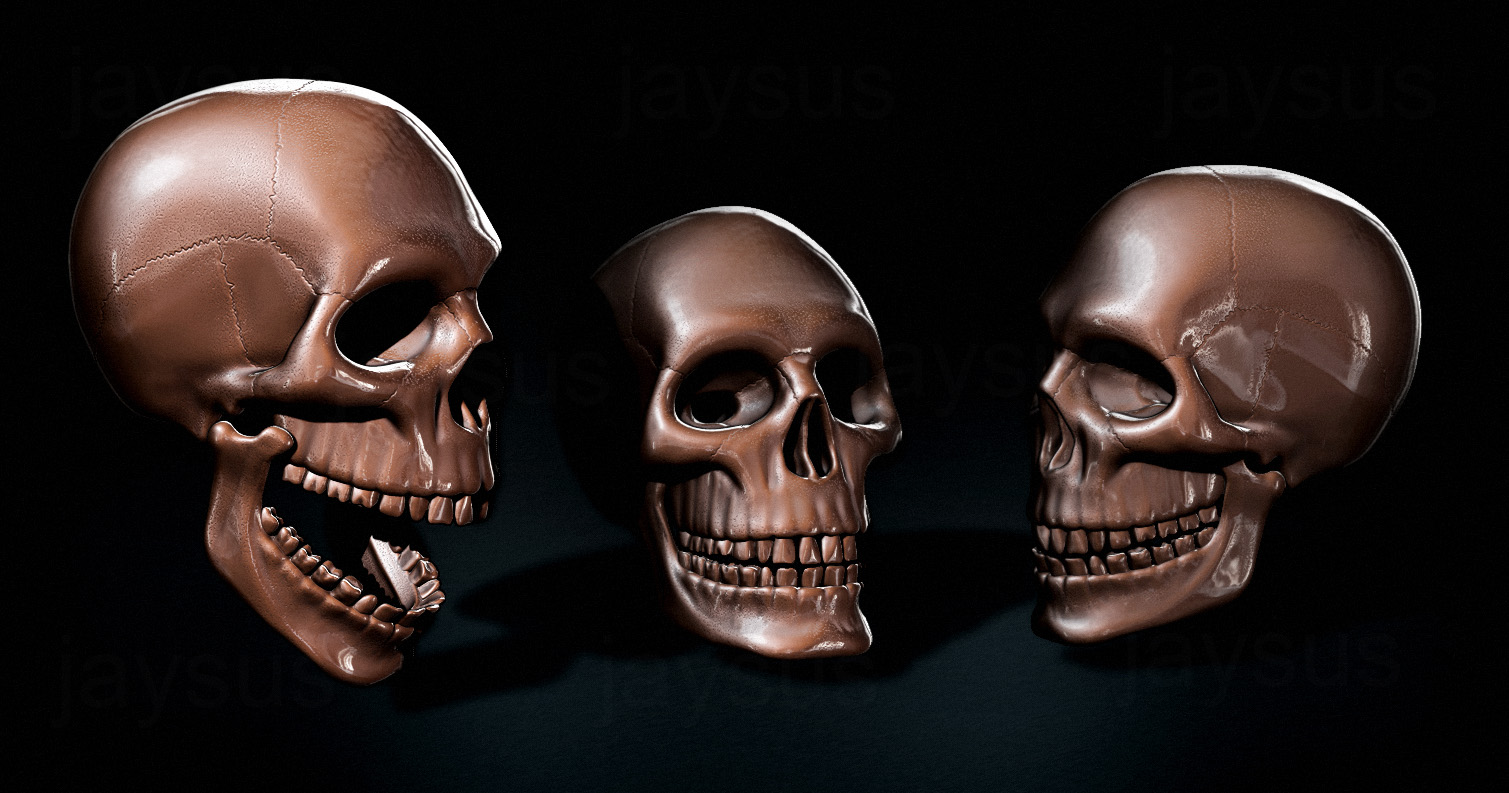
and more skull studies/doodles/sketches whatever you call em… in darkness!
this time: a buck’s skull (in attachment due to size)
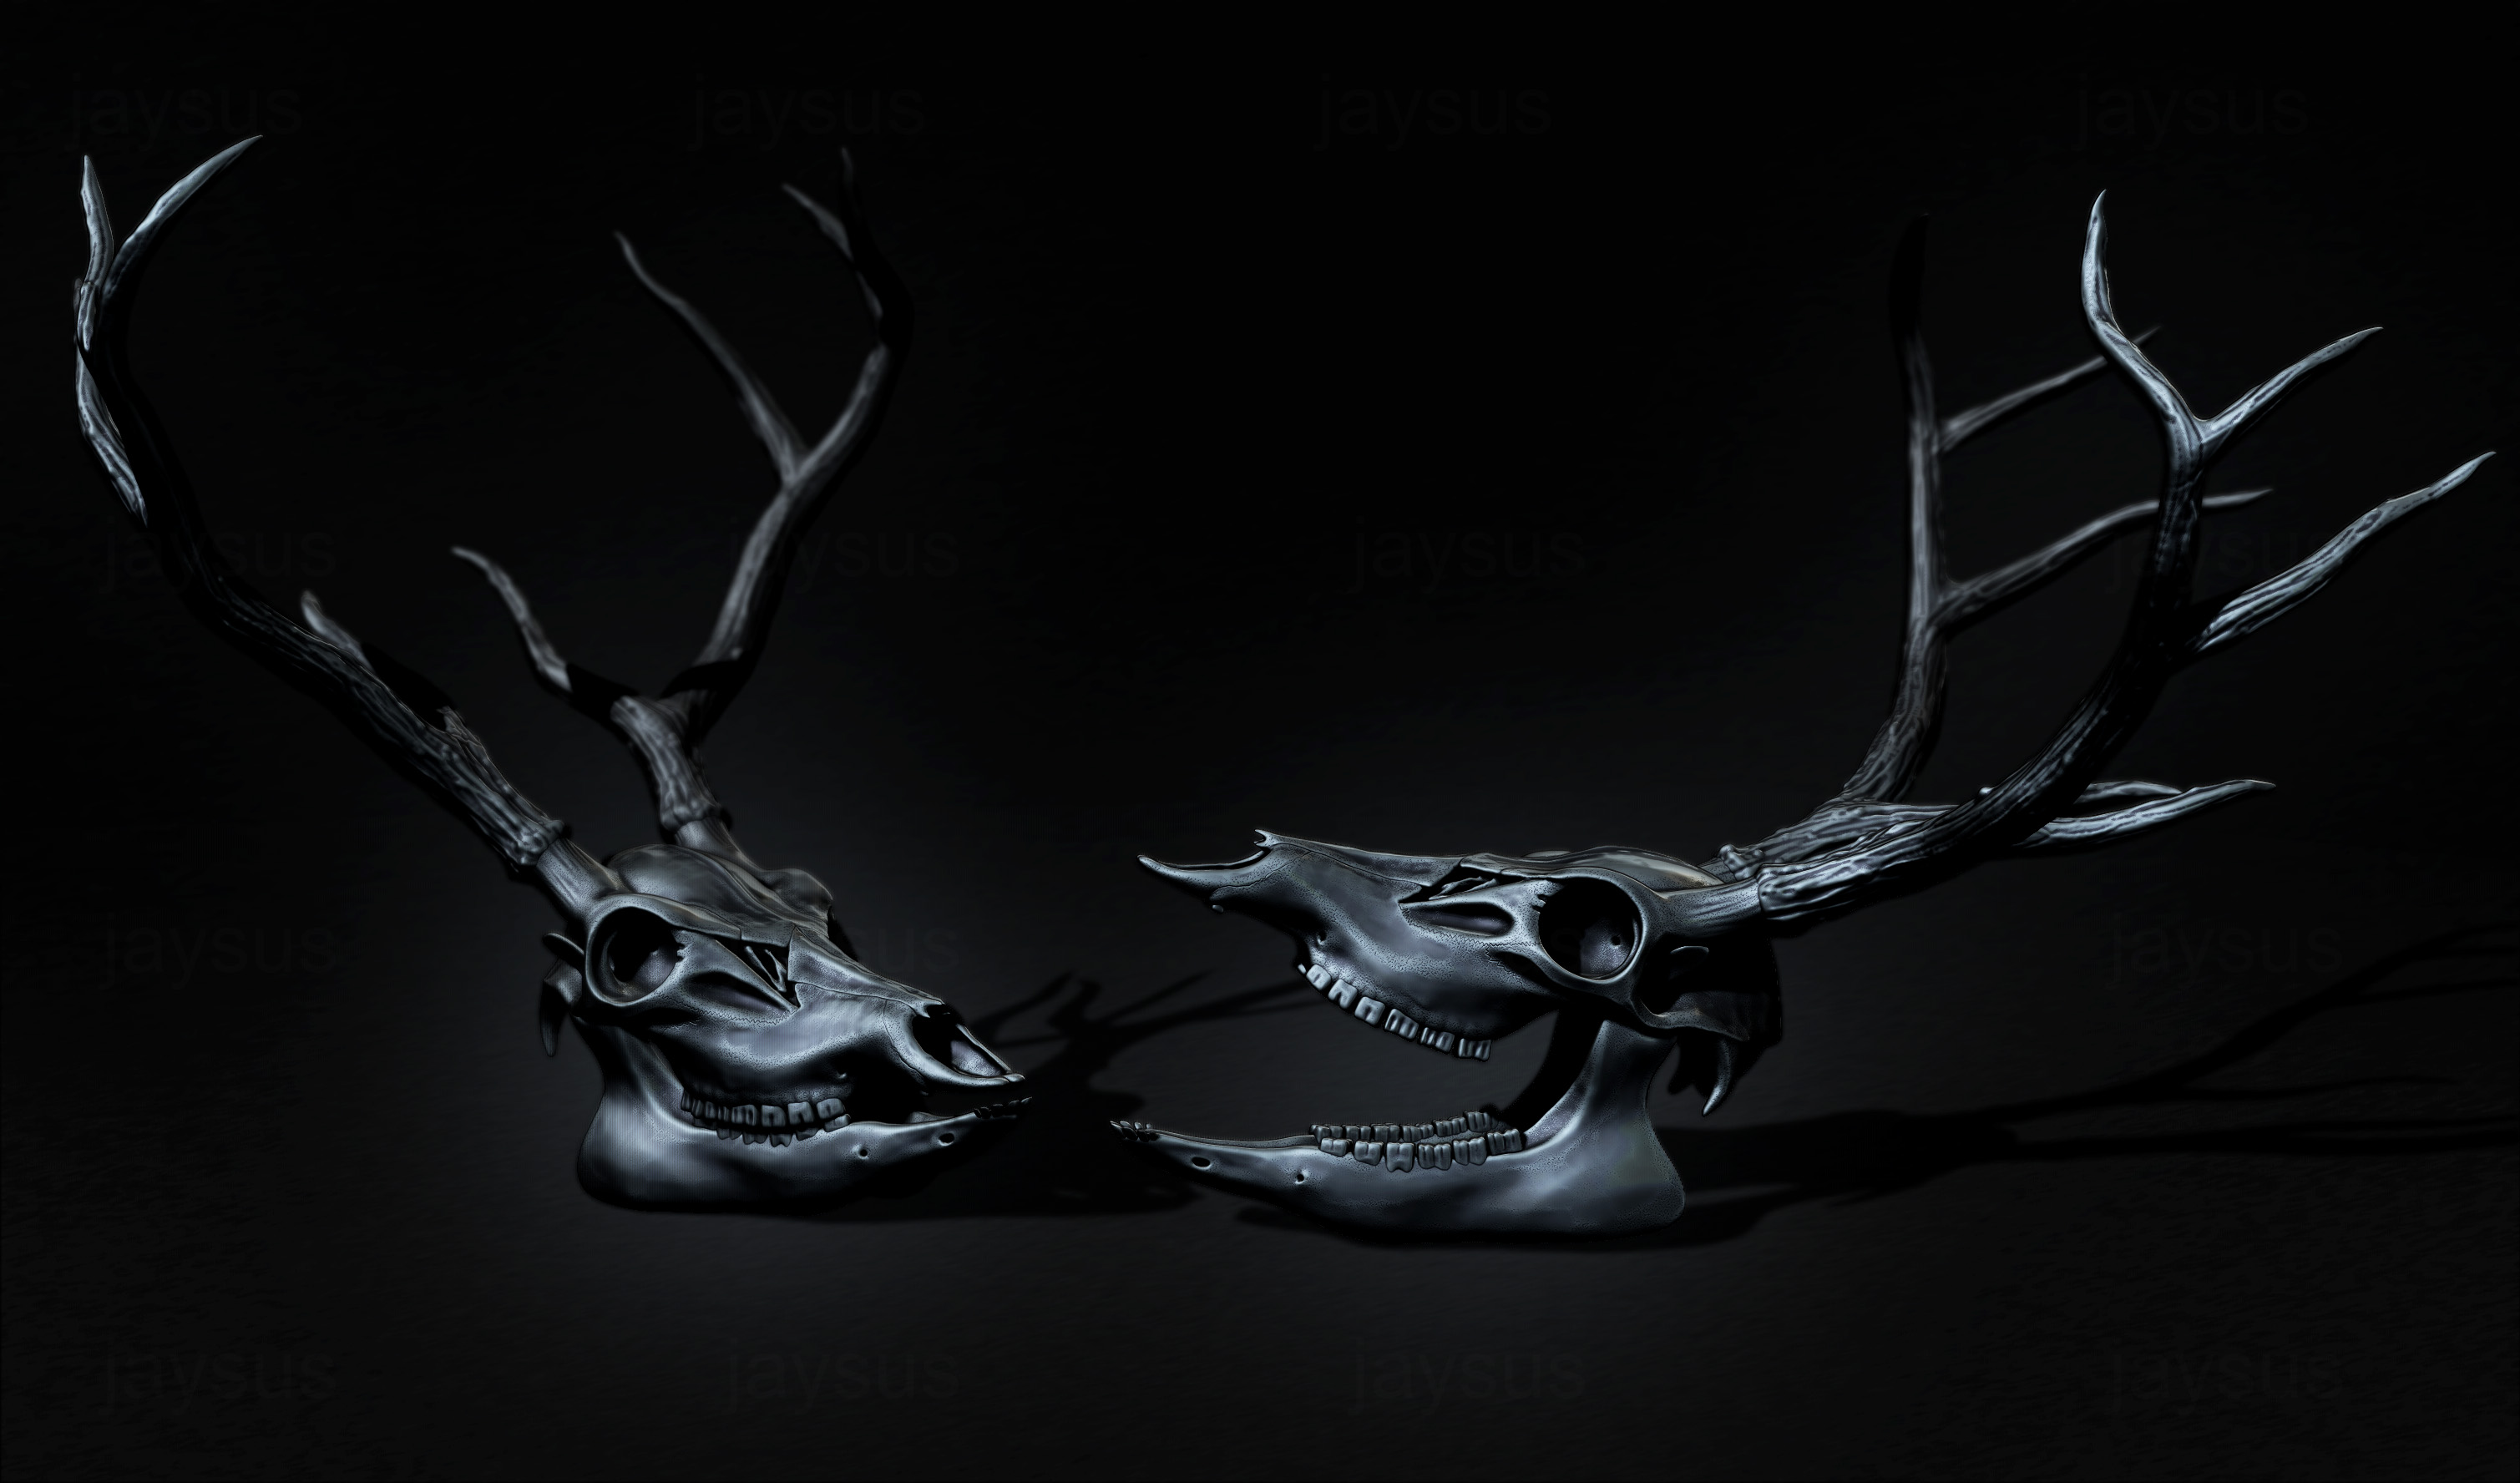
oh hell, i gotta stop doing skulls for some time, its getting creepy…
and sorry for the width… i like widescreen pics 
the addiction took hold again over the weekend, ZBrush uuuh…
Rumpelstielzchen – unhappy with the oversized brows, skin shading and horn material, blabla… on to the next

Eye Study – Rumpelstielzchen’s eyes made me contemplate and do some studies on eyes for future use
worked a bit more on my eyeball and am now at version F2 woho!
basicly a specular, polypainted ball with a “volcano” and a hole in that, a plain black disk in that hole, around all that a transparent highly reflective outer ball
needed a head to put them in, drifted away a little
all done in ZBrush apart from final composition,
roughly 2mil polygons for the head (400res Dynamesh), 4mil for the eyes XD (should maybe use textures for those lol)
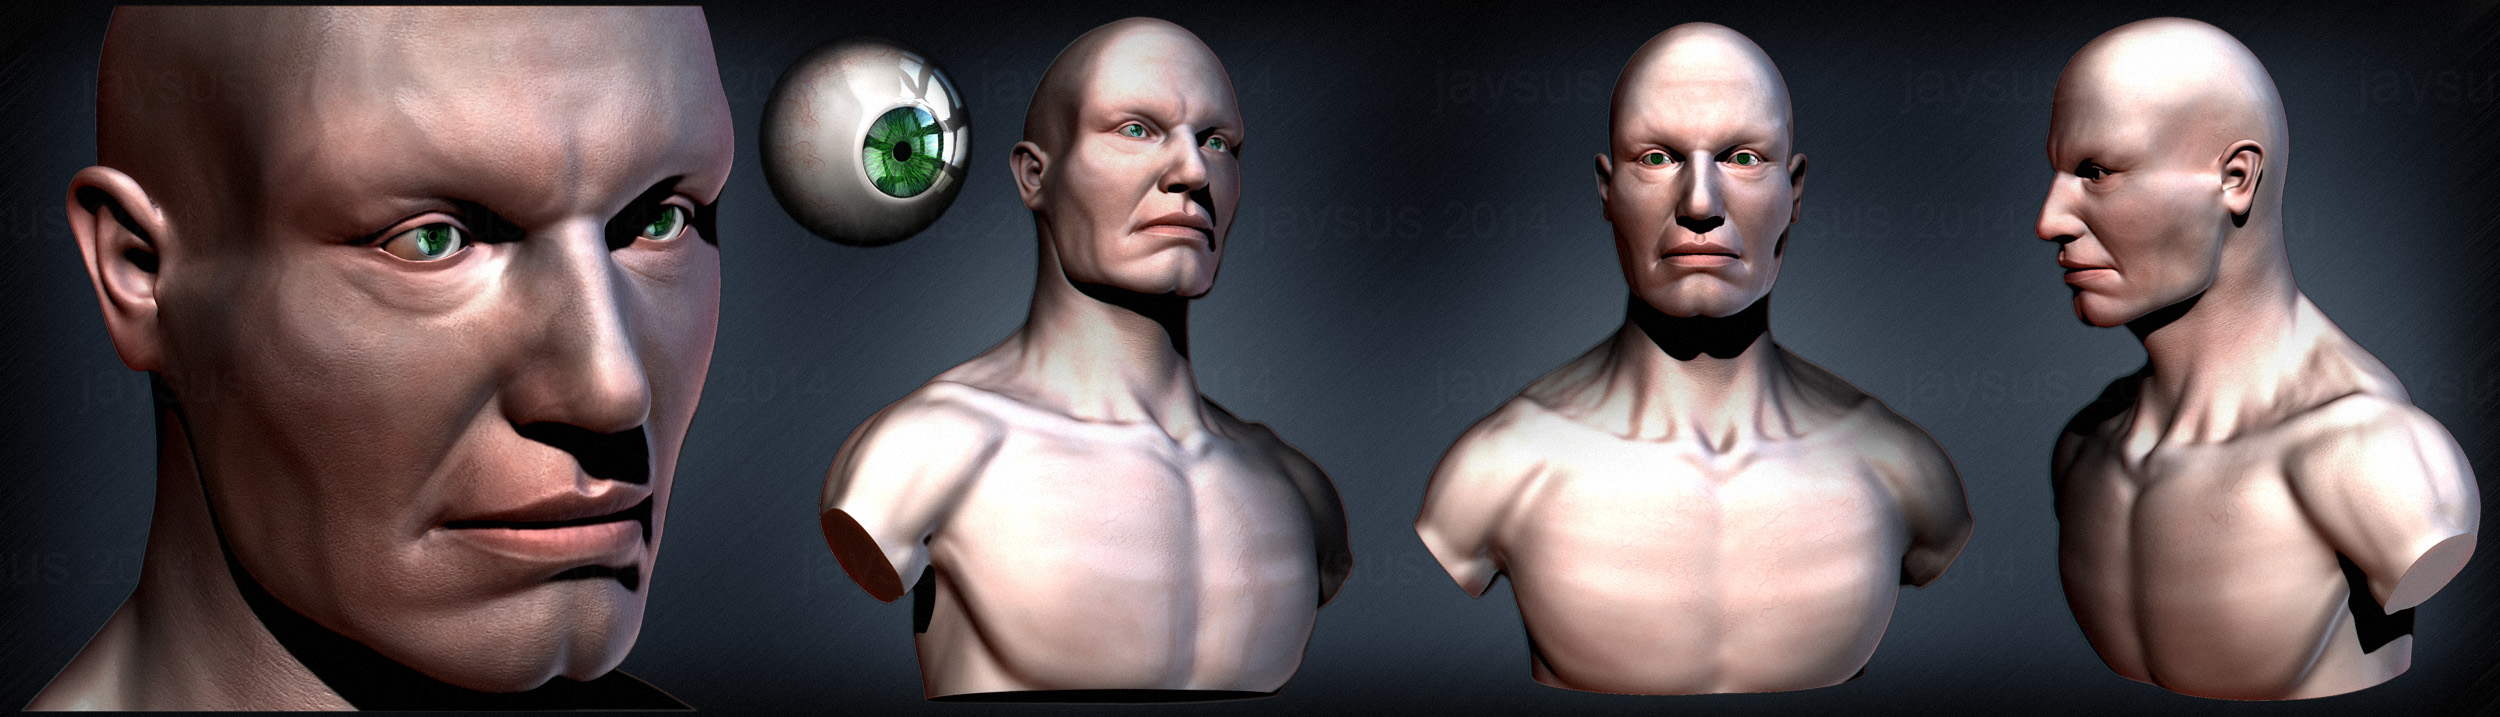
not perfectly satisfied >:(
on to the next!
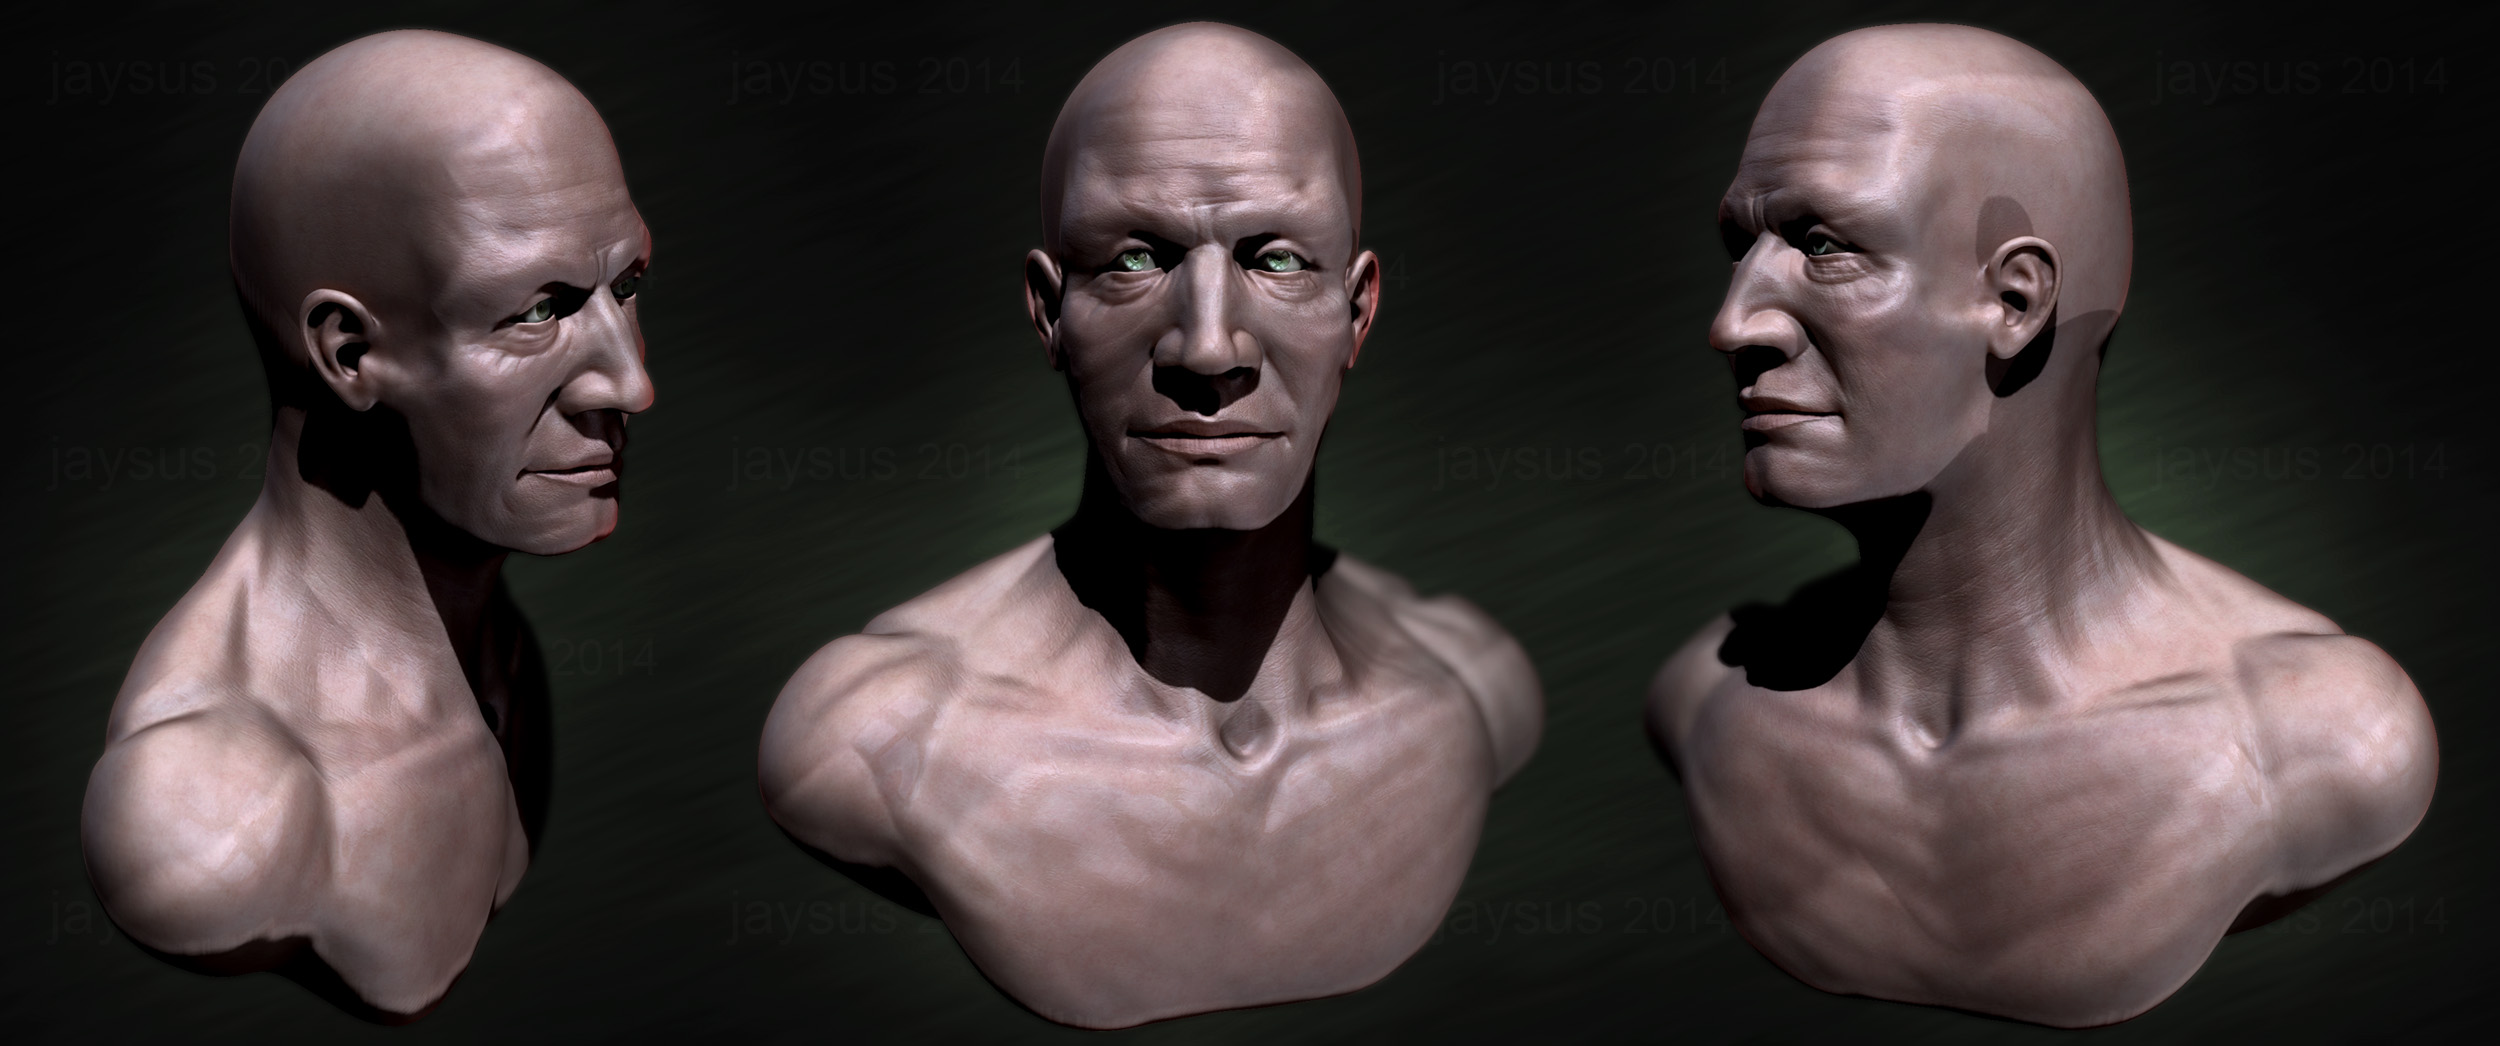
just another head
and another head, YaRRR!! viciously swings pencil, eyepatch, parrot and rum and all
allright, back to creepy things