ZBrushCentral

Greeble Pack for Zbrush 4R7

Hi Glenn, first off thanks for posting the tutorials on greebling.

I have a problem with displacement maps and GUV maps in zBrush.

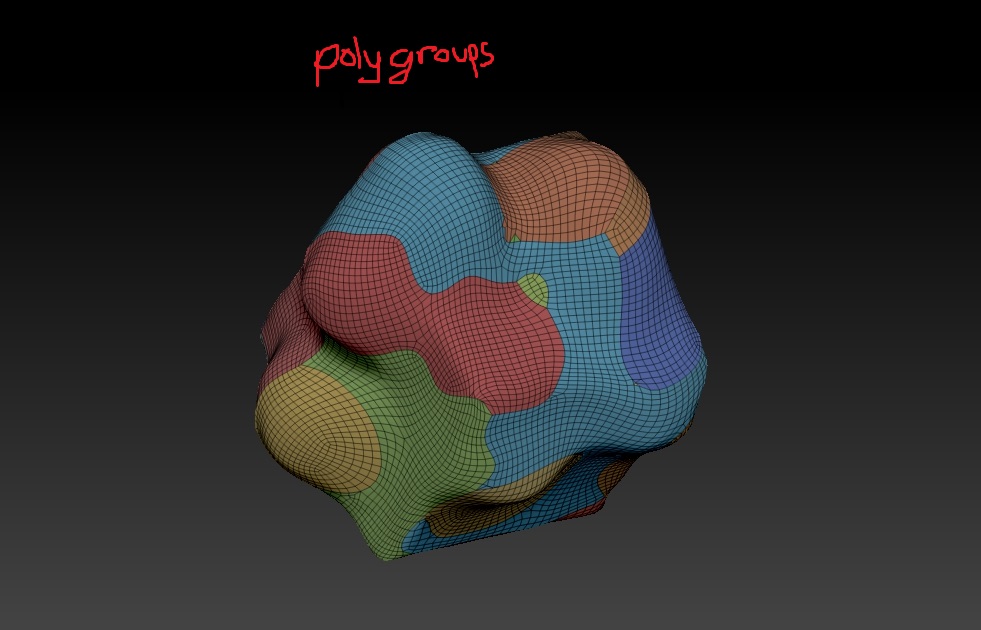
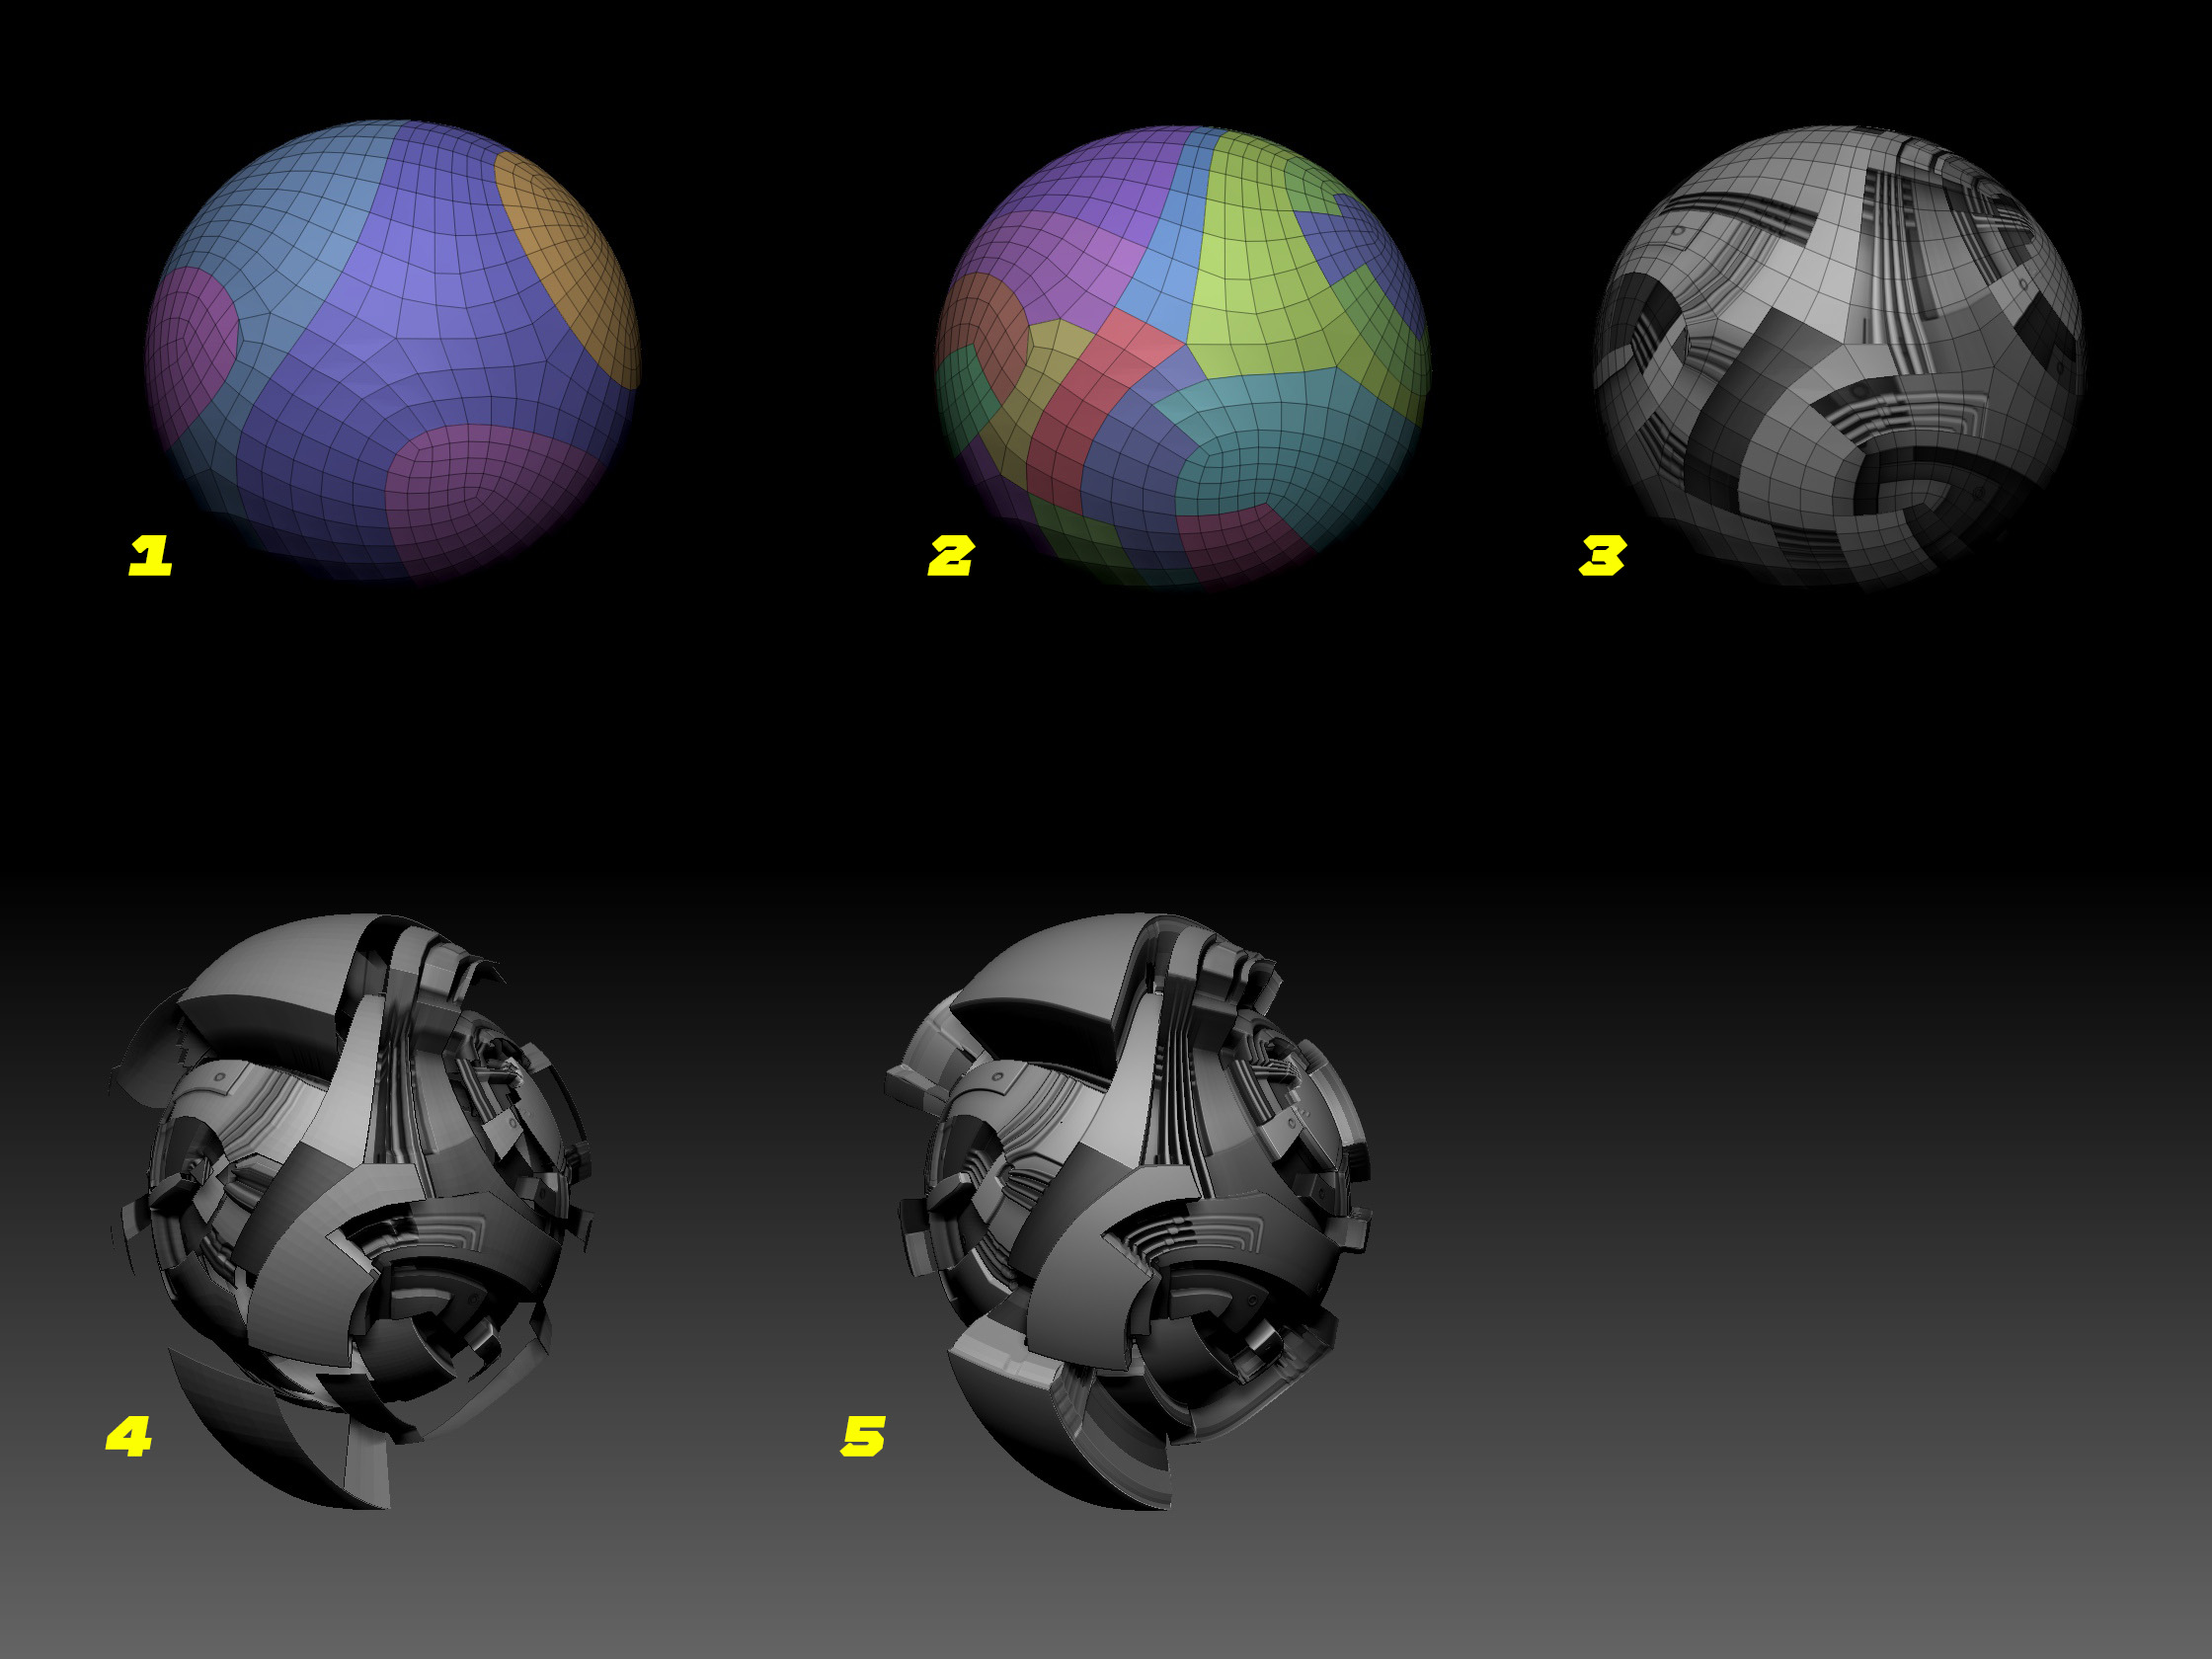
I made a simple cube with zRemesher (to get quad topology) and assign random polygroups to it
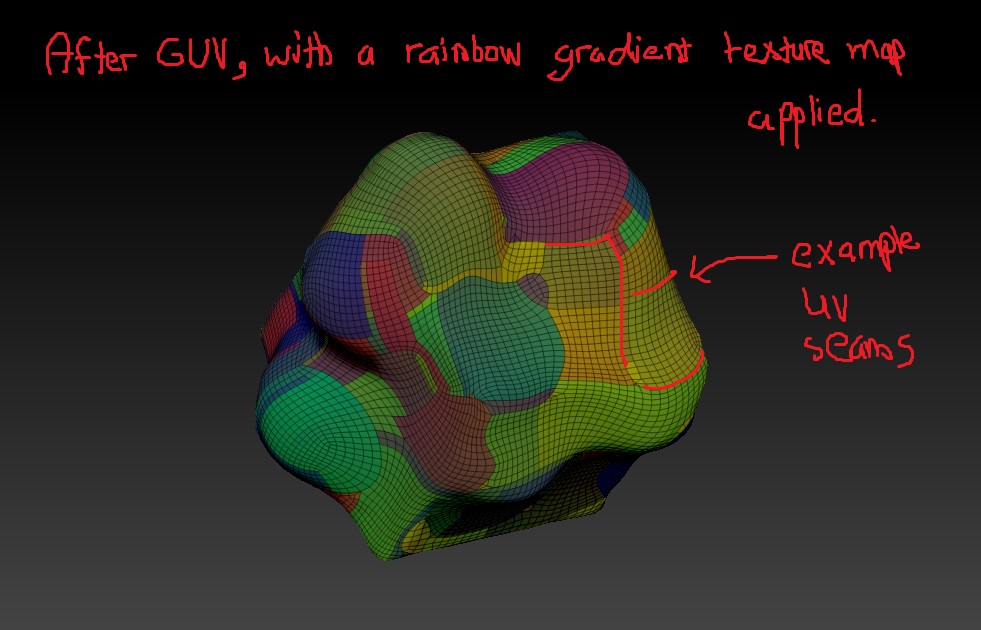
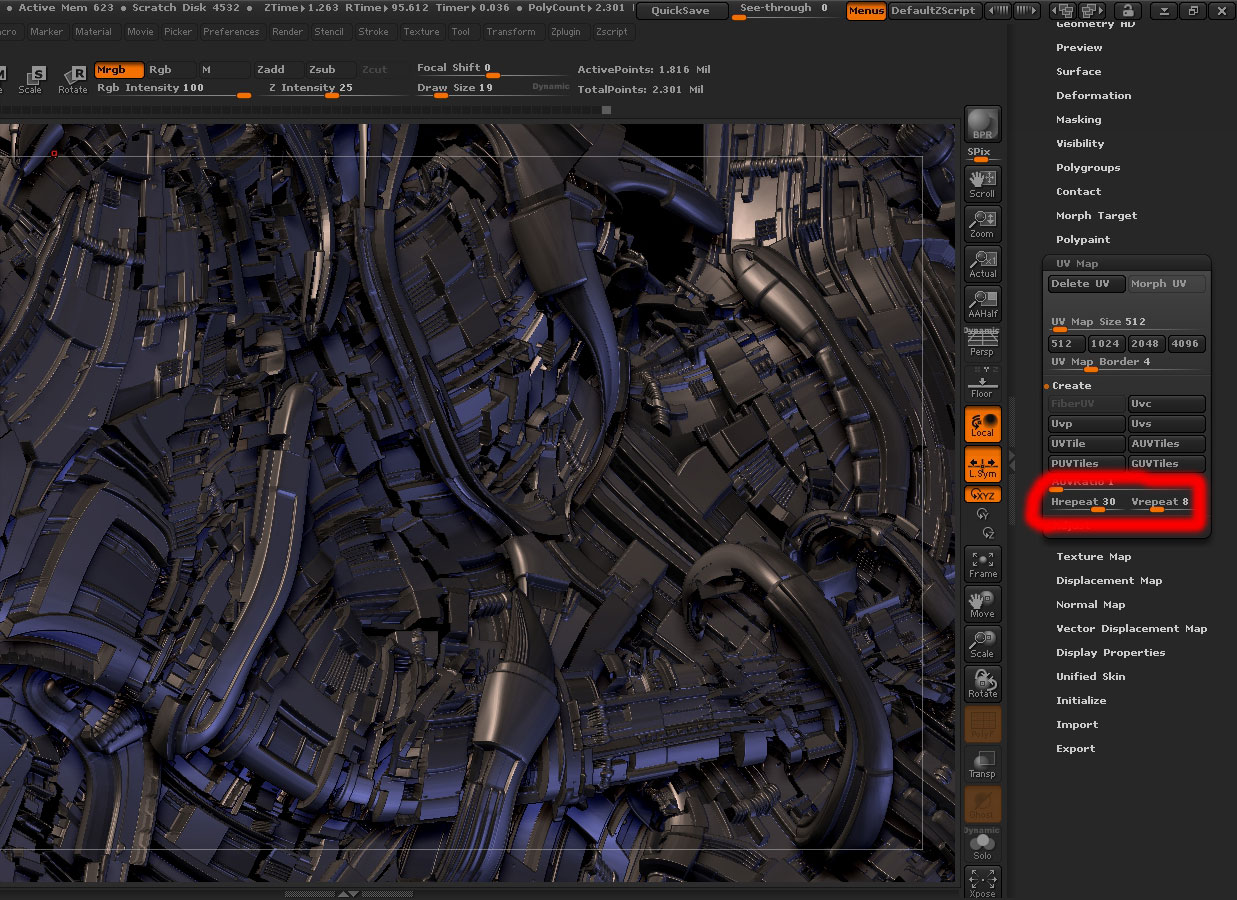
Then, I made GUV tiles.
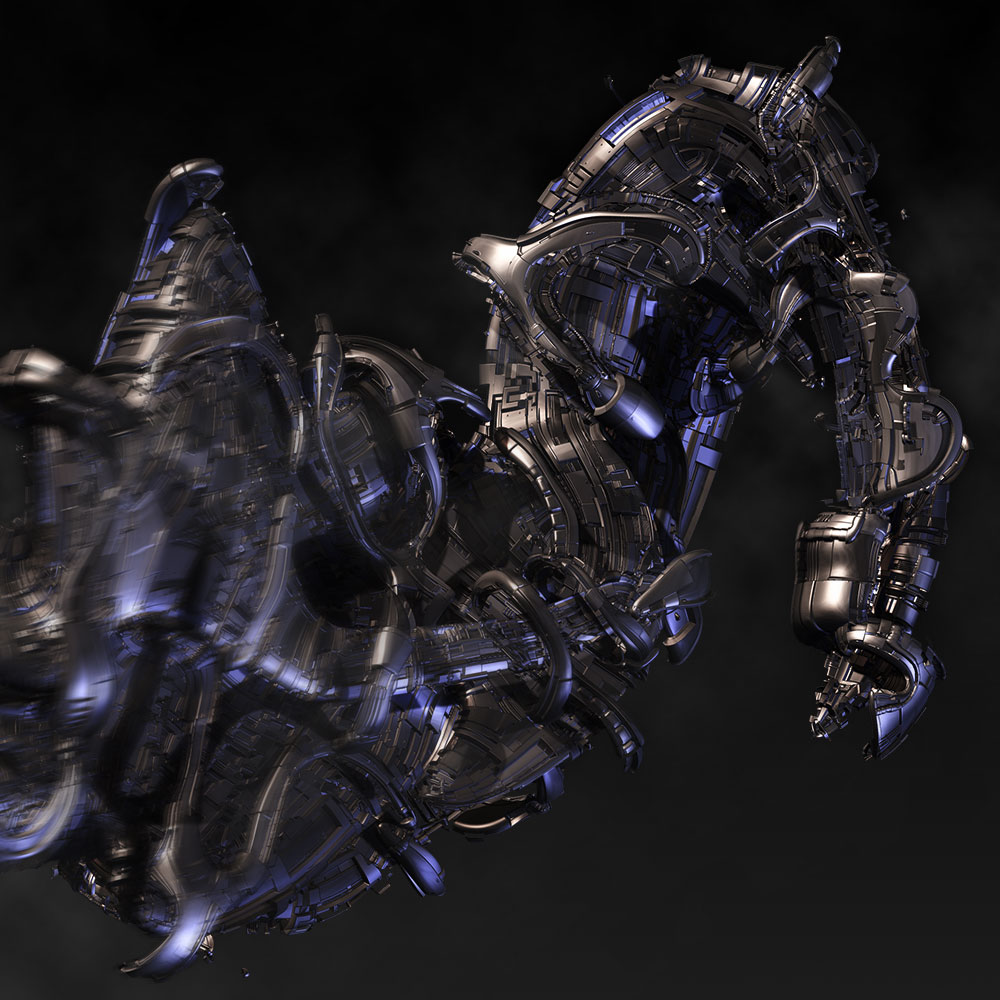
I then put a greeble texture map, and a displacement map on said object.
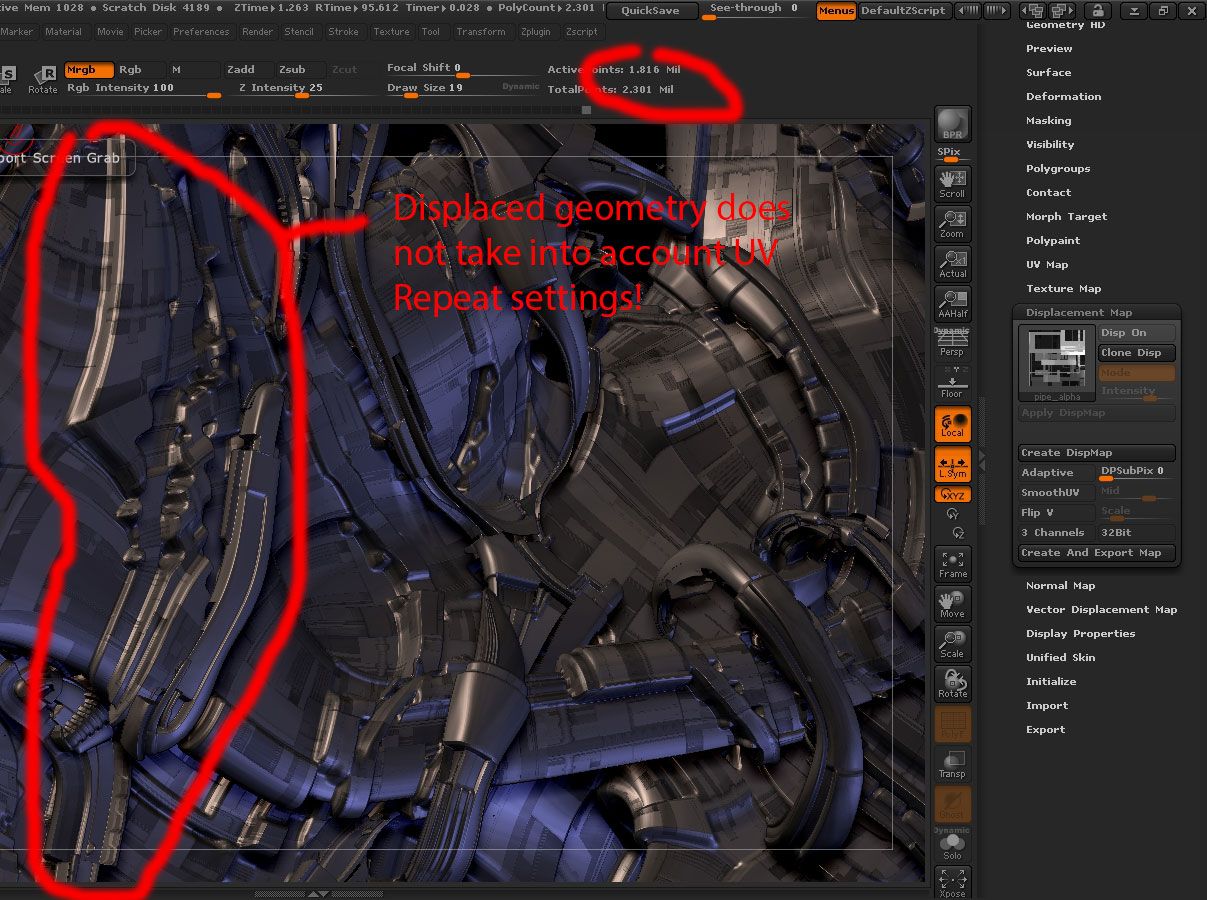
Upon turning displacement mode on, there appear to be gaps or see-through areas only in the parts where there are UV tiles ‘seams’ or ‘edges’.

Also to note, I am using 16-bit PSD for the maps.
Also I made sure there were no pure blacks in the maps by adjusting contrast in photoshop. So it can’t be a transparent texture resulting from pure black textures.

And it only happens exclusively on the UV’edges
What can I do to fill up these gaps?
Do you also get this issue and just ignore it due to the fact that when U and V tiling is increased, the displacement details tend to ‘hide’ these little seams?
thank you!

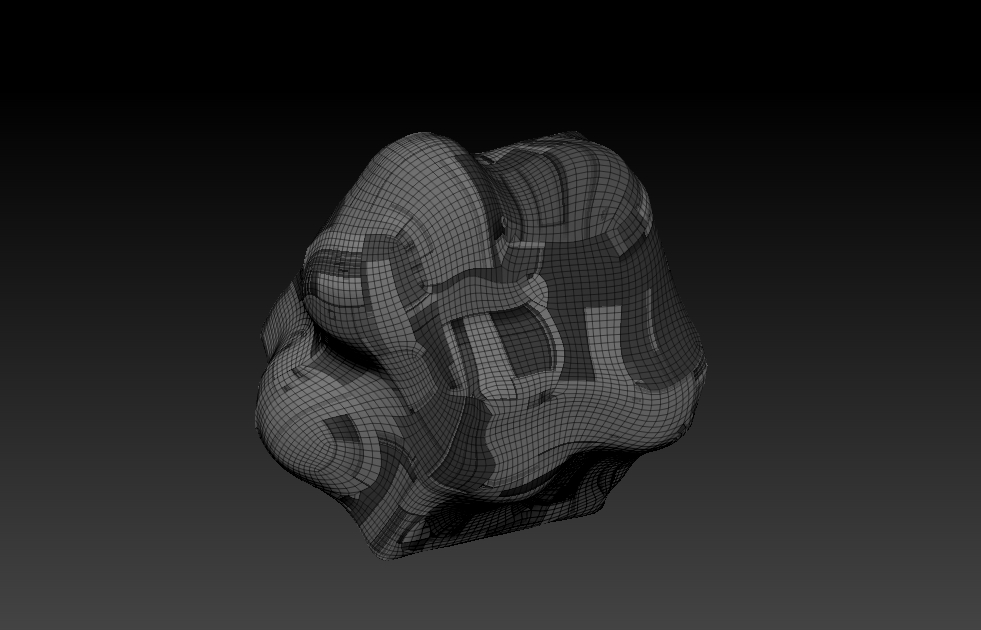
  1. Just the polygroups.
    polygroup.jpg

  2. After GUV, and applying rainbow texture. Can clearly see the tiles seams.
    GUV.jpg

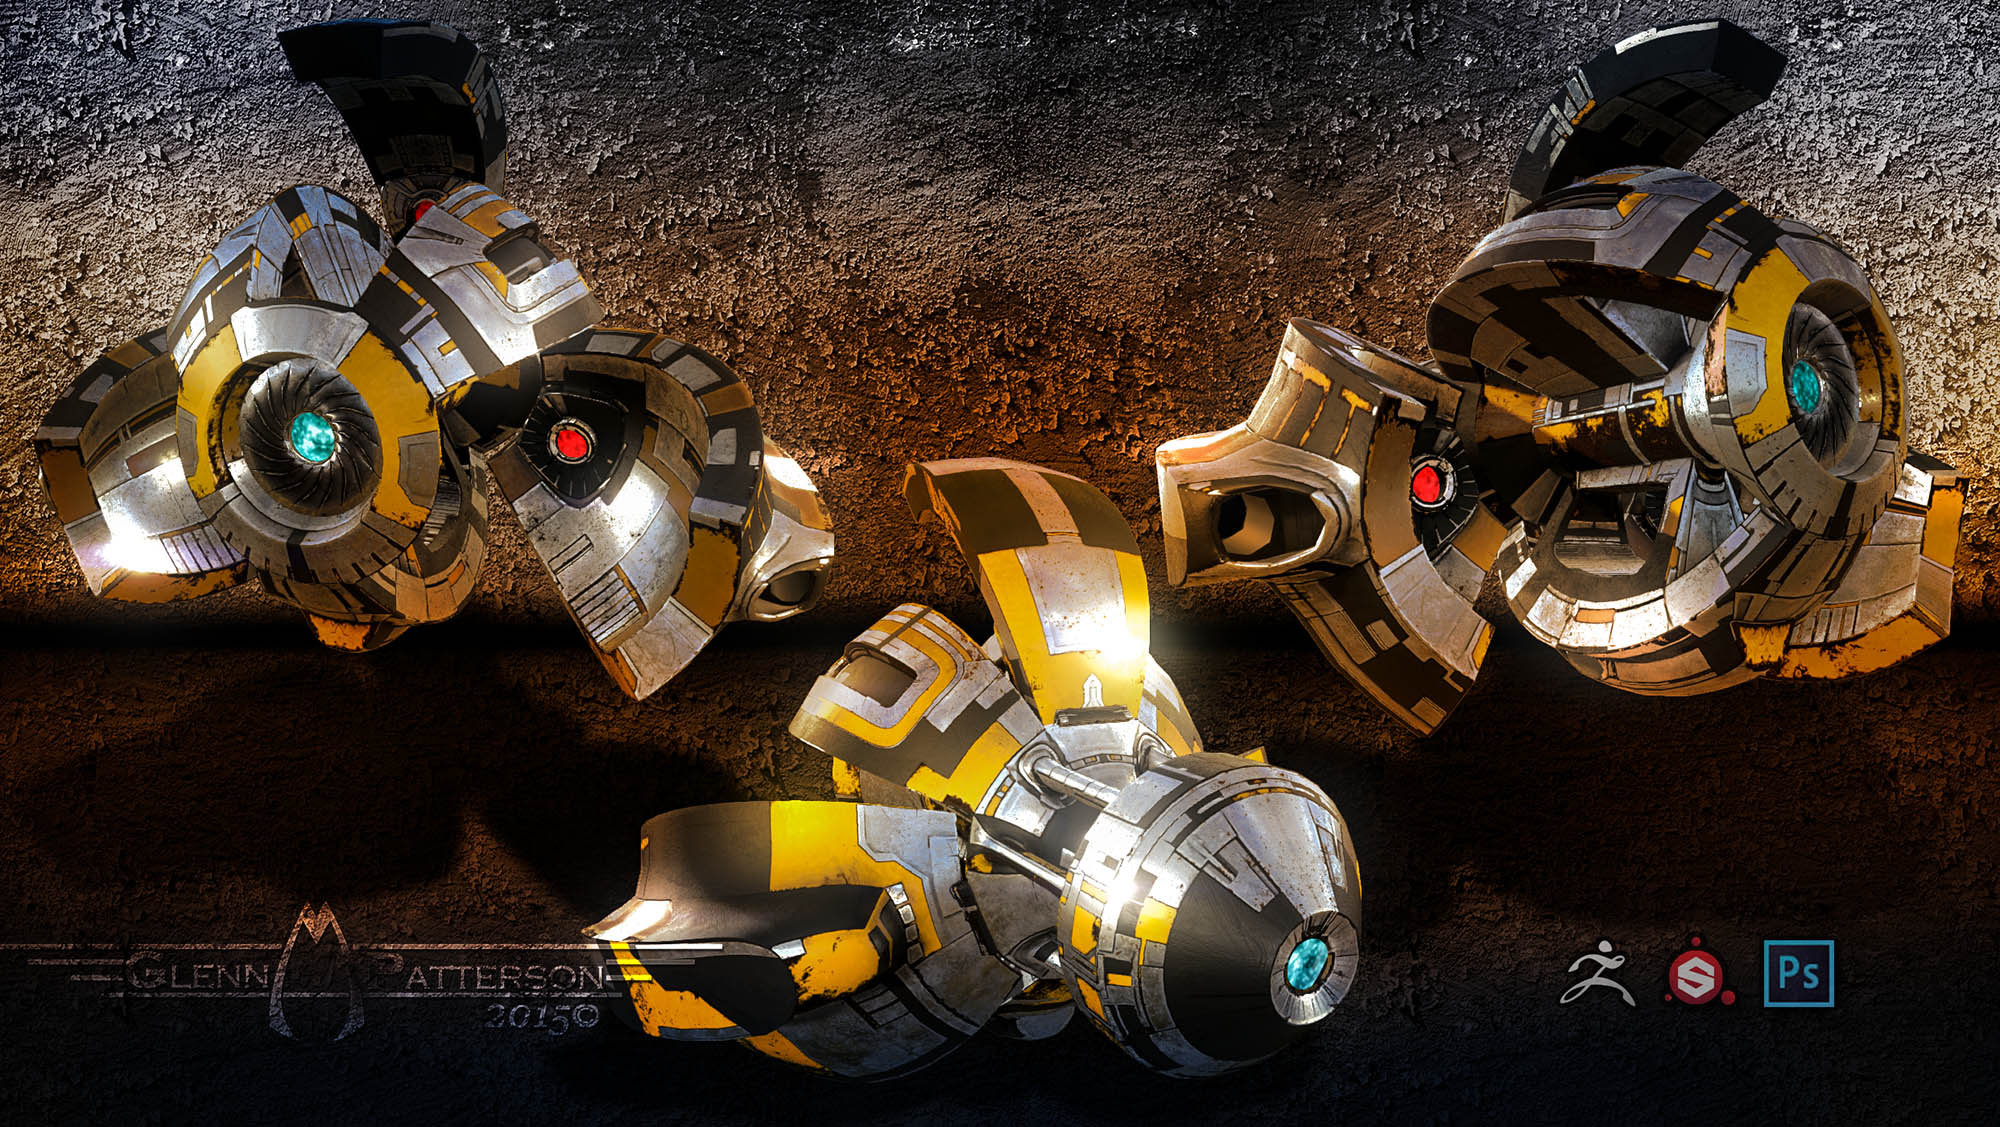
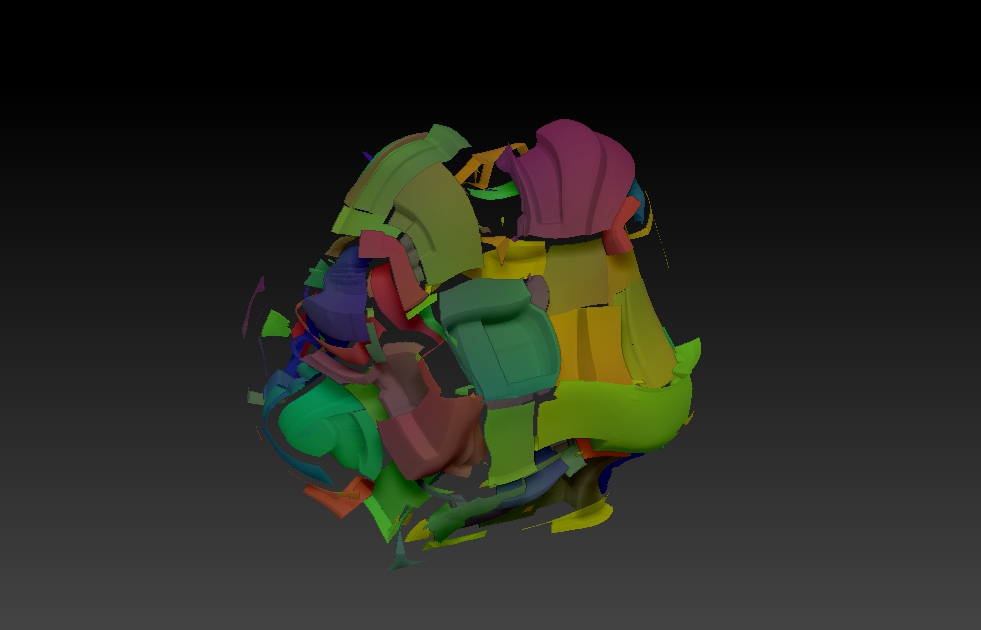
  3. Applying a texture map from your nanomesh greeble generator.
    texturemap.jpg

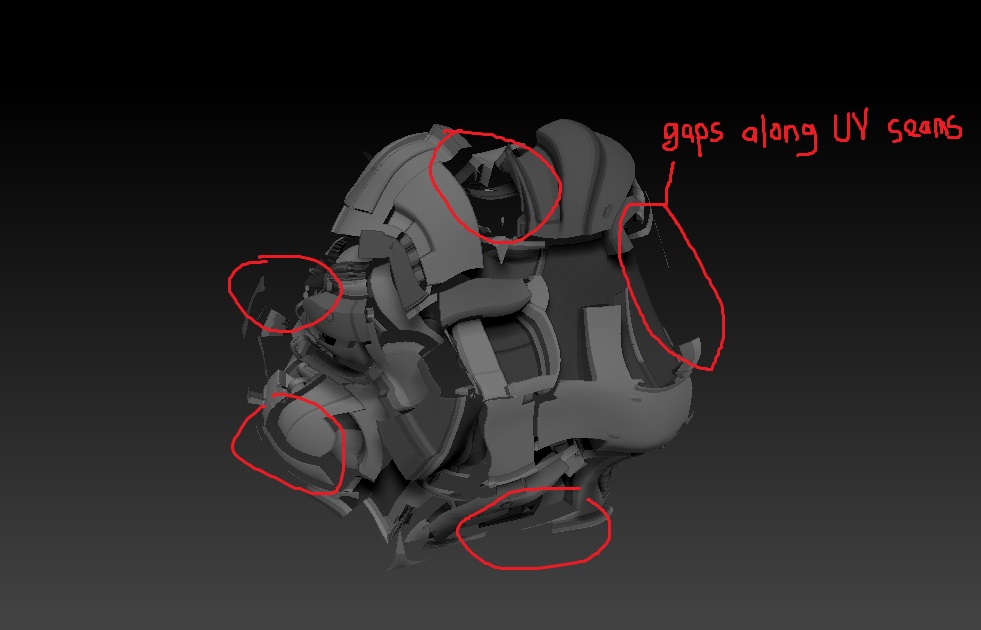
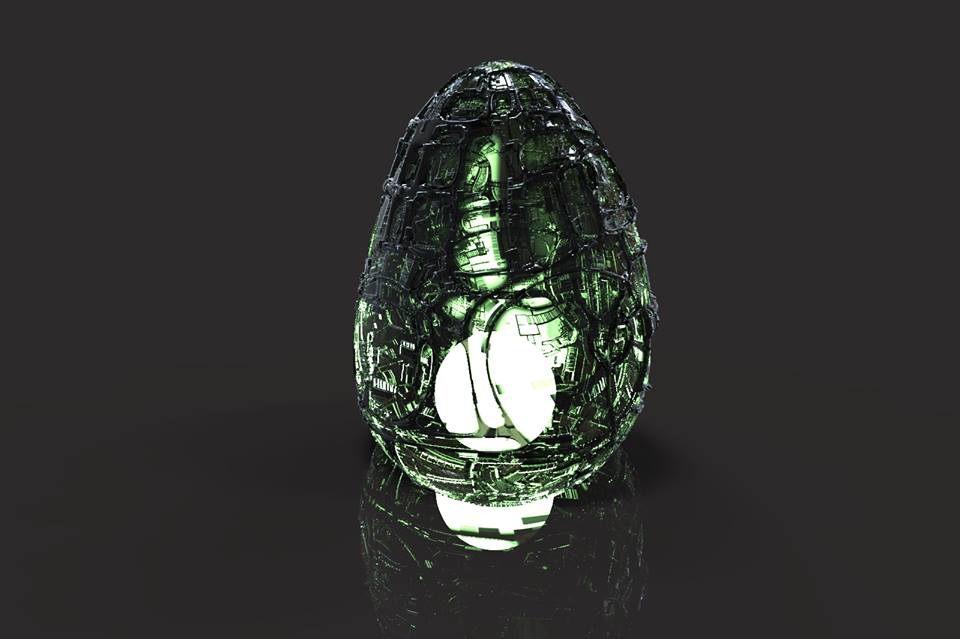
  4. Displacing it with the same alpha map. Only the UV tile seams create the gaps or transparency.
    disp.jpg

  5. Texture map changed back to rainbow gradient to see more clearly the gaps in the seams.
    disp2.jpg

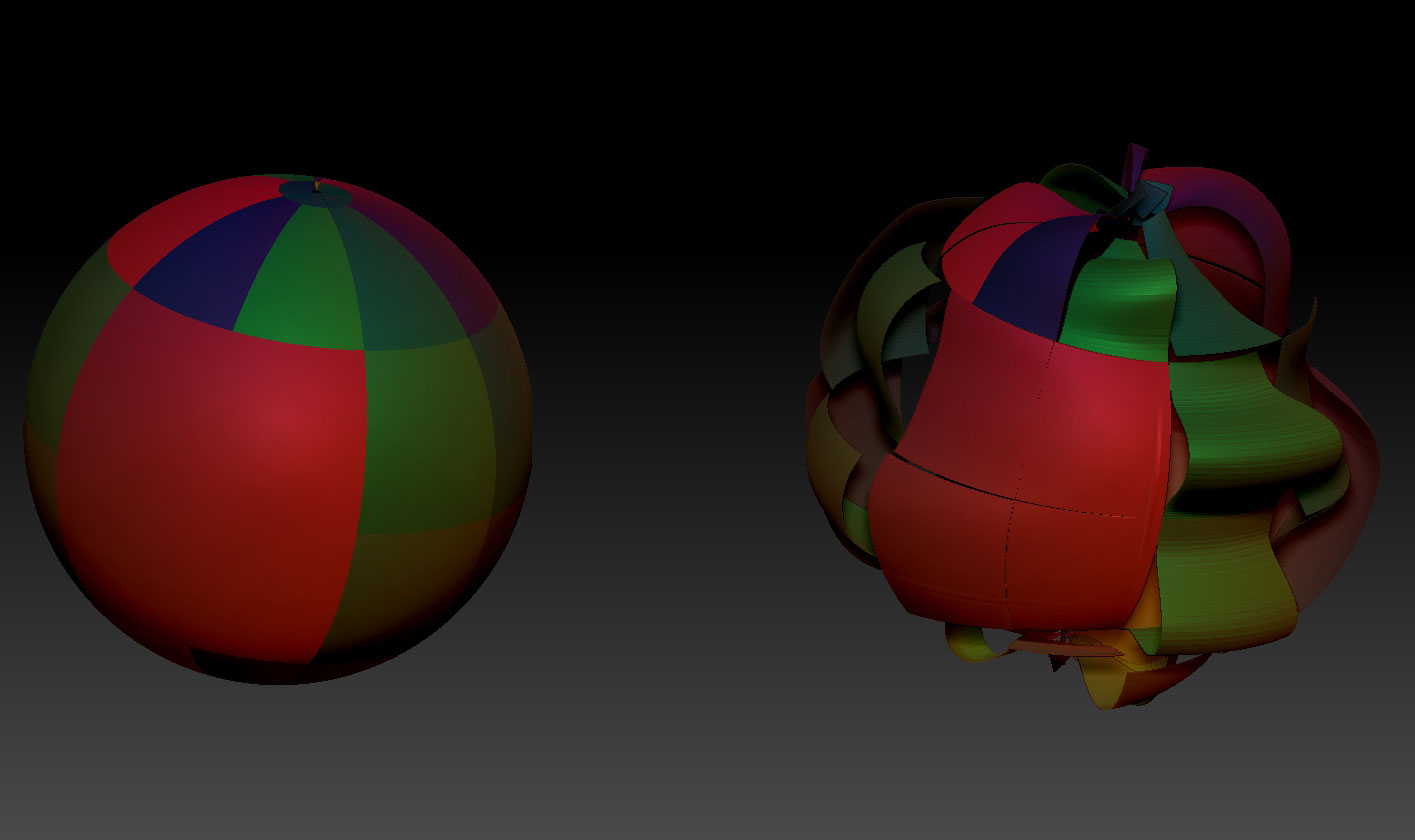
The same issue also arises when testing on a simple GUV-ed sphere with a simple alpha map displacement.
(I turned on double face view to better appreciate the gaps)
sphere1.jpg

Attachments

sphere1.jpg

hoongster Hi Glenn, first off thanks for posting the tutorials on greebling.

I have a problem with displacement maps and GUV maps in zBrush.

Your Welcome!

As for you Problem, I think your just missing a Step. Take a look at the image below

  1. Create your Base Mesh
  2. GUV your Mesh
  3. Apply Texture Map
  4. Load Displacement Map, Turn Mode on and Adjust Desired Intensity
  5. Subdivide Mesh to over 1+ Million Poly and Apply Displacement Map

ZBrush Document.jpg

Looks like your just missing step 5, Applying your Displacement, until you do that its just a Preview of the Displacement

Hope that Helps

Attachments

ZBrush Document.jpg

Glenn, thank you very much for taking the time to reply and make the screenshots.

I tried what you have suggested, and something unexpected came up…
It seems that applying displacement works perfectly as expected when UV repeat is set to 1 for both horizontal and vertical.
However, when I tried to increase the UV repeat values, zBrush previews the displacement correctly, but when I hit the “Apply disp” button, the actual resulting displaced geometry seems to be as if it were set on UV Repeat 1 (H & V)

I recall reading somewhere that this happened before, but I forgot the workaround or where I had read it…

  1. As you can see, setting UV Repeat to 30 horizontally and 8 vertically, the viewport previews it nice.
    ZBrush-ScreenGrab02.jpg

  2. Time to apply displacements. The actual displaced geometry did not take into account UV repeats.
    ZBrush-ScreenGrab03.jpg

Anyhows, I still went ahead with the ‘broken’ gapped BPR render for some simple photoshopping :slight_smile:
Couldnt have been possible without some tips from this thread!
BPR_Render.jpg

Attachments

ZBrush-ScreenGrab02.jpg

ZBrush-ScreenGrab03.jpg

I tried what you have suggested, and something unexpected came up…
It seems that applying displacement works perfectly as expected when UV repeat is set to 1 for both horizontal and vertical.

Loving the Design so Far! Your UV Repeat problem is a Easy fix. Set your Repeats (No Decimal Points ie, 2.4, 3.9, 30.2, and so on. Just Solid Numbers) Once you find what you like, export your object and reimport it back in. Reset the Repeat 1 to 1 and it’ll work. Now youve basically baked the UV repeat. Watch the Video Below to see

<iframe width=“960” height=“720” src=“https://www.youtube.com/embed/sSxCQCxRNis” frameborder=“0” allowfullscreen

Hey hoongster,
I believe the workaround is to export your model with high repeat uvs and import back to zbrush.
So experiment with the h and v repeats, when you see something you like export and import back and apply your texture and displacement.
Dont touch the repeats after that (keep them 1) cause I believe you’ll need to export and import again.
…Thats what I remember reading in Yings looooong thread. Hope it works for you :slight_smile:

Edit: Ooops Glenn already answered your question :smiley:

Is there a Echo in Here Lol

Thanks Glenn (and Kryat), The youtube video did the trick… how can i not have come across that.
your advice probably saved me needless hours of trial-and-error tweaking.

hoongster Thanks Glenn (and Kryat), The youtube video did the trick… how can i not have come across that.
your advice probably saved me needless hours of trial-and-error tweaking.

Glad I could Help. Let me know how the Results Turn Out

Hello! :slight_smile:

I must first say that i really like this threat. I made some sculpts using the methods descriped here. More are coming soon :slight_smile:

ssssseeht544e.jpg12032140_10207601952557512_7431590127703044053_n.jpg

Attachments

ssssseeht544e.jpg

Thanks for Sharing Itak. Those Sculpts are Great, gotta Love Xenomorphs

Itak,

great imagination & modeling. ;):+1:

Who is it? Where/when are they from?

How did you apply the “exo-helmet” to the head or is it a sub-tool?

Which of Glenn’s tutorials helped you?

Which of Glenn’s tutorials helped you?

He using the Bio-Mechanical Tutorial for those Designs, I’m sure with a little variation of his own. https://www.youtube.com/watch?v=5fZcA8rwQ1I

Oh, that one! :):+1:

I’ll go through it again. Great tuts Glenn!

Thanks!

that1.jpg

Hello!

Wow! Tenkyu gmp1993 and megacal :slight_smile:

It was quite easy to create this exonomorphs armor, i already had a bust head that i modeled a few days ago, so i used this model, duplicated it and zremeshed it downy to about 6k polys and created some uvs ( like u see in the tuto that gmp1993 linked)
after this is use some polyloops and did i little inflate with the brush. then i created some alpha maps using those great elements from gpm1993 ( haha it was hard to find this ” on my slovenian computer so i change the keyboard to US :smiley: )
and then i used the noise to create a finer detials with this map. After this i just move some parts of the mesh inside so the original head pop out :slight_smile:

Here are some photos of this :slight_smile: i hope u like it :slight_smile: (this is my first “tutorial” :slight_smile: )

dddddnt.jpg

Attachments

dddddnt.jpg

Pozdrav Itak! :slight_smile:

Thanks for sharing your method…very cool modeling!
I’m going through Glenn’s tutorial now, and hope to
create something to show. Though yours is outstanding.

Is that “us” a million years from now (or the past on Mars?) or from
another star system on the other side of the galaxy???

With a brain case that large, he/she/it must have incredible
abilitites…e.g. levitation, teleportation, control their ship
with their thoughts, etc.

There must be a great story for such an interesting being. ;):+1:

Itak Thanks for the Breakdown. I Love seeing how others apply my Techniques to their Work. Well Done!

In this Tutorial we will Cover on how to take our Symmetrical Models and create Mirrored UV’s to go with them. Also will cover how to use the FBX Exporter in Zbrush 4r7 to get our models into Substance Painter more Efficiently.

Go to the Link Below to Download the Model to Follow Along
(THE MODEL IS FOR EDUCATIONAL/PERSONAL USE. NO COMMERCIAL ALLOWED)
https://gum.co/HyWIU

Download my Zbrush UI
https://dl.dropboxusercontent.com/u/27015792/GlennUI.cfg

[Alien Drone](https://sketchfab.com/models/bc5978b6f0ee4e85966b9f552e6879e1?utm_source=oembed&utm_medium=embed&utm_campaign=bc5978b6f0ee4e85966b9f552e6879e1) by [gmp1993](https://sketchfab.com/gmp1993?utm_source=oembed&utm_medium=embed&utm_campaign=bc5978b6f0ee4e85966b9f552e6879e1) on [Sketchfab](https://sketchfab.com?utm_source=oembed&utm_medium=embed&utm_campaign=bc5978b6f0ee4e85966b9f552e6879e1)

AlienDrone.jpg

Attachments

AlienDrone.jpg

A new tutorial from Glenn P. is the Highlight of my day!

thnx, again and again and …
very usefull.

Awesome!!!

Thanks Glenn! :):+1:small_orange_diamond:+1:small_orange_diamond:+1: