The multi-eye process looks insane. Can’t wait to try it. You also do wrinkles really well!
Wow what a thread!
I have only one criticism…you do not post often enough
Followed
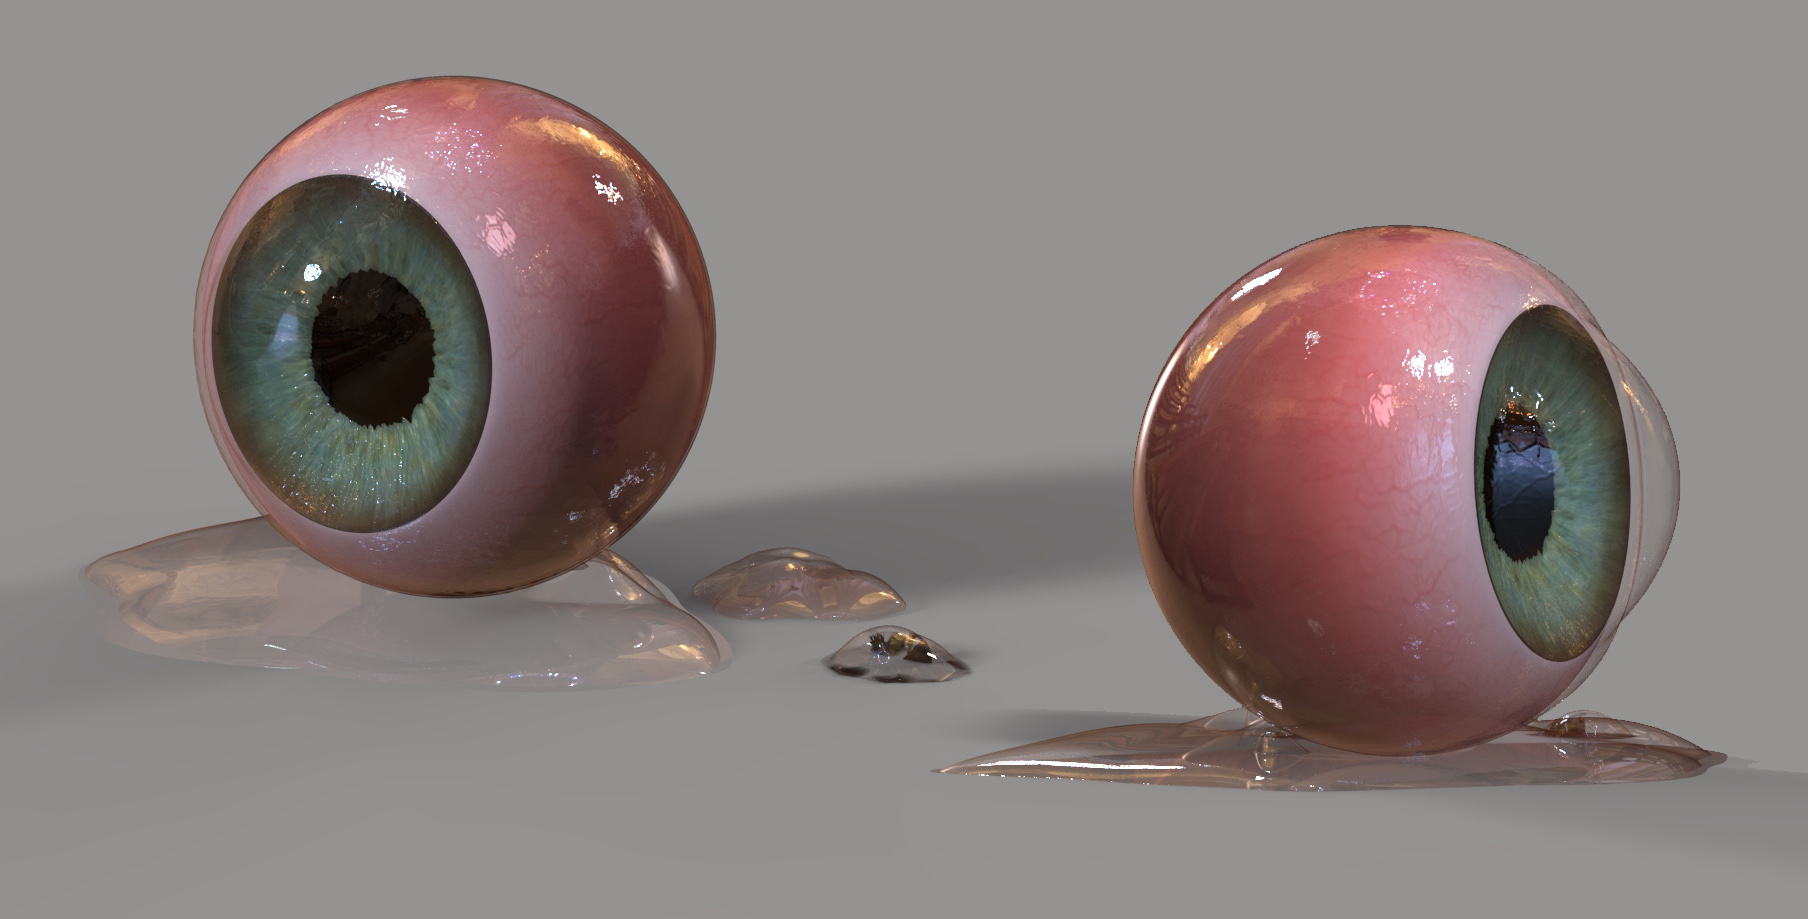
What’s up guys! If you’ve been following the development of the Multi-Eye project, I have some good news!
The Multi-Eye Tool is ready to download along with a super short guide on how to set up the project to achieve best results at render time.
I also bought a decent microphone last week, which means I can start recording some video tutorials. To test the new mic, I recorded a quick video (under 15 min) included with the resources. The video is just a test for future tutorials but it also shows you how to tweak the Multi-Eye Tool.
As always, let me know what you do with it and I hope you find it useful. Enjoy!

Wow, this looks awesome and very usefull! I also downloaded your Clay and Render Tutorial, thanks a lot for sharing!
Will tr it today, thank you!
Thank you for this! I’ve been watching your posts on FB, and I’m eager to play with this. Thanks for sharing it!
Can’t wait to try it out!
Your very Generous with your Tools and Documentation. Thank You
Hi Pablo, Thanks ever so much for this tutorial ( ). Fantastic job! The video came out amazingly well, very clear and precise!
Hey mate
Thanks for this its great but when i load the tool,the eye is this colour is it supposed to be this way as im finding it hard to get a nice transparecny to the eye anyway thanks again its great ps that is the outer eye the trans one
… for your generous gift. Great idea using layers for eye variation.
I’m having the same problem as Fonty with the material settings. The tool comes in with that metal grey look.
Do I fill / overwrite with skinshade 4?
I was also wondering if your have any ideas in regards to lights/lightcaps?
Anyway, not to worry.
Many thanks again for your hard work.
Thank you for the nice comments guys! I’m glad you liked the Multi-Eye tool.
Cosmick: Thanks! I’ll definitely try to take some time to update this thread with more WIPs!!
Wyattfox: Thanks a lot for the feedback!
Fonty, Shellac: Guys it looks like the cornea part of the eye is picking up the textured Metal from standard materials? its a bit weird but regardless of the material as soon as you enable “transparency” form the render settings you should be able to see through the sub-tool at render time. (try initializing ZBrush and reloading the tool). Ultimately you can fill the object with the Toy Plastic material, lower the ambient and diffuse slider and enable transparency. Let me know how you go!
cheers!
thank you for the heads up.
I’ll have a tinker.
Thank you once again for your efforts…
Here is your eye rendered in KeyShot. Looks great! My question is, how does one get the tool into another tool and still maintain all your great layer stuff? In order to position the eye in my character I usually merge all the parts, position it, then Split to Parts… but it lost all the layer stuff. I could do it if I don’t merge them, but then how do I position all 3 parts so they match up?
Attachments
LynneMitchell: That Keyshot render looks awesome! There are a few things you could do to place the eye tool into your models… you can use contact points but the easiest way is using the transpose master. I does essentially what you were doing (merge parts and move them) but you will retain all the layers.
So…
- Append the eye tool to your character tool (that is all 3 subtools that make the eye).
- Use transpose master to temporarily merge everything (TPoseMesh).
- Mask everything but the eye. move rotate and scale it where you want it to be. (you can take advantage of the eye polygroups to Ctrl+Shift click to hide it, mask visible and then unhide the eye.)
- Use transpose master to bring back all your tools with all the juice layers (TPose>SubT)
Let me know how you go!
Ok mate got ti working i changed the mat to toy plastic then did as you said also i turned of bpr shadows off that was under display prefrences where double is
many thanks
thank you Pablander
this eye tool is very useful.
Followed your steps and it worked perfectly. The layers are still intact… however, once in position, if I try to change the layers, that layer pops back to the original size and position (The eye is now back over granny’s chest). Don’t think it is supposed to do this. Could just be me doing something crazy.


LynneMitchell: humm that actually make sense, if you are importing the eye tool to the character. (it should work fine if you import the character to the eye tool but that is a bit of a hassle). Anyway, there is a super easy workaround:
Do exactly what you’ve done before to import the multi-eye tool (the 3 subtools) to the character.
create a new layer for each subtool (irirs, eye shine and pupil) and leave it in recording mode before you go to the Transpose master. that should do the trick.
the thinking is that the new created layer will record the changes done with the transpose master therefore overriding any other recorded position. I assume if you turn that new layer back to 0, the eye will jump back to the center.
Let me know how you go. BTW granny is looking pretty good!
cheers.
Thanks! Well, I couldn’t get that to work. Any layer that shifts position still wants to move back to the original place (here, the Iris size is warping) . Still must have that data locked in there somewhere. ZB won’t let me leave recording on for more than one layer. It would have been nice to get some animated eye expressions… It is still a great eye! I’ll have to give it some more thought.
