cool! thanks.
looks great, but pretty annoying that you have to register to download it …
why is it annoying it dont take 2 mins,and lynne i tried it and what i did was make the eye the way you want it,then merge the eye and pupil as a tool bring it in to ya modle and position it
then bring pabs eye in also and delete the eye and iris and just use the trans shell and position that on the new eye you made ,hope that helps its a pain but hey
… if you have time, could you possibly produce a more detailed making of the eye tutorial.
Perhaps a vid or pdf on making the main eyeball (iris size and colour process layers)?
As a side note, I can’t get the pupil disc to render if the main eyeball is selected at bpr render time ( I think it renders transparent). All subtools are visible tho’.
Anyway, not to worry.
Cheers for the tool.
Hey guys! I hope you had a good week, mine was pretty busy but I got a chance to finish the “Reflection shader” on the weekend so… time to share!
This is simple a shader, that you can apply to the Multi-Eye tool to get a better looking eye reflections straight from ZBrush BPR.
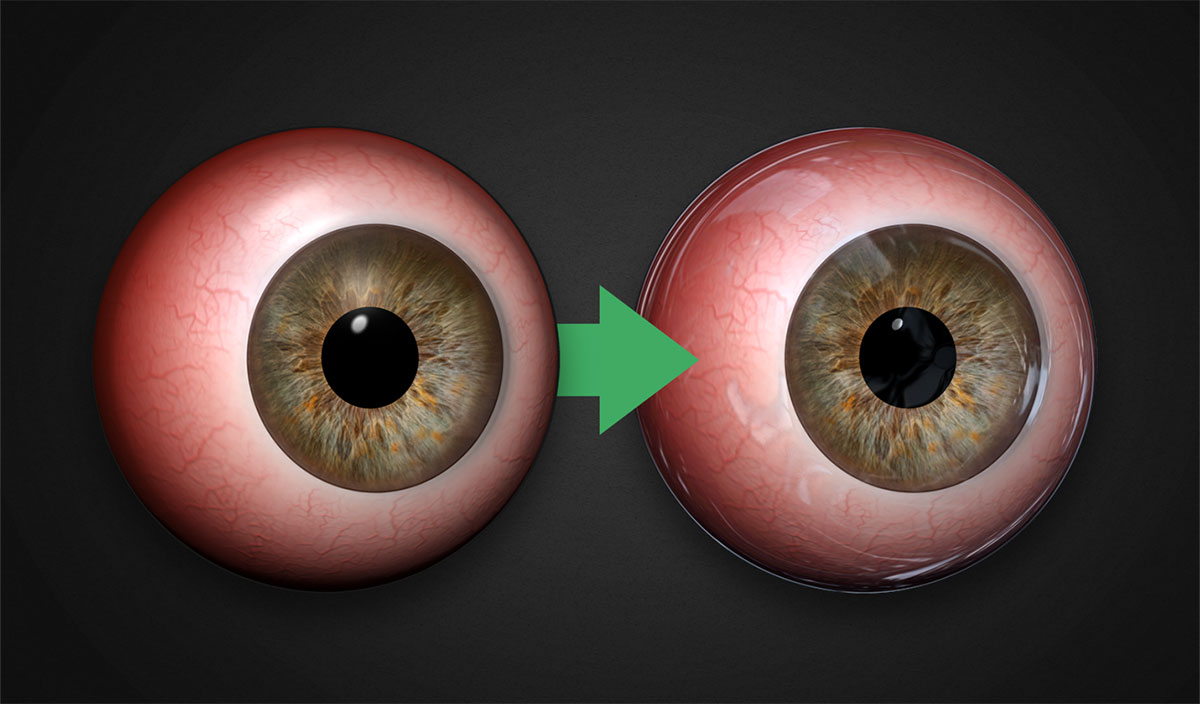
Here is the link to download the material: http://goo.gl/xTPMJI.
I also put together a quick video tutorial (11 min) about tweaking the material that you can find on vimeo:
I hope you find it useful!
Shellac: Yeah I was thinking that I might do a detailed tutorial about the actual construction of the Multi-Eye tool is there is interest in that. on the side note, I couldn’t reproduce what you described about the pupil, make sure that only the second subtool “eye_shine” has the BPR transparency enabled from Display properties. Also you can try assigning a flat material with a black colour to the pupil and try render again. let me know!
Attachments
Awesome! Thanks Pablander! 
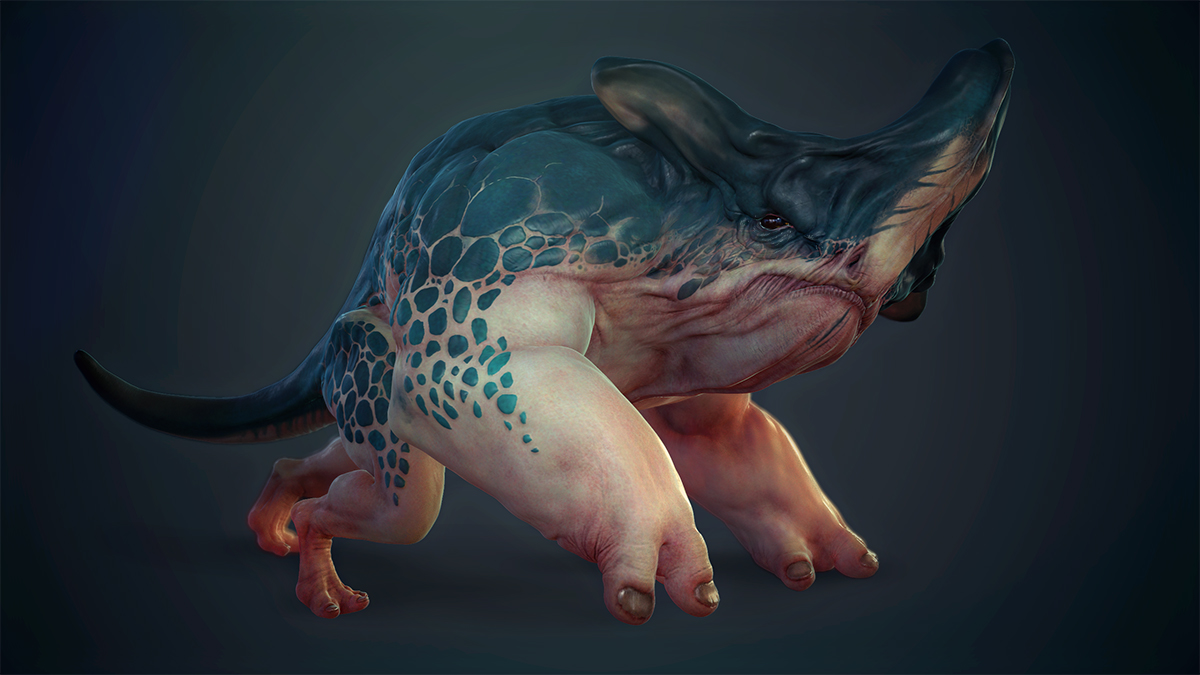
Hey guys, I finished this creature on the weekend to finally test the Marmoset viewer (I’ll post a link to the interactive model soon). really awesome tool! hope you guys like it.
Attachments
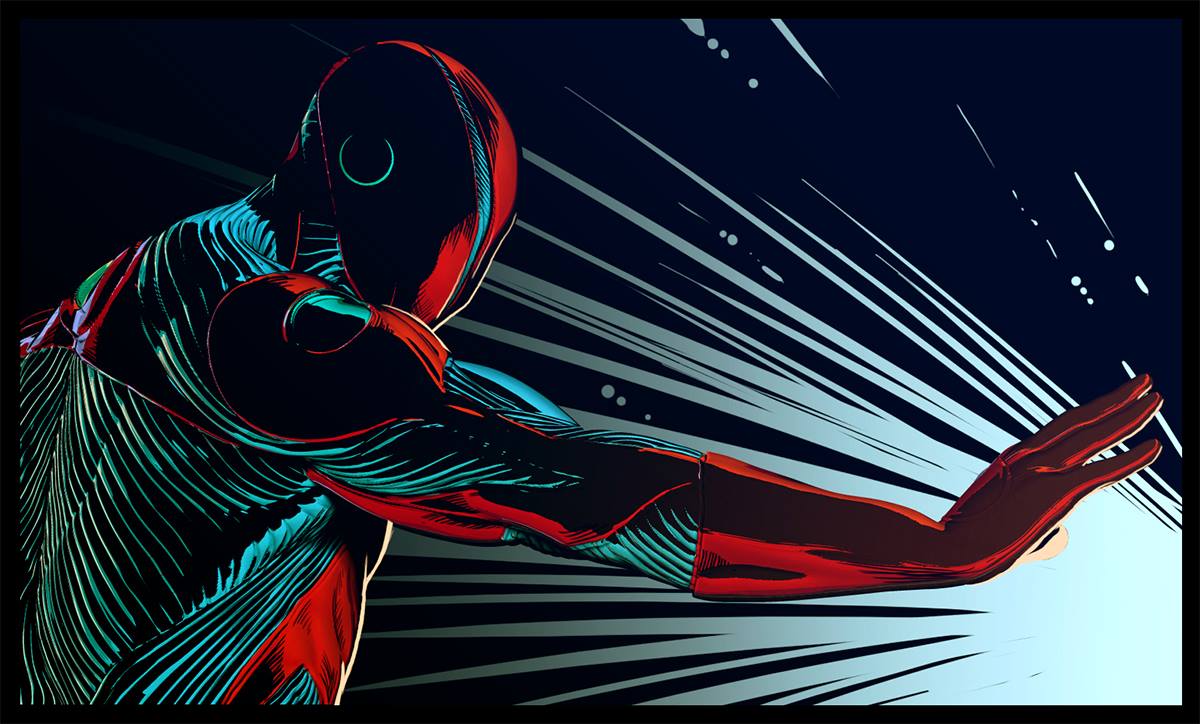
Hey guys! I’m working on something new that probably has legs for a new tutorial on rendering a comic style using ZBrush BPR. Hope you guys like this quick test.

Wow, very cool results! Can’t wait to see some more
That looks really cool!
Looking good
There have been some interesting developments in the “comic tutorial”. Here is an illustration/fanart of Mike Mignola’s character: Hellboy. This is one of my favourite characters, so I made a Dynamesh sketch and I used it to test some materials and techniques from the comic tutorial.
This is 100% BPR render straigh from Zbrush and no photoshop. I hope you guys like it!
I’ll post more updates later on.

Hey, that turned out really great!
great render
curious to see how to achieved those cross lines (im guessing its just lines carved in)
Fantastic final effect!
What how, please elaborate…this looks totally awesome!
I think you are trying to pull our leg with that hellboy NPR.
thanks for the comments guys! I’ll explain the process in the comic tutorial… coming soon!
Here is another test with a different style. The superhero is a 3D character I created for the tutorial, so you’ll see him in action very soon.
Maybe you can help me to give him a name and decide what sort of power is he going to have??? Let me know in the comments!
The character is 100% rendered with BPR. I just imported the render and a mask into Photoshop, added the Background and tweaked the colours a bit.
I hope you guys like it!
Attachments
Looks good, tis style is really cool!
Looks good, this style is really cool!