That steampunk site is awesome. The lightsaber is absolutely amazing.
Very nice work on the human anatomy. Looks like you had some practice  :lol:
:lol:
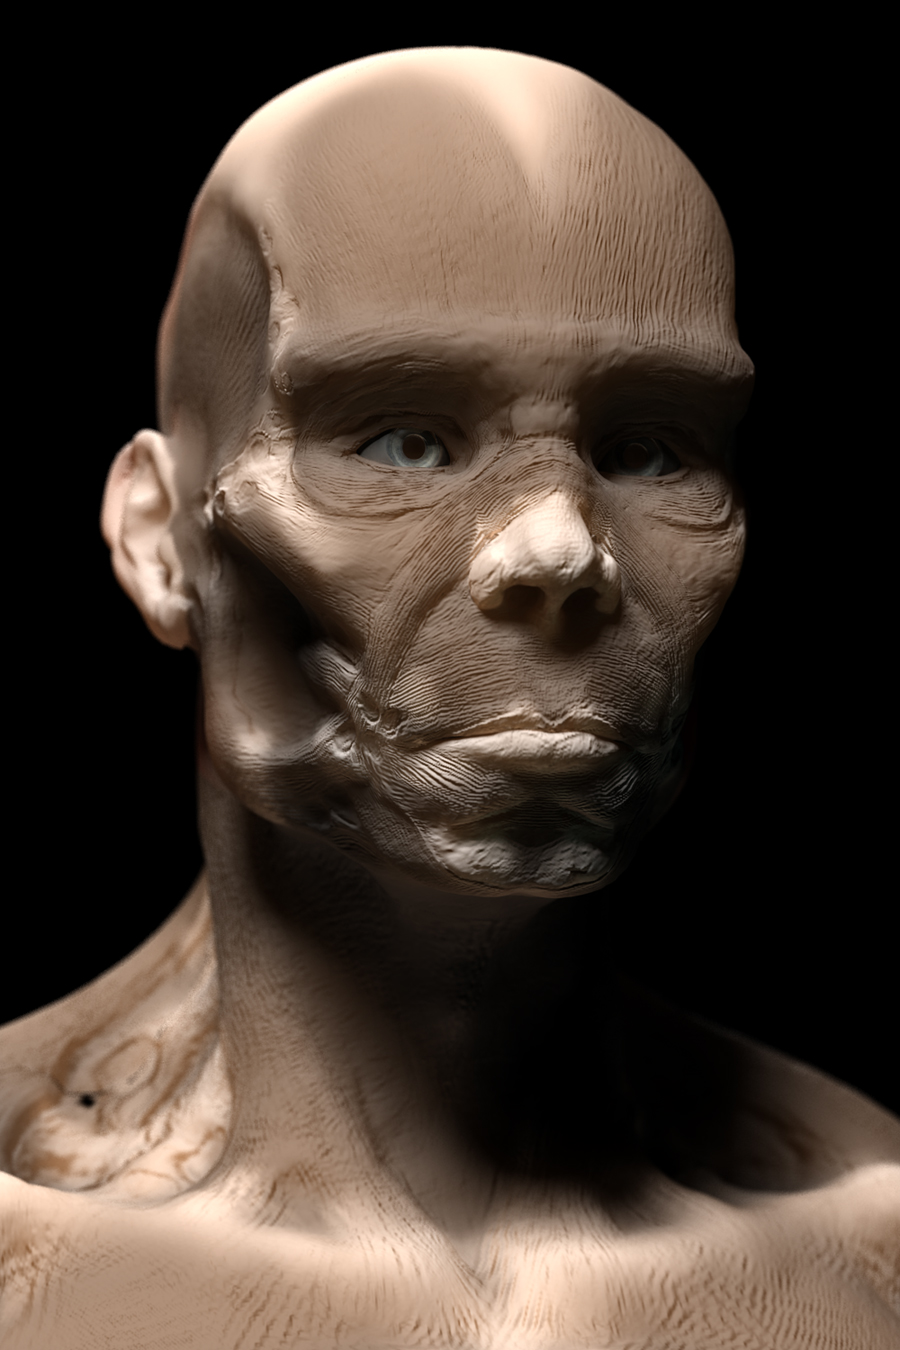
Here’s a head shot. There is some fugliness happening on the top of the ear that I need to figure out…probably a UV issue.
[[attach=156393]ecorcheFace.jpg[/attach]](javascript:zb_insimg(‘156393’,‘ecorcheFace.jpg’,1,0))
[ ](javascript:zb_insimg(‘156394’,‘ecorcheFace_thumb.jpg’,1,0))
Attachments
For anyone who is interested in using multiple uv spaces in conjunction with displacement mapping in 3ds Max, this is how I set it up for a bipedal character. Crits are always welcome.
I put the head on 0,1 and the rest of the body on 1,2.
[[attach=156397]uv.jpg[/attach]]
In Max I put a Composite node in every place I wanted a map to control the input. I give each Composite node two layers - one for the head and one for the body. Each layer gets an appropriate map. In the map properties for both maps I turn off tiling because I don't want the texture on 0,1 (the head) to tile all over my model. On each body map, I simply need to Offset the U coordinate to 1 for it to read the next space over. If X=U and V=Y, then I know I need to go over one unit on U.
[[attach=156403]shader.jpg[/attach]]
Basically stir and repeat for each map. The only caveat is that the Composite node for Displacement has to be wrapped in a Displacement node, and the Composite node for your Normal maps has to be wrapped in a Normal Bump node. This method works well though. If, for example, I wanted to add dirt maps, I could create two more layers in the Composite node for the color channel, and set them to Multiply.
NOTE: The one thing I haven’t been able to get working with Fast Skin is Normal Mapping with a Normal Bump node. I’ll post an update if I get it working.
Cool tips man, thanks
If your into steampunk and such check out this guys work, cool for reference too.
http://www.insectlabstudio.com/
-Cheers,
Thanks for the tips Dustin!
What follows may sound completely noobish, but…
Is the perk of this work flow being able to get higher resolution maps?(aside from the blending mode control)
What I mean by that is, since you are scaling up the UV’s to take up more space because you are not cramming everything into one single UV space, the maps will in turn be rendered with more detail. And since you can use as many UV spaces as you want, in theory you could make a 2048 or whatever size texture for each UV chunk.
Anyway, thanks again for the tips. 
Dustin - Thanks for the link, man.
Brian - Yep, you got it. In my case the point was to get more texture res on the head, so I dedicated an entire UV space to the head.
Looking good Dustin, I’ve enjoyed your scetchbook alot. I love the multi region UV idea, I’m wondering is it the same in maya? I haven’t tried it yet, I’m just learning UV mapping, but the prospect of being able to scale up areas where I want more detail is appealing.
Thanks, Rusti!
Fixed the seams. Ironically after getting on my soap box over multiple uv regions, it turned out I had to put everything in one region to get the Fix Seam feature to work in ZBrush.
[[attach=157116]ecorche_wip02.jpg[/attach]]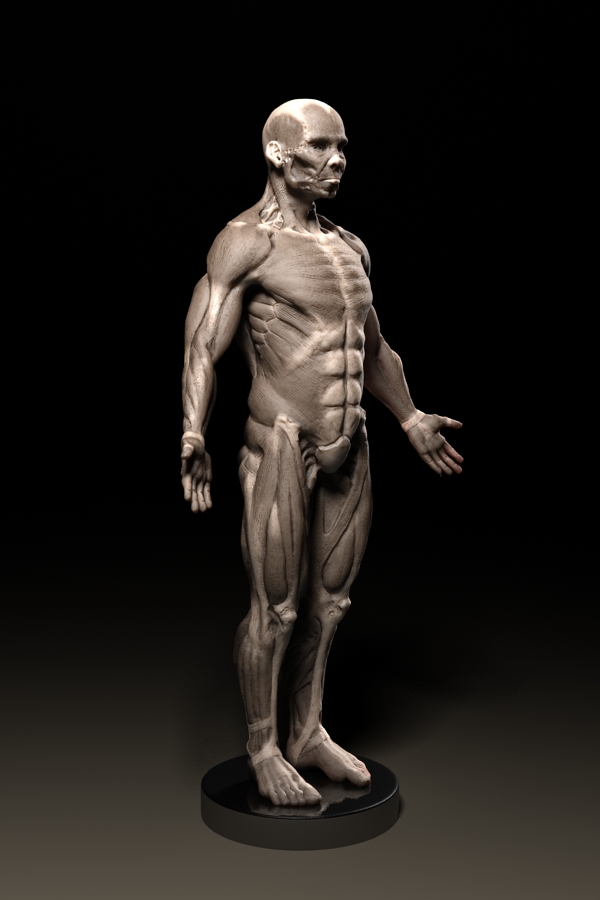
[ ]
]
If you’re still using Windows XP like me (until Win 7 comes out anyway) and you’ve ever wished the thumbnails in Explorer were bigger, then wish no more. Download TweakUI from Microsoft’s website, and crank your thumbnail size up to 256. Just be sure to dial the quality slider down so you aren’t over cacheing.
It’s fantastic when you’re browsing through your morgue or you want to quickly scan through some alphas.
[[attach=157288]tweakui.jpg[/attach]]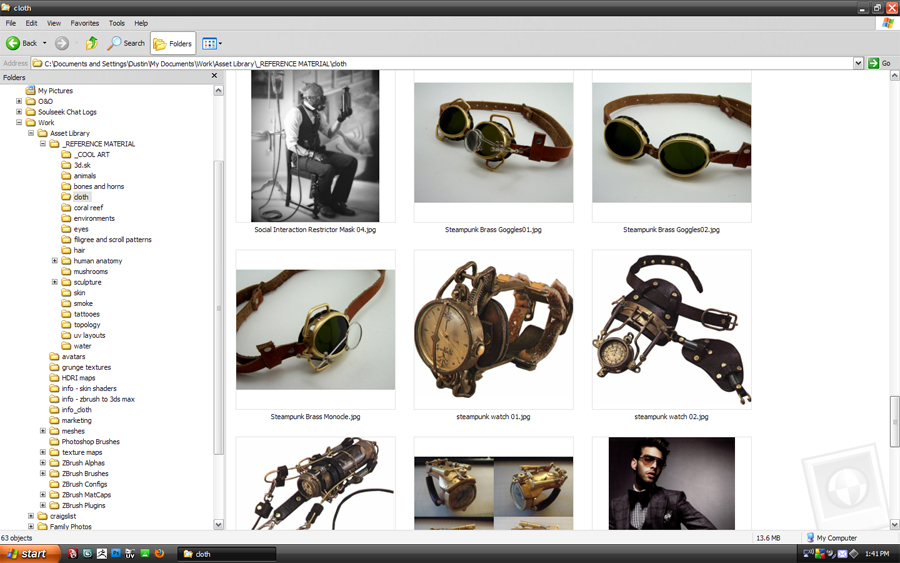
You always seem to have a tip / trick up your sleeve.
Your last render came out nice by the way.
So multi-displacement works with multiple UV spaces but fix seams wont, how lame.
“Its still not a bug” :lol:
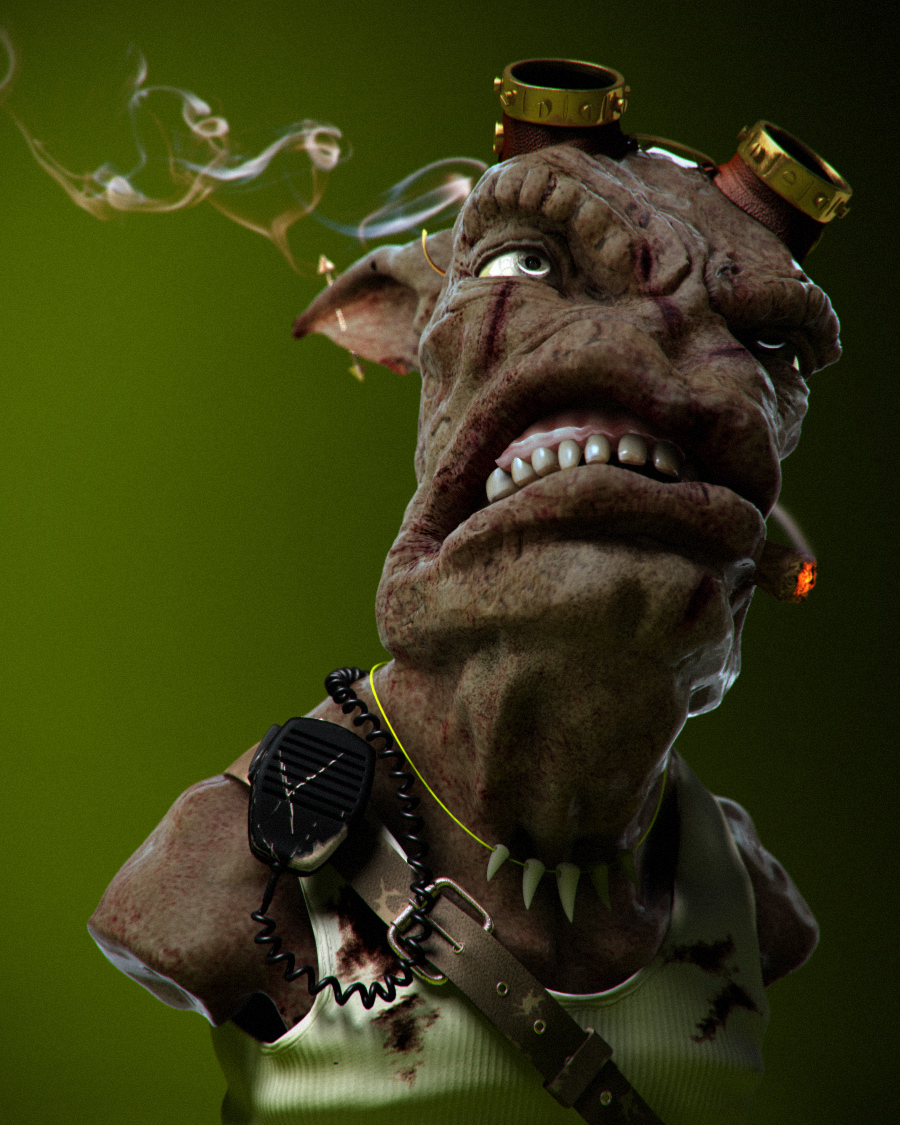
Here’s the latest version of my alien bust. Any suggestions?
[[attach=157758]phleg_wip09.jpg[/attach]](javascript:zb_insimg(‘157758’,‘phleg_wip09.jpg’,1,0))
[ ](javascript:zb_insimg(‘157759’,‘phleg_wip09_thumb.jpg’,1,0))
Attachments
Hey Dustin.
You just keep getting better and better.
Good on you, real fun watching you progress.
Cheers
Cesar Dacol Jr.
Aka, The Voodoo Monkey
<input id=“gwProxy” type=“hidden”><!–Session data–><input onclick=“jsCall();” id=“jsProxy” type=“hidden”>
Very nice lighting and great work overall Dustin. I think my only crit (a small detail) would be to change the spec and material for the bloody areas of the cut. To me it appears to be just a diffuse color but not sure if the material is different. Anyway, like i said its a tiny detail that probably wont affect it much. Really nice work.
Cesar - That means a LOT coming from you. You’re like my own personal Mr. Miyagi, and I thank you for it.
Brian - Thanks duder. Good catch, that’s something I forgot to add back in when I redid the UVs - the wet bloody bits.
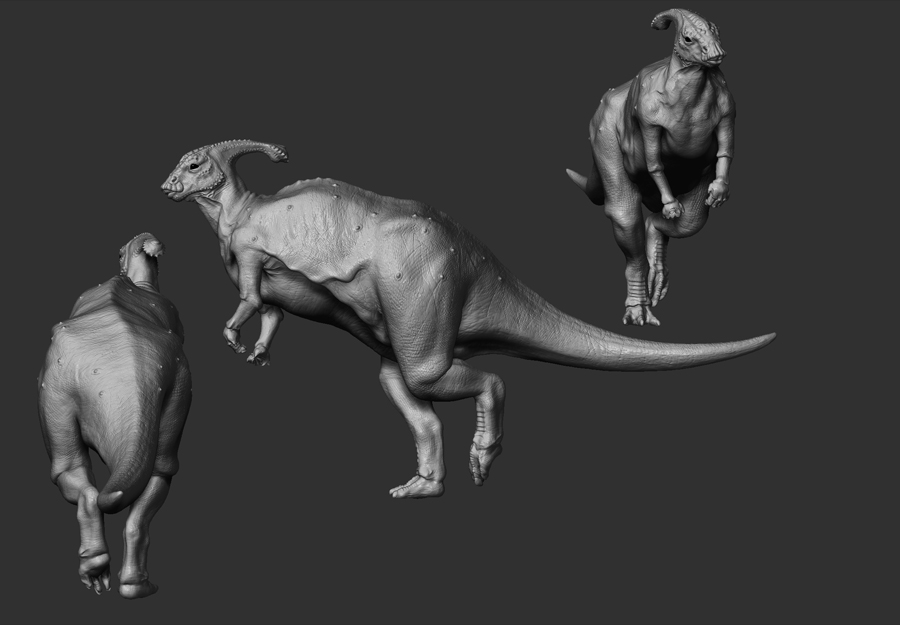
Here are some recent shots. They aren’t final, I just did some experimentation with lighting and posing. More to come on this.
[[attach=158375]parasaur_wip06a.jpg[/attach]](javascript:zb_insimg(‘158375’,‘parasaur_wip06a.jpg’,1,0))
[[attach=158376]parasaur_wip06b.jpg[/attach]](javascript:zb_insimg(‘158376’,‘parasaur_wip06b.jpg’,1,0))
[ ](javascript:zb_insimg(‘158377’,‘parasaur_wip06_thumb.jpg’,1,0))
Attachments
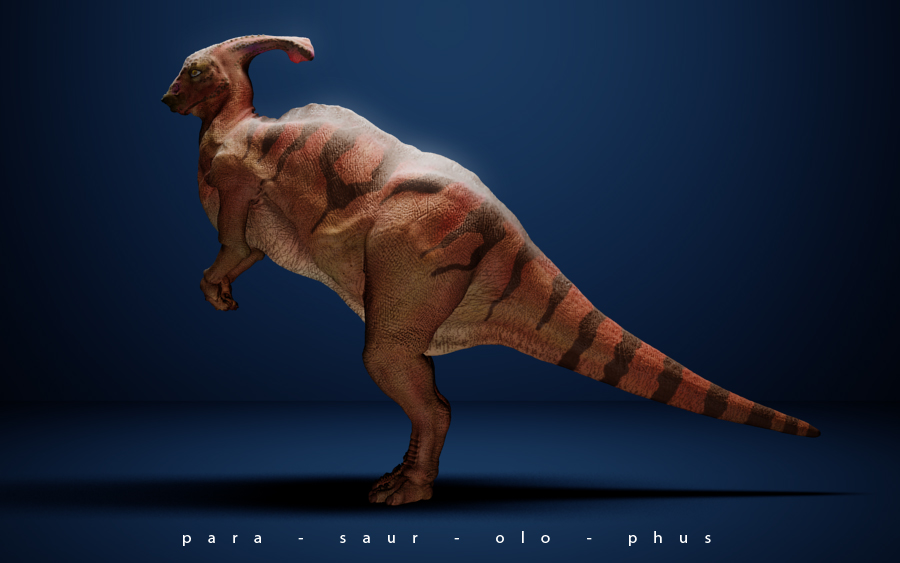
really liking the render along with the color choice has a very natural feel to it…;)…
you are improving…
Nice stuff Dustin, I like that pose of the dinosaur, very natural looking.
So thats what you were making when you were “working on something cool” recently :lol: I like it a lot. The lighting most of all. I would assume your using Mental Ray? Are you just tweaking lights and doing the glow in post? I like how it appears to be “on display”. The sculpt itself is great, do you plan on rigging and animating at any point? This would be a fun project to animate. Always good work man, I have always admired it.
This is Masa from magnifi.
This is my first time to check your Zbrush posting, your works are so amazing! I guess you began to use Zbrush same month of last year, now you are now at totally different level within just a year. Dammit I have to study A LOTS.
Cool stuff. The alien bust reminds me of the guys from the Fifth Element.