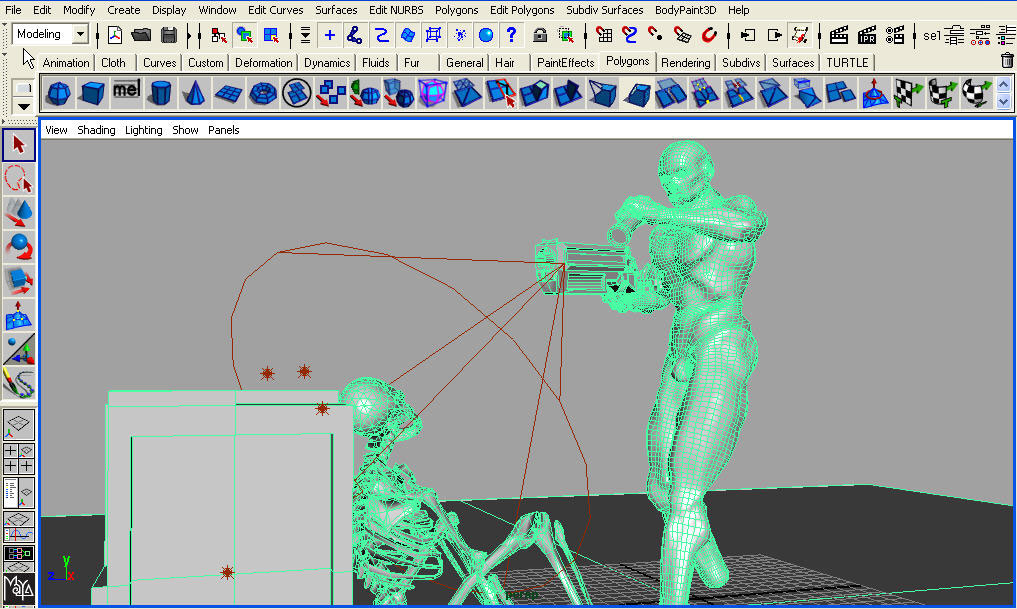
[attach=18594]Dark_Walk4.jpg[/attach]
Here are the wires.
Attachments
[attach=18594]Dark_Walk4.jpg[/attach]
Here are the wires.
you made me blush earlier in the thread…thank you very much…
love this update…how did you do the flashlight? painted on?
I like the scene setup as well…
You spoke of the nudity thing…you know, I don’t think my mother has ever seen any of my zbrush work cept for one tshirt with a face I once did…but I was always fearful to show her a demo tape of my stuff because everyone is always naked in my pics…I even annotated on one slide show it was because I honestly didn’t know how to make clothes to cover up the bodies…lol…that was a few years ago…but since then I have learned to kind of dress them, but the nude thing has been so habitual in zbrush that everyone is normally still nekkkkid…lol…but I have never seen it as a “dirty” thing really…seems like we are always trying to model that perfect body…and to put clothes on such beautiful models sometimes seems sinful in itself to me…(rambling again pointlessly ) …in my mind I guess I think all the models are wearing spandex…
I didn’t think about the nudity though till you had said something…lol…and then I looked again at the image and wondered who would be out hunting skeletons or investigating such matters butt nekkid with a machine gun and a flashlight LOL…so yeah I guess you gotta clad this masterpiece at some point…

Another kewl image and great use of your models as always…
thnx for sharing
Ron,
Thanks alot.
The flashlight effect was done (painted) in Maya using a glow effect. The lighting itself is a “Turtle” render also done in Maya. Turtle is the fastest renderer on the market for GI effects and the use of Final Gather. It is a plug-in for the Maya platform. The skeleton is an old Obj. file I have had for years. I rigged it and put him in.
Still struggling with the lighting and photon emissions. You can waste a great deal of time playing with lighting and settings. It’s got along way to go and i won’t have much time to work on it this week. I would like to have three fully armoured futuristic Marines in the final shot.
Thanx for the comments Ron.

Sorry for lack of updates…work is crazy and I have no time this week. did some head armour but have not touched the character yet.
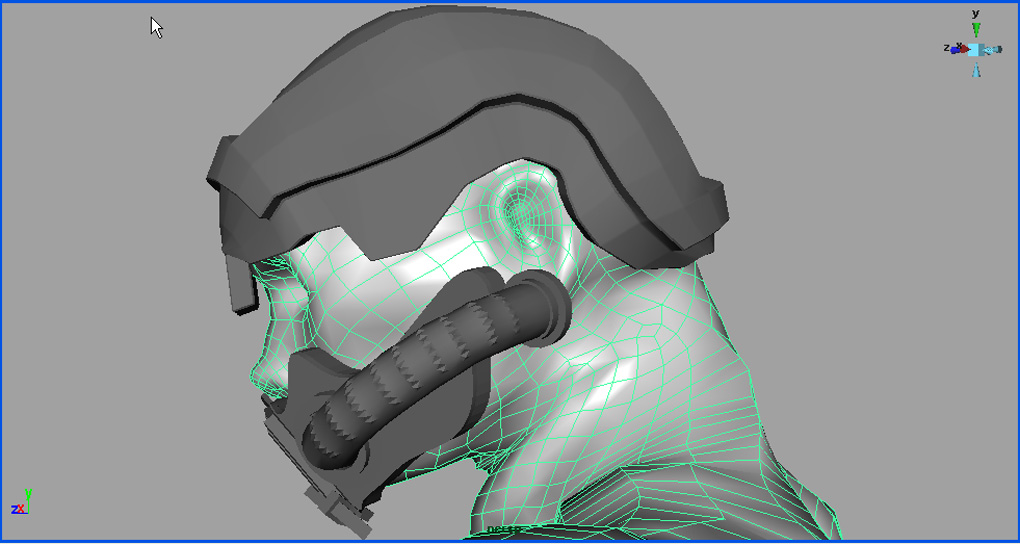
[attach=18763]armour2.jpg[/attach]
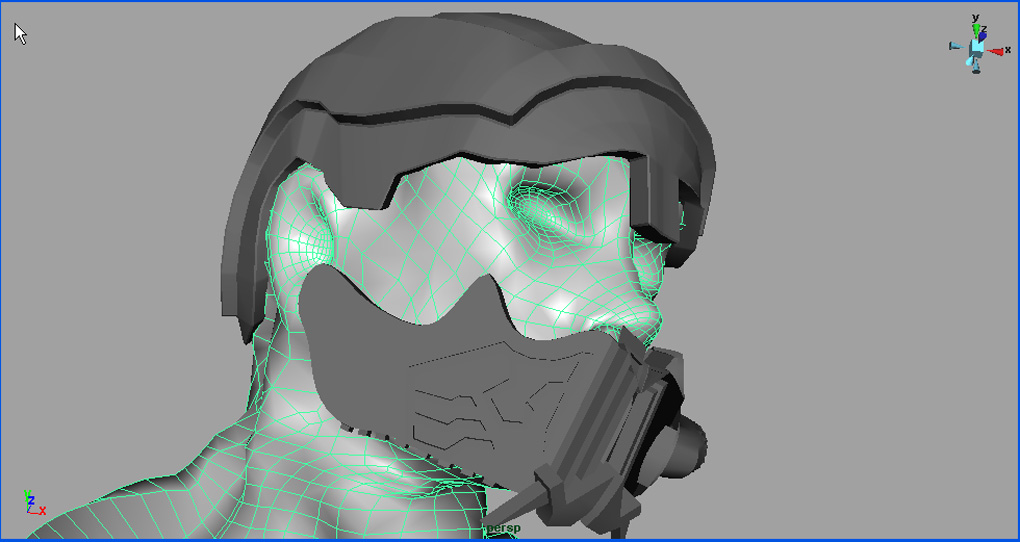
[attach=18764]armour3.jpg[/attach]
Awesome!
great stuff
Hypnotik:
Merci beaucoup mon ami.
MHS72:
Thanks alot bro.

Found a better and more accurate way to do armour today.
I did the jaw piece over and added the eye-wear.
I am using the actual edit points of the cv curves and attaching new curves over the surface made “live”.
They are then lofted and rebuilt.
Amazing work Beautiful modeling my friend 5 stars

Hypnotik:
Thanks my friend:)
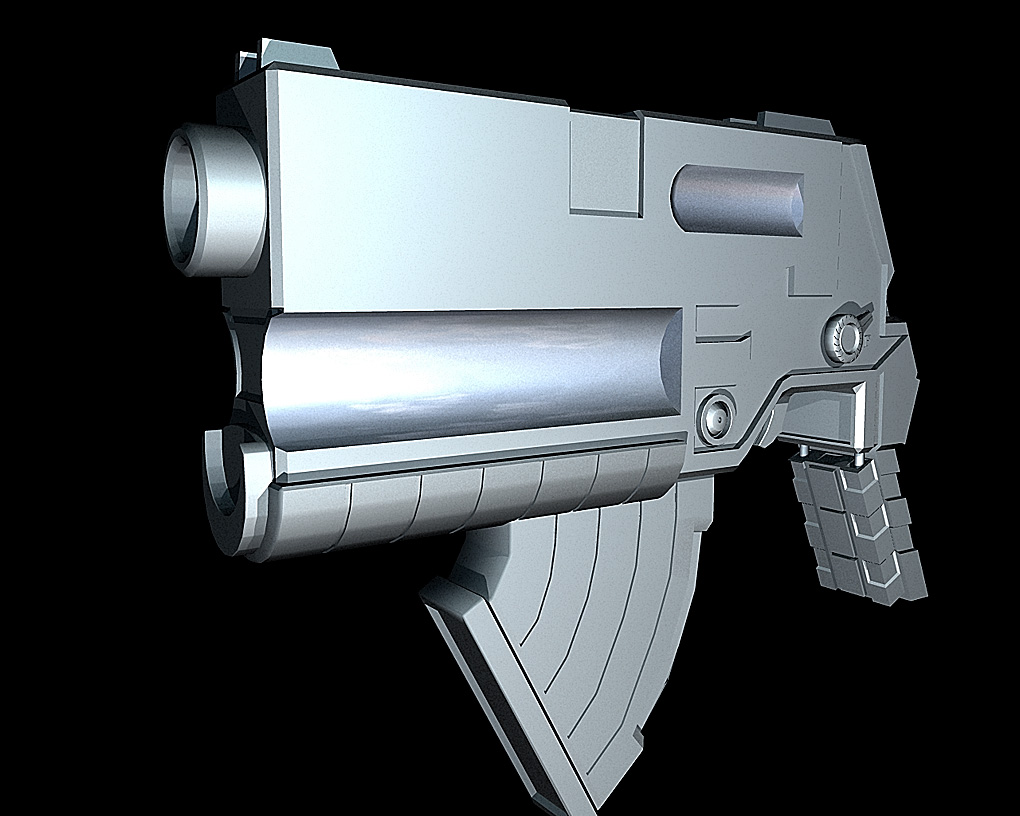
[attach=19455]gun3.jpg[/attach]
Had some time to work on weapon designs today…
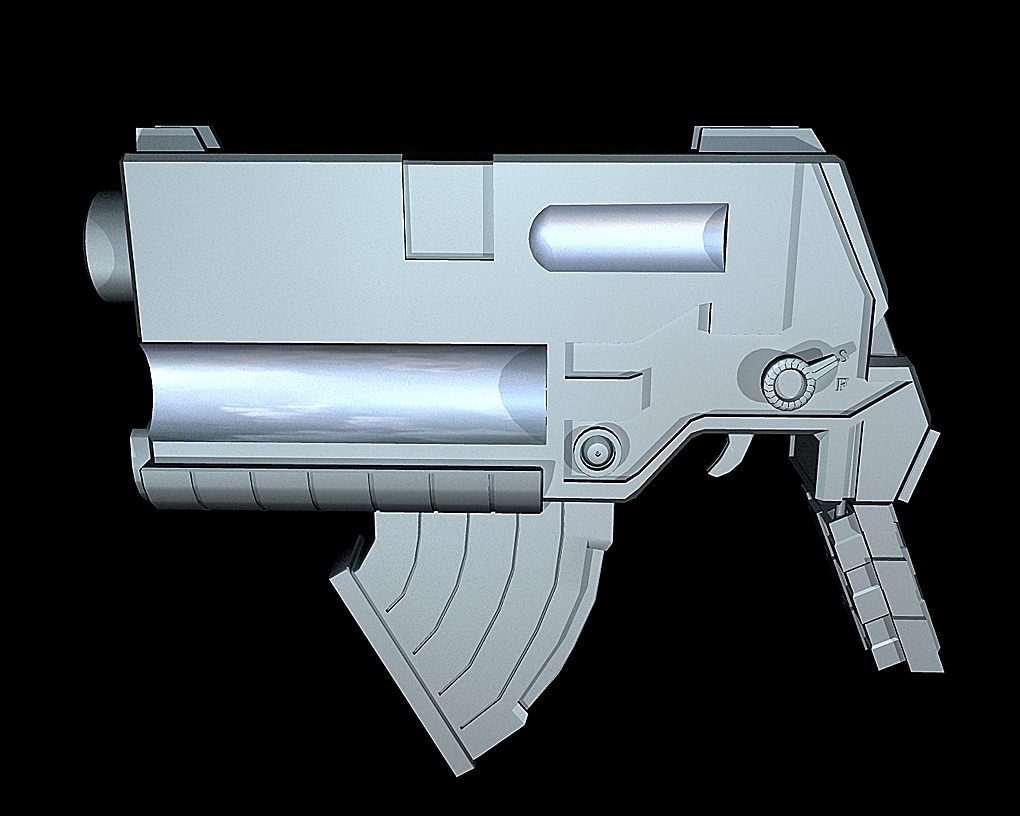
I love the new armor and head gear…apaprently the new method you found for modeling this is turning out very kewl.
I like the weapon model also. I have done a few pistol models, but your work is far superior to any that I have tried…may have to try it again after your inspirning models.
thnx for sharing and always looking forward to more.
regards,
Ron
[email protected]
Another splinter cell??? hehehe, great model are you making, greetins bro
Ron:
Thanx alot bro, have had no time to do anything, work has enveloped every second of spare time.
Your work on RENDEROSITY is really moody, great work buddy.
I have been fooling around with XSI but it’s still new.
You can set up the interface like MAYA which is cool.
Has some features that make my pipeline from ZBRUSH > MAYA
easier in terms of details.
An example is “bevel” in terms of the edges of your polygon object; Maya does not like this to a specific area once you are well into the models details. It can cause stray vertices which are the result of the ajoining borders collapsing.
In XSI you can highlight any area you want and bevel away.
Have yourself a good long weekend Ron.
IlusionDigital:
Great eye my friend. Funny cause I have never played it.
Mine will be a cross between QUAKE and SPLINTERCELL.
I find the armour so time consuming. You can’t rush it and there is no easy way to do it.
I have looked at it very carefully and found that NURB’S curves or cv curves are the key.
I will share this once I have finished, i think some other MAYA users will find it useful. Hope all is well with you.
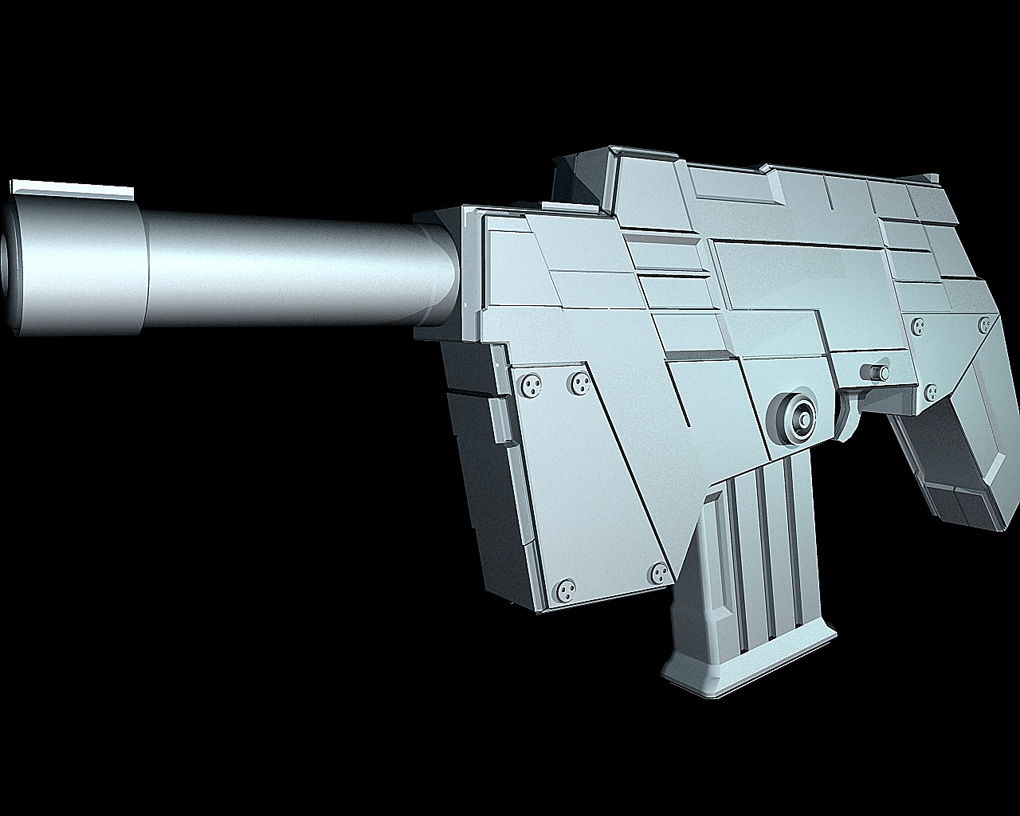
[attach=19574]gun6.jpg[/attach]
Here is another weapon design I did tonight…


Here are some free models for you guys…
Use him and abuse him.
Did this for those of you wanting to try detailing a full figure.
Very low poly around 9400 polys in OBJ. format.
Included one version without feet so you can model boots etc.
Holes are capped in no-feet version.
ENJOY.
Hey bro, very generous gift, i will use for sure
Greetings my friend

ILUSIONDIGITAL:
Your most welcome my friend, show me your results bro.
Here is another free model guys…
I added a tail in XSI, you can download it in OBJ. file format.
Good model for fantasy figures, ENJOY.
So nice tailman, only one thing bro:
ILLUSIONDIGITAL is with only one L
cheers