
Aurick.
Lemonnado,
-KDi:
Here it is… Any ideas???
The model will not let me create either displac-maps or lower the rez because of these attached edges.
I already tried to isolate them and if deleted it creates holes in the model.Thanks guys.
Have u tryied isolating those problematic faces vertices and then apply the deformation/smooth a couple of times?
Hope it helps:)
Options:
1.-If the model was made in ZBrush, be sure you have not the mask up on the model at the time of working it.
2.-Smart symmetry and ressymm aplied to lower levels in Deformatio Panel previous half mask.
3.-If the model was made outside ZB take the half and repair a degenerate and collinar vertices that always give that kind of artifacts, clean the half and mirror again that coud be made in Silo.
4.-Be sure about the displacement is not corrupted.
Just saying some tips…nothing from im sure in your specific case.
Andreseloy
Did you import it into Maya and then exported it back into zbrush… If you did then did you use “subd”, does your import option set to OBJ to Falce?
You can tweak you’r model in maya without adding new faces, but you can not apply any thing that resets the geometry…
woaouuuuuuuuuuuuuu i love this job very very fantastic  small_orange_diamondsmall_orange_diamond
-KDi, and Mr.Micro26, Andreseloy:
Thanks for trying to help me, it’s appreciated.:)
I fixed it… In case it happens to someone else here’s how.
- Isolate affected vertices go to tool-polygroup-groupvisible.
This way the problem area is seperated from your model. - Hide the problem area leaving only your model on screen.
3.Lower the rez to about 40,000 polys and then delete higher rez. - Divide model until you max out. I got mine back to over 7 million polys.
At 40,000 polys you won’t lose too much detail and you can quickly get back what you lost.
I already tried it out with projection master and it works perfect.
Hopefully the displace-map will go just as smooth. Maya zooms along at 40,000 faces and with the new Turtle renderer it should be ultra fast. Thanks again for the help guyssmall_orange_diamondsmall_orange_diamond

New guy…
still low poly of 27,000
[attach=17623]1.jpg[/attach]
[attach=17624]3.jpg[/attach]
[attach=17625]2.jpg[/attach]
Here is the rig and wires…
Attachments


Interesting to see because no one had seemed to have seen this happen before it happened to me. Unfortunately I was never able to fix the problem because it had an even more extreme issue. I had a foot control point somehow weld itself to the character’s back. I finally gave up on the model. I’ve had a few other similar problems that were fixable. I haven’t had the problem in a while but it only seems to come up with models around a million polygons or more. In case you’re interested this is the page I posted images of mine on. Just wish there was someway to edit polygons without loosing the displacement map.
http://www.zbrushcentral.com/zbc/showthread.php?t=28002&highlight=Mushroom+monster

[attach=17701]Crouching-_sorrow2.jpg[/attach]
Added some armour…
Still have the body to do, this shot is still 27,000 polys with no details added.
Smoothed out the normals for the shot in Maya.
Lighting is Global Illumination with Final Gather done in Maya.
Attachments

fantastic :eek: :eek: :eek:
Hypnotik,
Thanx alot bro.
hi, the model looks impressive, i have a quiestion, how you do the armor?, looks very nice
Hey Dave:
I’m sorry I don’t have time to give you a detailed explanation of how to build armour but here is the just of it…
This is for Maya only.
-
Make your surface live and then draw curves(360 degrees) around the area you want the armour to be> next loft the curves together and then delete the history of the new nurb loft and rebuild. You will find the rebuild setting under the nurbs drop down menu.
2.Another method…
Use the create polygon tool and map out your design on the surface of your model( make live). When done delete history and extrude faces of new poly armour. Simply move the highlighted faces outward to create volume. When exporting to Zbrush you will need to check the direction of your normals on the new poly armour and use the poly cleanup function as well. If you don’t do this step you may find your object once inside Zbrush will only have one face and be invisible on the other side. -
Make your model live as before then draw a curve in whatever shape you want on the surface. Lets say in this example we are making chest armour…
Once your curve is complete >close it > then rebuild it > and use the bevel plus function in the curves drop down menu to give it shape. This function outputs to polys and not nurbs as default and will cap both sides of the new object. Delete history and place object on model.
4.Make model live and draw curves or use create poly tool to ceate a shape on the surface of your model. Once you have your new poly shape done( output shape must be in polys) lets say in this example you want a gun belt attached to his waist belt,which goes over your characters shoulder. Draw a curve on your character in the direction of the new belt > highlight a face on the original waist belt > right click on the curve and select object mode > hold shift and highlight curve > use the extrude face function. In the channel box you can adjust the number of divisions and even twist or taper the polys that now follow the curve. this is similiar to the tool> deformation settings in Zbrush.

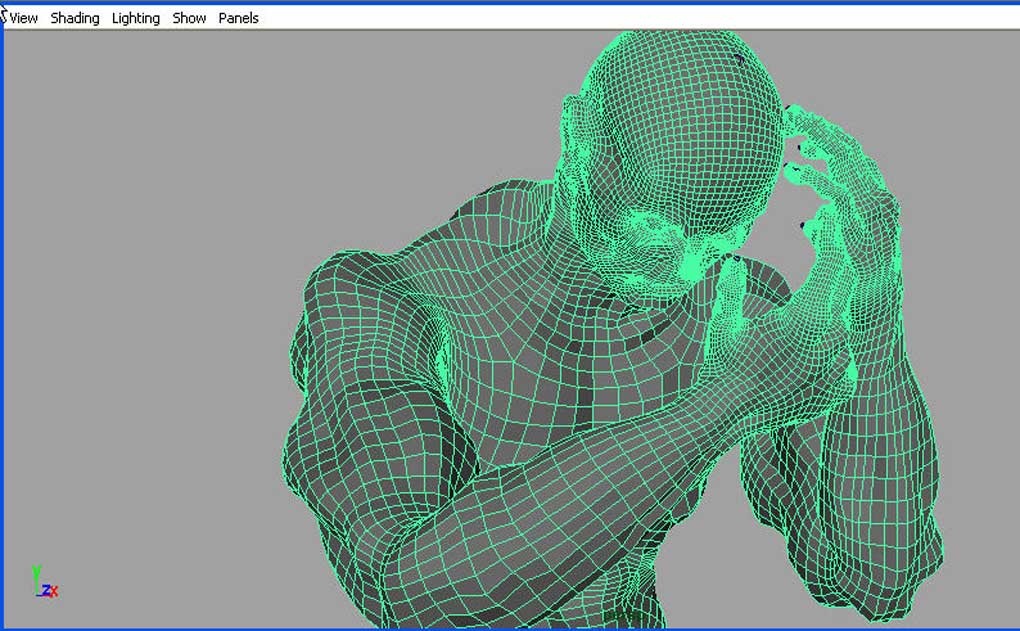
Finished the lefthand for the above character after work today.
You will not see 90% of these details but I like doing hands.
Cool hand.
I hope you’re backing up all this work … hard drives have a habit of snuffing it at the least appropriate moment. No idea why I said that … maybe a kind of premonition. I felt obliged to say it … isn’t that weird?
That is some crazy detail on those hands, man. And the guy with the mechanical stuff on him looks great too. I like that you’ve modeled in a lot of the details that most people would use a texture to bring to life. The stuff on his shoulder armor for example.
2 thumbs up from me. small_orange_diamond

Moochie:
You’re freaking me out… don’t say that.
Ok, you convinced me. I’ll back up all these files this weekend.
Replica:
Thanks bro, I’m a big fan of your work
Here is my new character with 80% of the body detailing done.
Going to re-do the armour because I suck at it.

Colour Test… not the final, just a w.i.p.