[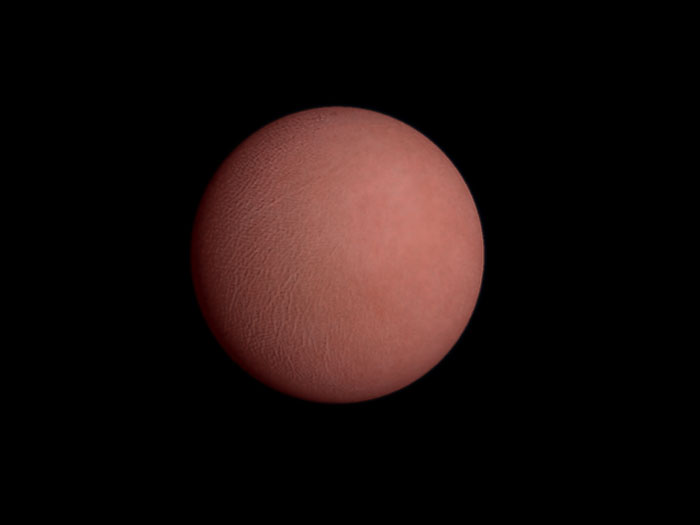 ](javascript:zb_insimg(‘39889’,‘FLESH.jpg’,1,0))
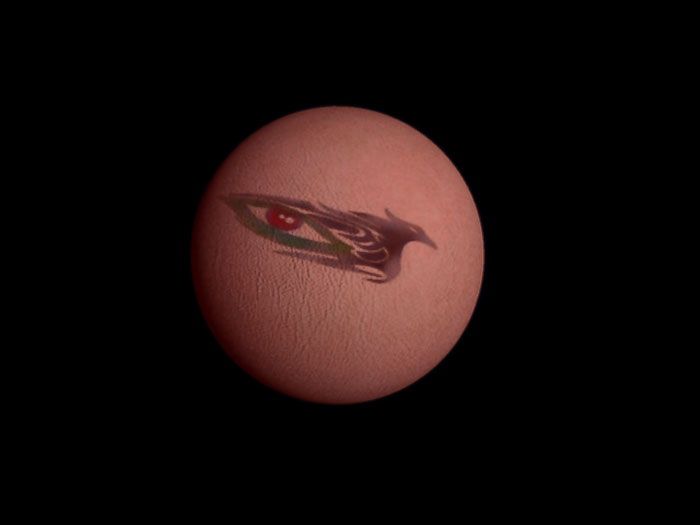
[[attach=39890]FLESH_tattoo.jpg[/attach]](javascript:zb_insimg(‘39890’,‘FLESH_tattoo.jpg’,1,0))
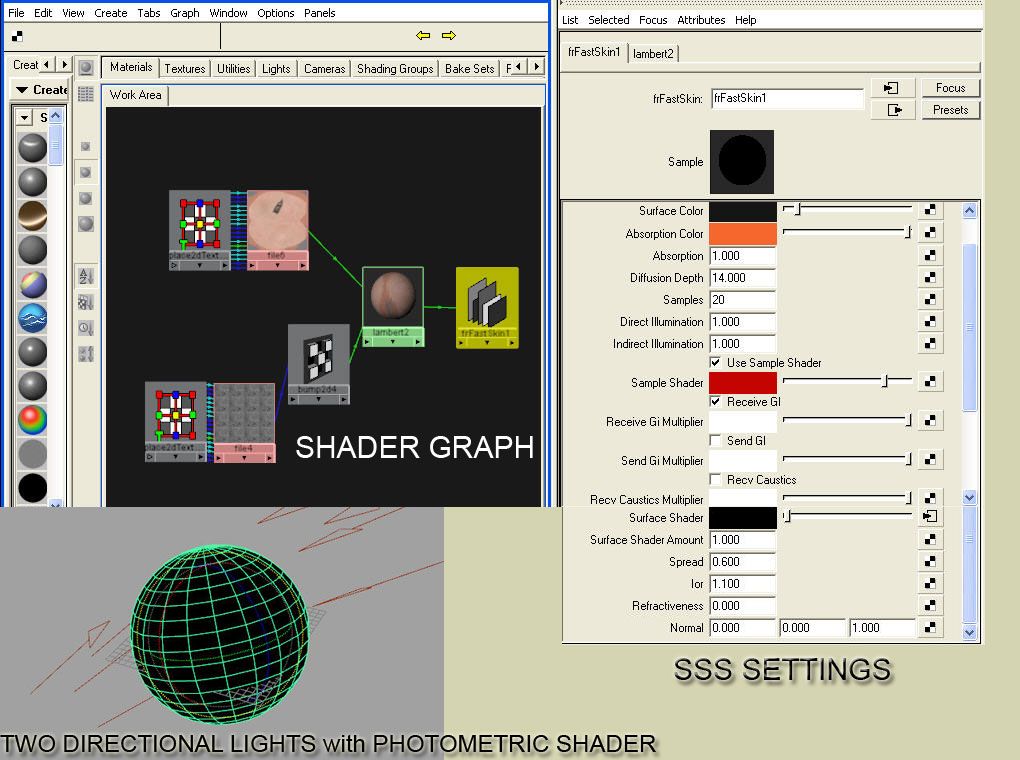
[[attach=39891]SSS_explanation1.jpg[/attach]](javascript:zb_insimg(‘39891’,‘SSS_explanation1.jpg’,1,0))
MAYA/ZBRUSHERS:
Been working hard over the last week coming up with a SSS skin shader from scratch. Here is were I am at so far.
I added the tattoo in Zbrush projection master and faded the look abit in Photoshop. Rendered in Maya with FinalRender.
I included some settings but there are lots more for the GI.
Let me know and I will post what you need.
It does not have that waxy look that Mr.Belec hates so much.
The pink colour can be softened, but this is the blood in the absorbtion layer.
Attachments
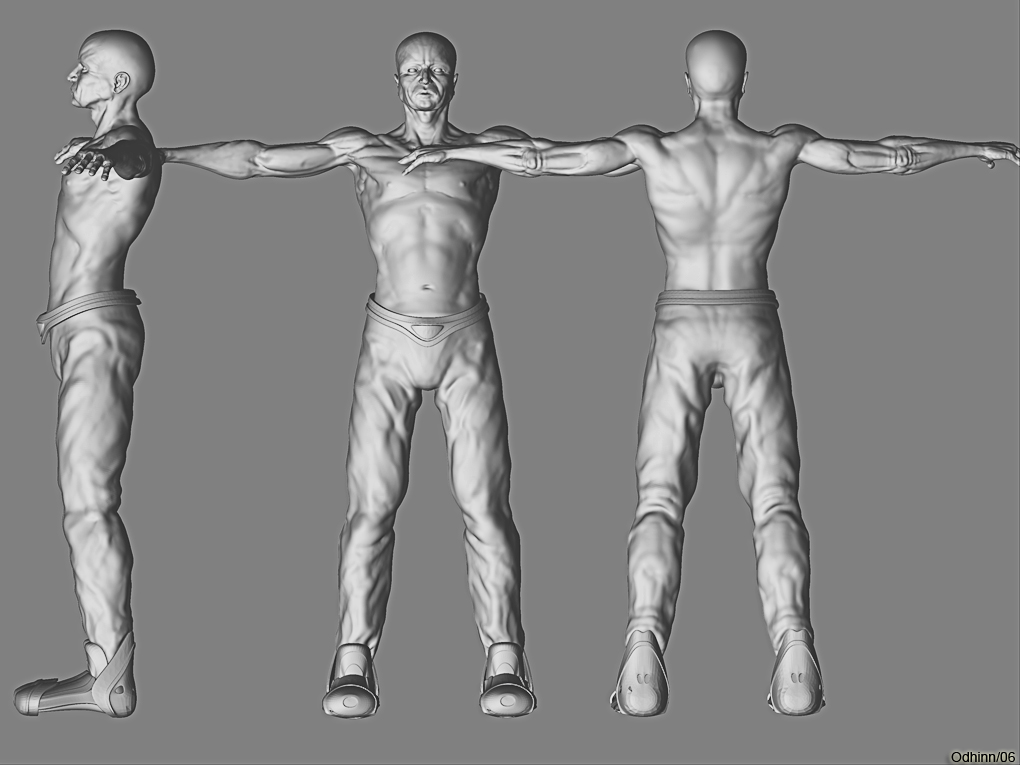
 ](javascript:zb_insimg(‘39974’,‘Anatomy_study1020.jpg’,1,0))
 ](javascript:zb_insimg(‘40033’,‘uv_mapCHARACTER.jpg’,1,0))


 ](javascript:zb_insimg(‘40092’,‘uv_mapCHARACTER2.jpg’,1,0))
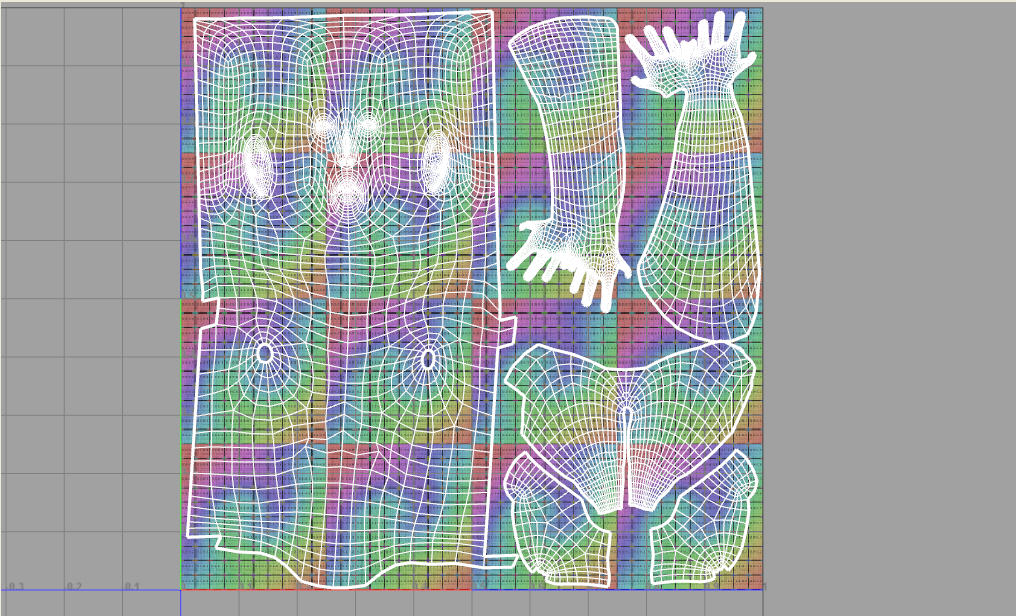
 ](javascript:zb_insimg(‘40236’,‘2.jpg’,1,0))
 ](javascript:zb_insimg(‘40320’,‘3_1020.jpg’,1,0))
 ]
]