amazing !!
can’t believe it !!
Great work, the only thing I think it needs is work on the eye specular. Eye’s actually aren’t that super reflective, I would soften the highlight very gently and mess around with the value of the spec. That’s all!
Amazing work there Big Guns, could you please post some screengrabs of 3dsmax with the setup of the shader, ilumination and render settings?, please.
Thanks so much, you deserve a job in the next avatar movie for sure! 
V.
Big guns - Congrats on the top row!
Could you please quickly explain how you were able to separate the hair for rendering? To be more specific, did you use the skin as a matte object? And are there any techniques you used when composting? I am working on a character with facial hair and find it kills render times. Any info would be appreciated.
Amazing work!
Could you please post the Material settings share the knowledge yo.Also this is f*%#ing awesome
soo realistic head… that’s awesome:D
Love it, I would definitely confuse this to a photo if I didn’t know it was done in 3D. But as I do know I can’t help but feel the ears seem a bit odd, either too rigid or too less light coming through them. Keep inspiring! small_orange_diamondsmall_orange_diamondsmall_orange_diamondsmall_orange_diamond
one more man 
Hi all!
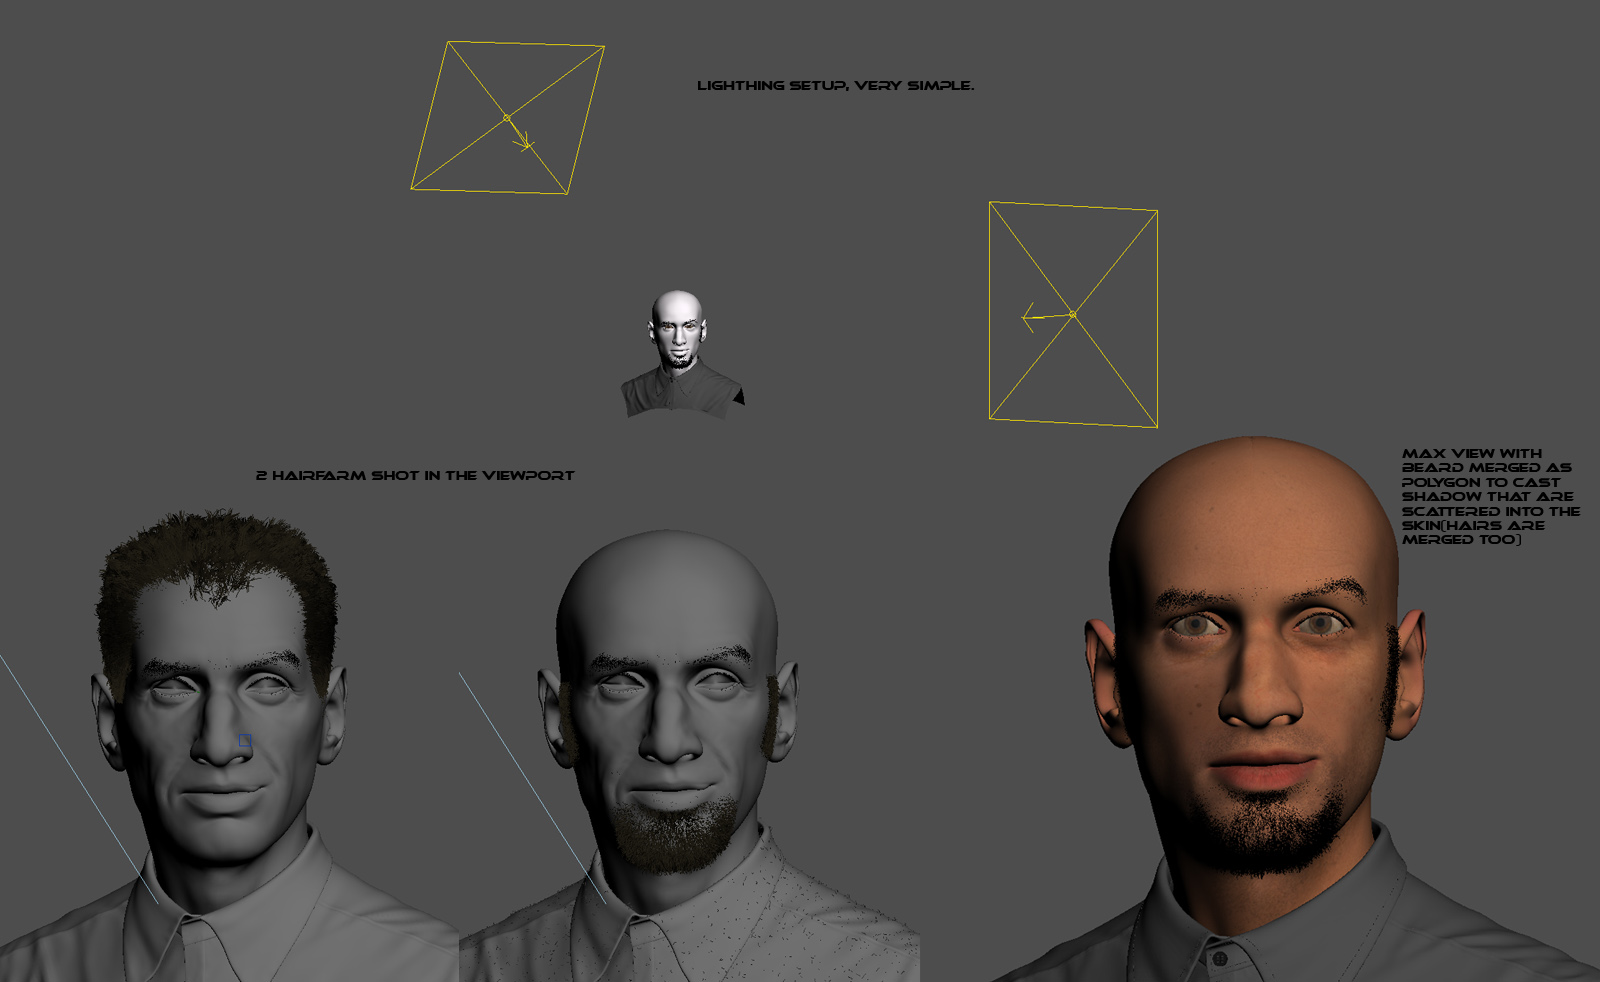
Here are some info of the making of on this character and some tips about hairs creations using hairfarm.
Aberrant: I will explain my workflow on this one. First of all, I did use Hairfarm, a fantastic plugins for max that is much more powerfull then the hair and fur in max and WAY much faster and better result,better material,etc.
First, set up your hairs modeling in a separate scene bacause doing everything in the same, as you said, it kill your renders, way better to render them separately and comp them after. Of course, you must match your lighting by placing 2 standard light at the same place as the vray light( or Mr if you used it).
So when all you hairs are done, render them ( I personnally, just for performance, had 2 scenes, one with hairs and facials hairs and on the cloths and one for the beard but you can also have all in the same scene)
Render wiht hairfam are EXTREMELY fast compared to hair and fur, on my slow pc(a core2duo 2,4) it took me 1 min rendering the hairs and 30 secondes the beards in hight quality. So I was able to do a LOT of render tests very fast and get what I wanted quickly.
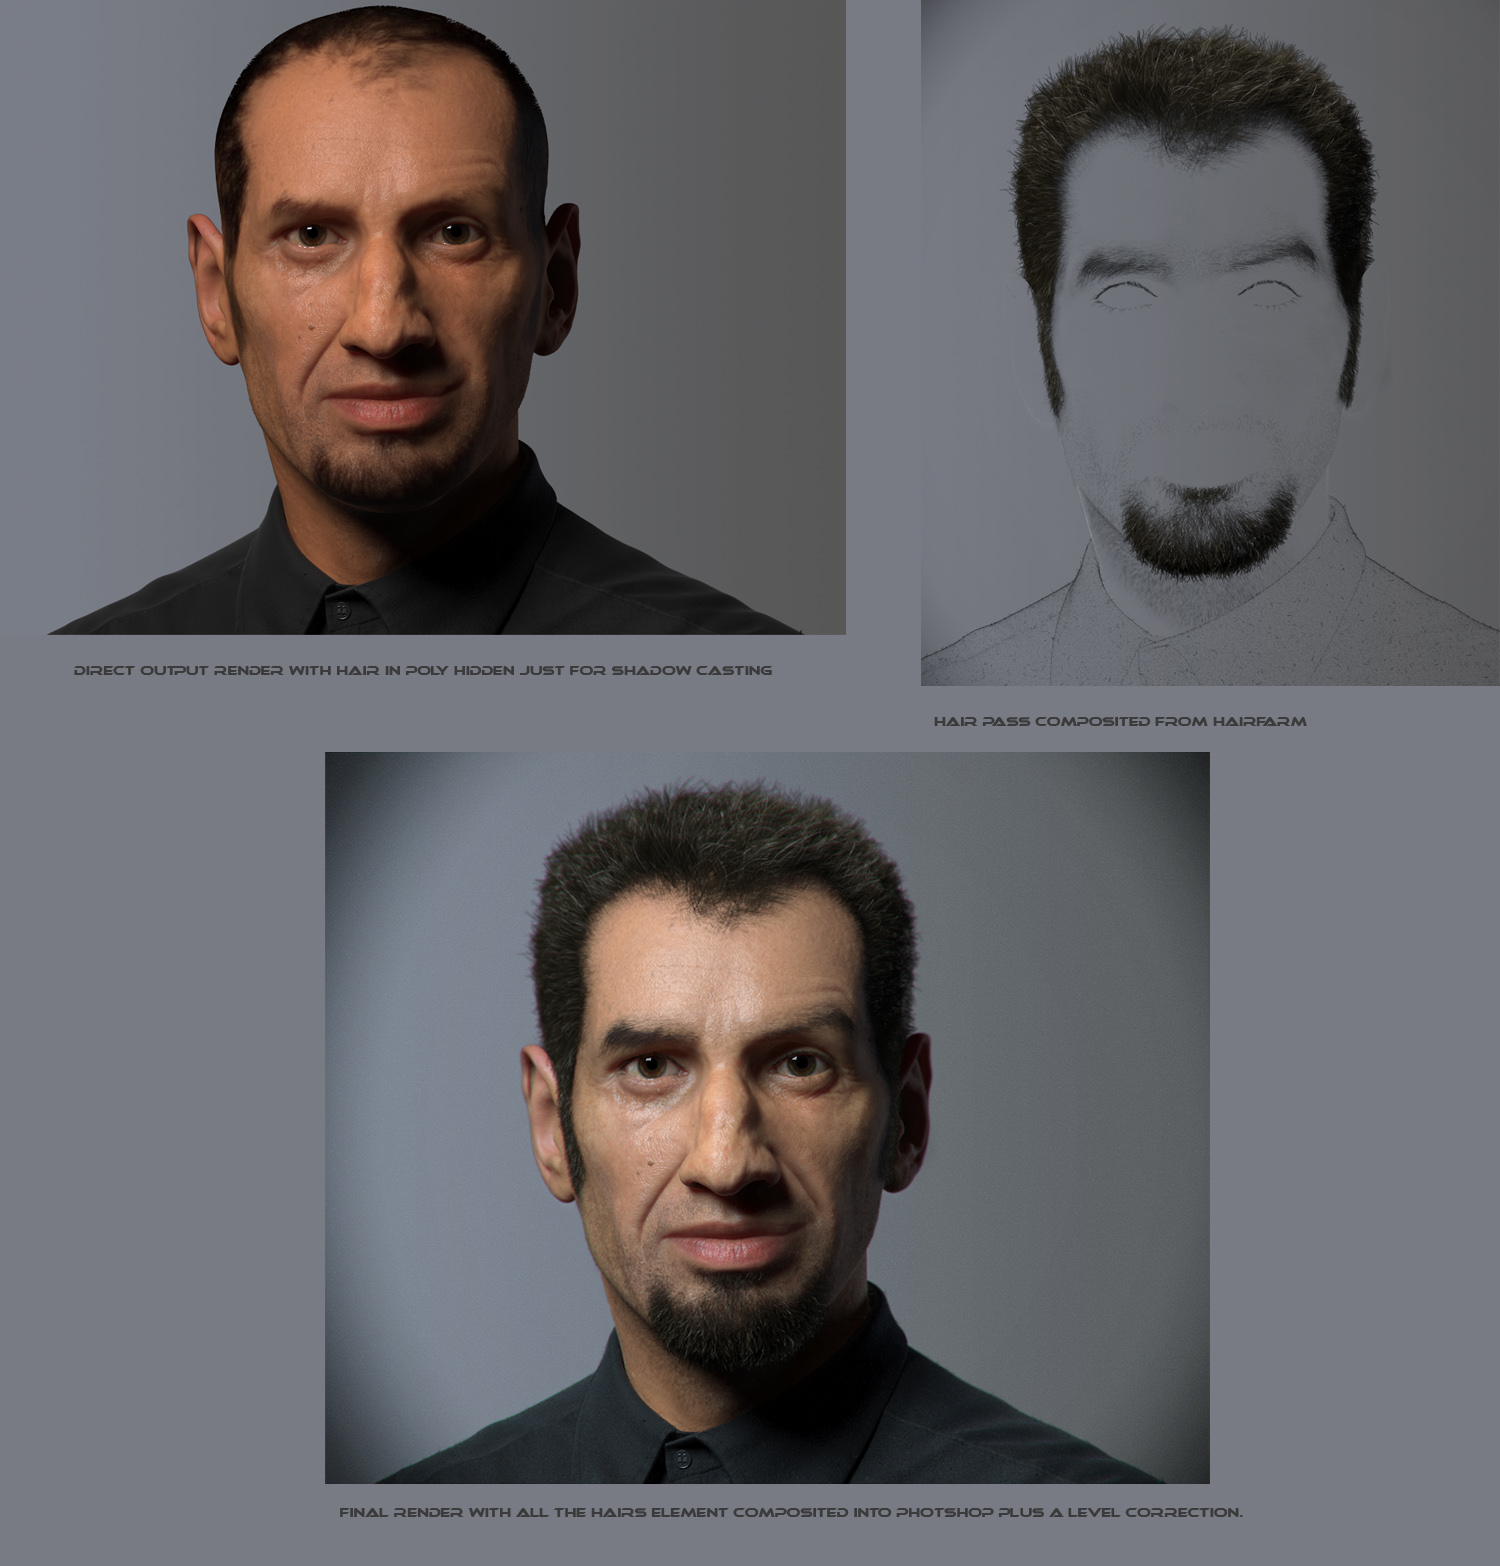
The enxt step is setting the pass with hairfarm(really simple) so a hair pass, shadow and a zdepht if you want. Save it in .png and import them into photshop.
Now, just comp them over your character render. By the way, I did converte the hair of hairfarm to poly, them export them into the scene of my character(my scene with the sss) and render the character with those poly hairs( only for the beards and hairs, not the facilas hairs etc.) the way they are not visible to the camera but still casting shadow on the mesh. that way you get really nice shadow scattered into the skin.
And now you go, just comp them and work well. 
here are some viewport grab and a little show of the comp.
[]
[]
I was just wondering these past days why this work didn’t end up in top row. Wonderful work man! (i preferred the version without hairs, but it’s only a personal thought)
Wow … That is a very deserved top row post!
The best work I’ve seen in a while.
Amazing job! Hyper realism.
Can you elaborate about the way you used Vray’s sss2 material and render settings?
Thanks for sharing !
TOP ROOOWWWWWWW. Hell yea Luc. Congrats man
I would kill for Your skin material settings Really great work, congratulations
Thanks for sharing!
But where is material editor with shaderball setting?
PS: I’m looking forward to see some girls’s portraits as well
Awesome!!!
I appreciate your work
Bah écoute, mec…
C’est du top ça !
J’ai suivi de loin mais le résultat final est tout juste excellent !
La base de ta texture est une projection de photo, as-tu travaillé un peu sur les cotés et derrière au point de pouvoir faire des rendus autres qu’en face ?
Man, that’s great !
I followed your thread a bit and I find it brilliant !
Your base texture is a picture projection. did you rework the texture at the sides and back to do another render ?
hey there thanks for quick replay.
i knew the hair wasnt native max hair. what abt the skin, the sss shader inmax as i use it i cant get much of scattering feel to it how did u do urs it looks like a photo.
did u use a real image to make the color map? and the eyes just looks awesome.
i know tht i would talk for everyone hee when i ask for a tutorial if not video atleast some screen caps.
Second that, I’ve learnt a thing or two with your tips for hairfarm. I would be as grateful if would tell us some tips for shader setup and workflow
Great work, thanks for sharing …this should’ve been top row weeks ago!