if you want “cleaner” results its better not to use the same size for the X,Y en Z axis…just do a up-sizing using the X, Y and Z axis…look for the axis that is making the mesh seem to explode…and use a lower value .
jantim
Attachments
if you want “cleaner” results its better not to use the same size for the X,Y en Z axis…just do a up-sizing using the X, Y and Z axis…look for the axis that is making the mesh seem to explode…and use a lower value .
jantim
Thank you Lemonnado for a fascinating tutorial.
I will have to create some cool Zeebles for you with my Zbrush Demo 
Seeya.
Paul.
I love this effect, it’s great!
This is a lot of fun, but for the life of me, I cant get sharp text. Could you offer advice for sharp text.
I used assorted maps of 2k to 4k on models of 2ook poly to 2million poly, smoothing etc, but still jaggy edges. I tried psd, tif, bumps, I tried grabbing my mask for alpha… nothing seems to work.
Any advice
Sorry… have not seen this for a while. The secret is:
[attach=37695]highrestext_actual.jpg[/attach]
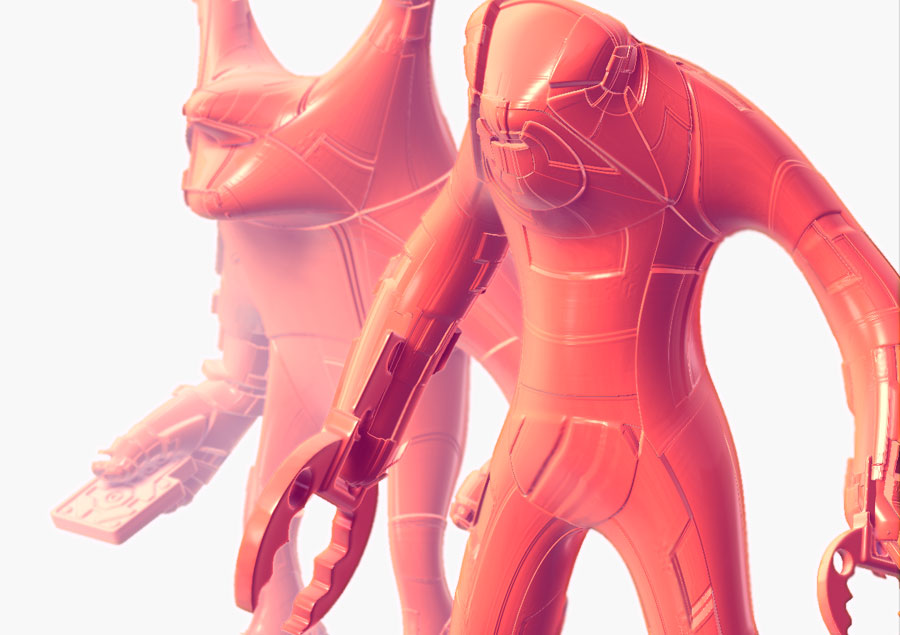
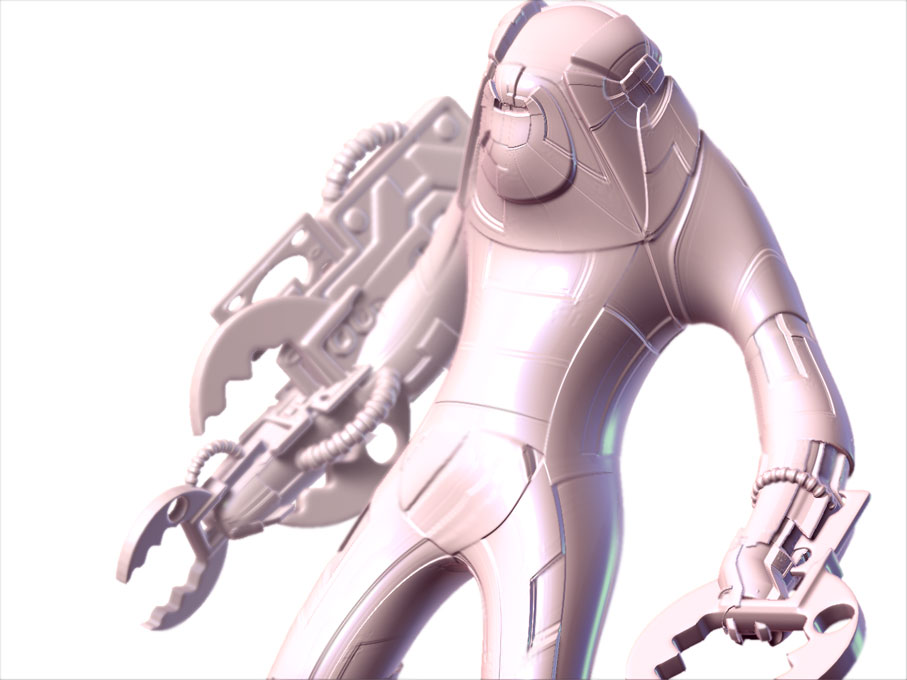
And Highres means HIGH RES. 2Mio will not cut it. One subd level higher and you are in detail heaven! For this cube I put a few support beams into my house before I dropped it onto the canvas ;-).
Besides that… Mask with 2K texture or higher… I UV mapped the 2K image onto each side of my cube. So it would require a 2K x 6 large texture to yield the same result on a cube where all 6 sides should be different… The cube itself has 6.x Megapolys… So… yes, it’s excessive…
Lemo
PS:jpg make such a mess out of the result 8-(. It’s much much sharper on my screen. To bad we can’t use .png…

Simply amazing, Lemo.
Even though all 3D apps have displacement, Zbrush can handle displacement like no other.
I really have to try and make a displacement map out of it and then have Modo or XSI try and match that… Modo with it’s sub micro polygon displacement (or so…) should be able to reproduce it… Should 8-)…
Lemo
That’s really cool Lemo! 
Gelato will render displacement maps. Which got me thinking. The whole process of making a greyscale pictures to use to control the intensity of a zbrush mask, and therefore the amount of movement of vertices with the size/inflate sliders is really just a way to do the equivalent of displacement manually isn’t it?
Spot on! That’s what the entire thread is about. Now think along the lines of surface normals and the difference of vertice displacement using size, inflate, and spherize becomes apparent.
Lemo
Just playing… Thanks to WB Yeats for the great Poem.

Lemo
Sometimes I’m a little slow to catch on. 
This leads me to the next question though. If I can easily produce a given pattern (displacement map) in a 2d fashion, then why make an uber dense mesh and “hand displace” it in zbrush? I can think of two reasons: It’s fun, and it’s a good learning experience. But why else would you do that?
I can just give the low poly mesh and the displacement map to the rendering engine and let it do the hard work and then not worry about things like curves and jaggies right?
Thanks.
Well… to apply a displacement map you have to have one first, right?!
SO, you need something with a lot of detail to generate the displacement map from. Or the Normal Map, or the Bump map… All the same, just different ‘channels’ in the render engine. The method to apply detail with an alpha brush and/or paint geometry onto the mesh is for no other reason than to be able to generate a displacement map as the original mesh would consume to much memory in the final target application. The capabilty to use maps to distort geometry in ZB is fantastic. You can even use another path than the masking technique. You can even import your own ‘painted’ displacement maps and experiment with that. Wild stuff… specially when your apply fractal noise etc… Not intended by the inventor but workable 8-). Thanks to PS 8-))).
Cheers
Lemo
Sure. Lots of displacement would be way too hard to do with just 2d painting tools. I guess I was just thinking out loud about how some of it might make more sense to do it via. other means in some cases.
For example, I have heard that all of the doors in Pixar’s Monsters Inc. were not individually modelled, but that there was one door with many different (hundreds!) displacement maps to make all of the various doors. If that’s true I would think that would have been easier to basically paint the different maps in something like photoshop rather than modelling them and then exporting a displacement map.
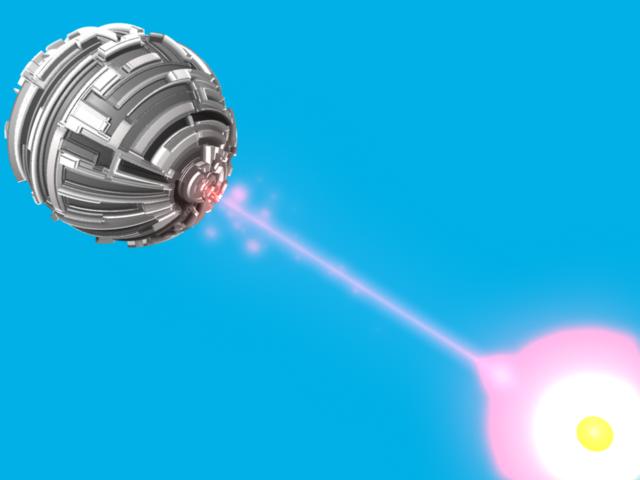
Yes, it’s bit cliche, but I was compelled to make it.
[ATT=]SphereTest.147.jpg[/ATT]
Cool animation! No end for the Zeeble fun 8-).
And yes Bill, simple stuff would work. But once you mix painting and geometry deformation you need something like ZBrush which calculates the precise geometry distortion as well as the painted equivalent. There is also the difficulty of painting DP maps manually as you have to have an image editor which allows for the file format. 8 bit depth is not cutting it…
Lemo
PS:Great idea to use it for architectural detail. That can save a LOT of vectors. Imagine a City scene where all the intricate windows are displacement vs. geometry. That can be a make or break issue.
Thanks for the reply Lemo.
I will know put my lappyto the test
Drum roll…
I have been up to 6M, but very unstable.
Cheers
Check that you have correct memory settings in the preferences… I had it at 2GB as I have a lot of ram. But it deos not seem to work that way. After I reduced that value to 1GB all is good and I even get 8GB out of the poor thing.
6MP was very unstable with the wrong memory settings. Now It’s cool.
If you can use a plane then it would work with 1MP and you could assemble a cube… Just a thought (tedious… yuck…)
Lemo
Lemo, just wanted to have a look again at your tutorial for the mac 
Thanks,
I’ll try to lower my ram to 1gig.
Cheers
![[ATT=]SphereTest.147.jpg[/ATT]](http://javascript%3Cb%3E%3C/b%3E:zb_insimg%28%27%27,%27SphereTest.147.jpg%27,1,0%29)