ZBrushCentral

ZBrush to Maya Texture/Displacement

I’ve been trying to fix some issues for almost 2 weeks now, and I’m really stuck. I can’t figure out if my problem is the Displacement settings from Zbrush, my render settings in Maya, or even if it’s the way I laid out my UVs early in the project.

I created a model (Human figure) in Maya 2011, and exported the OBJ to Headus UVLayout. I pelted the whole model in UVLayout, then took it over to ZBrush for polypainting and fine sculpture. I’ve been using Maya for a while now, and I’ve learned/used a little ZBrush in the past, but this is my first time trying to bring a sculpted (displacement, texture or normal/bump) back to Maya for rendering. I’m trying to add something new to my reel and start applying for jobs, and this has been eating up way too much of my time.

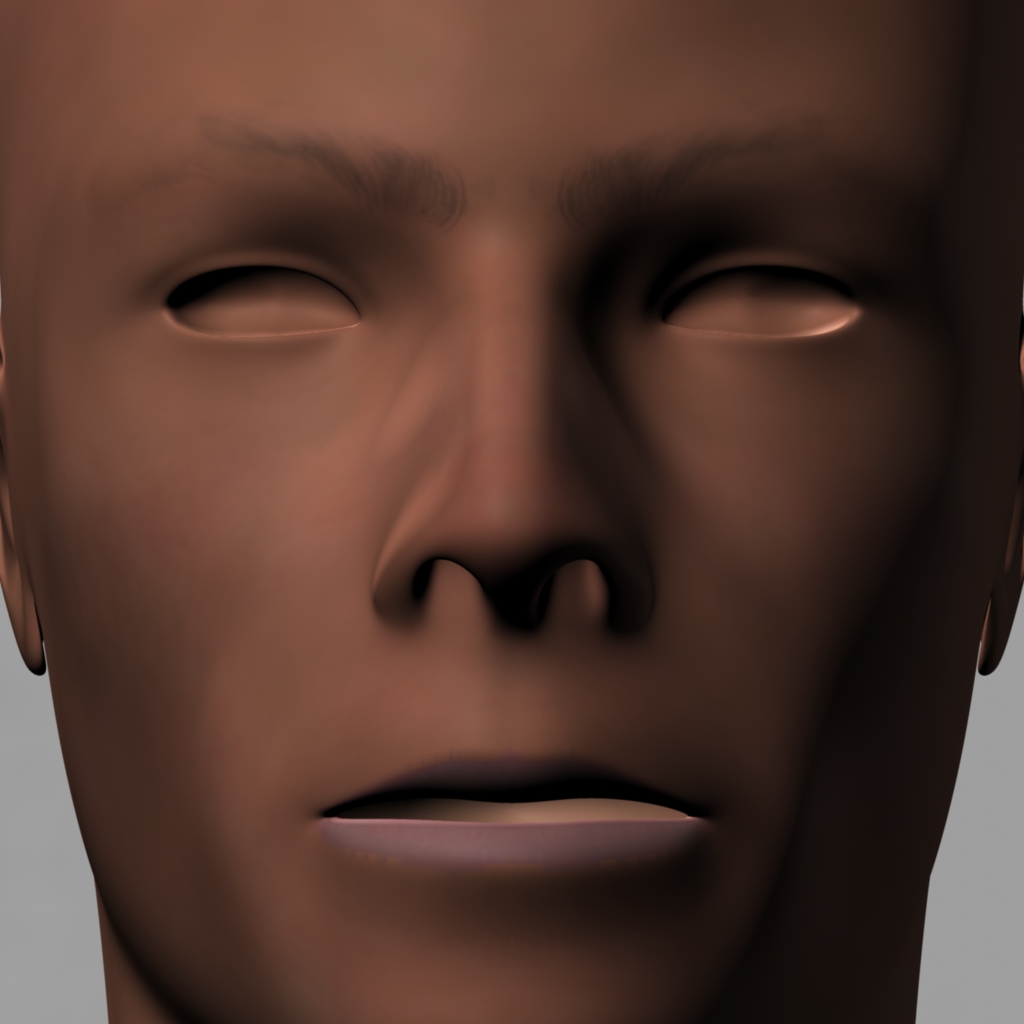
Original model from Maya:
crit1_face.jpeg
I could probably put Depth up to 0.06 or 0.07, but it still feels like it’s a ways away from the ZBrush render, and I doubt the problem is strictly with Maya’s bump map setting.

Changing the Approx Method in Maya from Parametric to Spatial seems to make some tiny difference, but they’re basically producing the same results.

Since this is really the first time I’m doing detailed sculpting in Zbrush, then exporting it into Maya, is there anything that sticks out that I’m doing wrong, or are there any tips you can give as to the workflow between ZB and Maya (with regards to the gaming pipeline)? Is there some setting that is limiting displacement to a certain number of disp levels? Should I always assume the I’ll need a bump map because the DM can’t get to wrinkle-fine detail without hundreds of millions of polys?

I’m tearing my hair out on this now, and would love any kind of insight I can get.

Thanks,
Rory Fitz-Gerald
Character Modeler

Attachments

crit7_Maya_head.jpeg

inca_3.jpg

crit5_lips_Tex.jpg

crit6_Maya_head.jpeg

My problem is similar to yours

Okay so I am a medium/noob (I have experience but new to bringing stuff BACK into Maya from Zbrush) I have been trying to figure this out for the past 4 months, none of my teachers know what the problem is, my university is crap, and I should just go to Vancouver Film School lol, The following are some problems that are going to drive me to throwing my desktop out the window:

I am using Windows 7 64 bit, Zbrush 4, AND Maya 2011
I have been trying to do the tutorials step by step ones from CG bootcamp, others from this forum, and gnomon. Every time i try the displacement either doesn’t work, I loose detail, or my model just disappears.

I create the displacement map 32 bit adaptive, and Smooth UV’s. I hit GoZ on my model it goes into Maya throws it in there, looks all good with the high quality rendering, I use mental ray to renter. No Model, “wtf” I go into the approximation editor i see that GoZ has turned on my subdivision approximation node for the model, So i turn it off, Render, the model appears.
WTF, I want the subdivision approximation for the subdivision’s at render time with mental ray. I tried using the Displacement approximation, which yielded no visible results.

I would like to learn how to do the displacement workflow without using GoZ because GoZ switches on settings.

So i tried to use a tutorial. From CG bootcamp, awesome tutorial on displacement. There the dude mentioned, that mental ray doesn’t play nicely with tif files. So he said to download a .bat converter to convert the tif file into a .map, also had one for a .exr format, He drags the file onto the .bat file and a converted displacement.map appears on his desktop. (is it cuz I am using a 64bit os?)

I did the same thing…nothing happened…other than the cmd window appeared for a brief second. So I tried to just skip that step and use a tif anyway. my model ended up looking like it has been shot with a Gatling gun, and then went through a cheese grater.

I thought maybe its the color balance settings under the displacement, i moved some stuff around, it made it look like the model was very obese. (which wasn’t what I modeled)

Please help me, I am desperately trying to figure this out, after 4-5 months, no success. GoZ is great an all, I just want to know how to do get the displacement map workflow, with a .map file. or if theres any work around, besides throwing my computer out a window haha.

Please help me anyone.

i’m having the same problems, Have you guys tried up’ing the res of your UV’s to over 4096, I am going to try this today…Some one answer this POST!!! Please!!

Midi

Hi guys,
Through my struggle with these problems, I might be able to shed a little light for you.

Arthur: I’ve had the best luck with just exporting to .ma and opening the file in Maya directly.
Usually from there I had to turn down the Specular and Reflection on the Material, add lights, and adjust render settings (Like bump mental ray quality to Production). To get that extra detail I was missing, I had to link in that secondary displacement map I exported from ZB (The one generated for subdiv level 4 to 6) into the Material under Bump.

I’m still not really happy with the result, but it’s better than nothing. I may have to end up doing some hand-painting of the displacement/bump maps to get stuff to look decent, but I’m still quite annoyed that I can’t find a solid tutorial or walkthrough on the Maya -> Zbrush -> Maya pipeline, when working with a relatively low-polygon model, and adding really high detail. If anyone knows of one, that deals with the troubles of high-detail displacement and bump maps, that would be super awesome! Everything on google I’ve found has either been too simplified, or is outdated (pre 3.5r3).

Midicon: I tried generating 8k texture and displacement maps, and it didn’t seem to make much change in the detail of the DM, or the texture problem in the texture - and would sometimes crash Maya because the image files were so big. HOWEVER! I think I found out why I was getting the texture blockiness when generating the texture from polypaint. I was going over the UV Map in Maya to see if anything was causing an issue. Lo and behold, when I had pelted the face in UV Layout, cutting out the lips for a better fit, it stiffened the UV edge there. I must have overlooked the fact that it crushed those UV faces down to almost nothing. Ultimately, after I brought the OBJ into ZBrush, I was trying to paint high detail into a very very small UV space around the lips. I’m in the process of bringing the adjusted UVs back from Maya into Zbrush a repaint the lips, I’m pretty sure that problem will be fixed.

The lesson? Triple check your UVs in Maya before exporting the OBJ to Zbrush (if you’re not planning to make any UV adjustments in ZBrush). If UVs aren’t spaced out properly, you could be running the risk of crushing some high-detail polypaint into only a few pixels of UV texture when generating your texture map.

Hope that helps a little - and let me know if you’re found a better way of getting that high-detail sculpture to show up in Maya.

Rory

Thanks a lot for your response, sophistry it actually helped a little.

Well I am also having trouble with Maya and 32 bit displacement from Zbrush so I am really in the same boat as you guys as far as that goes…but I can tell you that if you copy the imf_copy file from the maya bin directory and place it in the same folder as the conversion scripts made by cg bootcamp it works. I suppose you could put those scripts in the bin directory of maya but then you would have to move your disp texture in there and look for the converted exr in there as well. Just to be safe I copied all the imf_… files including the dll but I think the scripts will work with just the imf_copy.

I really wish someone would post a current tutorial on zbrush 32 displacement and Maya 2011....cause the cg bootcamp seems to work fine with maya 2009 but something is different with 2011....I.e. the alpha gain/alpha offset does'nt behave the way it does in that tutorial. Edit: Nevermind I figured it out....my problem was displacement couldn't capture all the detail on its own I had to use a combo displacement and normal map and now its rendering perfectly. Can't use Goz though as it only outputs 16 bit disp. Maya 2011 and zbrush 4 work better now as you don't have to mess with the maya alpha gain slider at all. There is a thread on this in the OLD questions and troubleshooting section. I guess I should learn to use the search function properly and start from there.... :o

and let me know if you’re found a better way of getting that high-detail sculpture to show up in Maya.

The best solution I’ve found is to use Mudbox.
Don’t get me wrong - I love ZBrush, but Mudbox works much better with Maya.
After a few months now of working with ZBrush I’ve come to the conclusion that in spite of GoZ, ZBrush is still made mostly for working with itself. :wink:

Though switching off feature displacement in Maya helped a little… Will now check that my UVs don’t have too small areas…

Anyhow, where’s the Zbrush crew? Why aren’t they responding to this thread? Hellloooo?

Nizan.

Unfortunately lwguy, you’re probably right, and I’m planning to pick up Mudbox in the future when working on Maya projects. However, I don’t have time to switch right now.

BSF: I had half-decent results using a Bump map on top of the disp map, I’ll have to try a Normal map. Do you have a link to the specific thread that helped you?

really? I haven’t tried it myself, but a lot of my teachers said that despite mudbox being an autodesk product it is difficult to work between maya and mudbox

This thread has some general information about 32 bit displacements…
http://www.zbrushcentral.com/showthread.php?t=84470&highlight=displacement
Although in zbrush 4 you can use adaptive and DPSubPix…

So the best result came for me when I created a displacement map for the subdivision levels that changed the profile of the model. Meaning I stepped the subdivision level up from the lowest level until the the subdivisions no longer had an affect on the outline of model they were just adding surface details to the model (usually 1-3 Levels)....then delete higher subdiv levels. I then created a displacement map for these levels of subdivision with the following settings in MultiMap Exporter: Subdivision Lvl 1 Adaptive DpSubPix 0-2 (probably dont need this being that I creating a pretty low disp map) Smooth UV Mid 0 3 channel 32 bit Hit create all maps....and save the tiff...... Note: Being that I am using a normal map for the really fine details I could probably get away with a 16 bit disp map....but the above settings were producing ALMOST all the detail I was needing when I was using just disp maps....with a 4k texture. For the Normal map: I hit undo until I get my previously deleted sub div levels back. Or load a saved tool with these levels intact. Then I switch to the level that was the highest when I deleted the higher levels and hit delete all lower subdivision levels....so I left with levels 3-6 for instance....Then create a Normal Map for these levels with the following settings in MultiMap Expoter: Subdiv lvl 1 Tangent Adaptive Smooth UV Create Nrm map and save as Tiff Use the Imf_copy script from cg bootcamp or use CMD to navigate to Imf_copy and execute it that way (the script is much easier) and convert the tiff displacement map to and EXR file....Maya does not like 32 bit tiff files so this is important. The normal map is fine as a tiff (EDIT: Mental Ray can run into memory problems with large Tiff's so you might as well convert them to .map files) In Maya 2011 (from cgbootcamp tutorial): Import low res geometry Turn off feature displacement. Soften Edges in "Normals" menu Mental Ray approx. editor> Create subdivision approximation node change settings to: Approx method: spatial Min Subdiv: two lower than your max subdiv Max Subdiv: depends on your model in zbrush in the 2-6 range Length: .01 to .001 depending on the level of detail you need Fine: on Again these setting are overkill if your using a normal map too but they almost captured all the detail I needed. In hypershade: Hook up your disp map to the shading group for the material and turn off filtering....no need to mess with the alpha gain/alpha offset anymore. Hook up your Normal Map to the materials bump input port....load the nrm map THEN change the setting to Use as: Tangent Space Normals (Bug...it will crash maya if you are using mia_architectural_x and you change to tangent before loading the file) Change your renderer to Mental Ray and adjust your render setting accordingly...Give her a shot... I am no expert by FAR...these settings are just what worked very well for me...Good luck;) As far as mudbox is concerned I have not used it so I cant really comment except I think the issues come from mental ray and not maya....meaning mental ray seems to be more trail and error....so I don't know if Autodesk>Autodesk can have a whole lot to do with it cause its more Autodesk>Mental Images or Pixologic>Mental Images.....I dunno though I might be wrong...

hey there,

tbh going for super high subd lvl in maya doesnt have much point
so what u did later was good: to go to 3-4 subDs in displacement
and then genrate normal map for highest subdlvl
(i think u did wrong just cause u used classic bump, not tangent space normals)

and about seam on forehead:
this most probably happened cause when ZB exports maps and it smooths UVs
it have NO FREAKING OPTIONS FOR THIS and exports smooth uvs BUT with
keeping uv borders str8 ! on the other side, subD metal ray node does this
with smoothing UV borders, so this will not happen when u have pretty much
str8 borders in uvs or if u have enough high dense model so uvs doesnt change much when u smooth them regardless of keeping borders or not

there is option to keep borders in MR node BUT it also have most ****ty bug and increases your render like 5-6 times !

so lets just hope that ZB guys will add “smooth uv borders” option

Thanks a lot, Luigi, that was very helpful. I’m trying Normal on top of Disp map now. A question I have is, how do I know how many levels the Disp map is exporting? Is there a setting for it that I’ve missed?

I’d rather know exactly what I’m exporting, so I can know where to start with the Normal map.

I’m trying to maintain my UV layout from Maya, and not have anything smoothed or modified. The head seam was weird, but will be covered by hair, so I’m not too worried about it for now.

I’ll post up again in a few days showing my results.

-Rory

Save your tool…then delete all the higher levels of subdivision than what you want to create the displacement map for…create a displacement map…then load your saved tool with the levels not deleted…move to level that you were on when you deleted all the higher levels…and delete all the lower levels of subdivision…then create your normal map…

Now you have a displacement map for the lower levels of subdivision and a normal map for the higher levels…

I have not been able to control these through any MultiMap Exporter settings but if someone has a method too do so please post it…Thanks!

Not at all. You can get issues when you try to send an object that has extreme largeness or smallness to Mudbox through the menu (sort of like the GoZ plugin does), and you can’t send it back the same way without it wanting to create a new Maya scene (unlike GoZ which opens a new Maya instance), but there are ways around that.
Otherwise it’s pretty much the same thing, no particular issues or strangeness between Maya and Mudbox that I’ve yet seen.
What’s especially cool though is that with Mudbox you can create as many sculpt layers as you want and when you send the object to Maya each of your sculpt layers can be sent as blendshapes and the opacity sliders become morph target controls.
ZBrush could really stand to have such a feature.

I much prefer sculpting with Zbrush though because honestly in that regard, ZB kicks Mudbox’s @55.

But anyway, I don’t want to hijack this thread, so no more Mudbox talk. :slight_smile:

And even though I didn’t start this thread I want to thank all of you who typed out this great advice for getting good displacement maps from ZB. That’s been an issue for me as well.

BSF: Your last two posts are really helpful, thank you so much. I actually missed the previous one before I posted my response to Luigi. I’m going to try a few different methods to see what works, but this info is very useful.

Your very welcome! :smiley:

Hope it helps some…be sure to post your results!! :+1:

Noob question: how do I convert the .tiff file in .map on Mac???

:confused:

Hmmm…you could try:

IN Maya
Window > Settings/Preferences > Rendering > Use optimized textures (auto-conversion)

Runs Imf_copy in the background at rendertime and stores them in a temp file…Other than that I don’t know…sorry I’m not much help but I have never used on Mac

I’ve been wrestling w/ these issues also, and unable to find a clear, current tutorial on the process of creating the maps using GoZ and importing back into Maya. After struggling w/ this, its apparent that it’s more complicated than hitting GoZ. Very frustrating- I would think people would want to know how to render their images outside of ZBrush. It seems the SubDiv Approx settings are crucial, and need to be adjusted according to the individual image. If anyone knows of a new tutorial covering this, please respond :wink: