Isn’t what you actually want to do there create a new polygroup of the 4 polys, and then extrude that out? (Just trying to follow the new workflow)
I know I can delete them and bring them back holding shift…???
My contribution to this thread is probably very little and very basic to most but I thought I’d share some array and nanomesh things.
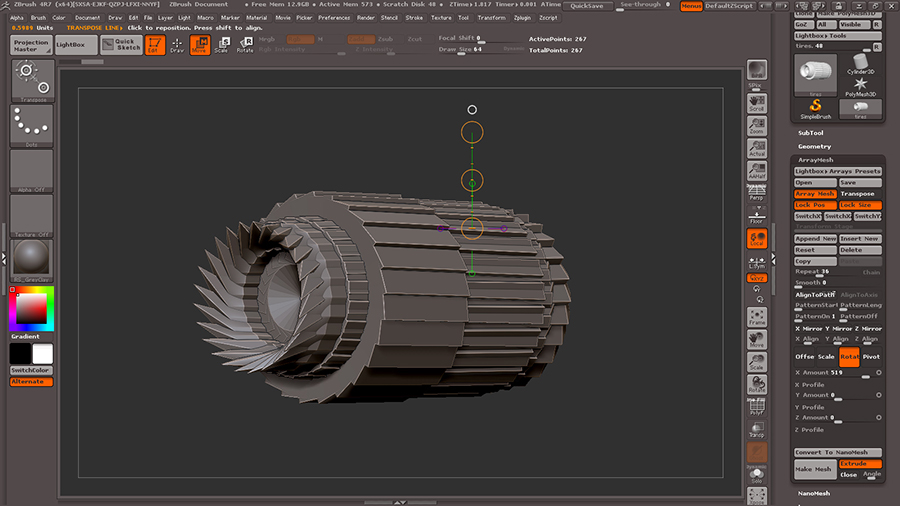
After you have created some random object and used a profile from the array presets if you turn off transpose in the array tab you can use the transpose
move line to manipulate the object further.
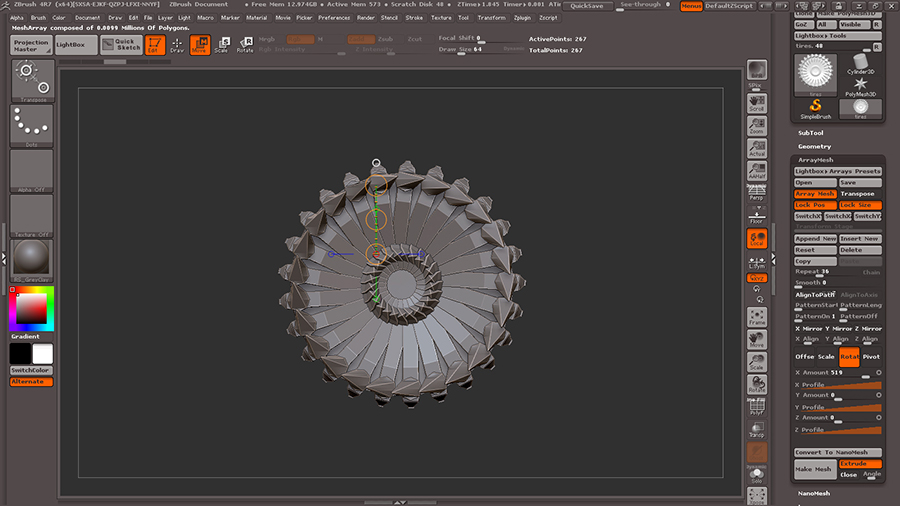
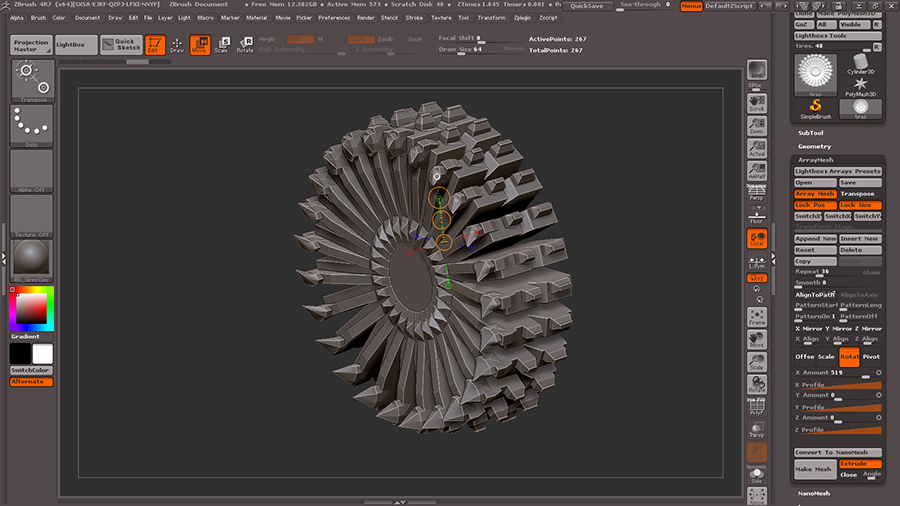
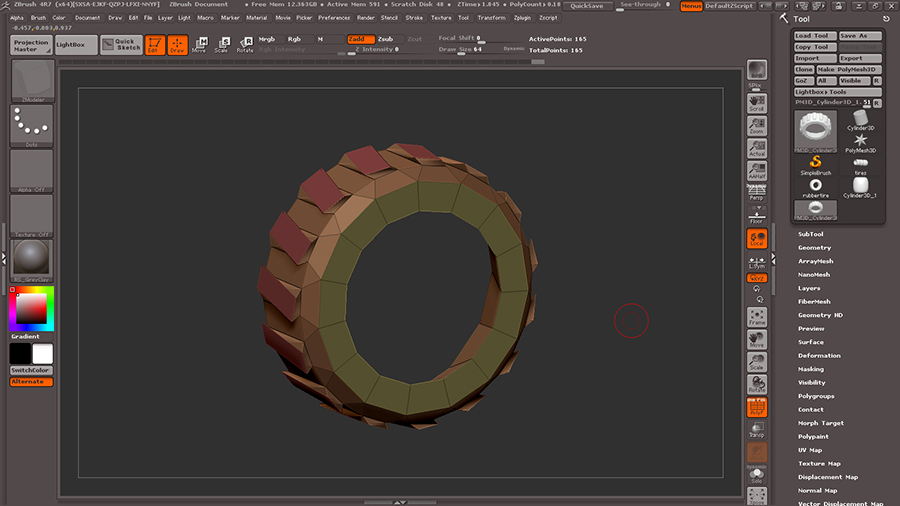
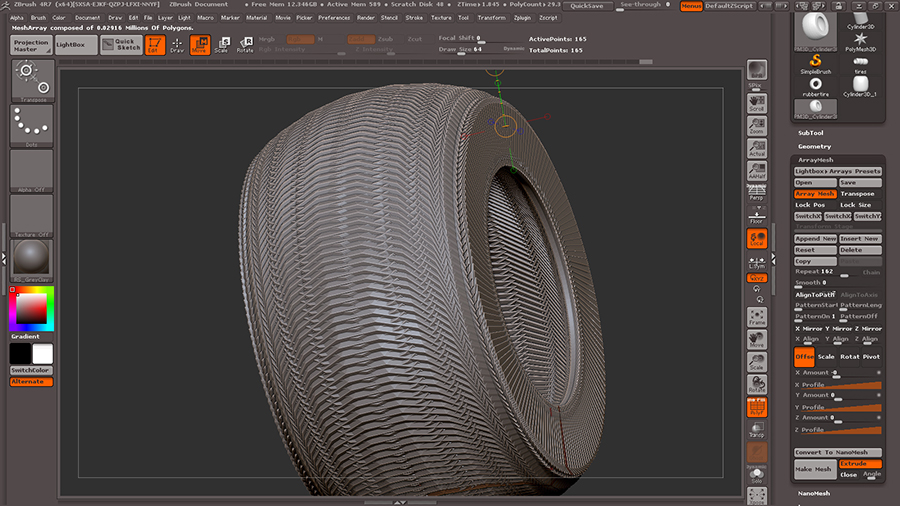
Some objects that in your head start out as something different after playing with the array mesh presets. I modeled a quick and dirty mudding
tire, mirrored it on the Y axis and pulled it out with the transpose line and applied the array tire prest with a high repeat.
Thus giving me something way different than what I planned, or as I like to refer to it “a happy surprise”.
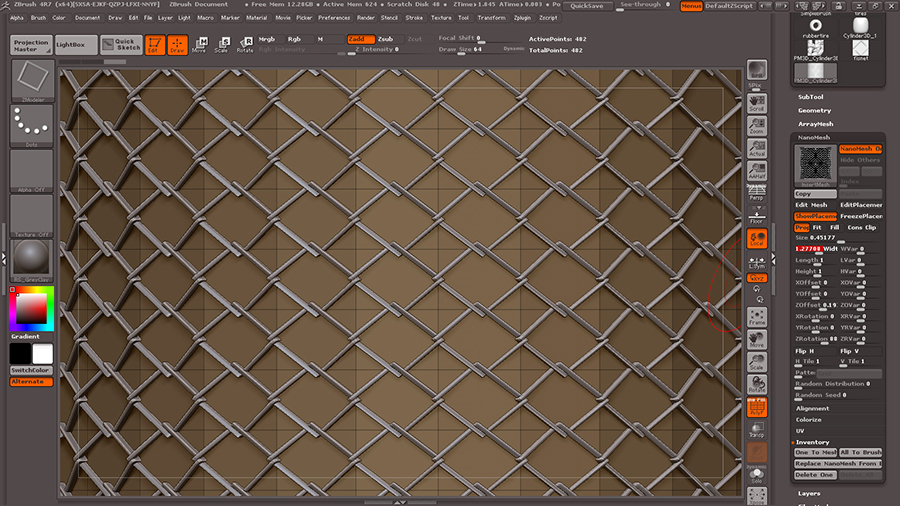
Now something I’m sure many thought when they seen nanomesh previewed, fish net, fence, etc. Here I modeled a quick net piece, made it an array mesh
then converted to nanomesh in array tab. In the nanomesh tab assigned it to the zmodeler brush, then set the polygon order of the brush to “insert nanomesh,
all polygons”. Play around with the rotation and size in the nanomesh tab to get best effect.
I know I can delete them and bring them back holding shift…???
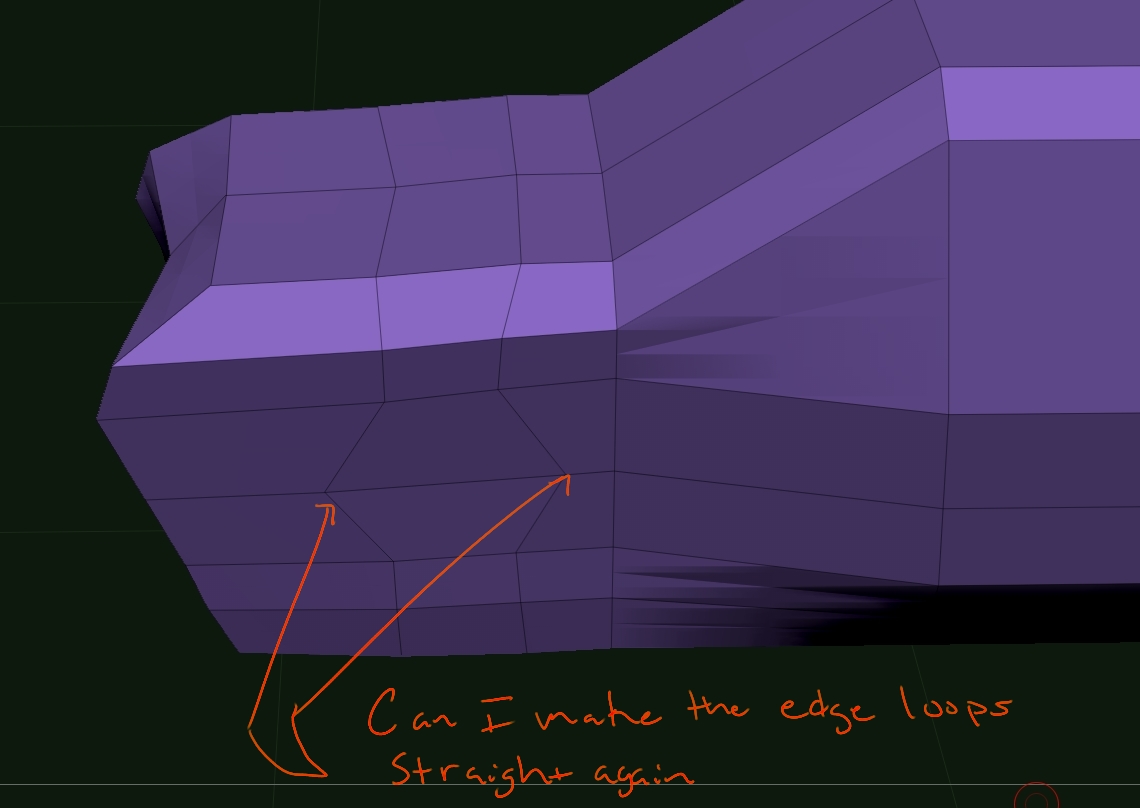
One possibility is to delete the Edge Loops and make two new Edges.
One possibility is to delete the Edge Loops and make two new Edg
es.
just say you don’t know
A bit late on this… I thought showing how to make the doghouse was a great way to show off the basics of ZModeler, so I made a tutorial image myself. Wasn’t able to get it uploaded until today, and I see that Spyndel already put up a great one.
Still, below is how I went about making it… a little simpler I think. I hope it’s useful to see a slightly different way to go about modeling the same thing. ZModeler is really fantastic… so much power tucked away in a rather efficient tool. Some rough edges, and some opportunities for workflow improvements, but it definitely seems to have nearly all of the key features I’d ever want to use for low res modeling!
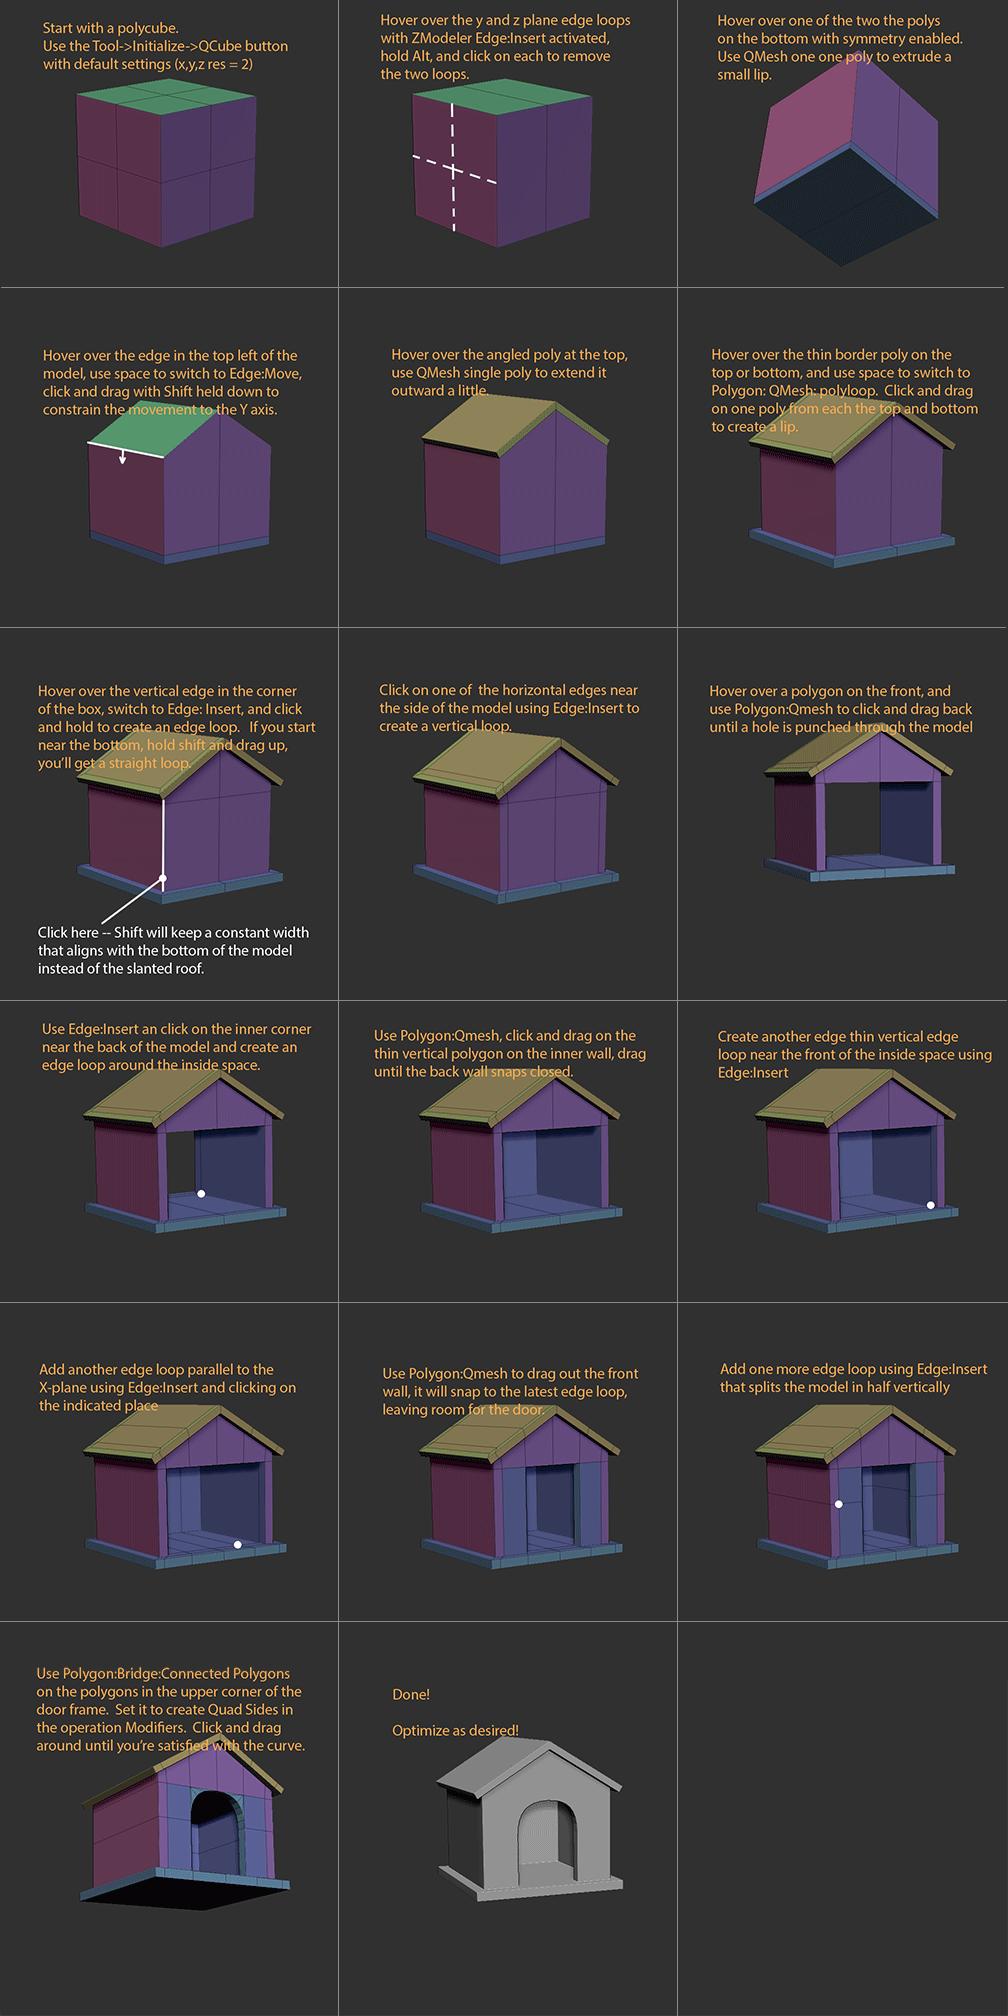
Something to be aware of is the snapping/merging feature of QMesh can cause some problems … try increasing or decreasing the brush size if you’re not getting the results you want. Also, sometimes it’s helpful to turn off attraction entirely in the modifiers section of the qmesh operation.
1 Like
just say you don’t know
Why i should say i don’t know?
Have you try to do this?
Or know you not how?
1.) Right click to one Edge > choose: Delete > choose: EdgeLoops Complete. = Then delete your Edge Loop comlete.
2.) Now again right click to once Edge > choose: Insert (RRRRRt! Not inset!) > choose: Single EdgeLoop = create your new, or two new straight EdgeLoop/s.
I know I can delete them and bring them back holding shift…???
I said I knew how to do that
Hey guys, was doing a quick vid for my Cert students and wanted to share. Thanks Spyndel for creating this thread! We definitely need more on this feature.
https://www.youtube.com/watch?v=9p-JYYgMahs&feature=youtu.be
Another possibility is:
Right click on a Point (EdgePoint not Edge) > choose: slide > choose: your axis where you want move that point > move that point, and with that your edge/s! ;o
*EDIT
And again another solution is:
Right click on a Point (you know smile) > choose: transpose > go out of the right click menu and click then another Point. And on this other Point you will receive the transpose tool and the rest of your model will be then masked. > Now you can with the middle circle of this transpose tool move your POINT (and hold shift during you move the point with the middle circle of the transpose tool) ;o)
Guys you are aware that ZBRUSH 4R7 has a manual with the explanation to EVERY SINGLE tool within it right… ZBRUSH 4R7 What’s New GUIDE! I’ve read it TWICE
and GUYS ZMODELER CAN completely replace EVERY SINGLE TOOL IN ZBRUSH for HARDSURFACE… I recommend you guys stop looking at CONFUSING tutorials from other artist PERSPECTIVES and just read the manual along with the tutorials posted on PIXOLOGICS webpage from Joseph… Tutorials from multi-perspectives are like ONE BIG ARGUMENT inside my HEAD… confusion
http://pixologic.com/zclassroom/homeroom/
also I recommend searching for hard-surface tuts in for 3DS MAX or MAYA and just doing them in ZBRUSH… It’s all the same bro …
Jovon here the guys want to help just push in that way,is easy:D
btw the guide dont show images that help a lot!
keep on the good thread!
@ Jovon : I think the only confusion in this thread is that Spyndel actually knows what he’s talking about while some other WELL INTENTIONED  people actually don’t. I almost feel like Spyndel should have a thread of his own. And I’m serious when I say that. Or at least the rest of us can show some restraint if we aren’t sure about something and not push anymore guess work forward in the thread.
ryankingslien Hey guys, was doing a quick vid for my Cert students and wanted to share. Thanks Spyndel for creating this thread! We definitely need more on this feature.
Thanks Ryan, and thanks for posting that great fundamentals vid! Although I didn’t create the thread, that credit goes to TheBest12.
Ryan makes a point in that video which I’ve been trying to get across, except he does it much better. Namely, about how ZModeler interacts with many of Zbrush’s existing features. Don’t let ZModeler isolate you from all the things you already know how to use in ZBrush: Masking, Transpose, Visibility shortcuts, Clip brushes, Edge Loops and Panel Loops, etc. They greatly enhance the ZModeler experience.
I honestly think that’s the first time I’ve ever read that sentence on ZBC. Finally, I’ve managed to fool someone!
There’s room for everyone to learn from each other here though. I’ve got a little more experience with the tools, but Im going to learn lots of things form you guys too, especially as we get into Nanomesh and Arrays, which I’m not nearly as comfortable with yet.
That’s a great tutorial, and a great way to show there’s always more than one way to get to the same place.
I hope that comment wasn’t directed at me. Are my tutorials confusing? Unfortunately, Im too shy to post a video on youtube. I communicate mostly via photoshop and tend to be long winded. Is anyone else having trouble following my tutorials?
Thebest12
I know I can delete them and bring them back holding shift…???
Or you can just move them ?? lol … [ Point Action - Move - By Brush Radius ]
FOR SURE YOUR EFFORT IS VERY APRECIATED DONT STOP PLEASE! IF SOMEONE DONT LIKE JUST LET US FUN HERE!
TheBest12 - Thanks for creating this thread! 
r
A couple more quick ones on the subject of not forgetting to use Zbrush’s traditional tools with ZModeler.
- Masking. How great is it that we can just mask a specific group of an polys we want with a touch now, without having to play hide the polygon rodeo lasso?

- A situation where masking and clip brushes are useful:

1 Like