ZBrushCentral

Willem Dafoe -_- Sci-Fi

Sorry for the late reply, I was visiting my family.

Philuxius - Thanks, I don’t like to exaggerate too much.

gyarados - Thank you. I’m glad if this helps you. It takes a lot of time to do all the polypaint specially because you’ll have to hide/unhide at the highest SubD but it’s worth it.
I saw your thread with the hair test, very nice! Are you using hair&fur to “sculpt” the hair??

Hey Olivier, I hope you had a good christmas holiday. For the hair iam using ornatrix since its ALOT faster to render than hair and fur and it looks better, however i have not yet tried 3dsmax 2013 and the new improved hair system. Iam still playing around with all the settings for ornatrix hair and trying to find a good way to style hair. You should definitely try it out though.

thx for the workflow for the cloth seams
it can be useful for hard edges too, cool
and of course you have done an hell of a job with Dafoe

gyarados - It was nice to have a break to see the family.
I don’t see a good reason to switch to 2013 so I’ll stay at 2012. I would sure like to work with ornatrix eventually and test it out with vray. If you want to do long hair stuff, splines is the way!

LVXIFER - Thanks! I’m glad if you find it useful.

Really like this one! Great work:+1:

Santis - Thanks!

I wasn’t home a lot lately but I managed to work on it some more. I’ve done the UVing and I’m starting the textures on the suit. I

I"ll resize the shoes since he kinda looks like a clown at the moment.

WillemDafoe_149_low_zpse00d282e.jpg
WillemDafoe_150_low_zpsa9ec9f9a.jpg
WillemDafoe_152_low_zps7dca88ae.jpg
WillemDafoe_151_low_zps6c354403.jpg

Attachments

WillemDafoe_153_comp_zps53ec9296.jpg

With more natural light.

WillemDafoe_158_low_zps6ff8a446.jpg
WillemDafoe_162_low_zps094286de.jpg

Belle avancée, i like.:wink:

Philuxius - Thanks!

I mainly (and manly) worked on the textures.

Hope you like.

I was using www.photobucket.com to upload my pictures and it seams they don’t allow big resolutions anymore. Is there a better image-site I could use? Thanks.

WillemDafoe_180_low_zps5d3f2a35.jpg
WillemDafoe_181_low_zps834fb263.jpg

I did another render for fun. I’ll rig it tomorow.

WillemDafoe_182_low_zps0a0965fb.jpg

I fixed the head size and made the shoulders a bit wider. I also took the skin’s bump map and applied it as a displacement. Still need to tweak that.

WillemDafoe_188_low_zpsacfc94ec.jpg

I had major issues with corrupted files but I’m back on track. I rigged it, now I need to find the right pose and lighting. Here’s an update.

WillemDafoe_200_zps941403a5.jpg
WillemDafoe_205_zps13295482.jpg

I started creating a pose.

WillemDafoe_209_zps3a575840.jpg

really amazing work!
i like it very much!:+1:

xexex - Thanks!

I started to create some kind of monster that will be chasing the main character.

WillemDafoe_214_zpseb578672.jpg

I played with the texture colors and the shader. I hope it doesn’t look too much like I’m making the hulk…

WillemDafoe_220_zpsbd4add6c.jpg

This monster will be way back in the final composition but I’m having too much fun on it, I just kept working on it. I’ll be done soon.

WillemDafoe_228_zpsca5e6328.jpg

WillemDafoe_229_zpsd52ae89f.jpg

hey Olivier, nice updates. I was thinking of the green goblin and hulk :cool:. I have some questions if you dont mind answering:


  • how did you create the specular map for the green monster dude? i really like how its breaks up and looks crisp
  • how did you texture the hands for both your characters?
  • is it possible to see the sculpt of the hands in zbrush?
  • veins, how? lol

btw, good work on the eyes, they have depth.

hi,

your william dafoe is way too skinny! give him broader shoulders and more volume!

gyarados - Thanks! I might do some tweak to the textures to keep it from being a hulk. I have no problems with question, BRING 'EM ON!!:stuck_out_tongue:

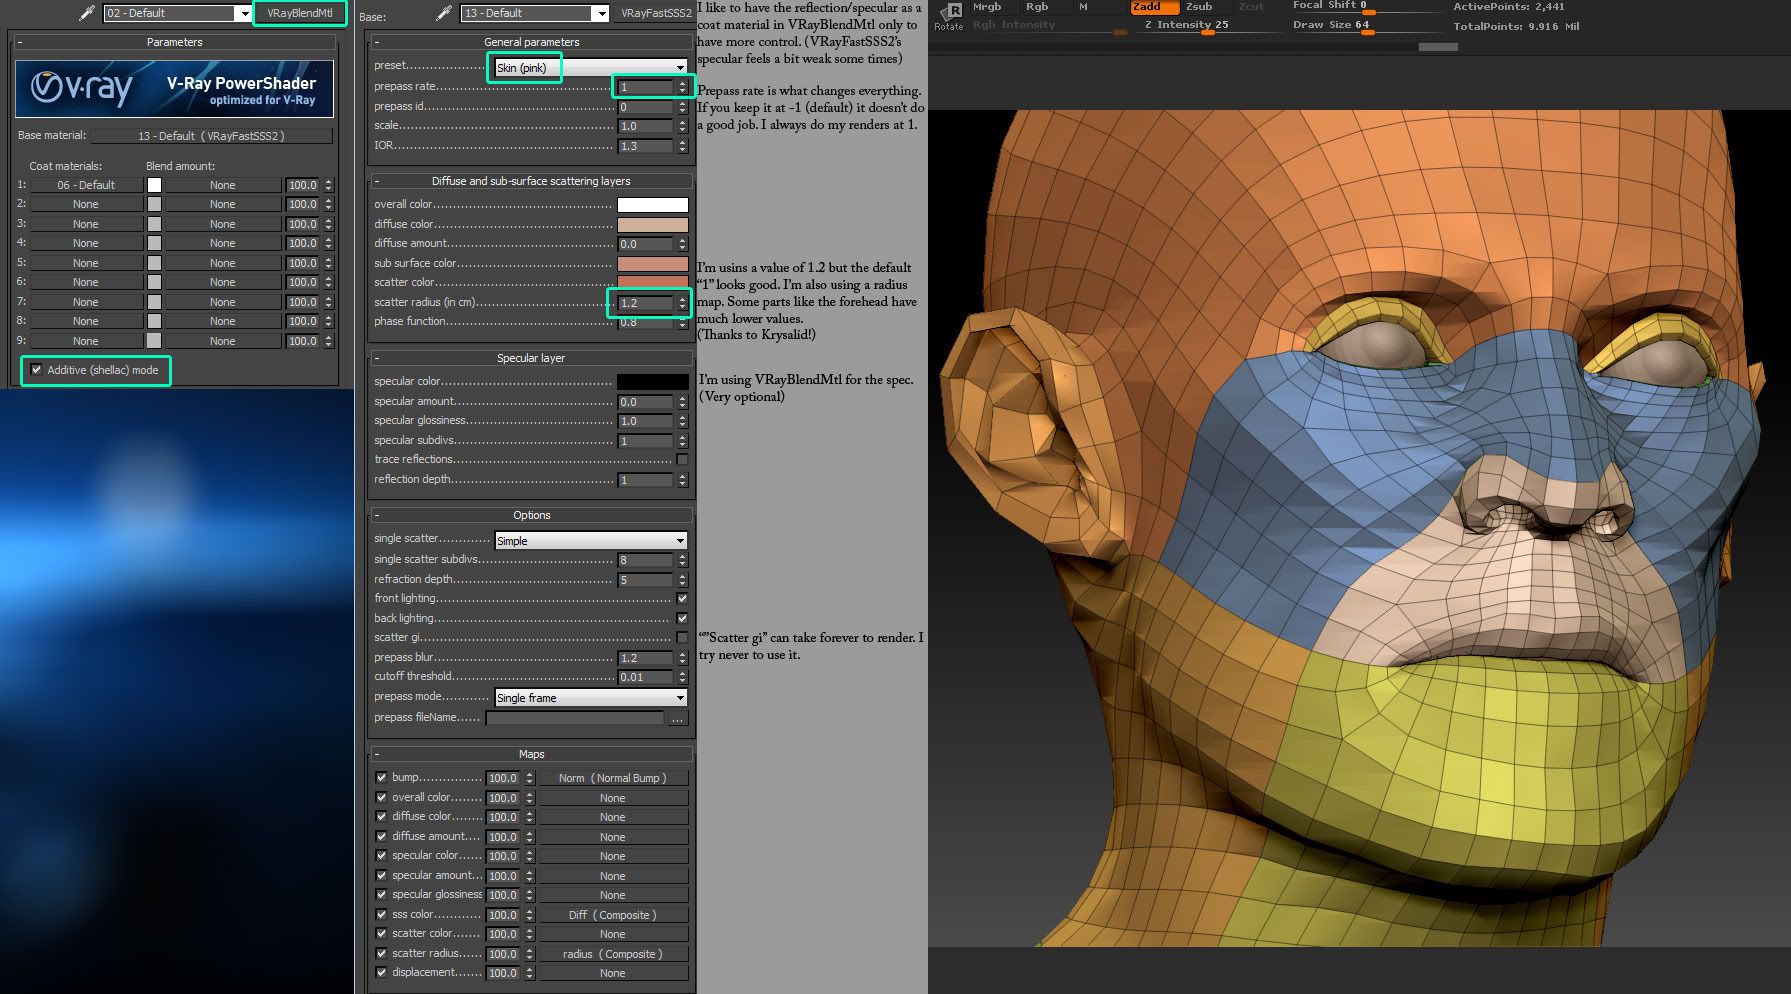
-For the specular, I did pretty much the same thing as I described earlier in this thread with the vray skin shader. The difference is I added a specular map in the VrayFastSSS2 to simulate water on top of the skin. Basically, the shader ends with 2 specular: one crisp with a map and one blurry without a map. To make the spec map for the water, I used a “RustLeak” texture I found on cgtextures.com. I applied it in MARI with a “TriPlanar” projection. Doing so will prevent any seams. You can see the result lower.

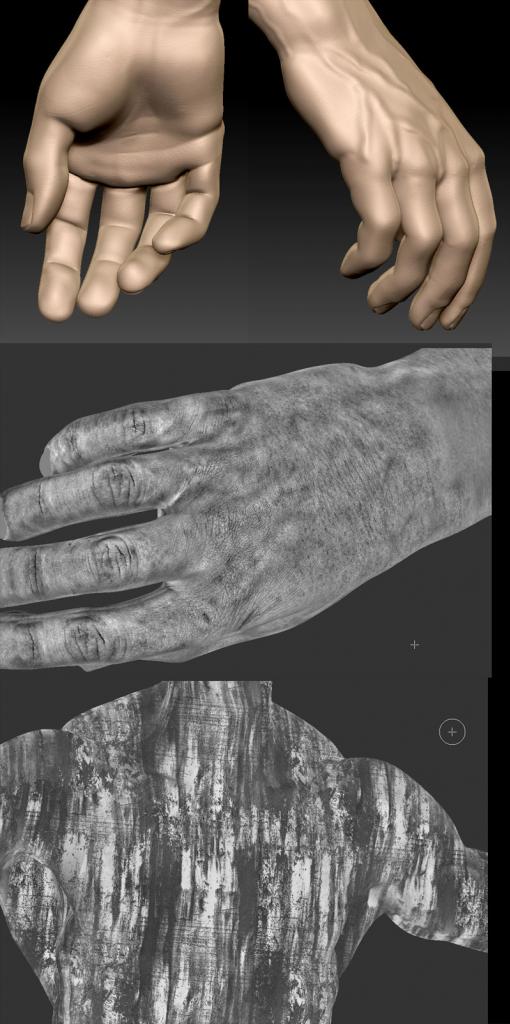
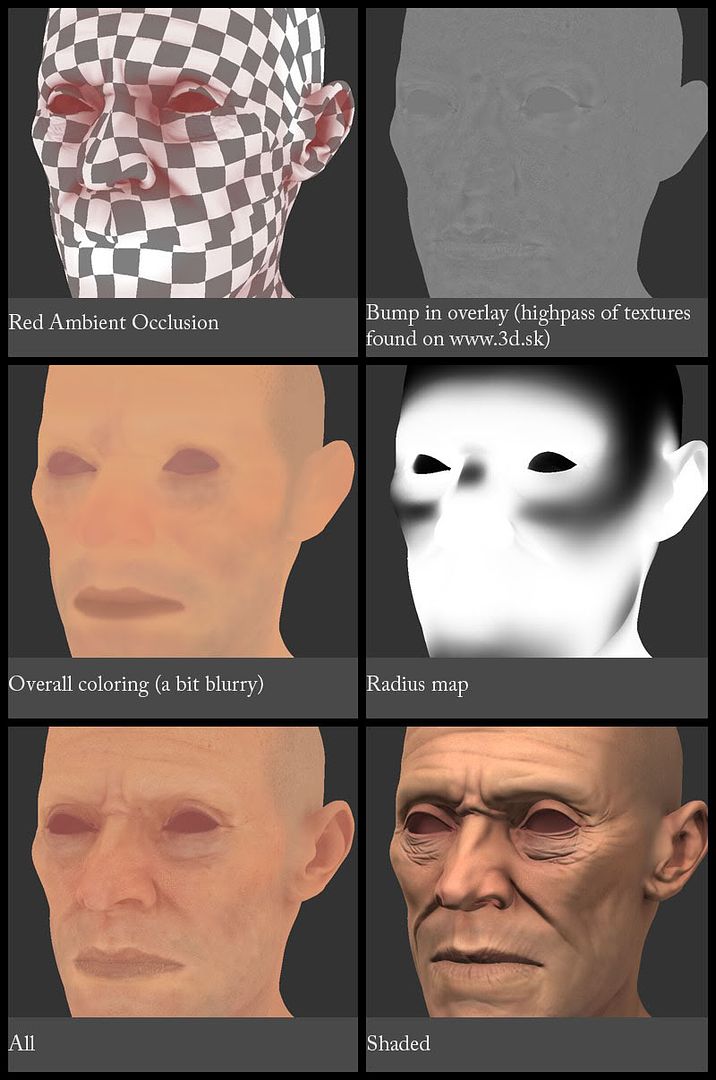
-For the textures of the hands, I did the same as for the head. I downloaded images from www.3d.sk and desaturated them in photoshop. I also did a “Highpass” on them. After that, I projected all of them on the model at very high resolution.

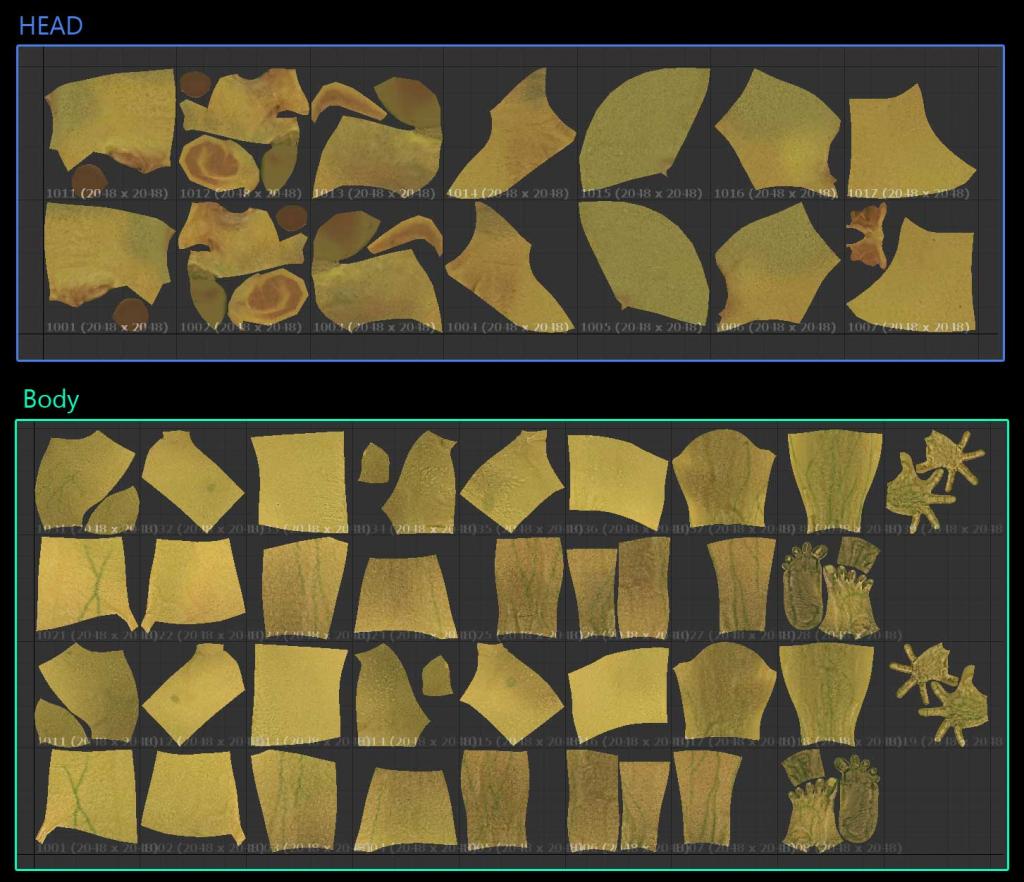
The green monster’s head and body are actually the same as for the Willem Dafoe character. I simply changed the color and modeling. I set it up so I can easily create just about any humanoid character from it. It took a long time to texture at first, but I’m getting the benefits now. the body is divided in 34 seperated UV and the head in 14 UVs. Each UVs is 2048px of resolution. The body and head contains the équivalent of 3x8k maps.

-When I took screenshots of the hands, I noticed a bug. There’s a strange noise happening at a tiny frequency. This happened to me before and it gets worse everytime I Hide/undhide layers in zbrush. I think I’ll have to reproject the whole body… CRAP!!

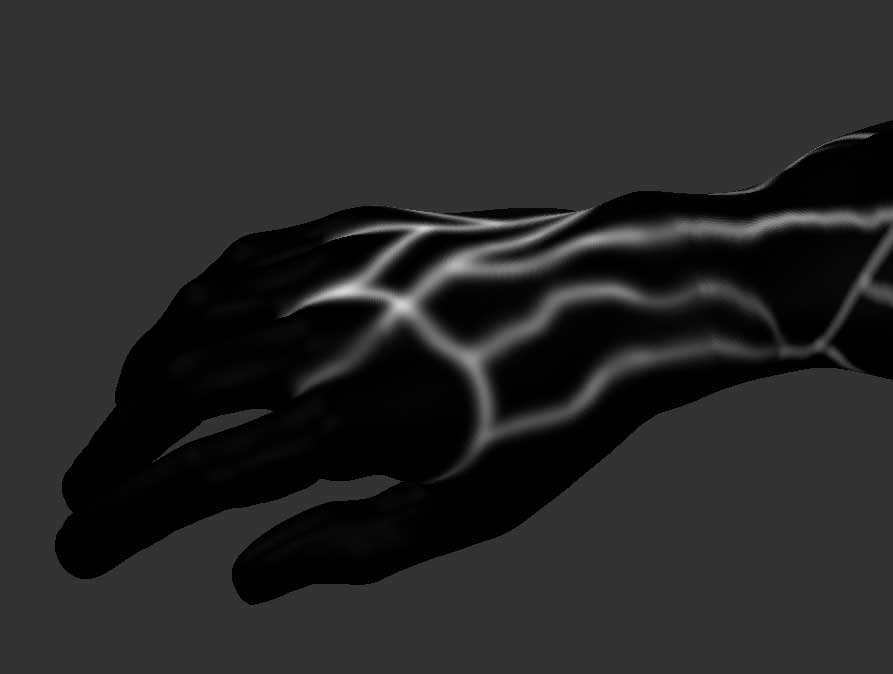
-For the veins, I painted it as a black and white mask in MARI and blurred the result. I took that texture and transferred it in zbrush to use it as a mask and inflated/smoothed it on another layer.

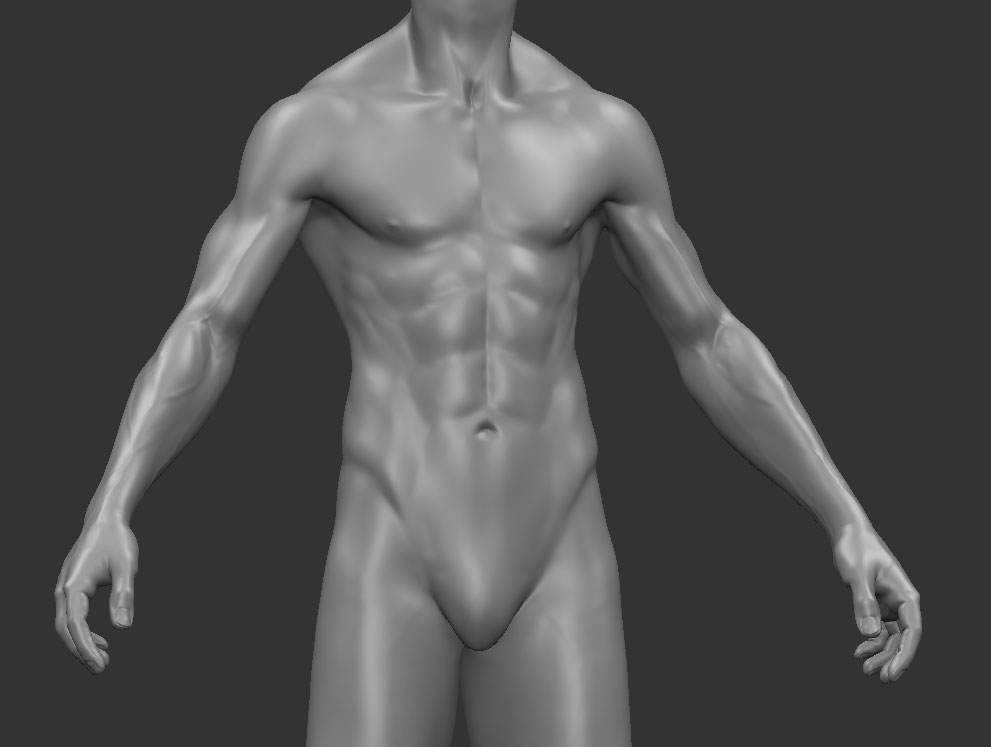
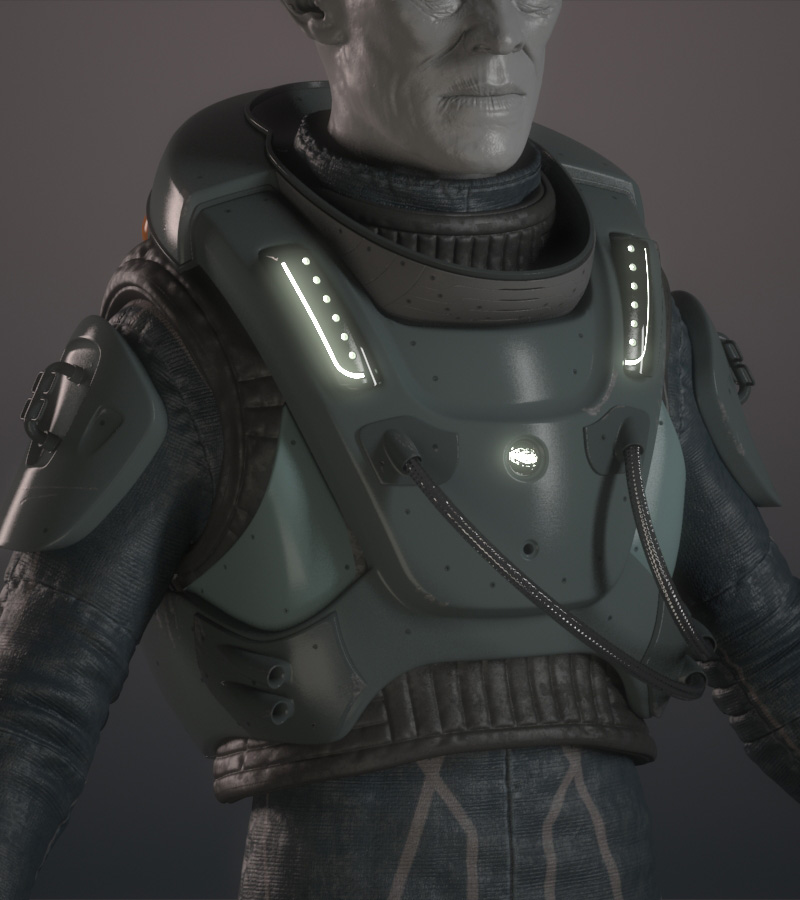
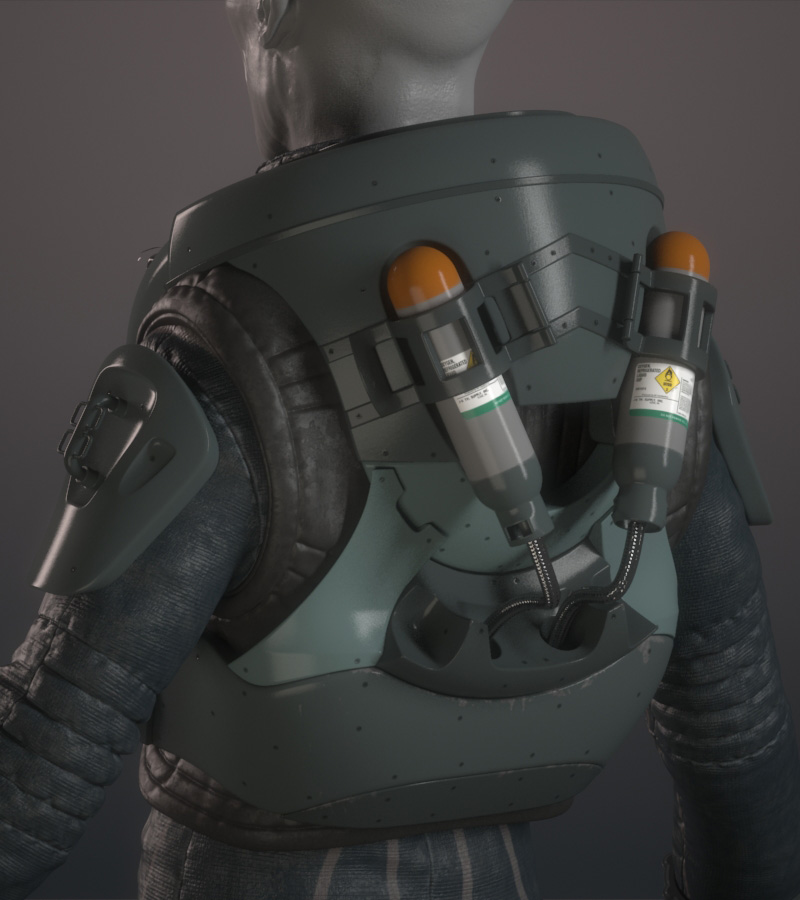
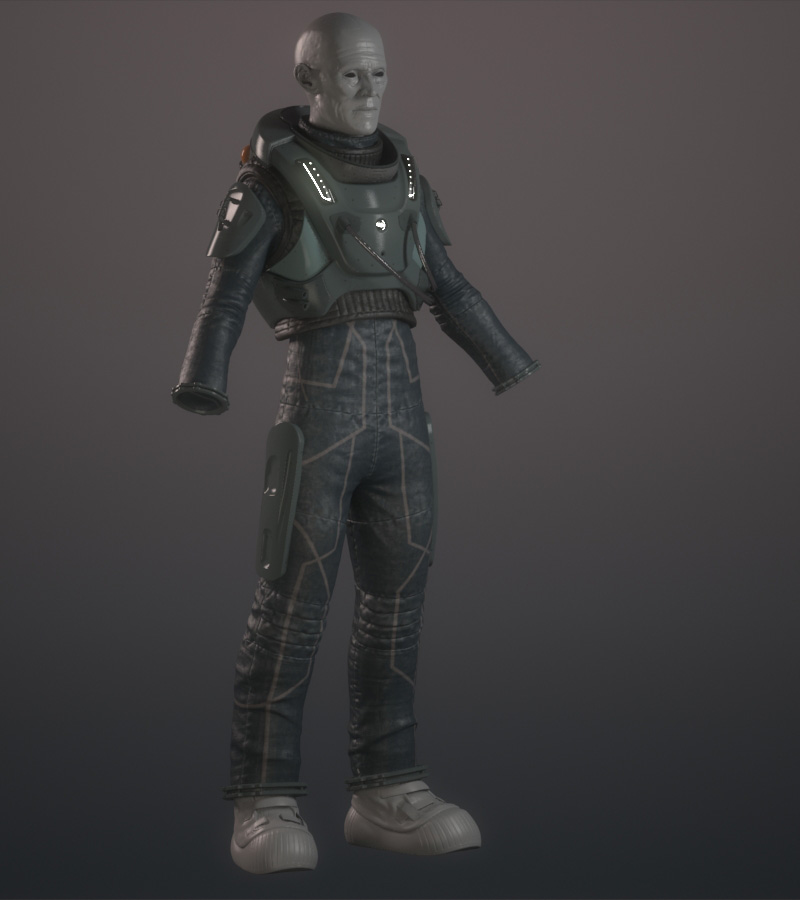
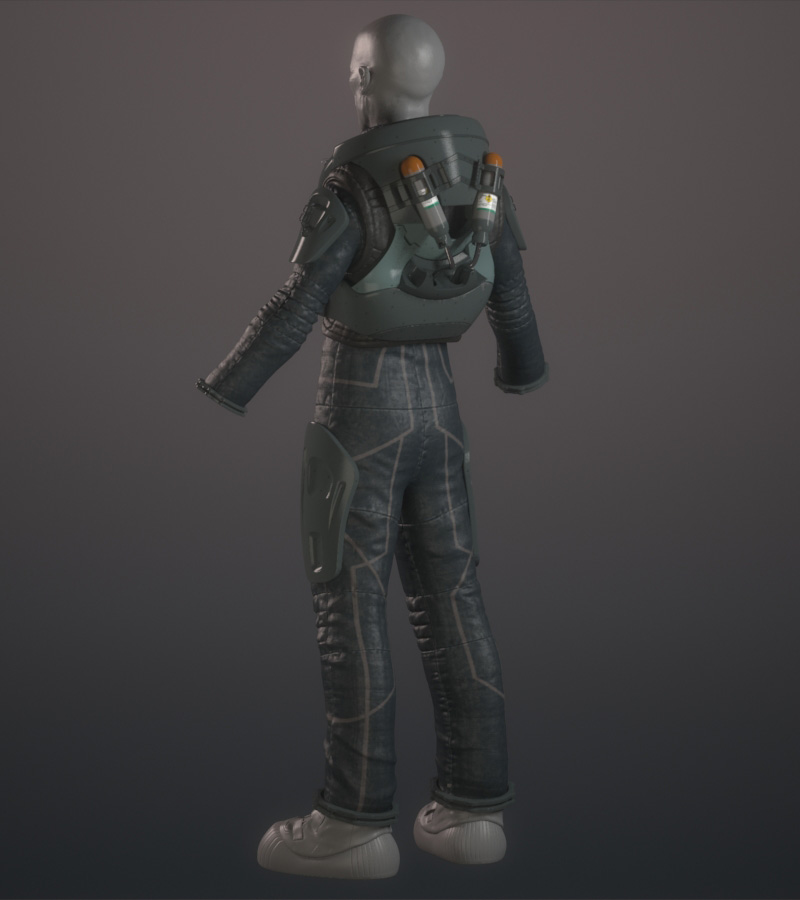
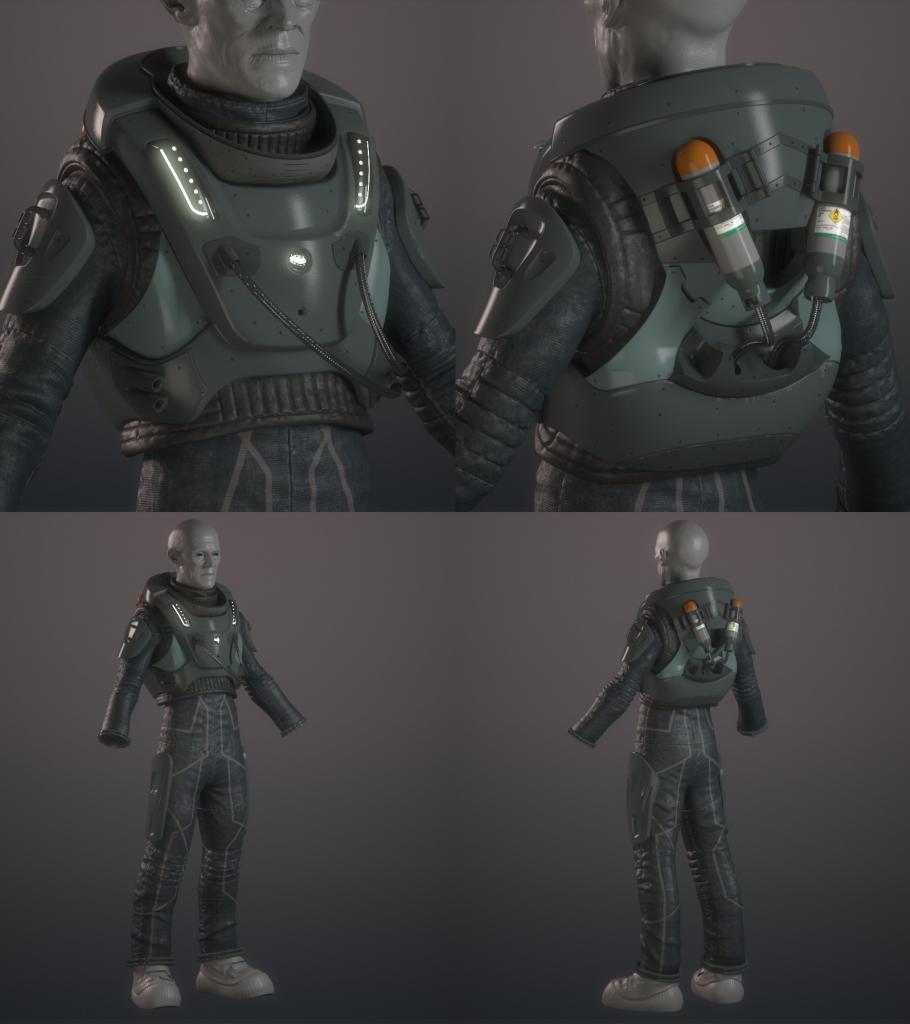
MichaelMaehring - I’ll probably make the neck and wrist wider but I don’t want to over do it. The body under the suit is already fairly wide and muscular.

hands modeling and bump. Body water specular.
HandsTextures_zpsdf002125.jpg

Veins mask
Veins_zps7dbd976b.jpg

Texture resolution
TextureResolutions_zpsd29f91e3.jpg

Body under the suit
Body_Under_Suit_zpsccd786a4.jpg