ZBrushCentral

Will Harbottle - Digital Sculpt Thread

After the pose was settled, I started roughing in the accessories. I already had the basic gun and boots from my earlier doodling. Other than those, however, I didn’t have any real design in mind – I was just winging it – so I used Z Sketch to quickly lay down some “digital clay”.

week2B.jpgweek2C.jpg

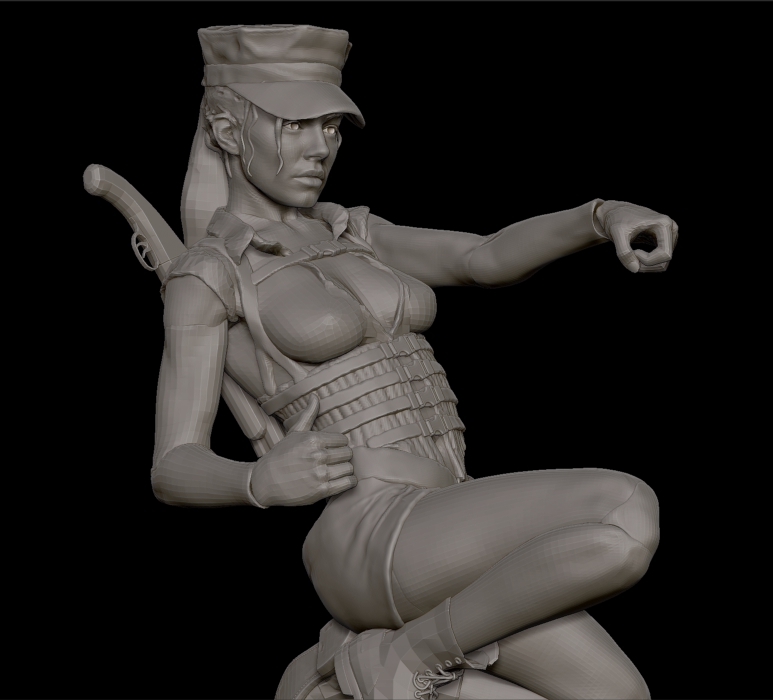
I use Z Sketch all the time because it lets you test things out very quickly. Sometimes I will clean it up and detail it pretty far and just retopologize, sometimes I get enough info from the sketch to go straight to Maya and build the details from scratch there. It depends on the individual item. The rest of the process is cleaning things up and adding details. But I keep everything as low res for as long as possible. This lets me easily tweak the pose or change it dramatically right up until the end. At any stage, I can just send it back to Maya, repose, and send it back to Zbrush and all the accessories like gloves, boots, belts, straps, etc, just go along for the ride. :slight_smile: This is also the reason why I am judicious with dynameshing. Dynamesh is a very powerful tool, but I find that too much of it severly hampers my flexibility. Usually when I dynamesh, I will immediately Z Remesh and project the higher levels of detail so I still have a low rez version to work with. I also try to keep everything in separate subtools for the same reason. For example, I keep things like the arms and legs in their separate pieces (upper arm, lower arm, hand, etc.) for as long as I can. I just blend them together to look like single pieces. Merging things too early always comes back to haunt me. This means I regularly work with 200 or so subtools – which is a pain – but it helps that everything is low rez and changeable right up until the end.

week3A.jpgweek4A.jpg

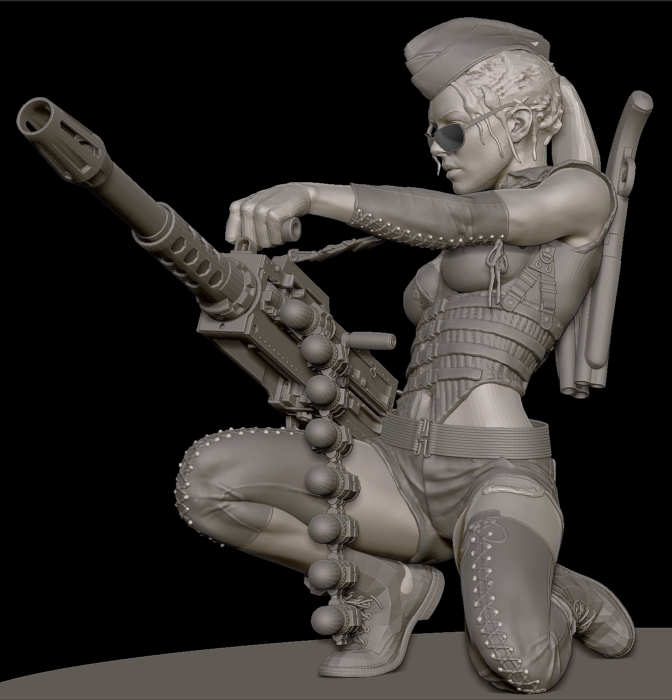
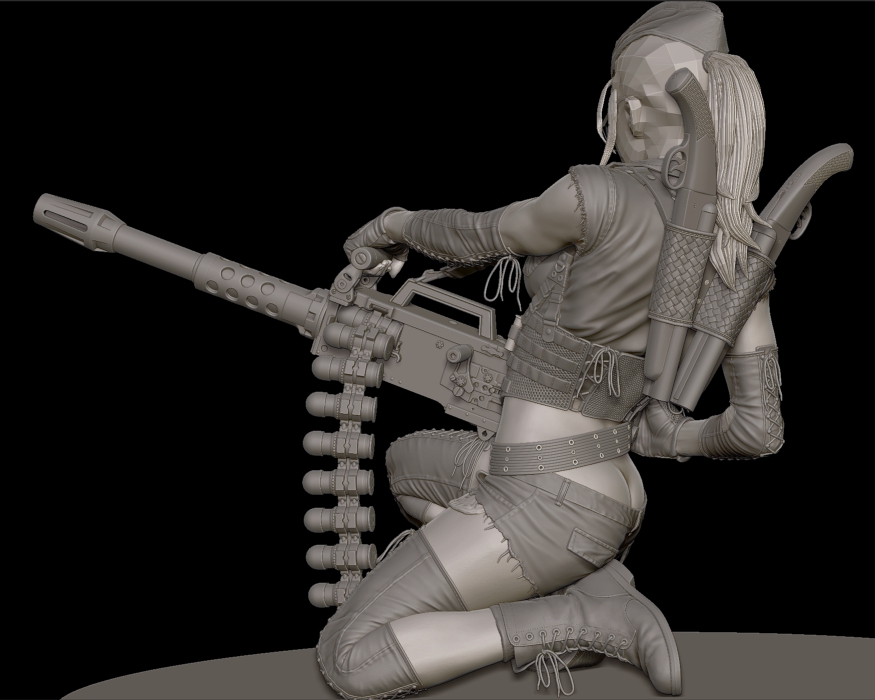
Since everything I make is eventually printed, the last stage is always cutting the model apart and keying it for production. Keying not only keeps the pieces smaller and easier to print, but if you cut it apart with some forethought, you can keep the pieces easier to mold and paint as well.

ZBrush Document2 (2).jpg

luckyRenderB.jpg

That’s about it I guess. Thanks for looking!

Cheers!
Will

Attachments

ZBrush Document2 (2).jpg

luckyRenderB.jpg

Thank you for the images. :slight_smile:

Again, you have admirable skills. I like your idea of having a library of different body types.

The site you recommended looks useful. It’s a pain to hunt down reference material, but putting bones and muscles under the “skin” does
seems to make a character more believable.

And your details – well, they are a standard for some of us to strive for. 200 subtools is a lot, but if that’s what it takes…

Thank you again, for the breakdown of your work process!

thanks a lot for the great breakdown of your process.
have you also made standard pegs/keys for your models or do you make those per model?

thanks again for showing your work and progress.

-r

@jan19: I don’t know exactly how harbottle does it specifically… but if you find it difficult to have that many subtools going in one Ztool, or if the file size ends up being too big; you could always make the basic sculpt of the body, block out the props with low polly placeholders, then split the props into separate Ztools and add the smaller parts there. After that, you can decimate everything and combine them back into one tool, to export for a render, or cut up for printing.

*Also to harbottle, I really liked seeing the way you made the pose with the limbs separated, like an action figure, then dynamesh and sculpt them. Super convenient, and I imagine it helps preserve the forms of the body.

Thanks for your breakdown…it makes a lot of sense to keep statues that you can begin with especially as it allows you to not have to carve in the joints every time you begin.

Thanks also for the links…they will be very useful!

I think the thing I’m beginning to learn about ZBrush is there are many different ways that you can achieve things. I’ve been looking at how to create folds and drapery in ZBrush recently and there are so many different ways that people use.

You mentioned that your work flow is not perhaps the best one to learn as it is influenced by your having made the dolls but I think that the more strategies one has or knows the better it is. When making things the more strategies you have the more you can do. I teach school (primary level, think little kids) and I know the more strategies I have the better as you never know when you will get a child that needs that strategy and I think it’s the same with sculpts that different types of sculpts require different strategies.

I don’t understand why people view scans as cheating…it’s a tool surely as artists we all need the best range of tools possible and we use them as the job requires. Years ago iirc painters all made their own paints from scratch and it was consider cheating not to make your own paints but that has changed with time. I think as artists(who often have time limits placed upon us) we need to use the best tools for the job whatever they may be. If an artist was going to paint a picture of someone they would make reference sketches. Scans are just digital reference sketches. It is only in the hands of someone who knows what to do with them that they are useful…I’d probably turn them into mush.

Thanks again for your breakdown and never doubt that your methods are as equally valid as someone elses. You do the most amazing work…

I love this thread. Thanks for sharing.

“Over the years I have tried about every method of posing (from rigging to transposing), and for me, nothing is faster and more flexible than posing up a “toy” version. I do this in Maya. We went through a bunch of poses before settling on the final one.”

Genius! Amazing to see your work-flow!! A very clever approach.

@jan19: I don’t know exactly how harbottle does it specifically… but if you find it difficult to have that many subtools going in one Ztool, or if the file size ends up being too big; you could always make the basic sculpt of the body, block out the props with low polly placeholders, then split the props into separate Ztools and add the smaller parts there. After that, you can decimate everything and combine them back into one tool, to export for a render, or cut up for printing.

Thank you. :slight_smile: It would be hard for me to have 200 subtools going at once. I don’t like to go over 20 - 25.

30 at most. Then I start losing track of what’s where, even if I’ve named the subtools.

I love this thread, too! Thank you again, twf152, for the tips!

And to W. Harbottle for showing this awesome work. :+1:

Excellent Work

It’s like a super mannequin, I love it!

Thank you so much for sharing.

Thanks for the Breakdown post.

Awesome stuff as usual! Any chance we could get a render breakdown?

Thanks for the Breakdown post.
totally agree!
Thank you harbottle

Fantastic work Will! Thanks so much for the great breakdowns and explanation of your process! I really dig the toy/puppet piece posing approach too. That is a common approach for character rigging and posing as well on various film/game pipelines to keep things fast, so it’s awesome to see you using similar strategies…definitely keeps things very flexible. Truly top notch form, anatomy, weight, balance, expression, and detail. Thanks again for sharing with the community! Looking forward to seeing more!

John

Beautiful cloth on the Spartans… how did you do that?

Outstanding layout and clean order with your work sir. Thank you for sharing. You inspire

You said with subtools that “I also try to keep everything in separate subtools for the same reason”…I myself am still trying to understand the value of subtools and the benefits of it. What I wanted to ask is, when do you start separating the body parts in subtools? Do you do a full body low render sketch first and then separate that way? Man your work looks so smooth. Thanks for sharing

Awesome work! But I love your action figure style body types you pose! How handy and cool, especially for doing statue work!

jaw dropping sculptures, I bet you are looking foward to zb4r7, with 64bit support I imagine it will be a godsend to speed up your workflow.

My good googly goodness what stunning craftsmanship.

Man I’ve been a huge fan of your works for a looong time. love the movement and keen details in it. just wow, that’s all