Thanks a lot for taking the time to do this tut! Wish I had thought of it for my last sculpt…exactly the effect I was looking for. Will definitely use this method next time!
Thanks for the tutorial.
I’ll aplly it to a current project!
Greate work, this is very useful! Thaks for sharing.
Great tutorial, thank you very much.
~G
I would like to introduce you to a job that I’m doing some tests and realized thanks to the help of Glenn, great guy and friend who helps me with your tutorial.
 i
i
very good, check also http://www.zbrushcentral.com/showthread.php?170297&p=1018244&viewfull=1#post1018244
from posts #1047 / 1052 and on
Very nice man. Exactly what i need. THX
Hope it helps in your project. Feel free to post your results here. Got any questions just shoot me a message.
hehehehe…
THAT was the best tutorial ever, I can go back to making fuzzy stuff now!
THANK YOU!!!
Here’s my little example:

what good surprise in this bag?
EVERYTHING!
hehehehehehe!
Nice! It’s so Warm and Fuzzy, Colorful Too. I like it.
A beautiful flower-power work! Psychedelic! I’m already looking forward to what’s coming soon!
The combination of these styles will be huge!
Ciao,
TM
Hello, i am having a situation with the micromesh, and is not based on this tutorial, that by the way i did it and it was great, thanks for such info. My problem is aimed to the render aspect of the micromesh, I have a clothe that i did add some micromesh, but when i do the render it appears like it as transparent. The micro appears but making the mesh transparent. And to be honest i did convert BPR to Geo but nothing happen(if that does anything about it.). How can I implement the micromesh so it doesn’t make the mesh transparent. And then i try it once more, but it breaks the geometry. (I try to upload a photo but it wont allow me to.)
I’m unsure what could be causing the issue without really seeing whats going on. Check your material modifiers, be sure Transperency is set to 0. Check your display settings there’s a tab for BPR settings, be sure BPR Transperent is off. Under Render settings turn off Transparency. Also set Double on Display Settings if your using a flat planes for the micro mesh, like the one I provided. Post some pics below to show me whats going on, Read instructions below on how to post a pic.
1. Click Reply to Thread
2. Scroll Screen Down to Attachments
3. Click Upload Image or File, a new Window will open
4. On the new Window click add file on the upper right hand corner of Window
5. Click Select and Select your file on your computer, mind you can only upload files under 500k
6. Now click upload
7. Once it uploads it should automatically move into the attachment tab on the new window.
8. Now just click insert line and it’ll will put it into your post, even if you just hit done on the window it’ll leave a attachment on the post.
Hope this helps you out.
Hey, Thank you very much for your reply. I did upload the file and it was under the 500k any how I saw if my transparency was turn off, and it was. I will keep trying to upload the file so you can see it clearly  402.6 kb to be exact. (the picture)
Finally i did it. I had to open Ps so I could save it as a Jpg (is odd right?) Any how you can see the problem in the pic
Dont think its the Micro mesh causing this. Looking at it, looks like some of the mesh is unwelded around the topology lines. Was the base mesh imported into Zbrush and did it have polygroups when you imported it in. I’m thinking it didn’t weld the mesh correctly on import. If anything try running Zremesh on base mesh, might fix welding issue. If that dont work export it out and import back in, make sure on import options on the tool menu has MRG on and Weld cranked up to .01.
Also before applying micro mesh hit align edge on micro mesh tab to correct mis aligned micro meshes (This wont fix welding issue, just something else I saw in image to correct.
Fingers Crossed this helps.
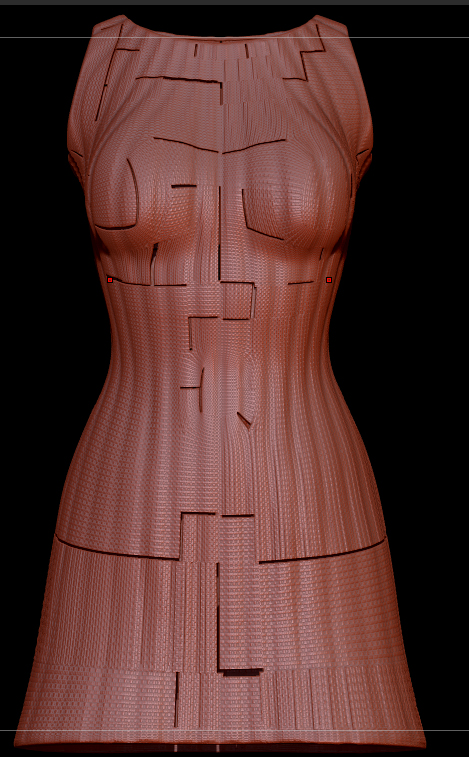
Picture one= What i did was, that the mesh of my model was on high poly, then I low the poli counts to the lowest poly and mask at Sub 1 what I wanted, then I “delete hidden”
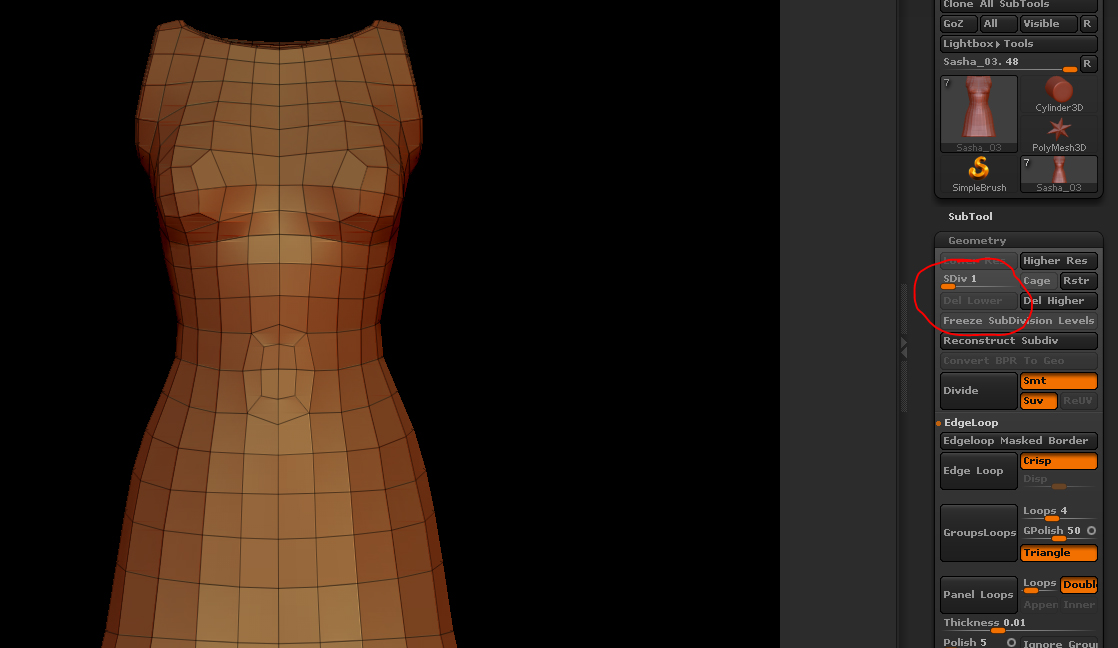
Picture two= What I did when I already had the mesh at the lowest polies as I wanted, I click on “Panel Loops” It creates the borders and other unnecessary panels, so i delete them, and the borders that you are seeing in there, are the ones that i clean up by mashing them correctly one after the other.

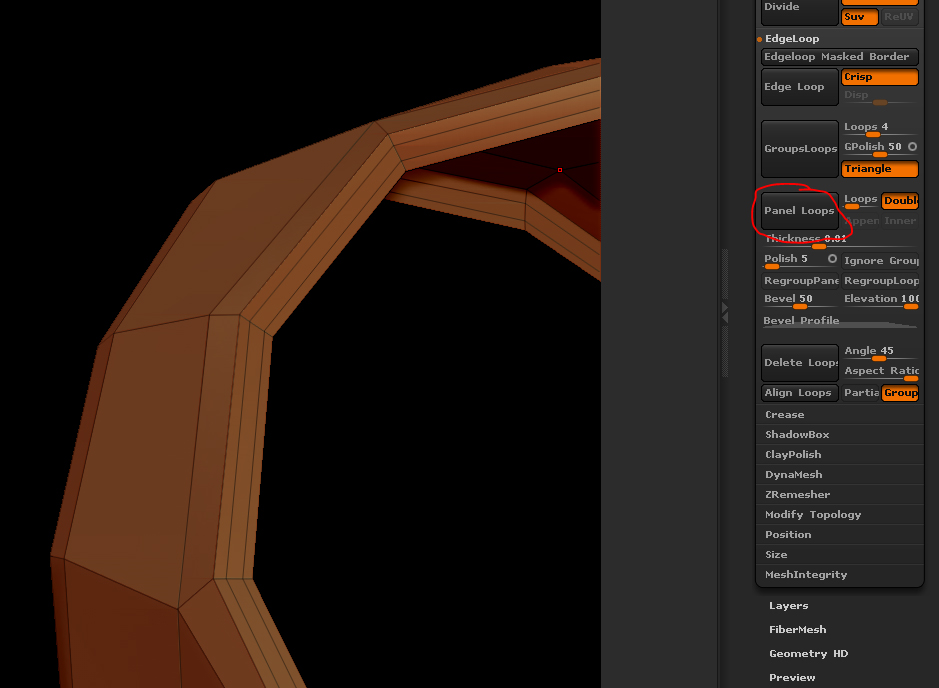
Picture three= After that cleaning and deleting the faces I didn’t want. I start subdividing the mesh so it look something like this (yet not finish, but that doesn’t matter lol) Then I decide to apply a micromesh and it happen what i show you in the previous post.
Okay, it doesnt look like its unwelded, because it wouldve separated when you subdivided. So, lets try 2 things here. 1st, make a duplicate of your your hi poly dress before you added micro mesh, do that in your subtool pallet. Now Zremesh it to 1000 polys, which you can adjusting the target poly counter slider to 1. Now subdivide the new mesh couple times to come close to the poly count of the original. Project all on your subtool pallet and you should have a almost perfect copy of your original mesh, but with new topology. 2nd lets eliminate any problems with the micro mesh. Switch your tool to the micro mesh weave and go to the deformation panel in the tool pallet and click the unify button and all that is doing from what I know is just resetting the center of the object. Now go back to your newly made dress and do your micro mesh now, be sure to hit the align edge button. Do a BPR before you do BPR to Geo to see if its working better.
If this doesnt work, Im stumped lol
Hahaha lol thanks buddy, I am already stumped, by all the thing you just explained to me, I will try them out. Thanks.
1st UPDATE: Many thanks it did works step by step, I can see I can do this with all clothes and other stuff correct, this method to implement clothes or even clean the geometry?..
By the way I see that the micromesh is till giving me those line (edges) issues. From here on, I think i have to play with the Zremesher?..or The micromesh itself? because it gives me that when i render it. And when i did the unify at deformations, the other things when smaller, and I did try unified them but still once or 3 inches smaller but I guess again that I click on every object I have and click unify so it be on center and then by hand I place them in to place, which if is the case i have no issue with that, but this is what i going on with my work space…
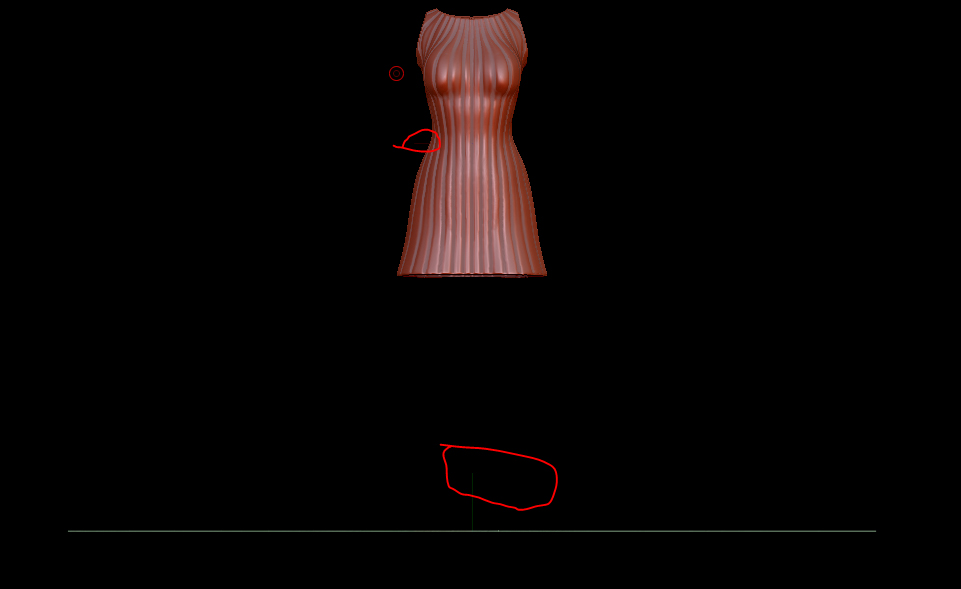
See the floor and the object itself… is like it have to pivot points… Is that normal?
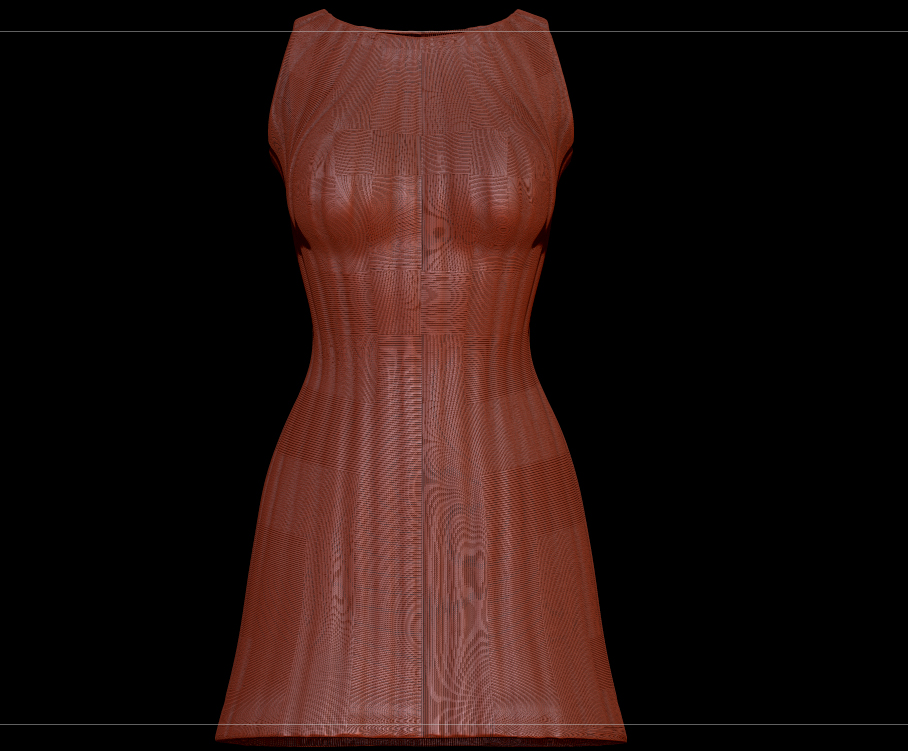
2nd UPDATE: I was able to move the original mesh (dress) the one i din’t Zremesh and apply the micromesh and it work perfectly, but when i apply the micromesh in a low subdivision at 5 or lower, this happen.
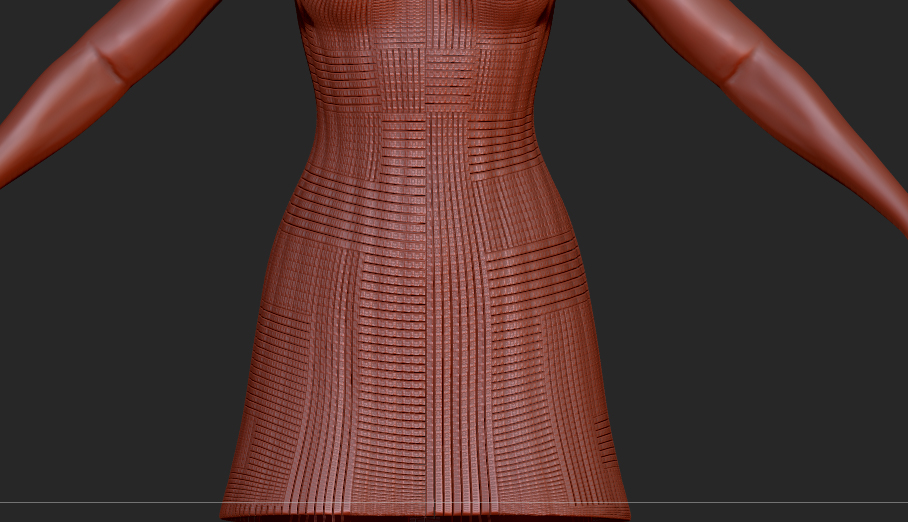
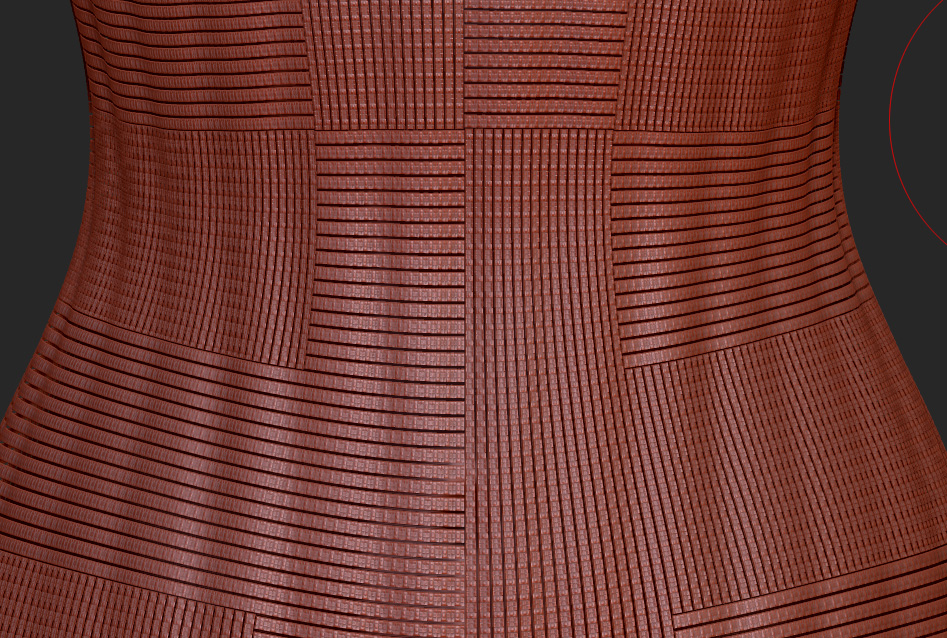
You can see her belly? I mean i guess is because the projections of the low polies edges points right?..the fact you can see trough the micromesh? I don’t know at this point much. Also the lines… the micromesh created looks like they are not parallel between each other. Any how in advance a Huge thanks for helping me to understand this, gump1993.