ZBrushCentral

Topology & Flow Lab

Alex: Tomorrow I will compare the shift-click method with the Ctrl-click method. Thanks for bringing it up!

Ralf: 23 posts young and already such an interesting and clear tutorial! :+1:small_orange_diamond:+1:Good stuff. It indeed seems a function that is not fully finished, but the potential is big: the speed and posabillity of ZSpheres and the mesh-control of Topology. The more options fore modeling, the more free we are to choose the techniques that suit us best. If you discover anything new, please let us know. In the meantime your tut will shine on the front page. :smiley:
I tried it, but ran into some problems. I’m gonna do it by your book next time, and will post any questions that arise.

Bonecradle: I think you make a point. But it’s such a flashy tutorial. :smiley: I’ll see if the .obj workflow can be incorpareted into the general edit topology workflow. If so, than with your permission I’ll remove the tut again. Thanks for making this thread more to the point. :+1:

Thanks Plakkie, your Thread is a great help for all of us.:smiley:

I agree, the potential of this feature is enormous. But I don’t really understand why Pixologic didn’t fully implement it right now.:frowning:
The old preview-video showed a nearly perfectly evolved workflow.:confused:
I will dig a little bit in the depth of the system, maybe I can find out more.
It would be very helpfull if we could get some insider-informations about this topic from Pixologic-members.:wink:

Ralf

OK! i really think i’m to stupid for the topology tools :angry: or they still have to many bugs right now :cry:
But every time, i have big problems with them…
I tried to edit the existing topology of one of my meshes as described on the first page of this thread. But after hitting the “edit topology” button, my problems began:

  1. some lines not there (image 1)
  2. symmetry doesn’t work
  3. in “move”-mode some vertices not connected (image 2)
  4. can’t delete some vertices

The tool was complete modeled in ZB2, i started with zspheres, then made adaptive skin and sculped it. Haven’t changed anything in ZB3 yet.
damn… i really don’t understand, whats wrong with it :angry:
It would be really kind, if someone here maybe can take look at my tool.
You have to take the topology from sdiv.2 and under rigging lvl6 :slight_smile:
starting at the fin
Please help, i don’t want start completly new with it :frowning:
Thanks in advance!

Train22

my tool (2,5 MB) deleted

one.jpg

Attachments

two.jpg

I’m trying to retopo a hand, using a very low number of polygons, and I’m having the same exact problem.

I’m seeing some weird issues with editing existing topology as well. Missing verts, non-symmetrical meshes, the whole bag. The mesh has no holes, but the figure is a mess.

Hmmm, wait, maybe I need to export as a obj, and use that? Do ZTools just behave weirdly then?

Has anyone found a way to make the mini-zspheres bigger and easier to see?

You don’t need to turn radial local zsphere sym on, holding down shift turns it on! :smiley:

I think I found something new.:smiley:

The second 2004 sneak-preview-video had two parts. The second part showed the now officially supported feature of that we all know now well, the creation of a new topology over a previous mesh-object.

But the first part is so much nicer.:lol:

It showed how to use the small micro-Zspheres-topology-lines directly as a rigg to manipulate the mesh on which they were drawn even before you make a mesh out of them.

Unfortunately, I didn’t find so far this cool feature exactly in the same way it was shown in the video.
But there is a way to similiar results.:smiley:

Do this:

Follow the steps of the Wiki to create a ‘Convert to Main’:

1.2 Convert To Main Feature

The Convert To Main feature has some very cool functionality. Designed to enable the surface rigs that were shown in '04 it has other uses such as creating vines on a character or a tree or many other things your imagination might come up with…you tell us!

To use Convert To Main there are a few things you have to keep in mind. First, all ZSphere chains must be connected to the base ZSphere that is active when you enable Edit Topology. If they are not, they will not be converted to normal ZSpheres.

The steps are as follows:

Draw your ZSphere on the canvas.

Go to Rigging and select the mesh you want to draw on top of.

Press Topology:Edit Topology. Make sure that the base ZSphere is selected or that the root of your ZSphere chain is connected to it.

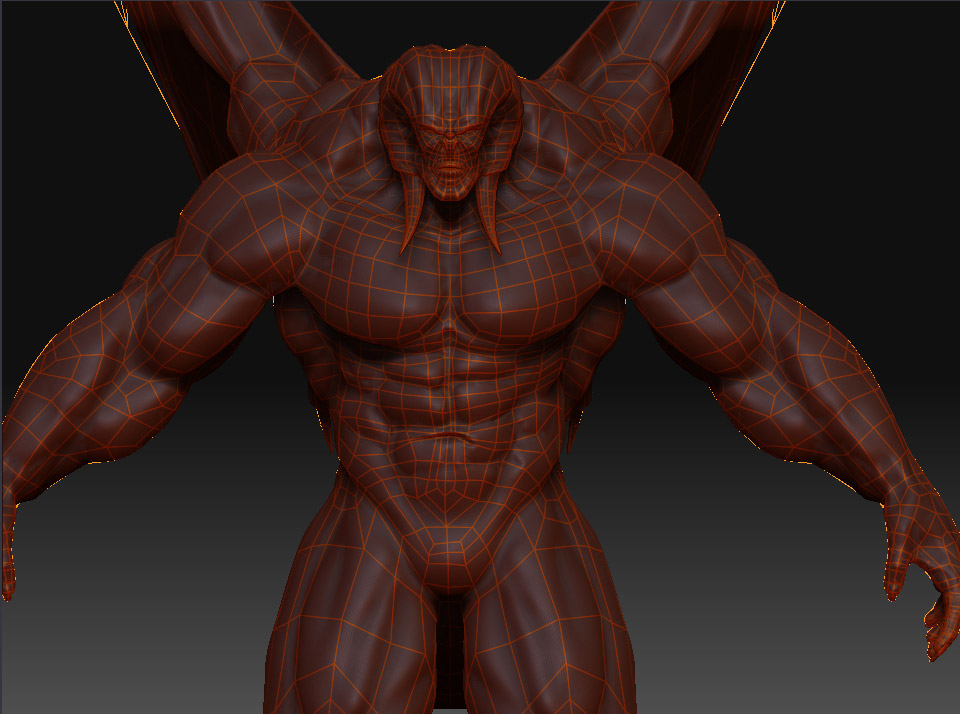
Begin drawing new topology on your model.

When you are done first press Convert To Main and second unpress Edit Topology. Your topology lines will now be ZSpheres that you can edit and adjust. From here you can add them to another model as a subtool

Now comes the trick:

  1. Press Tool -> Rigging -> Delete

The mesh-object on which you created the topology disapears.

  1. Press Tool -> Rigging -> Select and select the same mesh-object again.

3)Press Tool -> Rigging ->Bind

The ‘Convert to Main’-Topology is now the rigg of the mesh exactly on the same places where you draw it.

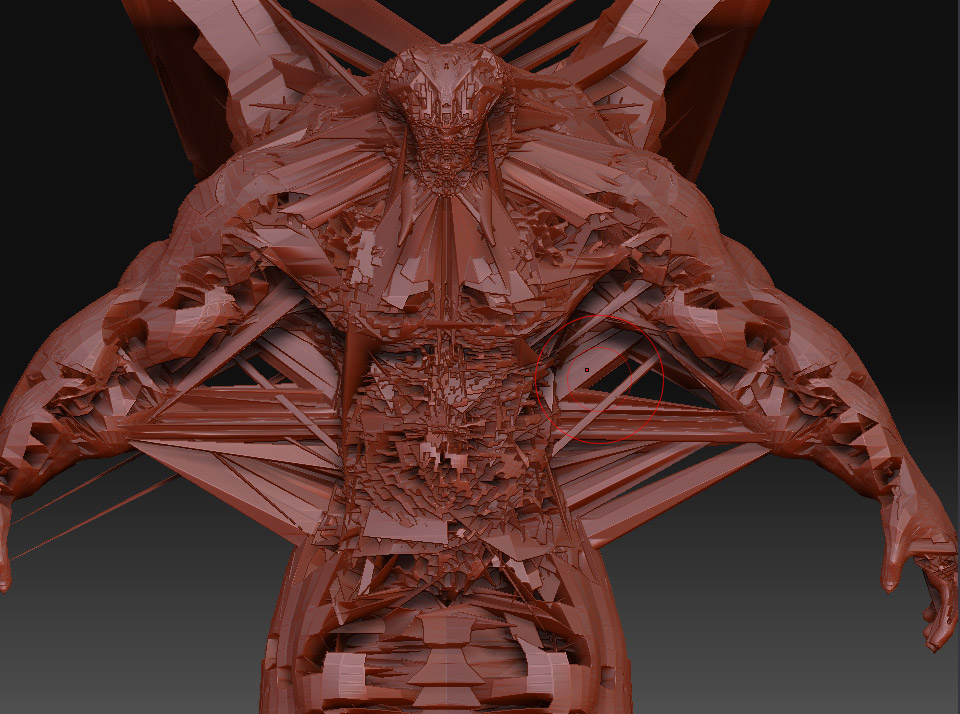
Now you can change to Move-Modus and manipulate the mesh very detailed via this new rigg.

The disadvantage compared to the original feature as shown in the video is that the rigg fully controlls all the mesh-strukture, even on places you don’t want this. The original function only influences a smaller amount of the mesh.
Maybe this can be compensated by masking areas (has ZBrush3 a weighting-option with his rigging feature ?)

Attached is a ZScript.

Enjoy.:lol:

EDIT: Ooops, I just noticed that the script won’t work without the model.:o
Because it’s a free model but from someone else and I don’t know if it’s allowed to attach it here, I cancel this Script and make a new one.
Please hold on.

OK, here is the new one.
Forgive the extremely simple mesh-objekt :o , but so it’s assured that everyone can run this ZScript without needing further files.:wink:

As you can see, there are some problems with that.
Some points don’t move at all.
The more micro-zspheres you add and the more subdivision your model has, the lower the speed later when you deform, at least your system will freeze frome one point on.:cry:
So I also think maybe because of the not perfectly programmed routines Pixologic didn’t implemend or describe this feature yet. :confused:

Last Edit:

Ah, I just noticed that Game Master 770 found this feature 2 days ago and made an own Thread for this. http://www.zbrushcentral.com/zbc/showthread.php?t=45109&highlight=rigging

Also the ZScript from Marcus Civic shows he same procedure.
I run it before, but somehow I didn’t realize it yesterday.
Did not sleep enough yesterday, sorry for posting this known feature again.

So this is not new, but I keep this post, maybe someone can use the ZScript.:wink:

sI struggled with the same thing that Train and Crusoe are describing for a while, but I managed to fix most of them by converting my tool to a polymesh at a low subdivision level before importing it as topology. I have still run into a couple instances of points on a mesh that wouldn’t delete, but that only seems to happen on the “green” points on the symmetry line, so I suspect that it’s a different issue.

Hey all,

So I’ve been using existing topology that I made a while back to make a game model.

So here’s a pic of the topology over my higher poly scupt:

[attach=61968]1_retopo_overlay.jpg[/attach]

And here’s the result I’m getting:

[attach=61969]retopo_result.jpg[/attach]

Any ideas what I’m doing wrong? Also, nottice on the chest one of the edges is missing in the middle. Odd…

Anyways, thanks for all the help!

Attachments

1_retopo_overlay.jpg

retopo_result.jpg

I have similar problems (to crusoe) with my mesh showing lots of missing edges when I want to edit the exisitng topology of an object. Doesn’t seem to happen with the built in objects, but happens with just about all other imported meshes!

About the holes in the mesh. I have found that if you are trying to skin something like a box with the topology shown below (in the wireframe) then it won’t mesh well since the adaptive skinning routine is looking for a network of connected edges and wouldn’t know whether you wanted to skin the surface of the box, or the square thats defined in the centre (shown in green) which is equally valid. The reason why goin up to subd lvl 2 can help is that the faces of the box have more edges to prevent this kind of problem, since the cross section is not a square any longer.

topQ1.jpg

Plakkie, your link to my .pdf on your main-site must be updated.

I renewed it with some infos.

It’s though to be at work will really wanting to play with Zbrush. (actually I’m spending more time editing this thread; it’s very rewarding)
Thanks for the update Rastaman, I’ve changed the link on the front post. :slight_smile:

Hopefully I can find some time later today to process some of the new replies.

Alex: In my experience Shift-Click to select a new starting point reacts a bit slower than CTRL-click. Maybe someone can concur. Ofcourse with CTRL-click there is a risc of masking, but with Clear Mask that problem is easily solved. There does seem to be a difference between Shift and CTRL click, but what it is…

Train, I downloaded your tool and followed the procedure on the front page. I got a decent topology mesh, and after clear mask could alter every point. As far as I could see everything was connected. Here is a ZScript I made while using your model. Turn on Show Notes in the ZScript menu, run the ZScript (after loading it’s hidden in the button shelf which you must open), and see if I did anything different then you. Please let me know if things still go wrong.
Cheers,
Plakkie

Ralf “Rastaman”, I see you have updated your new technique and ZScript. :+1:
I want to do it justice, so I’m gonna read it better and test it when I have time tonight, and see if we can find some space for it in post #1.

We are all making this a great thread!

I think the model needs to be a obj for ability to edit existing topology to work correctly. I will double check.

Did anyone already try this ?
I only could produce this one time (took only 10 seconds :eek: ), because in all other attempts ZBrush crushed.:cry:

I have a lot of ideas what I could do with that micro-zsphere-mesh, for instance use it as a rigg to be a kind of form where it could instantly reshape any basic tool like a ball into that face and animate it, but unfortunately ZBrush always crushes when I try to use this one as a Rigg.:cry:

HumanHead_converted_to_main.jpg

Yes, you can get this (if your PC dont hold down:D ) with the Convert to Main buttom
Convert to Main Toposubtool.jpg
Andreseloy

Crusoe:
You can accomplish the same thing that importing an obj does by just hitting “make polymesh 3d” on the subdivision level that you want to use as your topology before turning it into zspheres.