The other thing i have been experimenting with the rigging is once you have a desired pose press A (preview) and you can store Morph and make another one and so on, then you can use the slider to obtain intermediate posing…and Morpg Difference!
Andreseloy
Thanks, Andreseloy, I just thought if this would be possible but hadn’t time to try it out yet.
I will integrate it into the tutorial-update which already includes many new aspects and experiences and also new pictures.
Check in a few hours the new version.
hello boys and girls, i’ve just started playing around with the re-topology and posing using the rigging procedure thats been discribed in this Cool thread.
here’s what i get… so far the rig effects surfaces that i don’t want it too, but that was expected given the test i’ve seen so far, but all the steps discribed in the tut work very well to get me here. will be playing a little more to see if i can center the rig better and scale down the area of effect. any help would be appreciated.

@ Andreseloy: Storing a morph-target does not work with me, the Store-MT-button is always grayed out.
@ Threetails: It’s all in how you compose and lokate your rigg.
@ Plakkie: is PM here possible ? I would like to send you a copy of the word-version of tha updated tutorial.
@ All: An updated version with many new topics is right on the upload.
Watch out and load the actual .pdf.
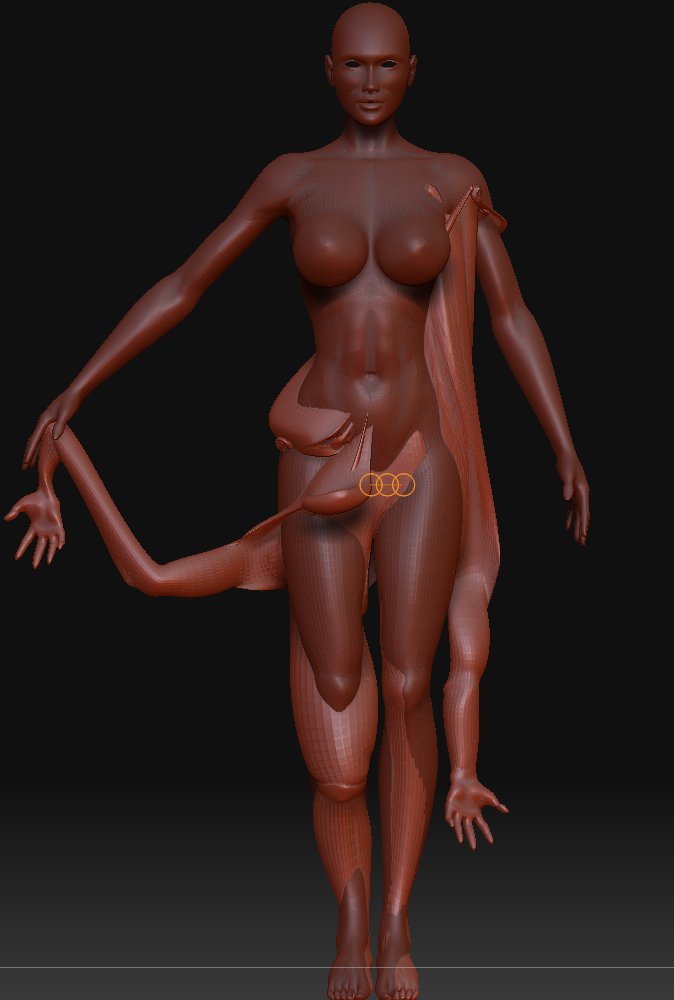
Here is an more improved rigging and posing of my model Jana.
Beside some left imperfections caused by a not yet perfected rigg, this is by far the easiest and quickest to set-up posing-method I have ever used in any app. If we can fix this to a workflow that produces perfect results, it’s far better than transposing.
But it might be also posible to combinate both just as one needs.
Will try it later.
[attach=57989]Jana-posed.jpg[/attach]
Attachments
Found another undocumented ‘feature’.
If you’re retopoing your mesh, and hold down ‘shift’ while drawing with a non-zero brush size, it creates a zsphere network that mimics the underlying geometry! Very bad for very dense meshes (scads of microspheres & a dense mesh! ), but great if all you are doing is reworking the low-res mesh!
Rastaman- Sounds like if its grayed out it usually means it is storing a morph target already. I think when you rig and do a pose then preview it seems to automatically save a morph target… from what I can tell.
Ahh long day, well dinner time and after that I’ll mess with the new method and push it to its max. See how it holds up with the poses and see how it differs from what we’ve been doing so far. It looks fun so far from what i’ve seen.
By the way, if you do rig with the previous version. Have the Glow structure and rig, can up the density in adaptive menu first make your pose then when you view preview mode in adaptive mode you will see the subdivision lvl 6 model with pose. Then you can just go into geometry menu and lower subdivisions at will and actually sculpt in each of those subdivisions just as you could do with zspheres in ZB2. Just food for thought in case it wasn’t worded right earlier when I briefly mentioned it.
Ok off for dinner then hopefully time to play with new method.
Rastaman did you run the zscript i posted?
at the end of the script you can see the morph target in on, and also you can pose in a different set and move the slider…
Crusoe i will check it to.
Andreseloy
OK folks, the updated tutorial is uploaded.
Crusoe and Andreseloy: will check this later, in Germany it’s now 4:30 AM :eek: and I need definitely some sleep.:o
Good night.
Happy ZBrushing.:lol:
Don’t know if this has already been suggested in this quite long already a thread: For retopologizing, since clicking and correcting in topo edit is kinda cumbersome (especially when you’re not already sure about your edge flows and like to experiment first), with moving points not sticking to the surface etc., it’s certainly good practice to simply paint your lines on the mesh beforehand. It becomes more similar to Silo’s topo painting then.
Up to now I haven’t managed to have an applied texture show up on the mesh in topo mode, so it seems one would have to do a Txr>Col first with reasonable subdiv resolution (and clone the tool before if there’s something polypainted already on it so you don’t lose that). Or you don’t use any texture at all and but polypaint right on.
It gets quite easy then to just paint some strokes along the right features of your mesh, do some quick concentric rings around the eyes and the mouth for example, add orthogonal lines etc. This serves as a great visual aid for the actual topologizing.
Sure: click on my user name in any of my posts and in the list you see “Send private message”.
Tried the new posing out, and ZBrush didn’t crash! Moving the rig inside the mesh was a very smart move Rastaman, and it shows you understand how software ‘thinks’. I’m gonna have to try some more, as untill now I haven’t gotten a good pose, because of the slow reaction time (got 1 million poly’s to push). Also rotate twisted my entire model, and not the one ZSphere I had selected. Is this normal?
I believe I read somewhere that Pixologic was working on ZSpheres with more control over how much geometry they’d affect. That would be a treat for this technique right?
this isnt exactly on topic, but considering its a zsphere thread sort of i have a quick question, when modeling with zspheres, if you try to rotate a zshpere it goes crazy, in z2 the rotation was much slower, is there a way to restore that?
Crusoe! This is awesome. :eek: Has anybody tried? You can actually PAINT on the existing topology. Take a fairly low poly mesh, set it up for topology, set the brush size, hold down shift and paint the topology on!
Why didn’t we notice this before? This goes on the front page asap. Together with Rastaman’s newest invention as soon as he sends me a wordfile. I’m actually amazed he DOES go to sleep. :lol:
Hi Threetails! Thanks for showing your findings so far. Really love the model. It has elegance and character to it.  small_orange_diamond
Ok, on a lower poly object it works much more faster, and somehow better I think. Rotation does the same thing as move with me. Should rotate really work as rotate? Arm and legs work just fine. But when I want to pose the head, the whole model reacts! Is this because I’m using too little Zspheres?
I’ve included my test object and a ZScript showing what I mean.
[[attach=57984]Riggingtest.jpg[/attach]]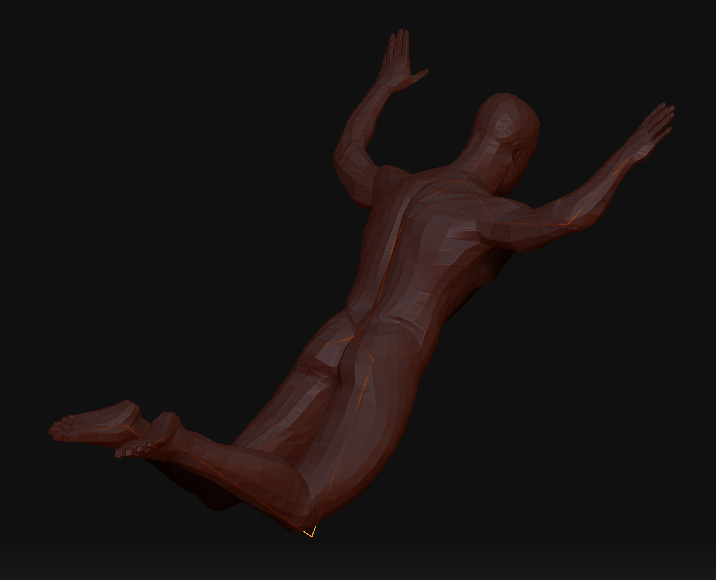
Plakkie: Word-file will be sent soon, but I want to try first a few things more that will be integrated so you don’t have too much work with all the updates I always do.
To your questions: Haven’t run your ZScript yet, but every Line in the topo can act as a root for all the following (meaning it also moves the whole afterwards connected mesh, but that depends on if you grasp the micro-zsphere itself or its connection-line), and it does this in the same direction that you placed it in the chain at creation-time. So like bones in maya, C4D etc, the connection has a base where it’s stable and an end where it moves. (and yes, Rotate and Move does nearly the same, except that rotate doesn’t shorten or elongate the Zbone, it only rotates them with a stable length.
You will figure it out soon when you play a little more with it))
The whole thing is so far I see mainly like a FK-Rigg (Forward Kinematik).
IK (inverse Kinemtik seems not to me implemented yet. So its like the old Rigging-systems of other apps from abaout 10 years ago or so.
So it’s very important for an easy and right working flow in your posing that you constructed your topo-rigg with that in mind, say you build Character-biped-riggs from the center to the peripherie, the first root-Zphere located at the center of your body (a little bit below the belly). Build the arm-rig from shoulder down to the hands, at the fingers use the wrist-point as base and connect via Ctrl + LMB-click all the fingers to it, but also draw them always from the wrist down to the finger-tips.
Keep all parts of the rigg connected together and build by this ‘from center to peripherie’-rule.
Then there should be no more wired behaviors when later posing them.
(This will be a topic in the next tut-update.)
@ Crusoe: Sounds great, will soon check it and if it’s OK for you, integrate it in the hidden-secrets-Tut with refer to you.
@ spaceboy: do you use a graphic-pen ?
If so, check in the Preference-menue if ‘use tablet’ is actvated. If not, do it . That should solve the problem.
plakkie, i think the head movement is caused by the root zsphere, just like when you make a normal zsphere model when you try to move the root it moves it all.
rastaman yes i have a tablet and its enabled and works fine, i’m just saying the rotation on zspheres for me is way too strong, not like it used to, i’m even using the same tablet settings i did in z2
Thanks Rasta and Spaceboy, I’ll keep it in mind when I try it out further. Ik in Zbrush… who would have thought…
Rasta, you drop the bomb when you are ready.
Read the new method tut, reads fairly well, though wasn’t clear at first how to connect the all the fingers to the one micro-sphere point in the hand, or I was just too tired to see it. Played briefly on a high sculpted model, had some points seep down into the model hard to see them. Sadly had to turn in another long day today. Prolly won’t get a chance to really go through it until Monday-Tuesday. Think i’ll start with a low poly model and to get the jist of the workflow first.
If the zspheres in this method work as usual in this new method could be interesting. Keep up the good work folks!
AngelJ, you join us when you are ready! We can’t all ZBrush round the clock like some people I know… :lol:
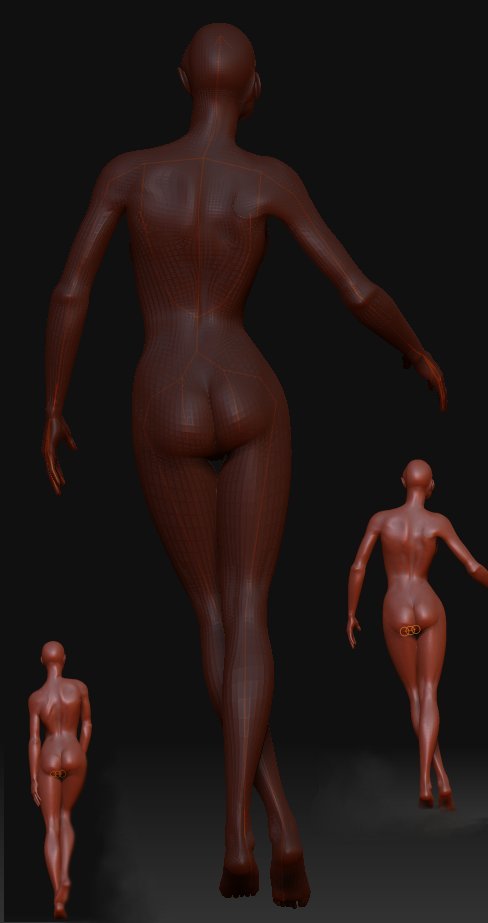
Some food for you:
Jana peels her skin off.
A double rigg work :eek:
[attach=57991]Double rigg_gross.jpg[/attach]
The tutorial-update is just in Upload,
All tutorials have moved to:
http://www.zbrushcentral.com/zbc/showthread.php?t=46117
Plakkie, check your PM for the word-file.
Attachments