Adreseloy: good idea. Sifting the working stuff from the not-working-that-good stuff. 
Plakkie
On the “convert to main” question, you have to unpress “edit topology” straight after converting to main. Then some geometry should appear rather than a blank screen.
http://www.zbrush.info/wiki/index.php/Tutorial:_Hair_Sculpting
Alex
Yes, that gives me some ZSphere chains to look at, but then what? If I preview that mesh I see nothing or a complete mess…
As I wrote, the last technique I described could be a verrrry cool tool for further usage, IF only it would work like it should.:mad:
You come with that to a microzshpere-mesh of your previous normal mesh-object within a few seconds and without any handwork (like the official way) and if ZB wouldn’t crash when you try to make the last step (Unpressing ‘edit topology’) , you could use this resulting ‘Main’ as a rigg.
My suggestion for something like that would be f.i., that you could bind a let’s say normal simple sphere-mesh to that ‘shaped’ rigg and the Sphere would instantly take the form of this rigg (maybe you could control the amount of this effect via sliders) and then you can change postions like you do in animations etc.
So with that feature, you could convert every desired Mesh-model into a highly detailed rigg that also acts as a mold (correct word ? in German I mean a ‘Guss- bzw. Abdruckform’) for almost every other Mesh-objects.
Imagine what cool things you could produce with such a feature.:eek:
Here is a script to that.
The first part of the first script is only to create the mesh-object, the second script uses the default star-mesh-object from the tool-palette and is a liitle more ‘nicer’ in the produced mesh-rigg.
The script ends at the point where you should unpress ‘Edit topology’ to create the usable rigg, but if you do so… data-nirwana :rolleyes:
is there any way to turn that caged wireframe in to a poly mesh so we can combine it with another mesh and over lay it? the micro zsphere im talking about at the end of the first zscript.
Thanks Rastaman i will look right now! Thanks
Andreseloy
ps:mold= container
In the second zscript ZBrush hold down, not the PC.
Andreseloy
it may have been mentioned somewhere, but I have been unable to find it. I need help asap. I cannot retopologise my model’s hands without big holes appearing on the fingers. It worked ok for the feet, but no matter how many times I try I cannot make it work  Does anyone have any advice for me?
Lead Balloon: show pictures, upload your tool, and we will see if we can spot the problem.
Rastaman, tried the scripts, got a nice looking star. Your plans with these ZSphere structures are tantalizing, but as we found out, every endavour to do something with those microspheres makes Zbrush fall flat on it’s a**.
We’ll probably hear something about it when the first upgrades for Z3 come out.
(btw. I ordered the official disc, but I got a message which read that due to last minute code changes it will be delayed. Maybe pixologic read this thread and are desperately trying to fix this weak spot. ;):lol:)
Cheers Plakkie, the problem seemed to go away when I doubled the number of faces I was making around each finger. Unfortunately, I accidentally deleted part of my foot  so i gotta reconstruct that in a minute. Ill post my tool if I get any more major problems
Glad to see it working out. Sometimes you get some scary previews, but they mostly go away when you continue. 
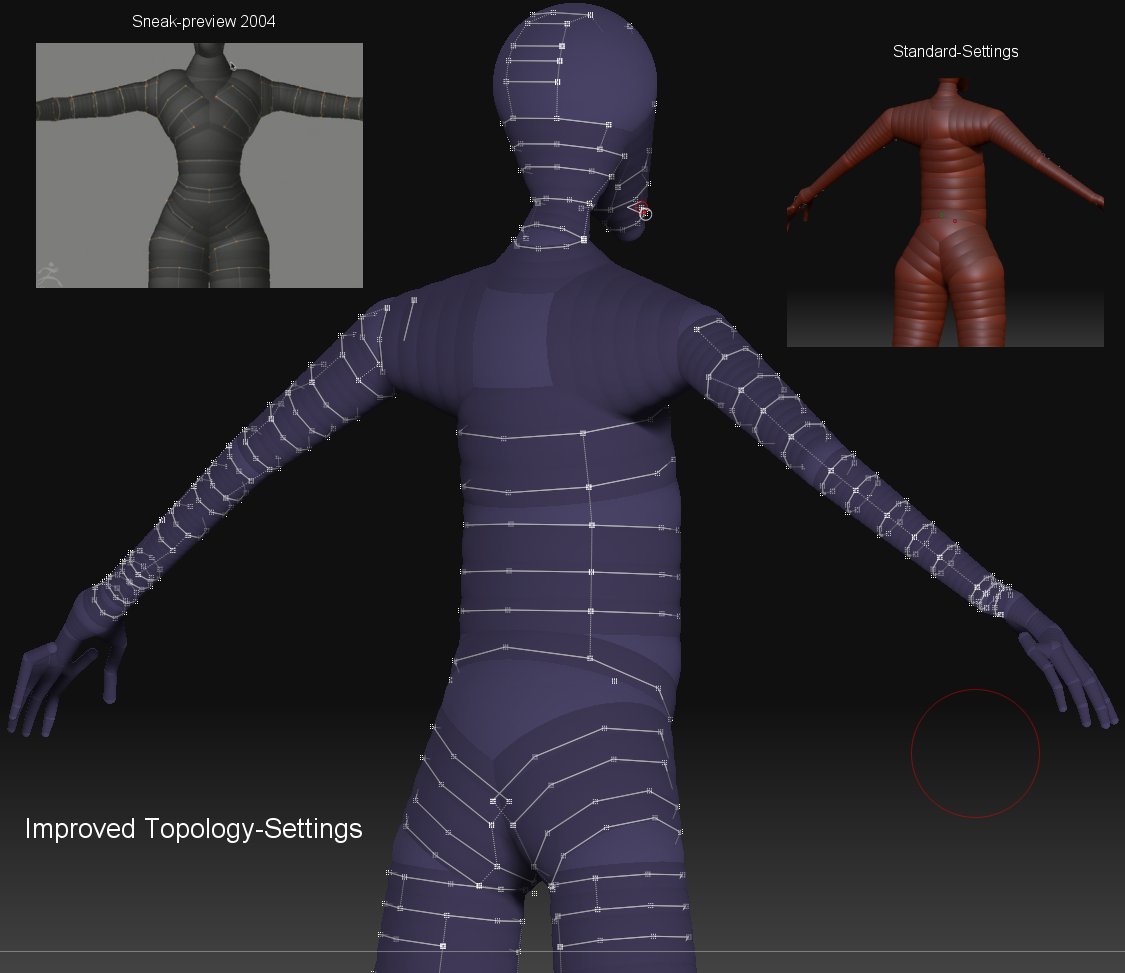
Unfortunately we don’t have the same good view to the topology during the creation-process as shown in the former sneak-preview.
Fortunately  I played around with some material- and light settings…
Tataaaa:
[attach=61970]Lights_Materials.jpg[/attach]
Hint: the topology here is only quick and dirty done to show the differences.
And here are the materials and lights for that:
Attachments
Arghhhh :mad: :evil: :evil: :evil:
Just noticed that ZBrush didn’t save the color-settings within the modified materials. :rolleyes:
Could please somebody tell me how this works ?
So you have to readjust the color settings to your choice.
Because some shaders only varied in the color-settings, you can delete the double-ones.
Sorry for that.:o
Sorry if this was arelady asked but here’s a thing. I made a quick retopo of some hair for my character and so far it says that there are 800+ polys,but when I hit Make Adaptive Skin and set density to minimum -1- I get a model subdived one time… What’s up with that? How can I get a model that has those 800 polys? Reconstruct Subdivison doesn’t help… Cause if this is how reropology works in 3.0 then I don’t see a point using it… Must have been something I missed.
EDIT: Nevermind the question… I found the solution
Sorry hadn’t much time the last days…
@Plakkie: i had run your merman-script, and everything seems ok now, but can’t understand why my steps didn’t work.
Show action were “on” but couldn’t really see your steps in this script. But as far as is could see you made the same steps:
- loading the tool
- clone tool
- add zsphere to canvas
- select original tool with subd.lvl 6 under rigging
- select cloned tool with lvl2 under Topology
- edit topology
after running your script i saved the topology-tool and i will try to continue my work now with this version
thanks a lot
best regards
Train
thanks for all the tips, really useful. the only thing i can contribute is watching the direction of the zsphere ‘bones’ as you click and join; if its pointing towards the next join it’ll work, if its pointing away (ie you’re wanting to attach to the base rather than tip), it’ll mess up. in that case, deselect by clicking empty space first, then click the other sphere, and connect it to the first.
my efforts after an hour or so… great fun. clearly the tools need a bit of a polish up from pixologic, but the core functionality is great. seeing a virtually instant update of the old mesh projected onto the new when you press ‘A’ is fantastic.
[ ](javascript:zb_insimg(‘57271’,‘z3retopo.jpg’,1,0))
Editing existing topology
- Load the model you want to edit
- Select a new ZSphere tool.
- Clone your model.
- Make sure that the subdiv level of the cloned model is at 1 or 2 (If you don’t, it doesn’t work! The original model can have as high subdiv levels as you like)
- In the Tool:Rigging subpalette, select the original model, and activate (optional) the Projection Mode, so that the model which will be generated is projected on the Template.
- In the Tool:Topology subpalette, select the cloned model. All the lines will show up.
- Enter the Edit Topology Mode.
Thanks
Lefty: see post #151 and post #166.
Can we lay the finger at the sore spot here? I never got this problem. When does it occur, while importing a .obj, or .ztl? An older model made in Zbrush 2? I’d like to recreate it, see when it does and does not occur.
plakkie, which problem are you talking about? Importing foreign topology?