You’re welcome. It can still get frustrating trying to see everything so you just have to go slow.
One thing I’ve noticed with this method though, is that if your original mesh has a lot of surface detail, it won’t project through to your retopo mesh using the projection menu. The detail will only show up on the first piece/tool that you started to retopo. (like the torso, for example). So you’ll have to project all that detail back into your mesh through the subtool pallet once you’ve completed the retopology.
Going slow isn’t a problem for me lol as Ive been on my mesh for weeks. Its a fiddly business topology:) but perserverance is my middle name:)
Thank you very much for pointing me in the right direction, I shall try a bit today:)
Yippiee:)
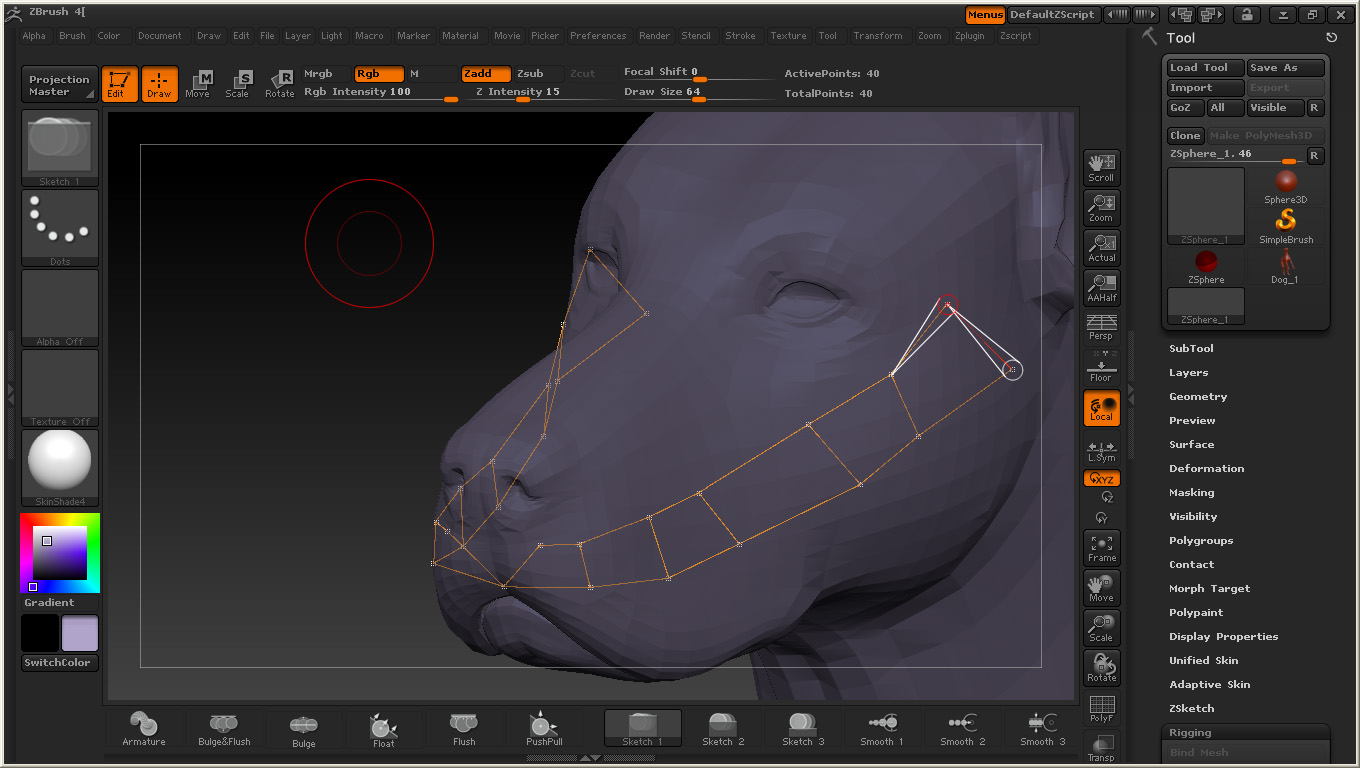
I want to hide the other side when i make retopolgy
Attachments
Holy cow XP!
I read the whole thing here, all 50 pages and you ask my one question one the last post of the last page!
So…
How do we hide the stuff in the back?
This is quite possibly the best example of a lot of people getting together to help each other I have ever seen online, Im very very impressed you guys, THANK YOU!
without options:( …the only way http://www.zbrushcentral.com/showthread.php?t=99645&highlight=ReToPology+transparency
Thank goodness for this trusty old thread. It just saved my ass! Thanks!!! 
[quote=“Plakkie”]
Well, I tried two different ways, both of them ugly. The second one give a nice artifact, a pit with a point very far away from the model. Is there a cleaner way to close this gab/make the points come together?
[
Attachments
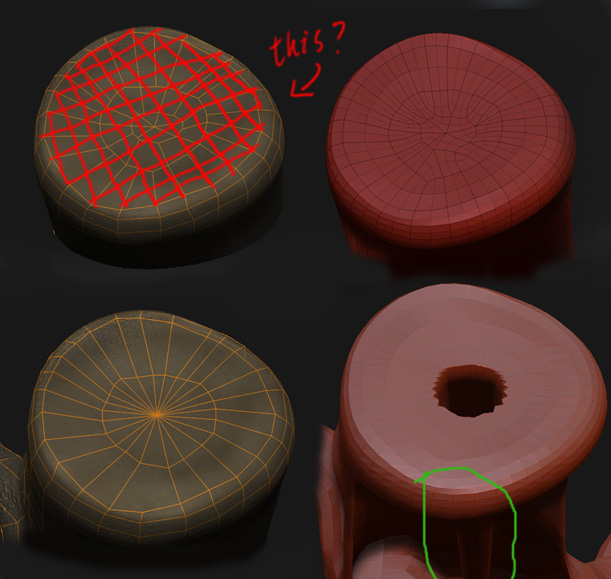
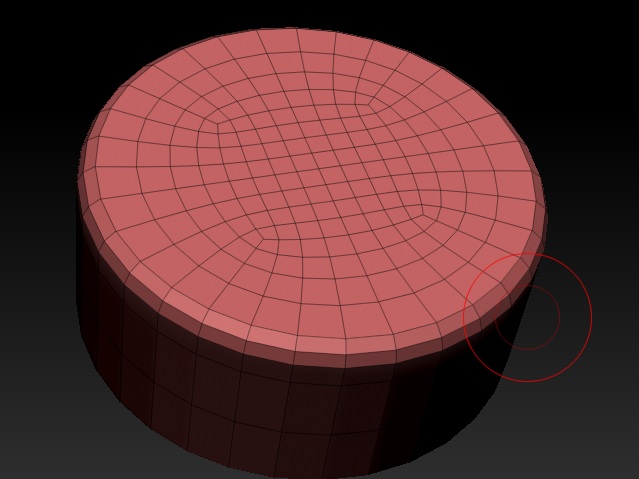
or this way which keeps evenly spaced quads:
Attachments
Script file for showing top procedure gives error
tool:rigging:select
in…
[IPress,Tool:Rigging:Select]
OK
Hi,
This is probably something very simple but its got me stumped. I’m trying my first topo of a decimated model, I would like to have quads again instead of the tesselated triangles that decimation master makes after a decimation so I am following some tutorials on how to re-topo in zbrush however, my biped rotates all over the screen instead of locally where I am working on the new loops. Its agrivating since I’m not sure where to fix this, and manipulating my object around the screen to keep the spot I’m working on in view is painful.
Can anyone help with this?
-Andrew
Do you have the ‘Local’ button pressed (Local Transformations)?
Without that, the model will rotate around the models center. Tricky if you are in close.
Ross.
Hi! Like many before me, I’m learning topology in brush.
I ran into one issue in the op.
I retopo’d, created the adaptive skin, but I think they moved th eprojection button to project detail on the new mesh. (And yes, I did look under projection.)
So I managed to get the basic shape of my test onject, but couldn’t then project the detail on it.
Is there a newer tutorial using Z4 or zbr2?
If you change the Dist setting under Projection from 0.002 to 0.2 that might help, I dont have a lot of experience with this but someone suggested that to me and it worked great.
I’ll try that and report my results. I the projection button as grayed out and non selectable before.
During retopo you should be able to preview the adaptive skin by pressing the ‘A’ key, or clicking on the ‘Preview’ button under Adaptive skin.
To project you just turn on ‘Projection’ under the Tools->Projection options.
I thought the button was greyed out at first too but for some reason it’s fine on mine. Try doing a preview before clicking ‘Make Adaptive Skin’. You should see your projected details. If not check the settings under the tools->projection and make sure it’s turned on. Or adjust the strength and other settings. You may also need to increase the density of the adaptive skin. Or reproject the details through the subtool menu option of ‘ProjectAll’. This can be done by appending the high detailed model as a subtool with the new retopo low poly model and using the ProjectAll options.
Thanks for the advise!
Greetings friends,
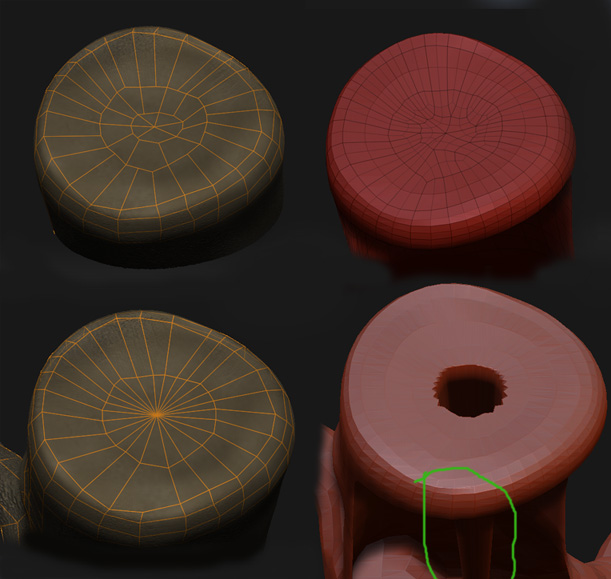
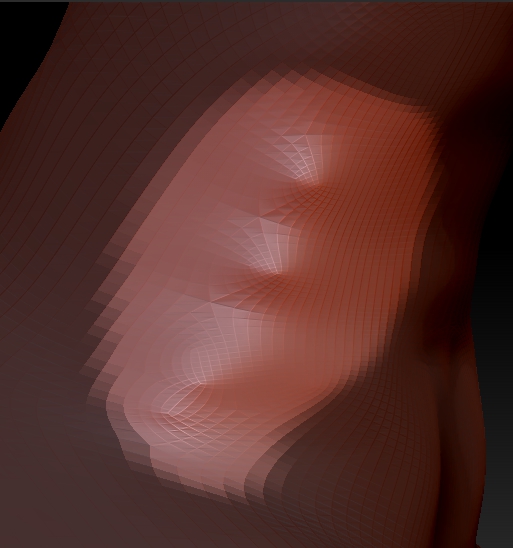
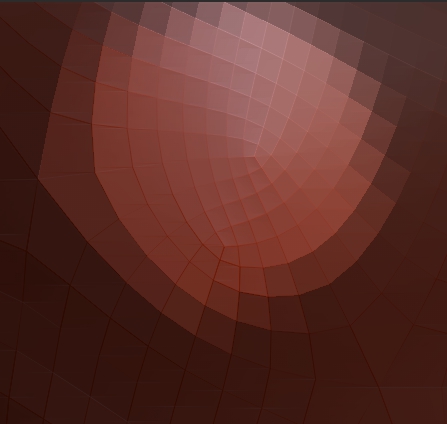
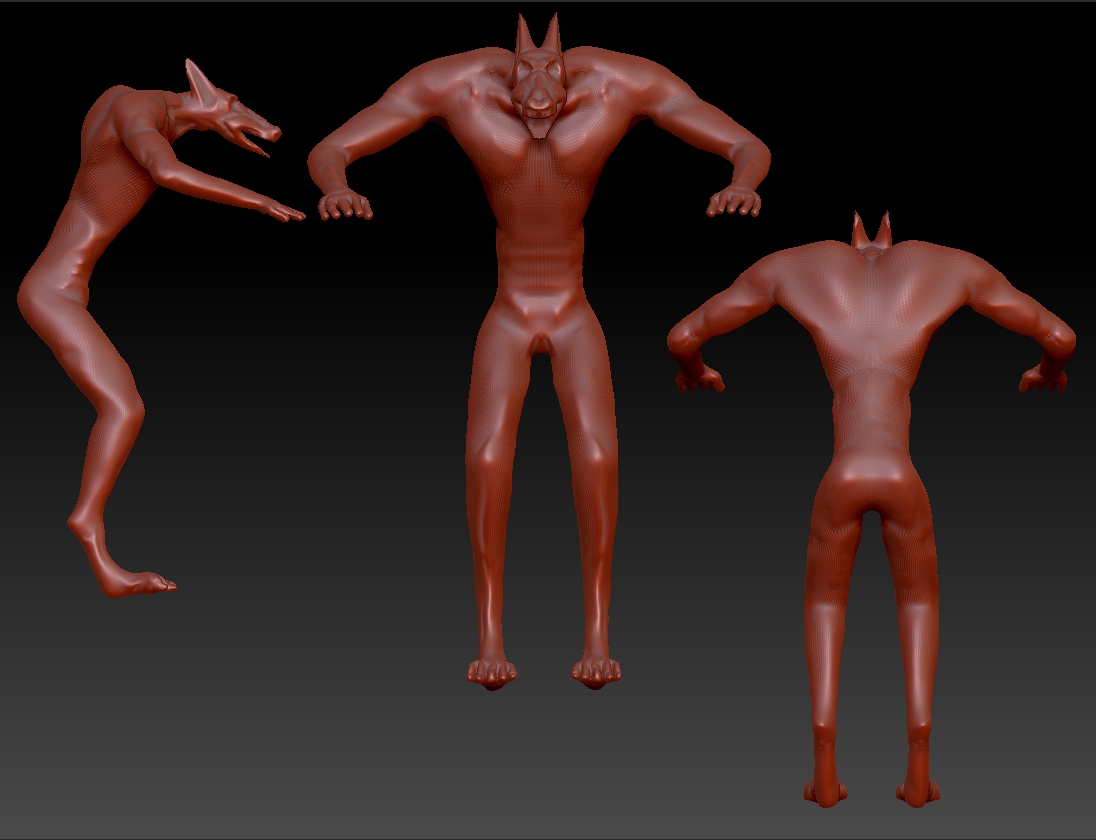
I have been working on a Werewolf for a few weeks now and I had to completely retopologize him in order to create his head correctly. I am fairly new to Z brush and I have hit a road block! After retopping the entire model, I saw that in some sections there were what appeared to be “Pinched” and “swirled” areas. They took place where I could not make 4 sides Polygons and they are now causing me many problems as I raise to higher Sub Division levels during the creation process. I tired to go back and edit the new mesh but I find that anything I do always ends in some problem. 1) How can I quick fix those “swirled” pinches?, 2) When painting on soon-to-be mesh for retop, how can i keep nice straight lines (My hands aren’t stable enough to draw them perfectly on my pad)? Added the pics of the Werewolf and his current problems.
Attachments
This is where you may need to rethink that area of your topology! Almost all triangles CAN be avoided.
If your mesh is symmetrical then i am almost certain you will be able to get rid of those pesky tri’s 
Hi, Im new here.
I would like to know how to delete multiple vertex points when retopologising with zpheres on a mesh.
I know deleting one point is {To delete a point: ALT-click on point.}
but what about multiple points?
I do not want to export my mesh to MAYA to retopologize there.
I know even in MAYA, you can’t delete verts in vertex mode, but at least you can delete the edges, or faces.
What is the equivalent of this when you are in using zphere for retopology?
I hope there’s someone out there…
Thanks!
Make your draw area bigger, I mean the cursor, or try using the retopology brush.