ZBrushCentral

Thread of Madness - Joseph Drust

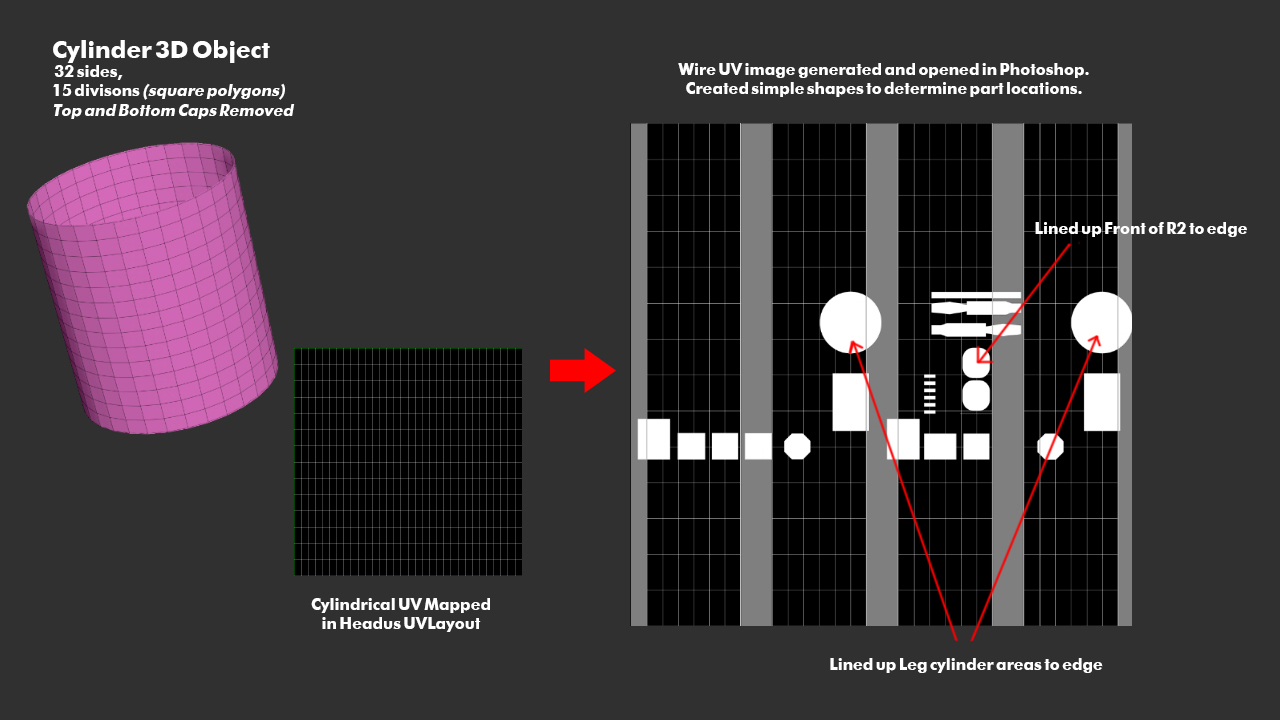
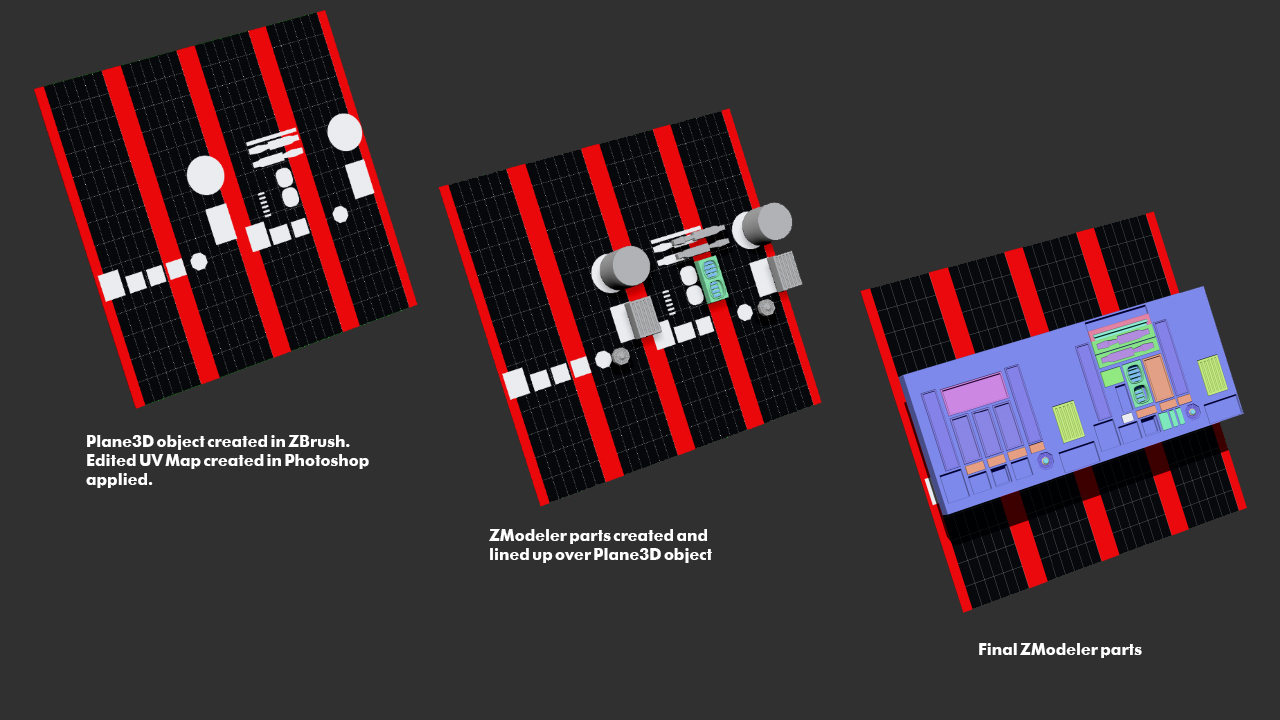
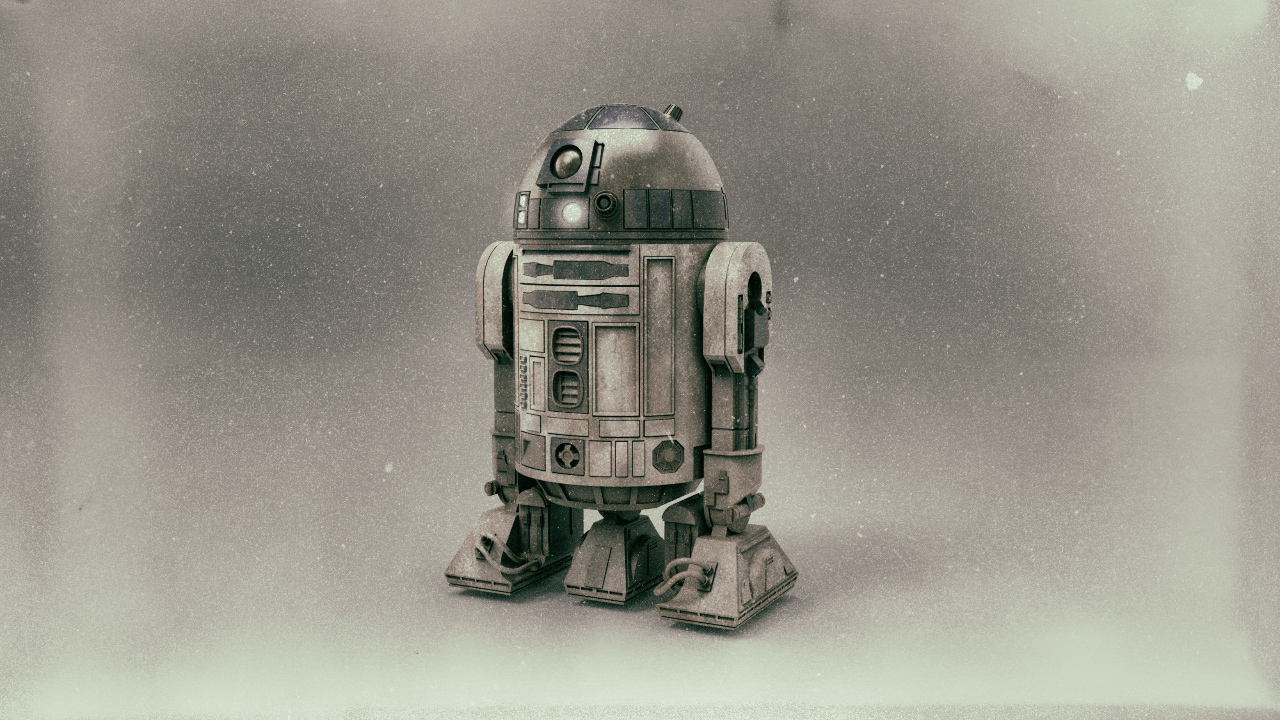
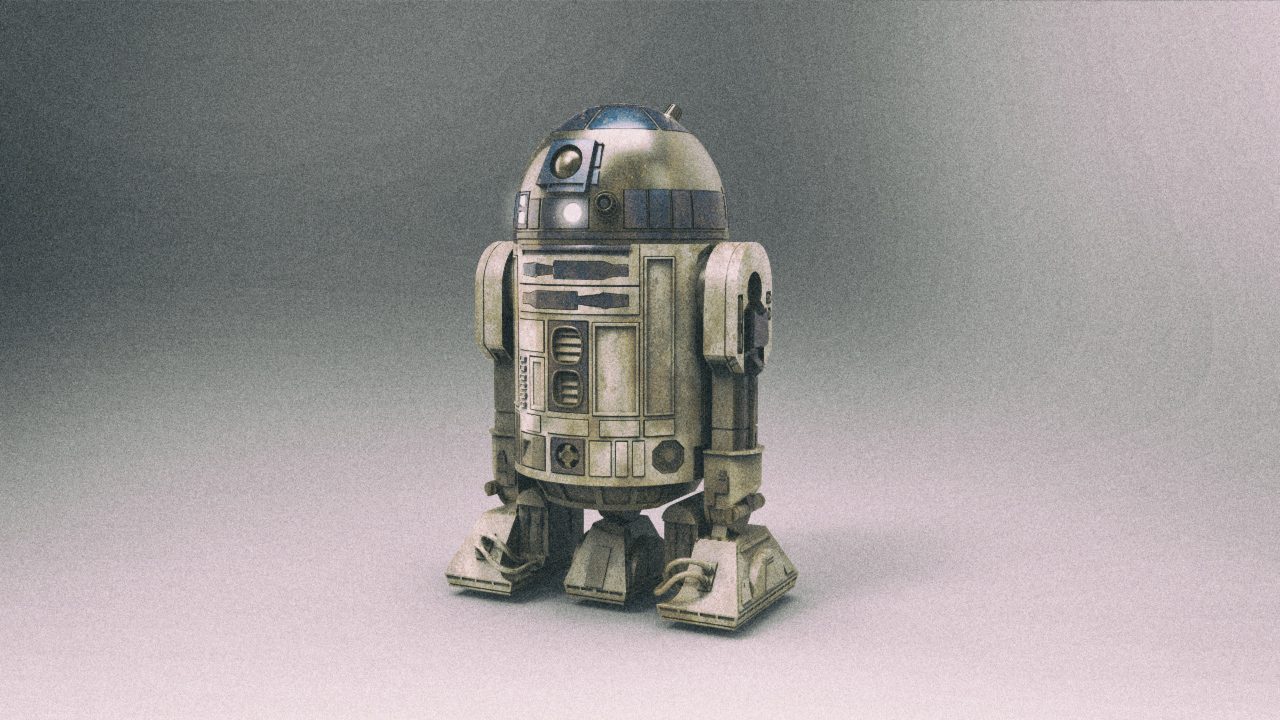
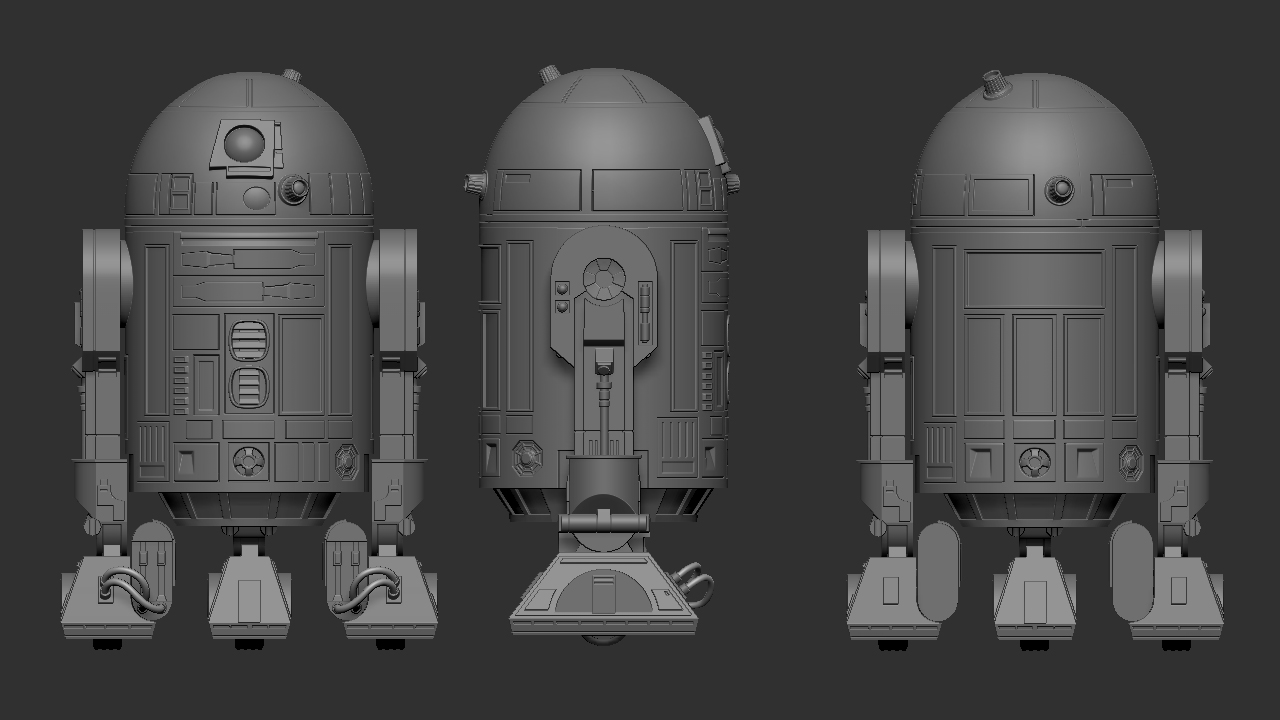
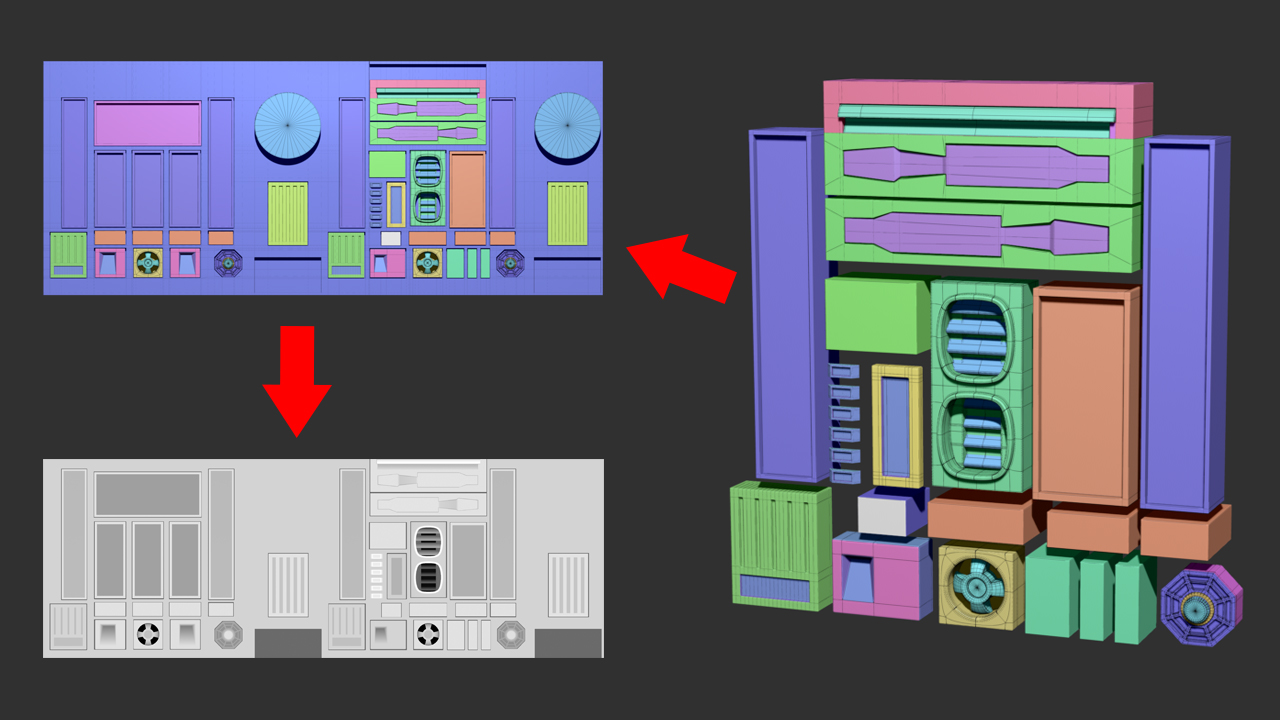
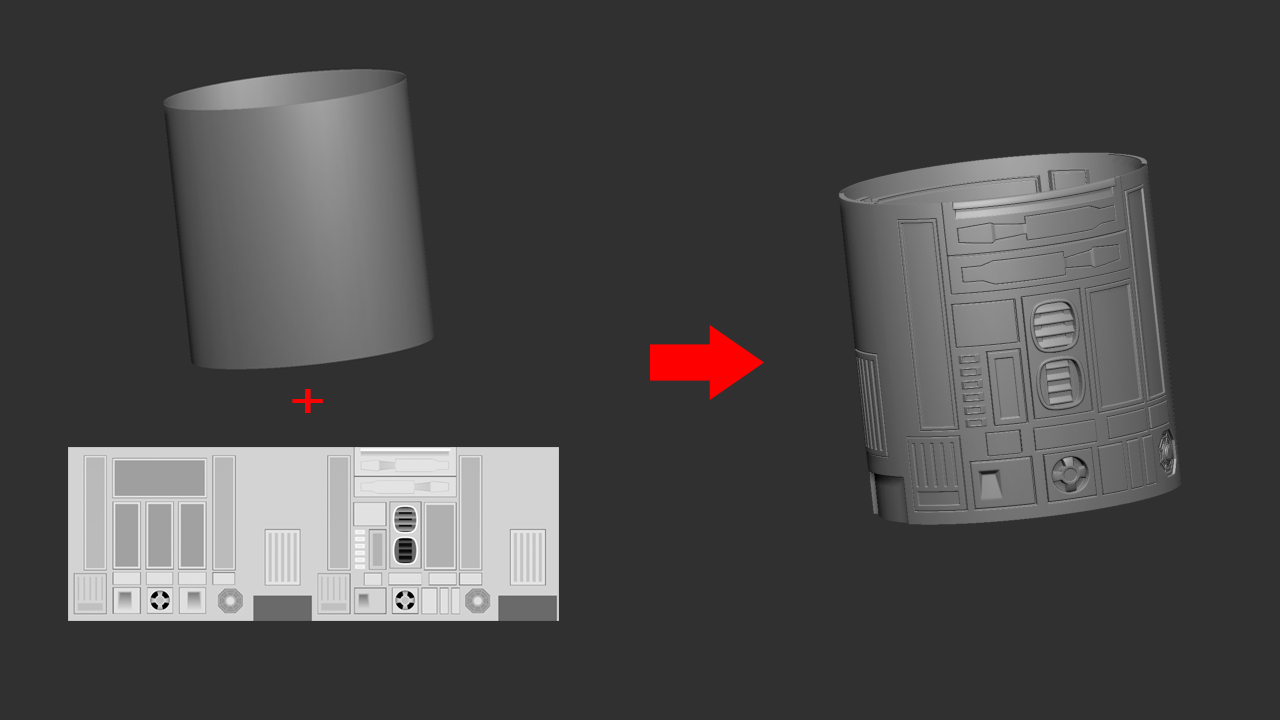
Instead of doing another quick sculpt, I started working on an R2 model. Now I know I could have just downloaded one of the countless other R2d2 models you can find online but I wanted to test some Surface Noise workflows and ZModeler Usage so he was a good test case :slight_smile: I will be posting some other images of him posed and probably 3D printed soon
 :wink:

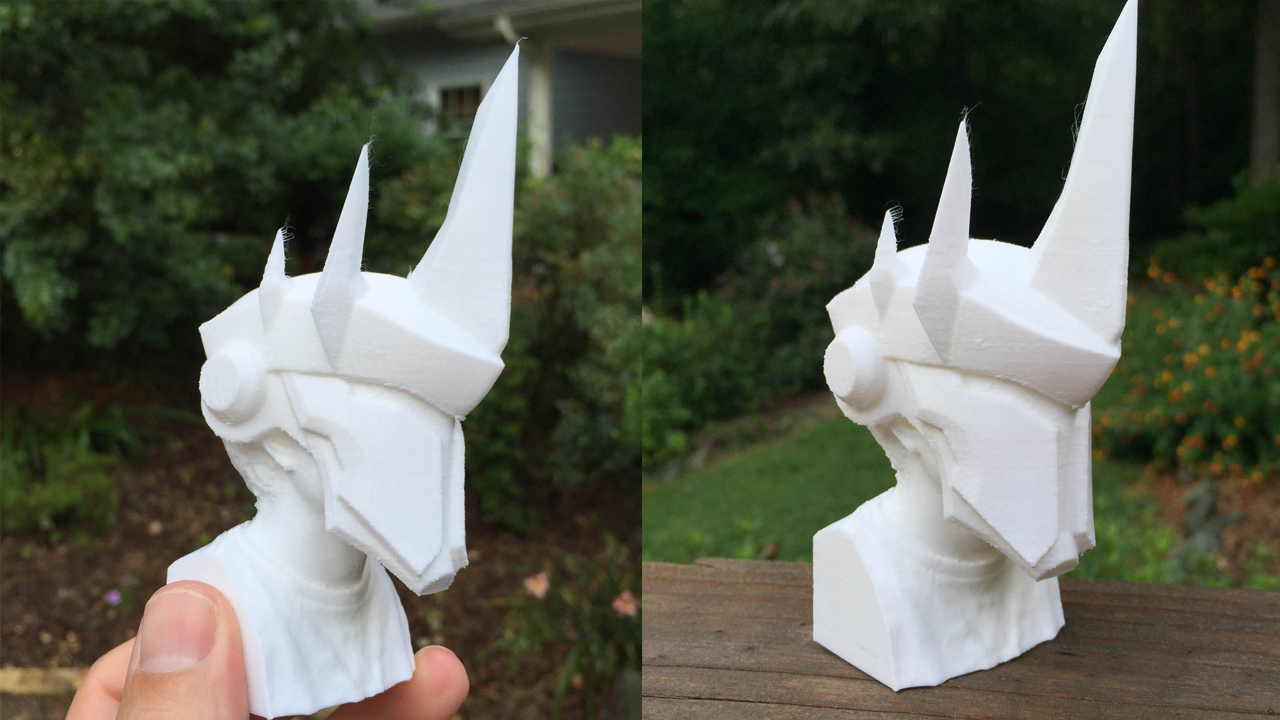
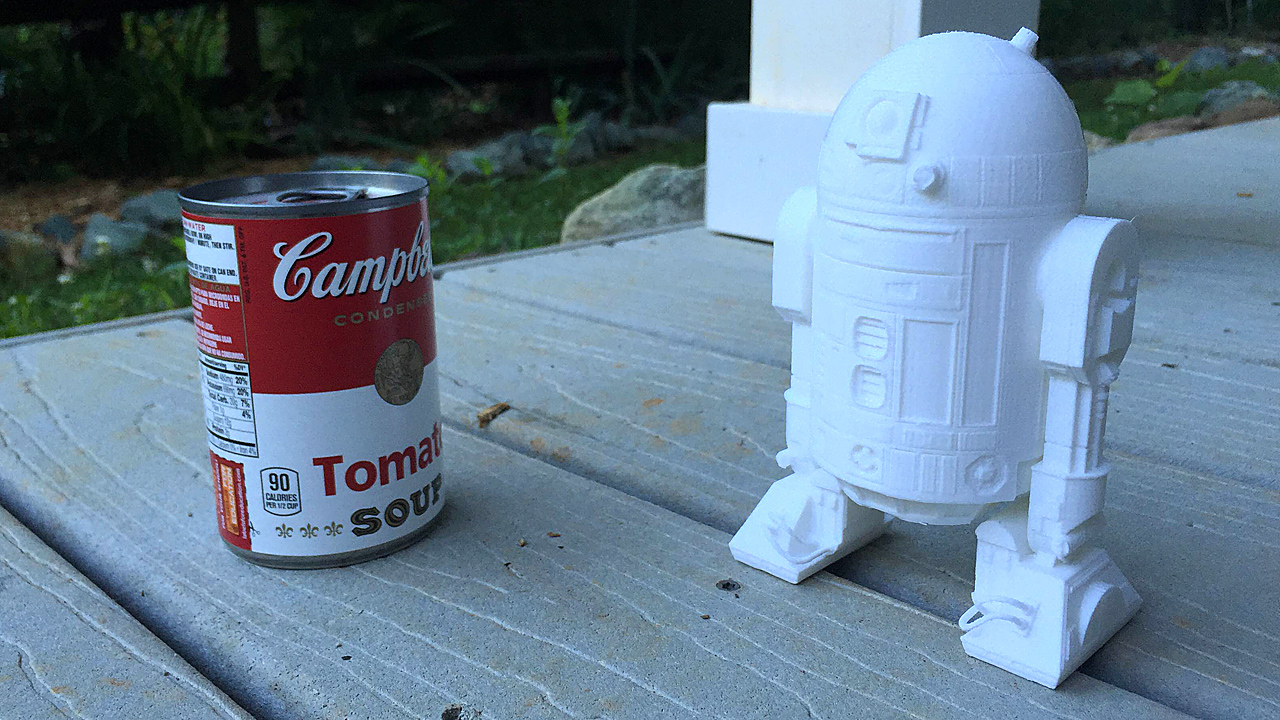
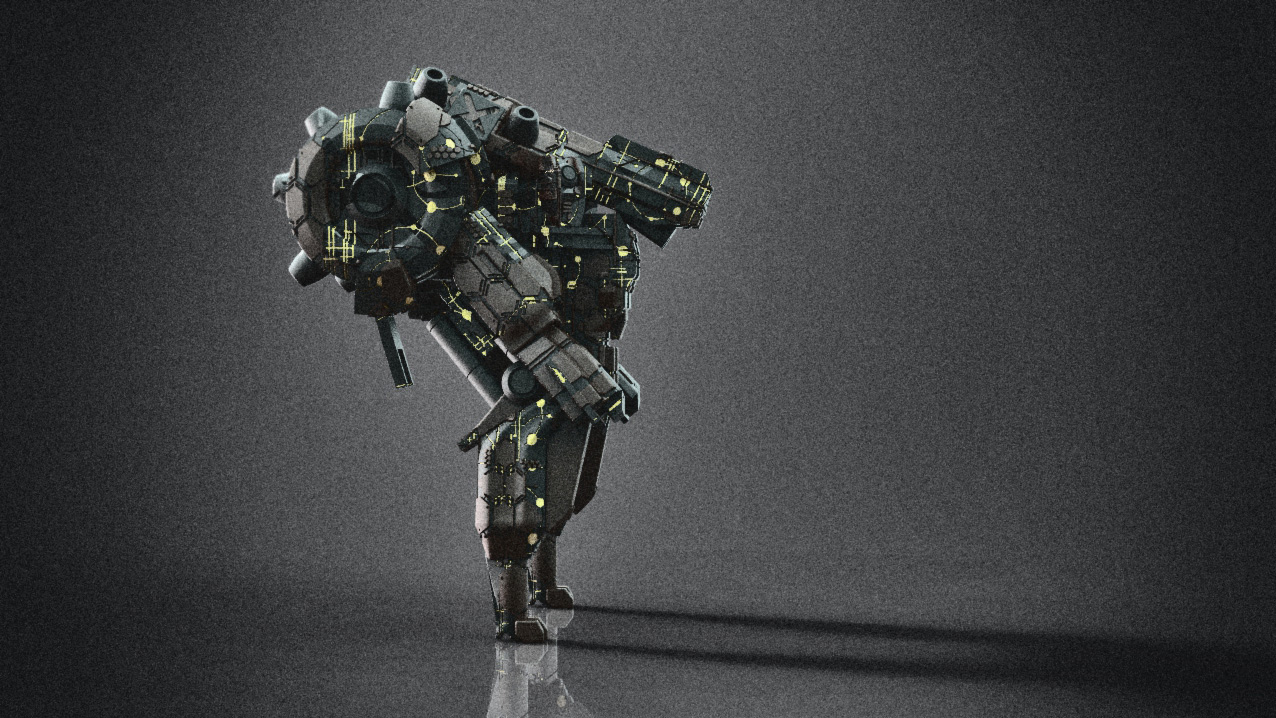
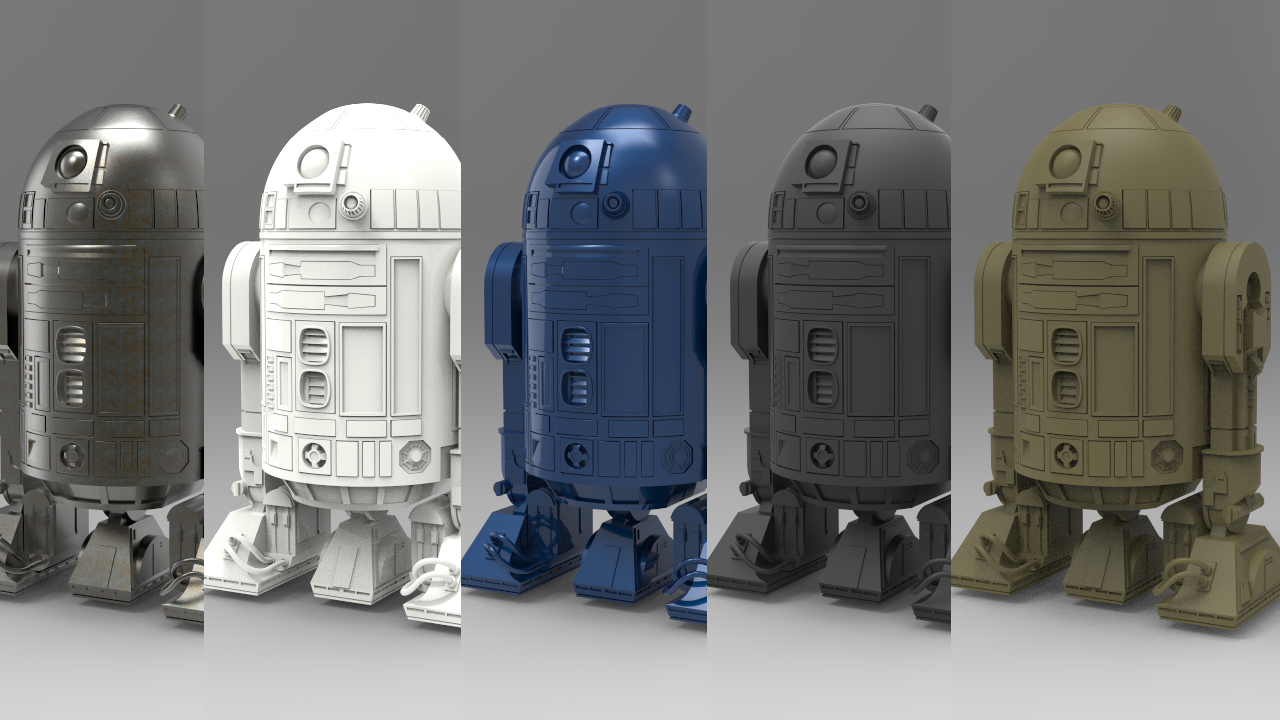
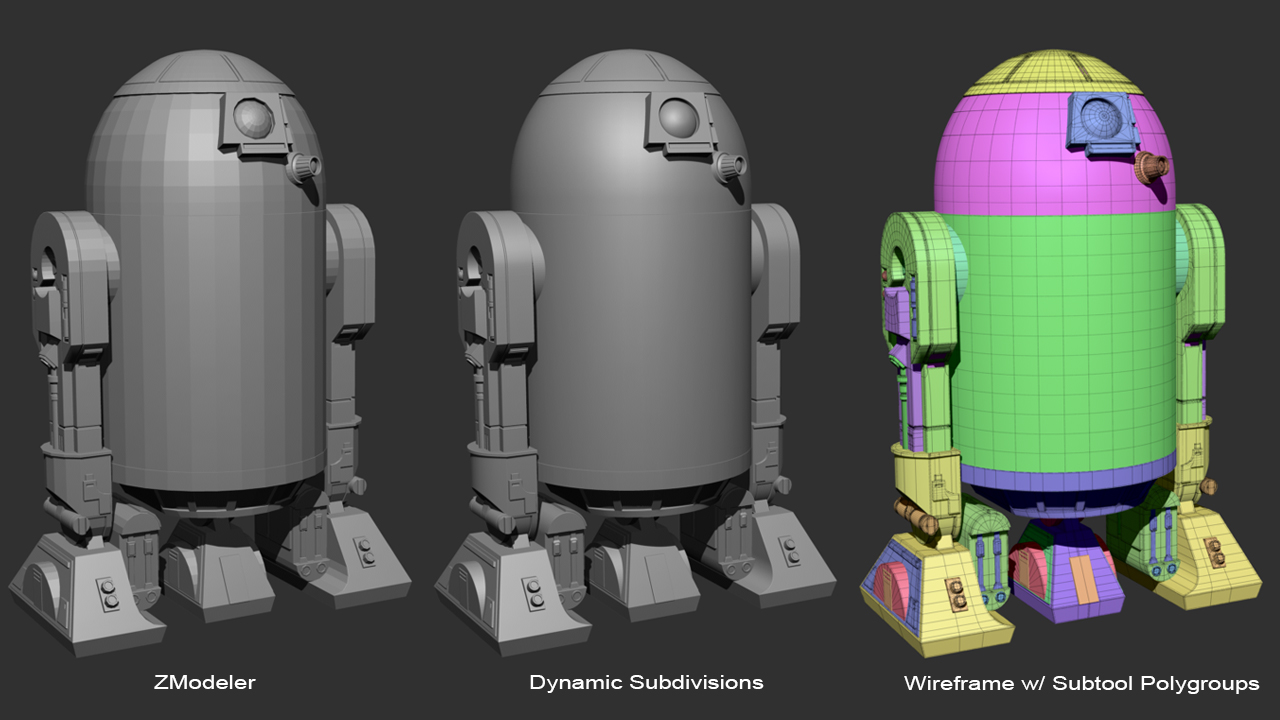
I created a few render passes in Keyshot then did the Photoshop comp with layer masks. Right now he is in multiple parts; I am going to organize him and make him a little more user friendly.

r2_02.jpg

r2_03.jpg

r2_04.jpg

r2_05.jpg

-Joseph

Attachments

r2_03.jpg

r2_02.jpg

r2_04.jpg

r2_05.jpg

Its working after the updated file was replaced. Thanks mate, really appreciate that.

Hi joseph awesome work . What are u doing with those planes on your last image . Perpendicular ones i mean in that sci fi image .

@snipex12: The Planes of geometry I am using to create horizon effects. Once then get to Keyshot I apply a ‘XRay’ material to them to generate atmosphere (depth pass could be used to do this as well.)

So I wanted to post images on how I created the Alpha maps for R2. R2 is made up of standard primitives with greeble attached. His body and dome panels were created flat with ZModeled parts. These parts where they placed on the canvas. Once they were in the precise location I did a GrabDoc from the Alpha panel to create the height map. These maps where then applied to a cylinder and hemisphere model to create the body and dome details. Below are images describing the process.

ZModelerAlphaCreation_01.jpg

ZModelerAlphaCreation_03.jpg

Rest of the parts modeled with ZModeler and ZModeler InsertMeshes.
ZModelerAlphaCreation_02.jpg

I also did a quick test print of him out of PLA (white is a bit hard to read.) I think I am going to work on creating joints for him next then print him out on in resin.

ZModelerAlphaCreation_04.jpg

-Joseph

Attachments

ZModelerAlphaCreation_03.jpg

ZModelerAlphaCreation_02.jpg

ZModelerAlphaCreation_01.jpg

ZModelerAlphaCreation_04.jpg

Went on another Scripting Tangent :slight_smile:

Cki Vang (krysalid - http://www.vangcki.com) wanted to store some PanelLoop presets inside of ZBrush so I threw this plugin together. The FREE plugin is called ‘PanelLoop Presets’ and will allow you to load and save 12 PanelLoop Presets for later use. Below is a video of the usage and also a link to download the FREE plugin.

PanelLoopPresets.jpg

FREE Download and Install Instructions at: https://gumroad.com/l/kLMOY

As always If you run into any bugs let me know and ill try to fix them =) Thanks to Cki Vang for help on this plugin!

-Joseph

Cool Panel Loop Plug-in. I think a Custom Section under all the Default Presets would be Cool, so you dont have to Replace the Defaults, that would be a Nice Addition.

nice plugin
would be nice to see the bevel profile curve in the icon displayed somehow


ask zbrush
was always curious if its possible to get rid of that little lip of overlapping polygons you always get with panelloops

Sweet, just got it! Thanks for this Joseph and Cki!

Mighty fine scripting tangent it is too:+1:
Thank you Joseph.

@gmp1993: There were a few blank slots with this version but then they got filled :slight_smile: I’ll look into adding another Row for custom ones =)

@airbrush: Sadly I can’t access that through ZScripting. The best approach to see the graph is to have the Panel Loop area open while you are selecting the presets. Then you will see the graph updated for each one before accepting.

@Marco Splash, @boozy floozie: Thanks!

I released a quick update for the PanelLoop Presets (v1.1) fixing an issue where the icons were not showing up in OSX. If you have downloaded the plugin already through gumroad you should receive an email about the update. All the information posted above about the plugin is still valid along with the download link :slight_smile:

Cheers,

-Joseph

HIPiggyson
I would like to make a suggestion.
If this function can be loaded like fibremesh presets and arraymesh presets, it will be more convenient to use.

psExcuse me, did you check the message in the forum?

@tdrs: Yup I agree having a separate file format that stores the settings like FiberMesh, Noise, and ArrayMesh would be a better method. Unfortunately a file format for storing PanelLoop settings doesn’t exist in ZBrush so this plugin is just using what is there and creating a storage function. (I also wouldn’t know where to start for coding a file format. All the plugins I generate are mostly just for automation purposes and are created on my free time late at night. :slight_smile: )

I’ll check my PMs.

-Joseph

thanks a lot sir. -for more awesomeness.
downloading in a sec.

-r

Another supernice plugin!! thanks Joseph and Cki:sunglasses:small_orange_diamond:sunglasses:small_orange_diamond:sunglasses:small_orange_diamond:sunglasses:small_orange_diamond:sunglasses: The R2 unit came out great - sweet workflow 2 :sunglasses:small_orange_diamond:sunglasses:

@gmp1993: Added some custom slots for ya :slight_smile:

I have updated the PanelLoop Preset plugin to version 1.3. There were some additional OSX bugs that have been resolved. I also added 7 more ‘Custom’ preset slots. Thx goes to gmp1993 for the suggestion :slight_smile:

v13.jpg

Files have been updated on GumRoad: https://gumroad.com/l/kLMOY
If you run into any issues let me know =)

Here is some more Randomness; been sucked into Overwatch. This is a quick sculpt printed out; may end up doing this lifesize and wearable :slight_smile:
reinhardt.jpg

-Joseph

Attachments

reinhardt.jpg

Hi there,

In the R2 example you have an illustration of the alpha + the plain cylinder equaling the final detailed surface, but I’m confused as to the process to apply the alpha without it wrapping around etc. Did you unwrap the original cylinder and dome first so that you knew exactly how large to make the alpha detail? Any further information that you can add to this stage of your modeling process would be most appreciated. Cheers!

@EmperorHamHam: Here is a breakdown of the process :slight_smile: Let me know if you have any questions.

R2Cylinder_01.jpg

R2Cylinder_02.jpg

R2Cylinder_03.jpg

R2Cylinder_04.jpg

R2Cylinder_05.jpg

For today’s randomness I also created another simple utility plugin called IMM Extractor!

IMMExtractorGumRoad.jpg

This plugin will take any IMM brush and turn it back into Subtools. This is handy to revert a IMM Brush back to it’s original multiple subtool creation state for modification and dissection. To use just select a IMM Brush then click the button :wink:

The Plugin is Free; here is the link to download on my GumRoad site:
https://gumroad.com/l/scCIh#

If you run into any issues using it let me know and I’ll attempt to fix them :slight_smile:

-Joseph

Attachments

R2Cylinder_01.jpg

R2Cylinder_02.jpg

R2Cylinder_03.jpg

R2Cylinder_04.jpg

R2Cylinder_05.jpg

1 Like

thanks for more useful plugins
cnc plugins up next :slight_smile:

@airbrush: =)

Here some randomness for today. Messing with a new workflow for these robots that generates a less random effect. Still messing with the workflow; ill record a timelapse when I get in nailed down :slight_smile:

Anyhow on to the images!

DynaBot_Angle_04.jpg

DynaBot_Angle_02.jpg

DynaBot_Angle_03.jpg

DynaBot_Angle_05.jpg

-Joseph

Attachments

DynaBot_Angle_02.jpg

DynaBot_Angle_03.jpg

DynaBot_Angle_04.jpg

DynaBot_Angle_05.jpg

Cool
 I still tend to get just a mess using the noise technique. Interested in seeing how you’re developing it.