Amazing, beautiful new renders. Your old Evangelion Mk. X thread was a huge inspiration for me when I first started browsing these forums. One of my favorite models, love the poses, details, everything.
Man, that is awesome! Congrats! Amazing model and render.
Looks good!
Very cool look you have here! I really like the clean lines, color choice and line of action that you are using for your pose.
Peace-NickZ. 
I am I am stunned 
Wicked !
Looks great, especially in bronze colors.
I can just concur, really nice character design! Reminds me of an mix of Iron Man and a character from Azuras Wrath 
Keep up the great work Oliver!
Cheers,
- Kenny:)
Everyone - thanks for your kind words
@Mrspooky - I’m glad that it got you inspired
HI! This is what I have been doing lately.
This is “Mask of Oni - Possessed”. It’s a low poly game character.
I finished it with 29,363 tris or 16,575 polys.
Concept
I started without any solid concept in mind. I was watching Full Metal Alchemist Brotherhood and got inspired by one of the character. Sig Curtis, he has an interesting solid silouet. He’s huge but not actually leaning on the usual muscular super hero guy.
As for the supporting theme I initially decided that it should be a uniformed guys, influenced by Fullmetal. But that design later on got discarded because it always ended up looking like a huge guys version of splinter cell by ubisoft.
After looking from some inpiration from the internet I ended up on an idea of creating a possessed monk.
Sculpting
This area is the easiest, after sculpting the basemesh of the body and getting the initial silouet I decimated it and exported in Max. Then from there I created a base model of the whole costume then brought them back to ZBrush for sculpting.
LowPoly Convertion
The usual process, I decimated all of the sculpt then brought them to max the modelled a low poly version over it.
I gave myself a 30K tris budget and initially ended with 44K tris. It’s a bit of a challenge deciding which detail would be modeled or which detail would be relied on normal map. In the end I sacrifice the beads on the right forarm, the rope around the body connecting the shoulder armor, the waist, the face mask and the oni head was reduced a couple of times.
UVMap
Since a lot of details is involved and I would like to minimize mirroring, I decided to divide them into 3 parts. The UpperBody - from waist up, Lower Body, the Shoulder Armor and Staff, 2048x2048.
Texturing
I want to compact my process so instead of baking the normal map then a different process for texturing, I did polypainting instead. Baking the normal map, texture map and AO in one process…sweet. Though polypainting is system intensive since you need to subdivide your sculpt up to a number where you have a good resolution, its really worth doing because editing the seams are minimized.
Lighting
I just used a simple 3 point light and an additional omni light placed at the lower area.
Rendering
I used different packages in rendering. Since this is a low poly model I would like to see how it translate in a game environment. I tried it on Xoliul and marmoset. Those 2 just gives a kick and shows a lot of the texture details in viewport. As for the 3 beauty shot they are rendered in max then with a very minimal post work, just color correction and background.
By the way sorry if there’s a lot of view on different packages, i just like seeing how things translate from highpoly sculpt to lowpoly to how it appears in different rendering packages.
Hope you like what I did. Until the next project.
I would like to hear your comments.


Attachments
great work on your model oliver, really digging the style and the render came out great! Nice texturing aswell!
One thing that bothers me is his stomach area, he has a sixpack but looks like he drank to much beer a little belly
other than that really nice!
All the best and happy sculpting,
- kenny:)
This is really impressive/armor/clothing/Instruments/ very good sculpture.
Thank you for sharing.
Good luck
Kenny - thanks, I consciously did that, just a way to kinda get away from the super hero silhouette. It kinda makes it a little more interesting.
What a gorgeous EVA model! I love the forms you’ve created with it <3
Wow!! It’s MikeJensen.
Thanks man , I owe it to your Zen of ZBrush. I was really inspired by that book.
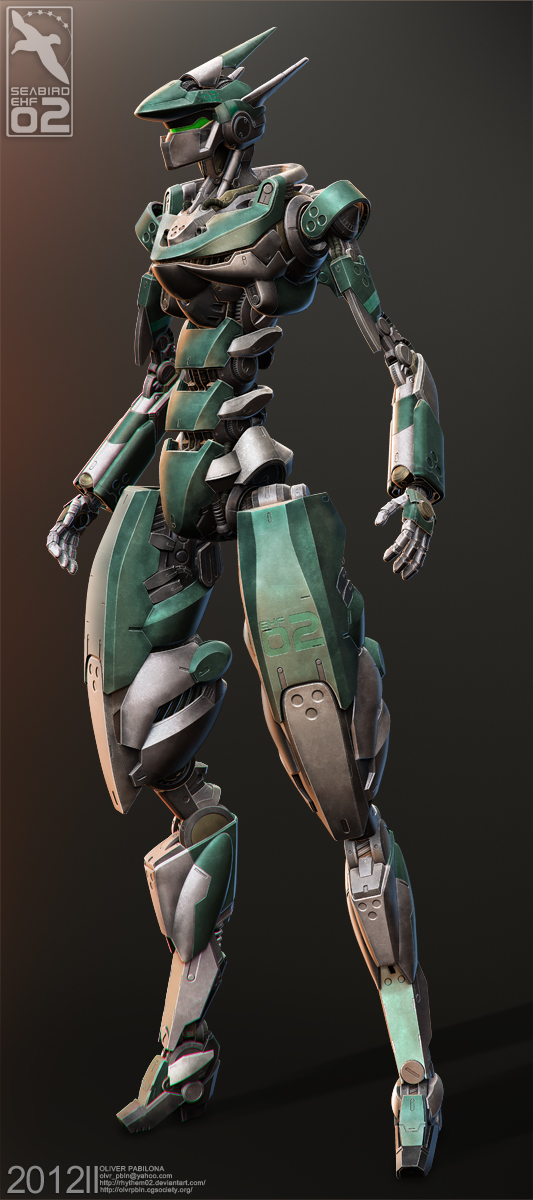
Hi Everyone
This is what’s keeping me busy lately. It’s “EHF02 Seabird”. Its completely sculpted in ZBrush and composited in Photoshop.
The concept design is not originally mine; it came from a mech illustration by Geoff Herndon he goes by the name ~Tekka-Croe. He illustrates Anime Mechs and Vehicle as a Hobby. There are a couple of illustrations of his that I liked but this one I find really interesting because of the weird proportions, thin arm and feet and yet the torso and thighs are quite large and yet it all worked very well. So I decided to sculpt this one.
By the way here is the link to his website in case you want to check out his concepts and Illustration.
Now on to my part, the sculpt is a bit different from the illustration. My reason is for one there are a lot of dark shadowed areas and this is the only illustration that I found for this mech it doesn’t have any view from the back nor the sides so I have to fill them up with my own original details. Second, not all concept work well once translated into 3D so I have to change them up a bit while keeping its appeal and still staying true to the original design.
Challenges, there aren’t a lot on this one except from the lack of reference from other views like the sides and the back. So the issue there is proportion. I have to figure that out myself from a 3/4 view illustration. So it***8217;s a bit of a challenge.
On post production noting much worth mentioning except on how I did the depth of field. I did the ZDepth differently. Rather than using ZDepth side with Lens Blur, instead I duplicated my final image; then applied Chromatic Aberration with values +15 on red/cyan and -15 on blue/yellow, and used the ZDepth as Mask. This gives a sense of depth of field without losing much detail.
I hope you like it. Comments and Critiques are mostly welcome. Thanks

Attachments
Really great progression! I love your hard edge mech stuff, looks awesome! Love to see more.
This has to be one of the ‘cooler’ Mech’s I have seen here or anywhere else. I know it’s not of your design, but, your rendition of it in 3D is just stellar. That is truely some great HS sculpting and the final render came out extremely clean. I viewed some of your other works as well and man, your a high details guy for sure. Your ‘LowPoly Game Character-Assassin Bunny’ tute was very intense.
You deserve them.
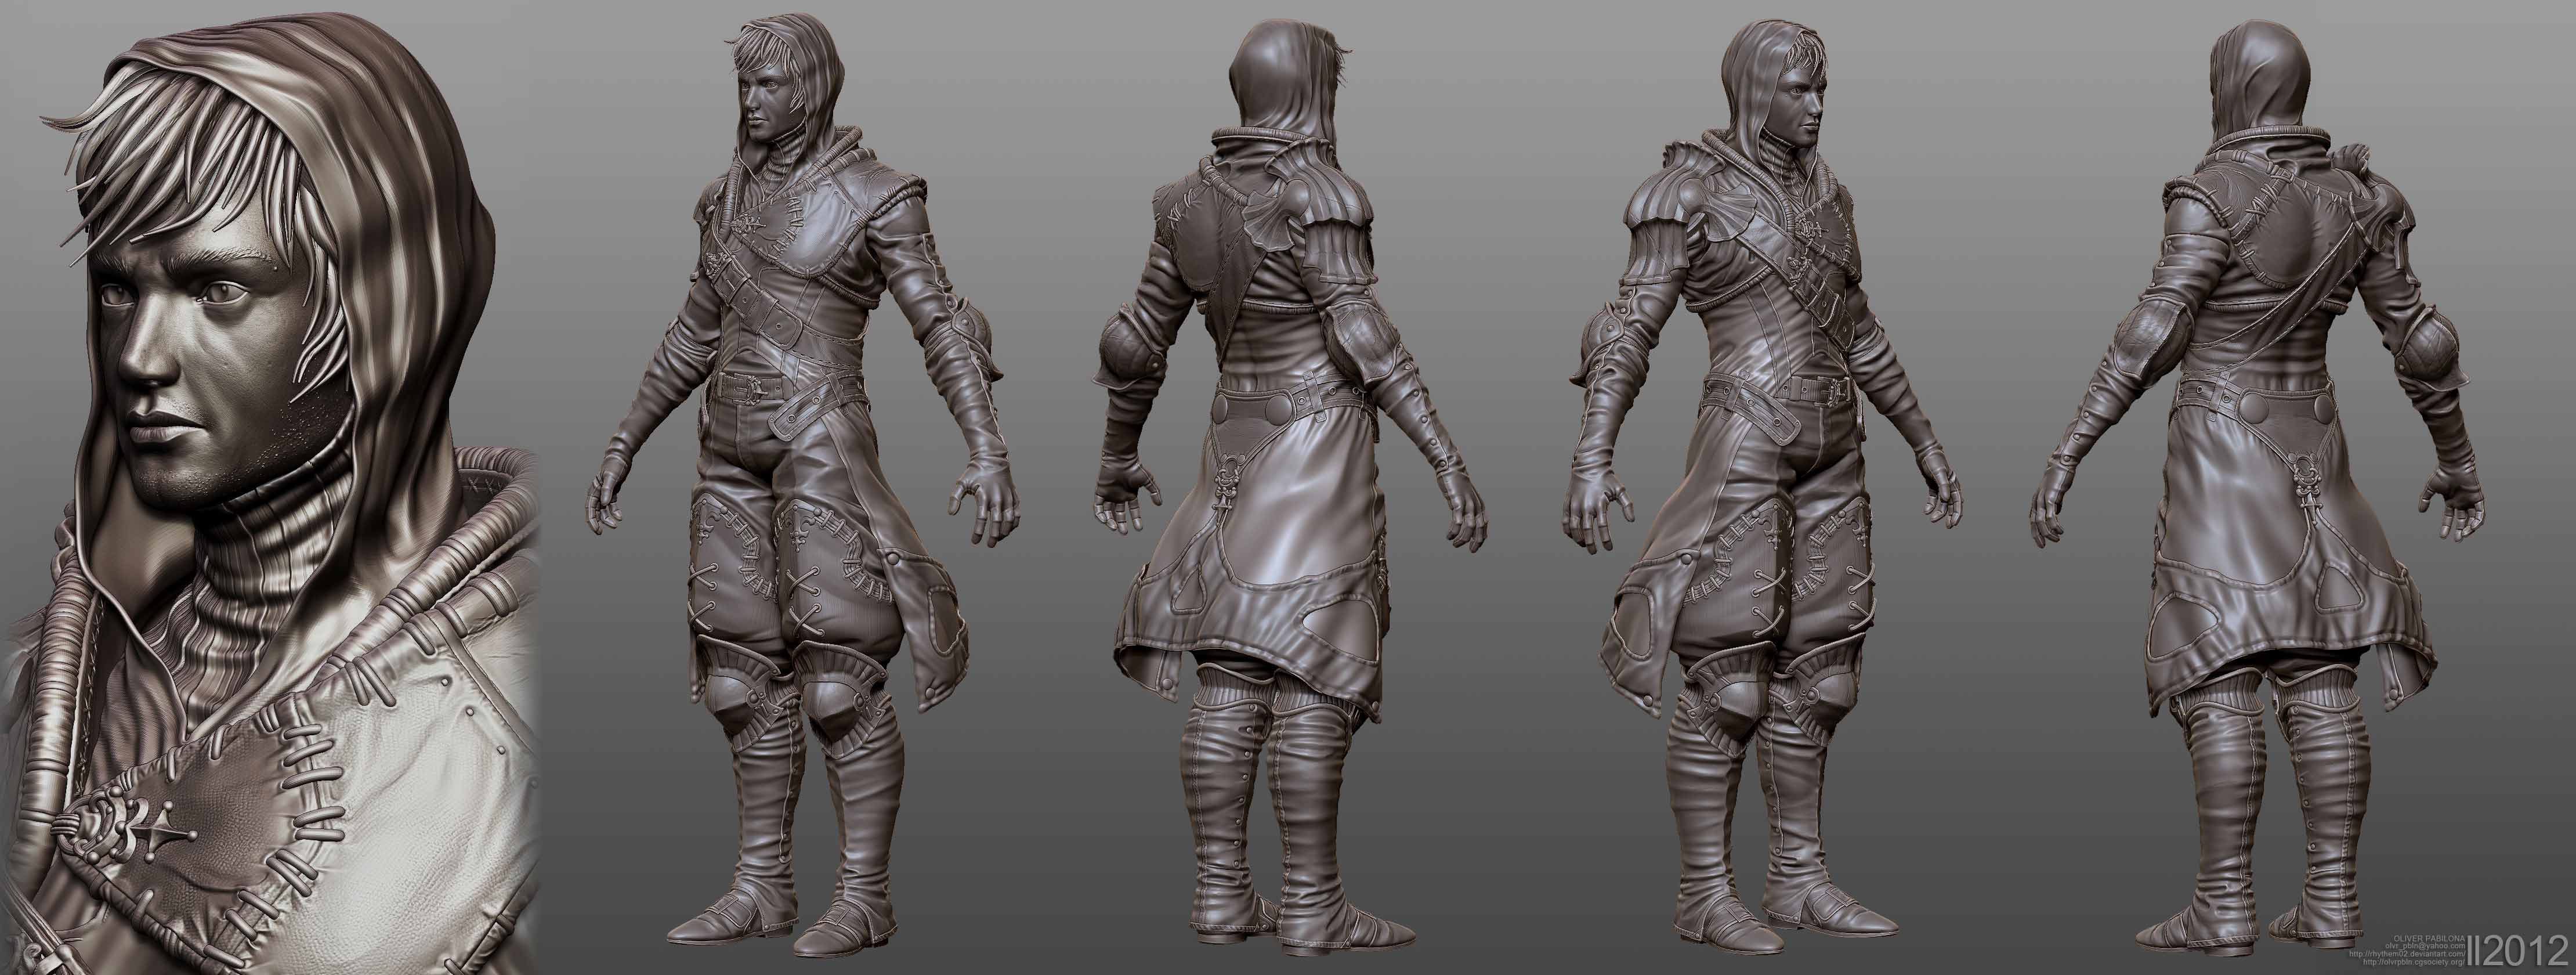
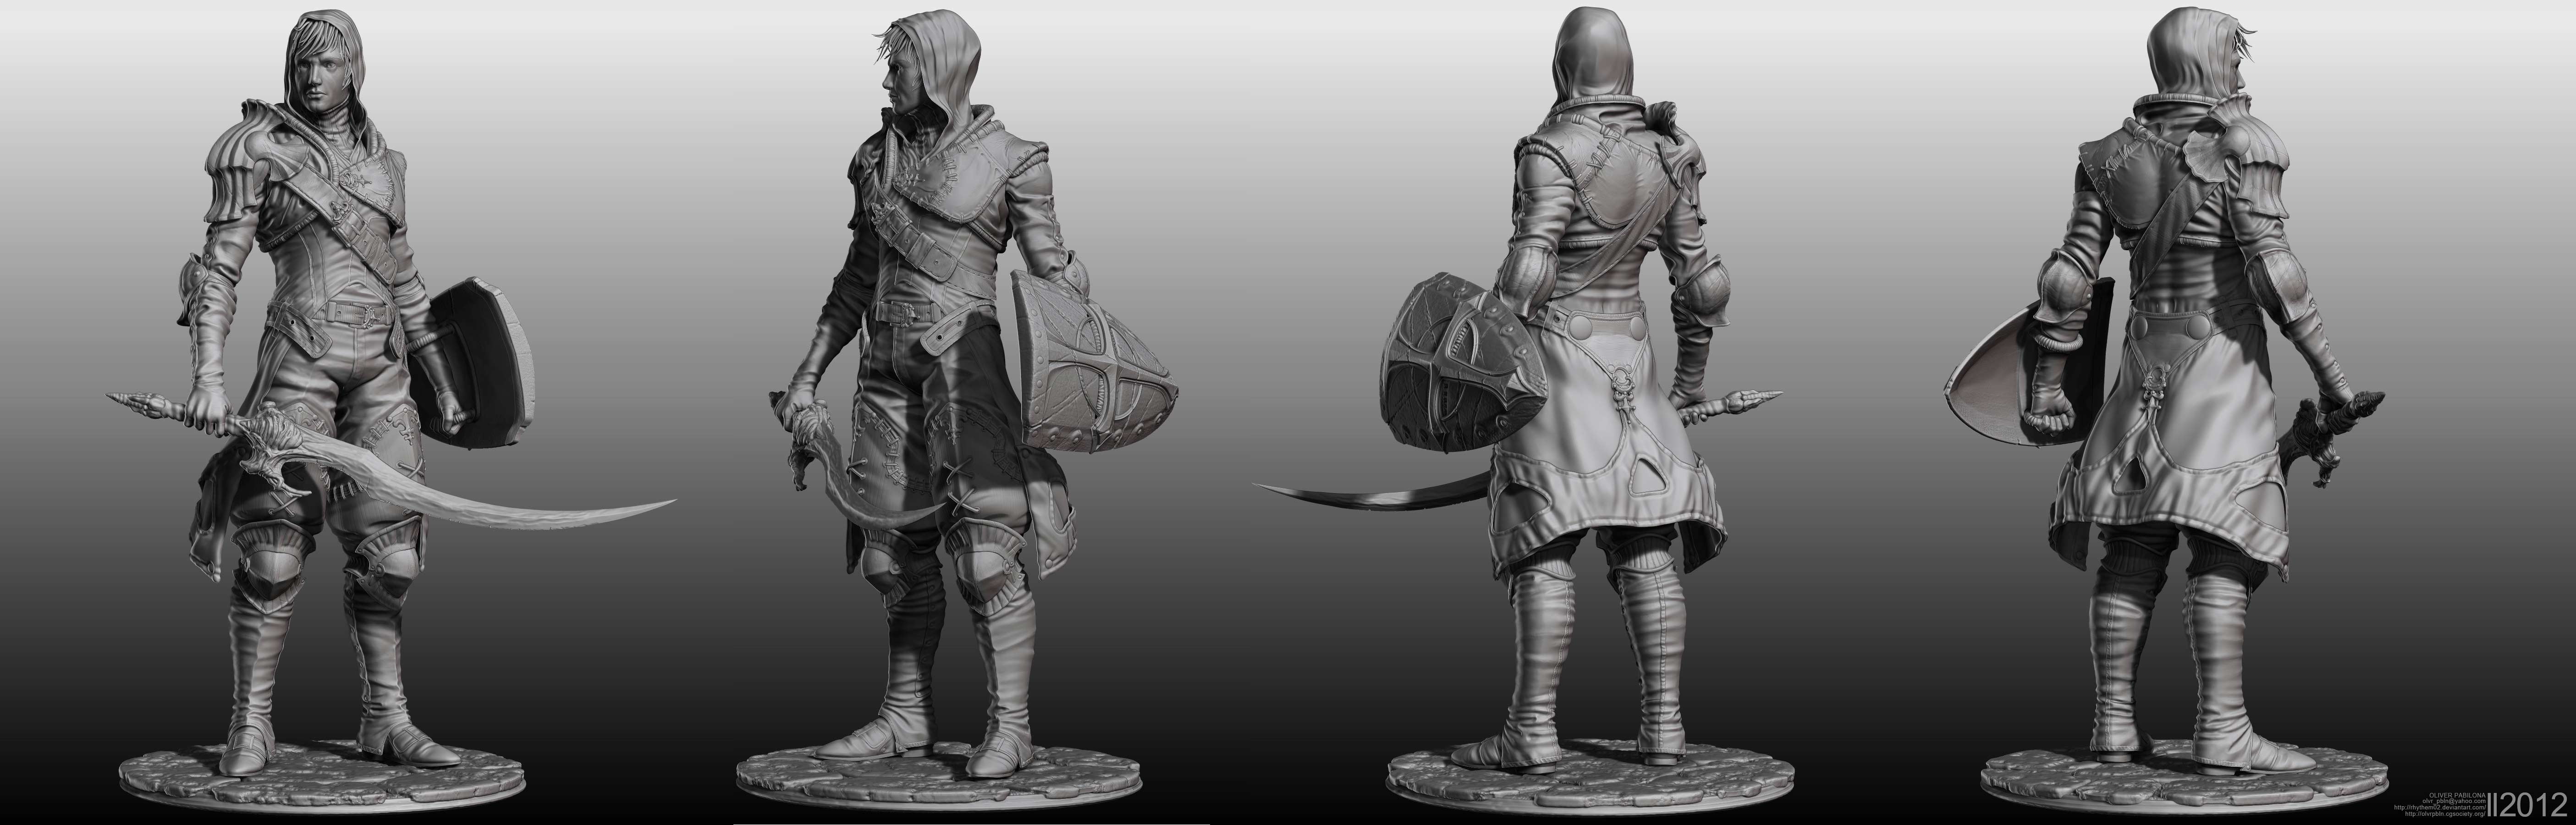
This is my latest creation a Swordsman(male). The original concept is from “kyoung hwan kim”, such a great artist.
I’ve been doing characters from other artist lately to see how I’ll be able to translate them.
I hope you like it.
For a higher quality version you can visit my Cg hub account
http://rhythem02.cghub.com/
Attachments