Hi all!
Thank’s for your critics and comment, I decide ton build a little tutorial to explain my technique for apply a displacement map from Zbrush inside XSI.
This tutorial is for person who want to apply displacement from Zbrush inside Sofimage XSI with Displacement 3.
Displacement Setting Zbrush – XSI
-
This is a really precise displacement technique for XSI.
-
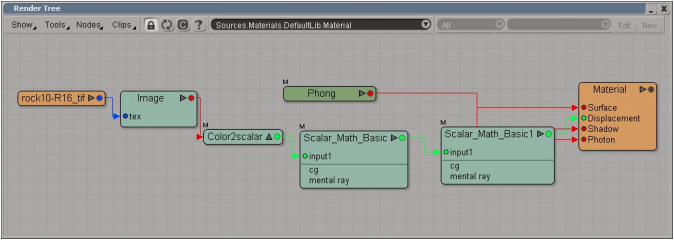
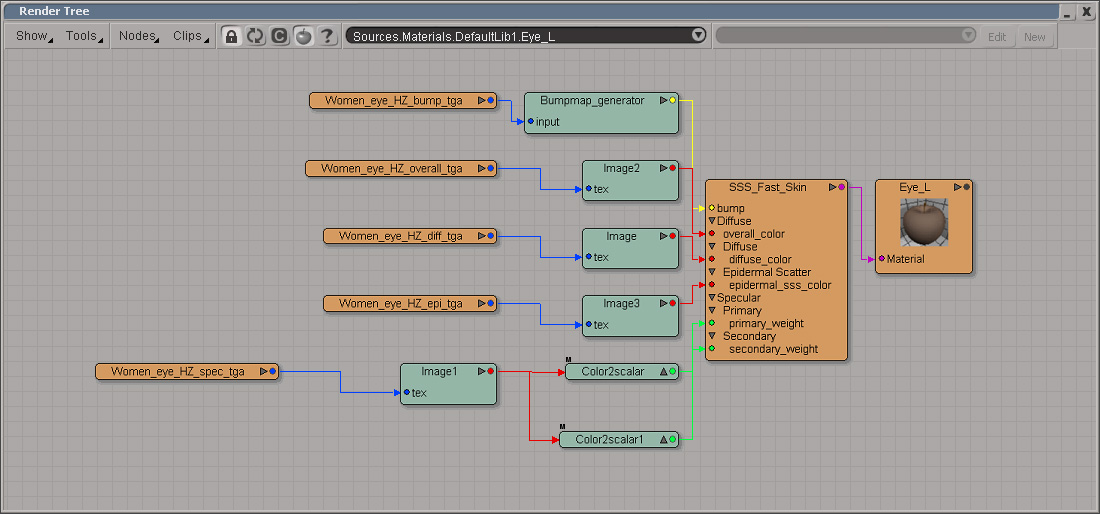
Import the 16bits image you create from the zbrush extration inside XSI, in general, you have a better result if you put your image in .tiff.
-
Next, select the node inside the render Tree ( Scalar_Math_Basic ). To found this node, go inside the mathematical node.
-
Connect the Displacement image to the first Scalar_Math_Basic imput and connect the second Scalar_Math_Basic inside the imput of the second one Scalar_Math_Basic.
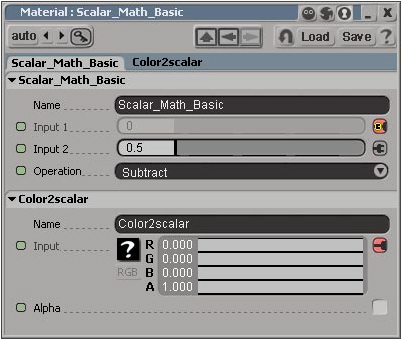
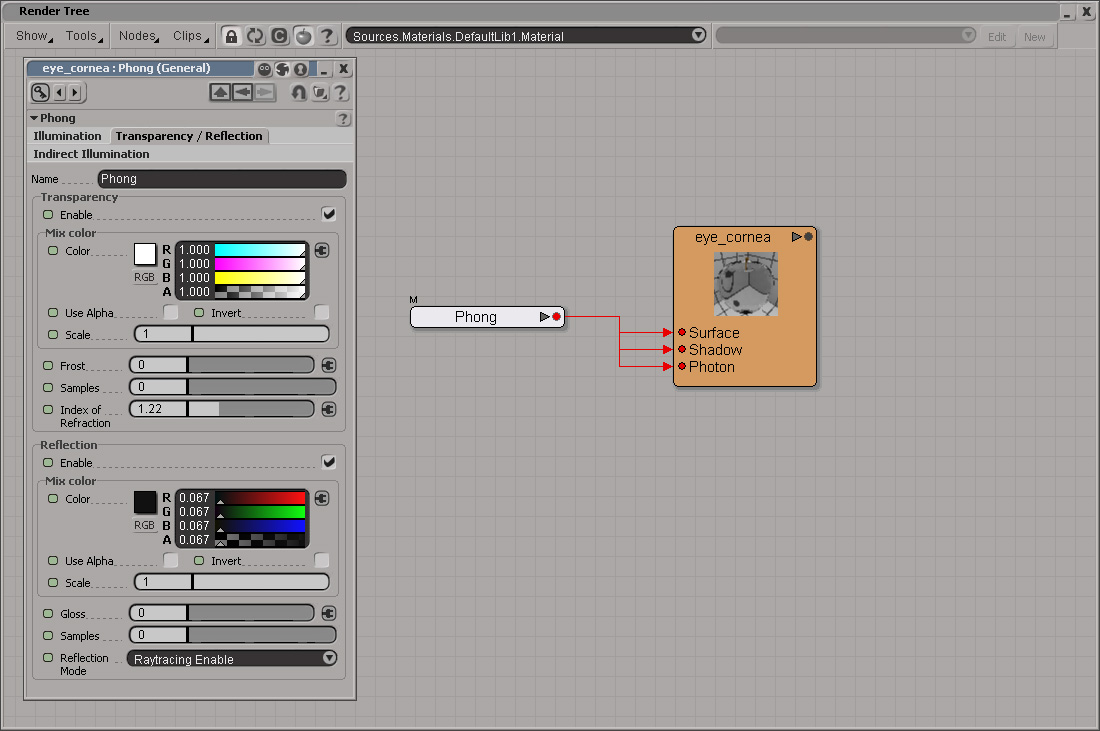
- Scalar_Math_Basic :
Change the value of the the imput 2 by 0.5 et Operation by subtract
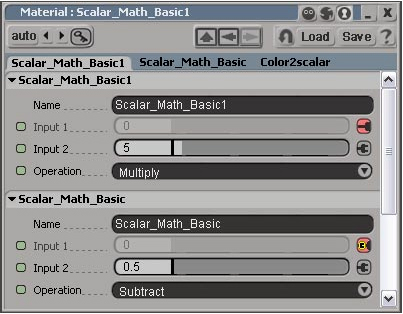
- Scalar_Math_Basic1 :
Change the value of the the imput 2 by 5 et Operation by multiply
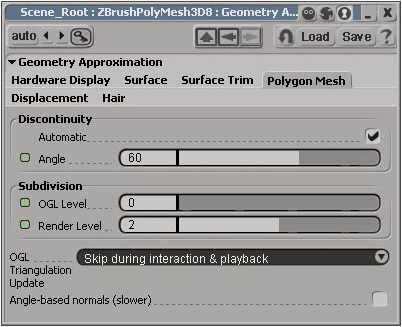
Open the Geometry Approximation pannel for this object.
- Inside Polygon Mesh panel , put the Render Level at 2
Next, in the Displacement panel, put the Max Displ by 2, and the Lenght by 0.25, check the View Dependent and put the Sharpness (%) at 100.
That sit, all of the value maybe change if you don’t have the same scaling I have. For exemple, all of the value I have is made with a head look like the xsi charater head.
Thank’s all and I hope you like this tutorial.
Cheer’s Steve Jubinville
Francais:
Voici une facon d’obtenir un bon displacement dans XSI a partir d’une map creer dans Zbrush avec le Displacement 3.
Displacement Setting Zbrush – XSI
-
Voici une façon d’obtenir un displacement vraiment précis dans XSI.
-
Importer l’image 16bits obtenu lors de l’extraction du displacement dans Zbrush, en général, il est conseiller de laisser la texture en .tiff.
-
Ensuite, aller chercher deux nodes ( Scalar_Math_Basic ).
-
Connecter l’image Displacement à l’imput1 du premier Scalar_Math_Basic et connecter le 2e Scalar_Math_Basic a l’imput 1 du 2e Scalar_Math_Basic.
- Scalar_Math_Basic :
Changer la valeur de l’imput 2 par 0.5 et l’operation par subtract
- Scalar_Math_Basic1 :
Changer la valeur de l’imput 2 par 5 et l’operation par multiply
Ouvrir le panneau Geometry Approximation de l’objet.
- Dans l’onglet Polygon Mesh, mettre le Render Level à 2
Ensuite, dans l’onglet Displacement, mettre le Max Displ à 2, le Lenght à 0.25, cocher le View Dependent et mettre le Sharpness (%) à 100.
Voila, jespere que ce tutorial vous permettera d’avoir un bon displacement. Les valeur peuvent varier si votre personnage n’a pas les memes scaling que le mien. La tete que j’ai sculpter et sur laquelle j’ai appliquer le displacement etais de la meme grandeur qu’une tete du personnage XSI par default.
Merci et j’espere que ce tutorial vous aidera dans votre demarche.
Bonne Chance!
Steve Jubinville
Digital Sculptor
Hybride Technologie