Hey, great work!
Would you mind telling me a little more about your lighting layout (position of lights and stuff)?
I still have got problems with lighting and am trying to improve in this area…
thanks,
Mathias
Hey, great work!
Would you mind telling me a little more about your lighting layout (position of lights and stuff)?
I still have got problems with lighting and am trying to improve in this area…
thanks,
Mathias
Nice mon Steve, felicitation pour le feature du Front Page! Comme toujours, tu kick des culs!
Duy
Very nice, the light rig would come handy to me also!
The shape of the mouth is far too artificial, it kinda ruins the realism of the picture…
Thank’s all for you nice comment! This character is not finish, for this reasons, I have some point I wich to update, but some perso call my to explane about the technique to build my character. I will try to explain that.
Little Tutorial for create realistic head Zbrush3 ans Softimage XSI
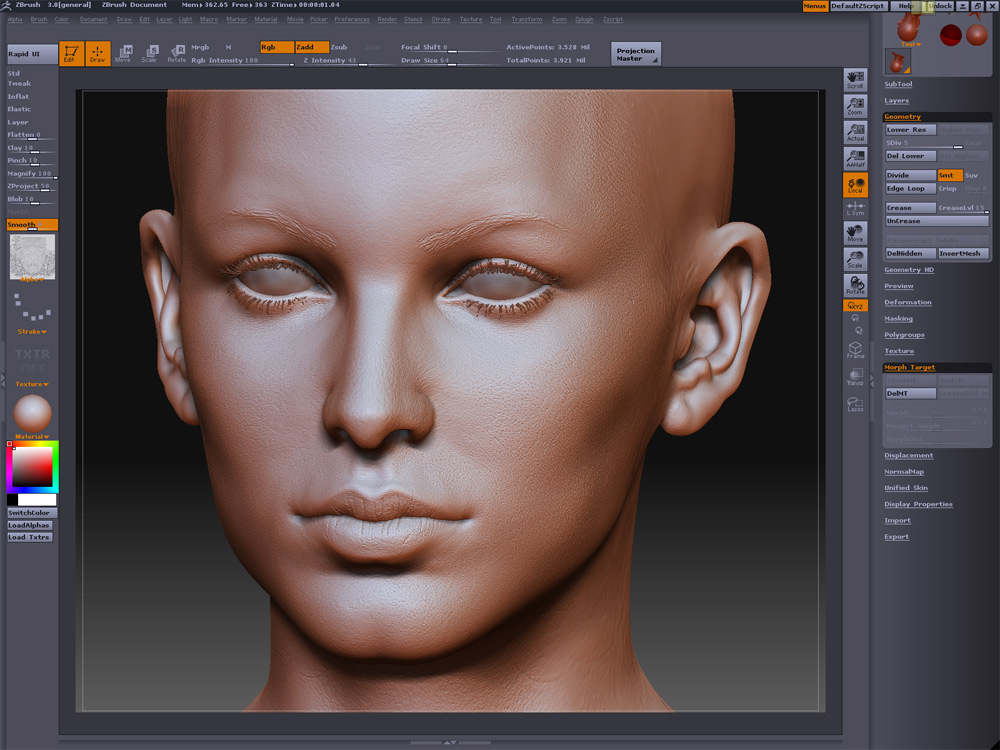
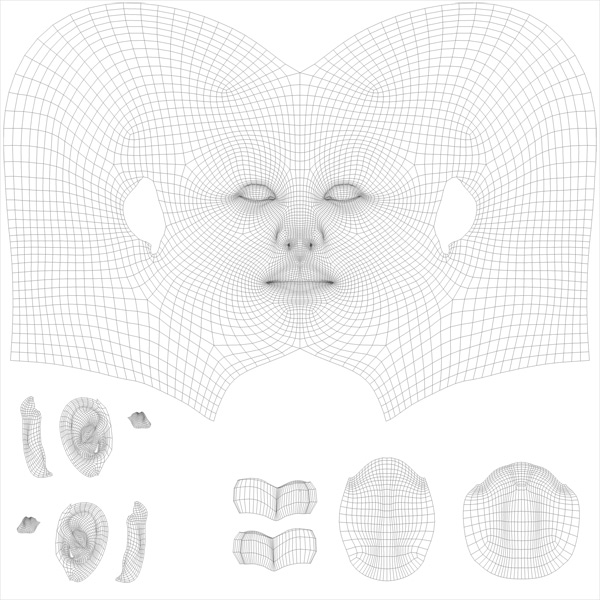
I start to build my mesh in Softimage XSI. Not to High resolution mesh but with all of the essentiel line to make the animation and texturing better.
The UnWrap, I prefer the traditionnal uv in xsi for base just for a head, a normal cylinder is perfer to start that. When I found some point a bit strechty, I export my head inside Aheadus UvLayout.
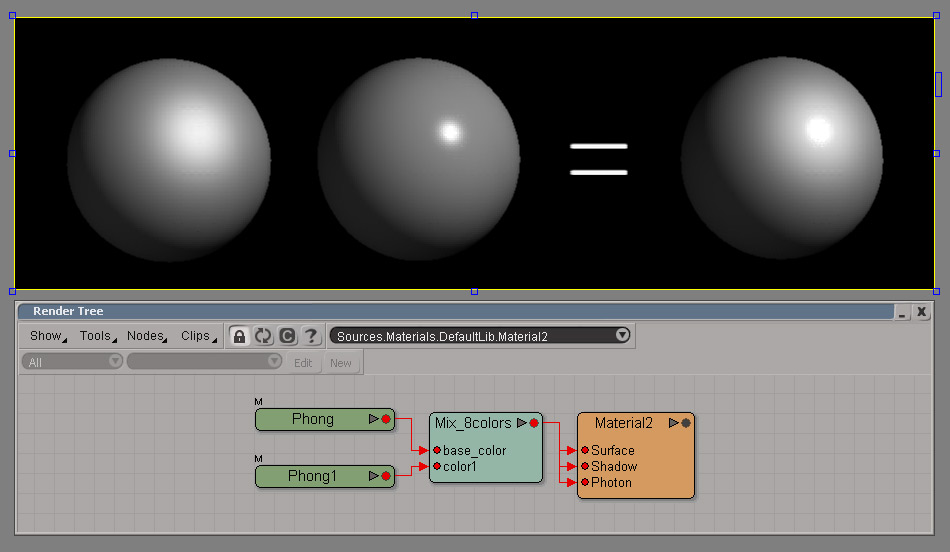
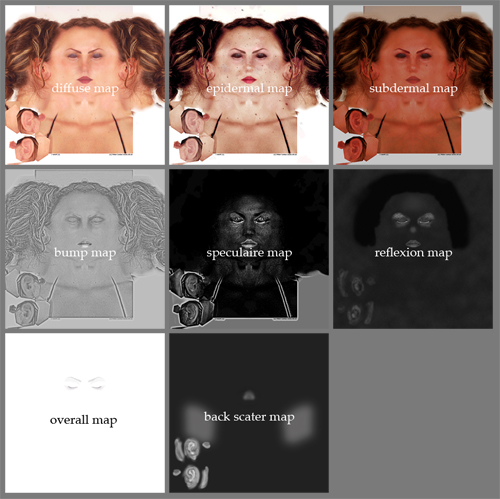
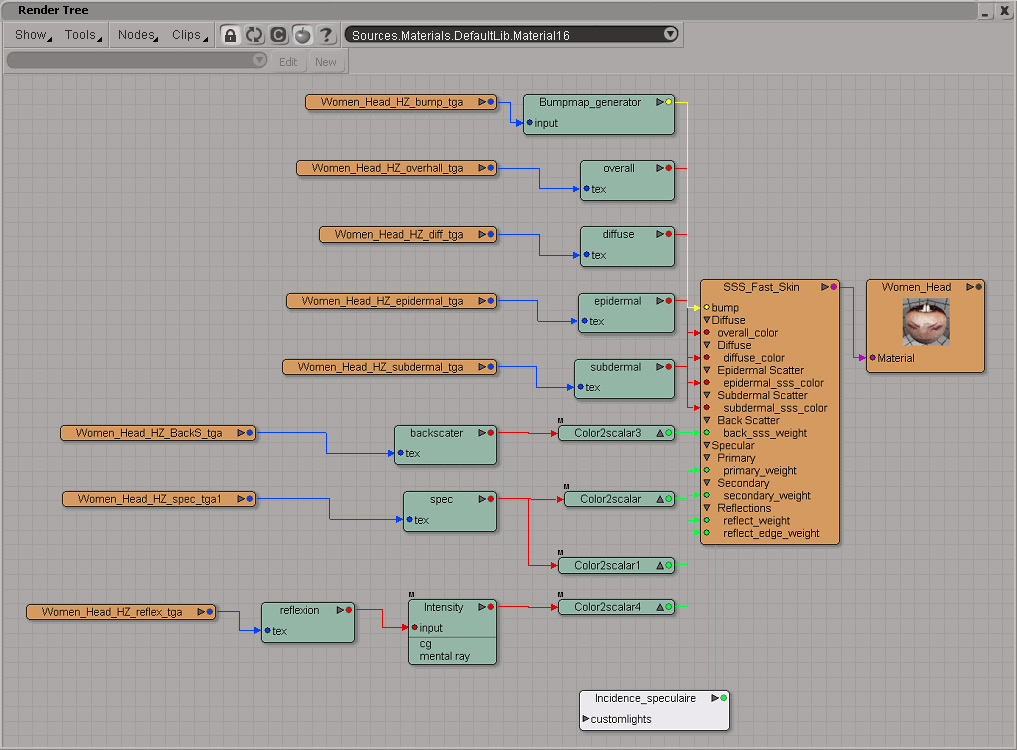
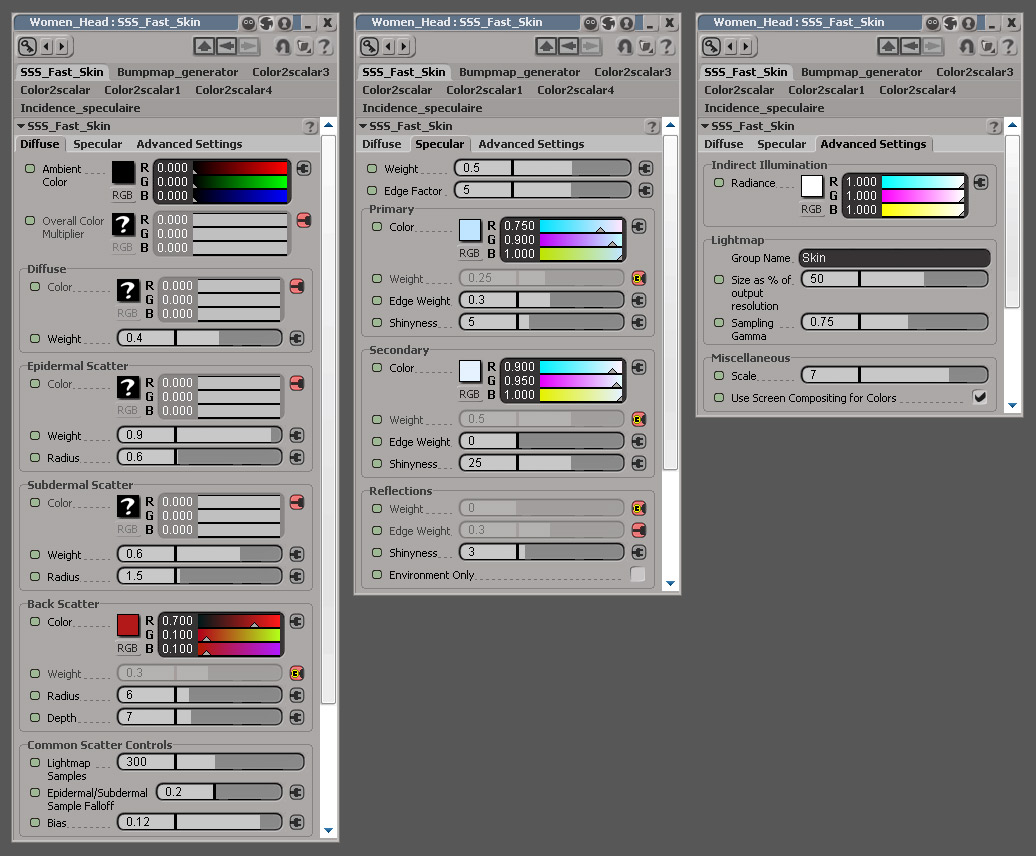
This kind of phenomen is inside the sss fast skin shader node. If you add some reflexion at your speculaire, is possible to recreate nice skin shader.
This complex shader is perfect to create nice skin effect. If you want cool tutorial about that, visit : http://www.thegnomonworkshop.com/tutorials.html
Alex Alvarez is my reference to create nice shaders. This is my XSI shader tree:
In this Rendertree, I add an incidence for accentuate the reflexion effect on the border of the face.
My sss shader tree in details:
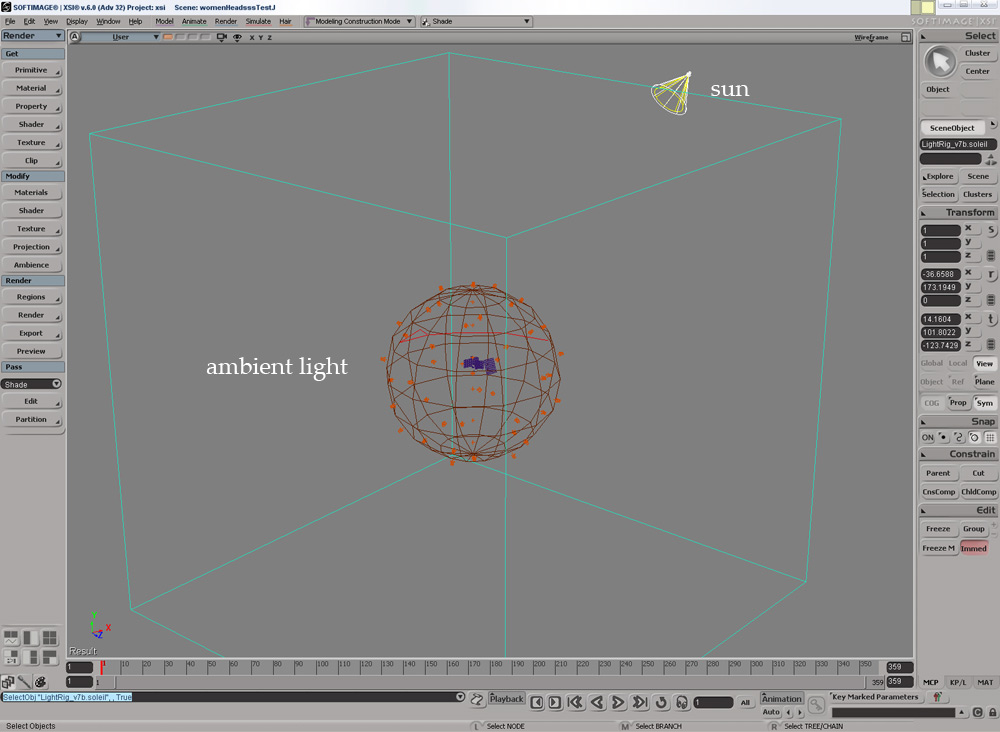
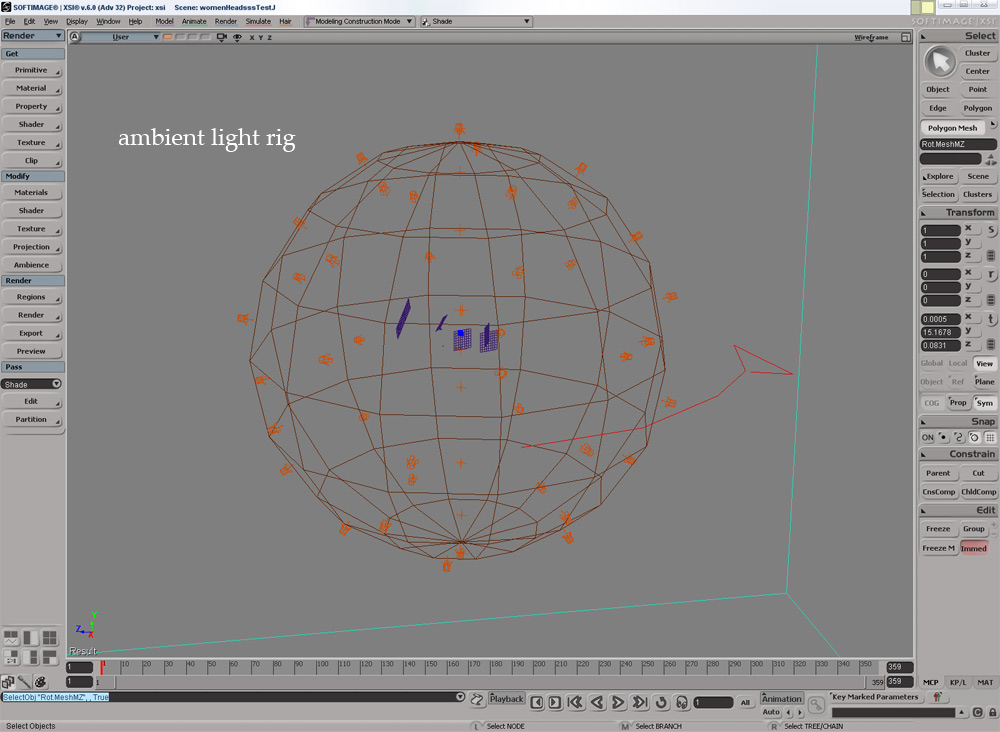
My lighting is a complex rig of many different light to recreate an outdoor ambient, one sun for recreate really nice rim light on back border of the head.
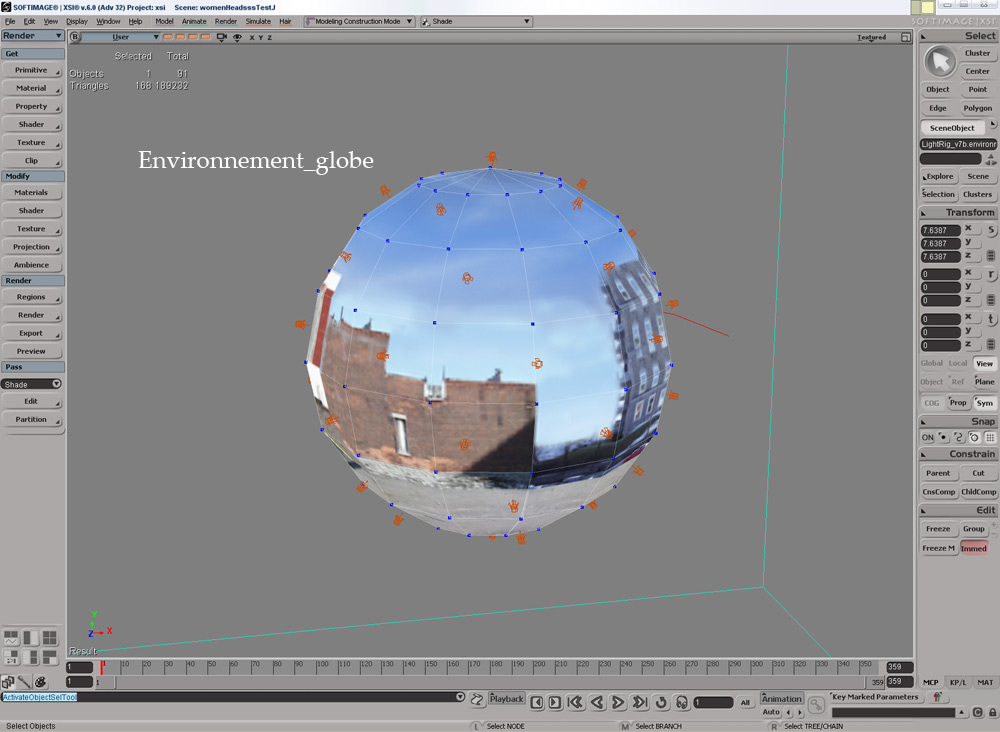
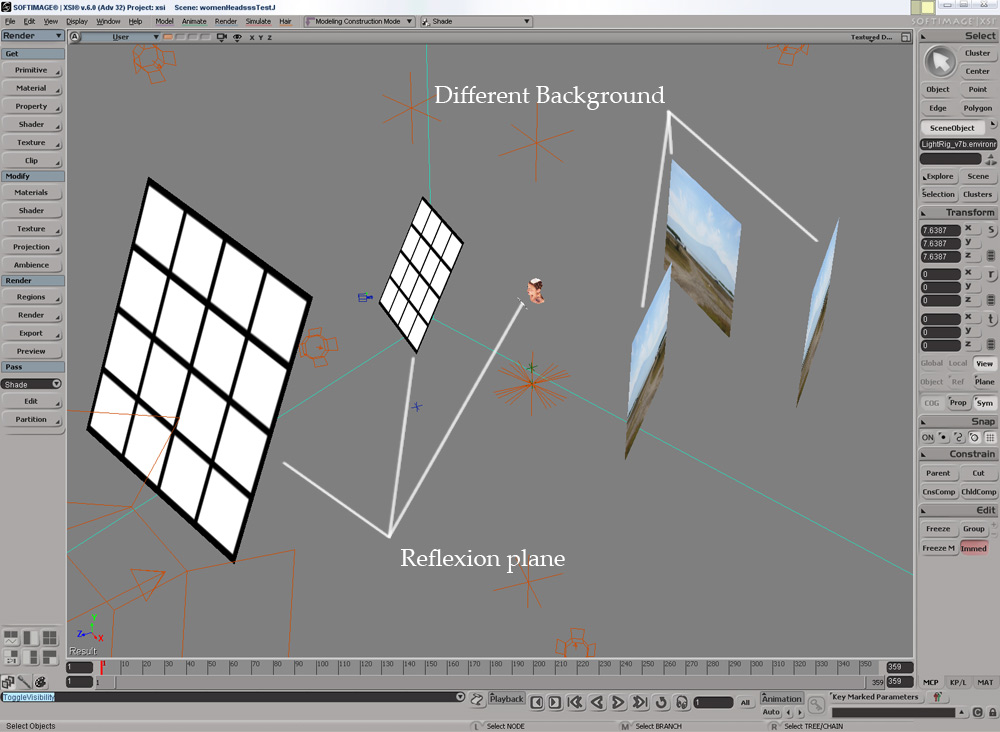
In real life, the reflexion is create with the object all around the people, Sky, ground, cars etc… For this reason I insert a sphere in constant with spherical uv’s and I put on my sphere color, a Environment map with real and natural outdoor details and cool variations. Like that.
This map is primordial to creation nice reflexion on all of this object of your scene. Hdri map is not really nessessary but cool fo little high light. I prefer to add specific little grid with image in transparency for create specific reflexion.
I drive all of my light with the coloration possition I have for my Light. The light is not too intense maybe 0.3 max cause I have around 40 light with Area for my ambient. A bit longer for the render but if you settup your BSP tree is possible to uptain nice render in good time laps!
Sun & Ambient:
Ambient Light Rig:
This is a little looking of my head technique, hope you like and understand. If you have any questions, write my at [email protected], I have msn too.
Special Thank’s to Jaime and Ryan from Pixologic for your help! And thank’s to my collegue Yannick Gaudreau from Hybride for your light help.
~-----------------------------------------~
Steve Jubinville
Digital Sculptor
Hybride Technologie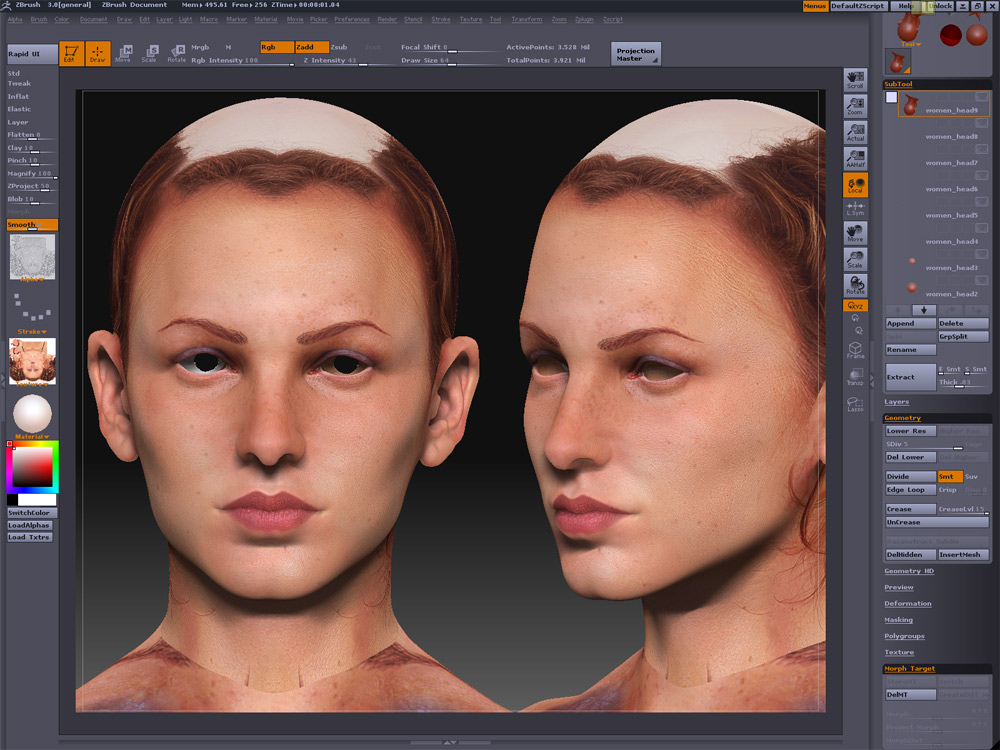
well… Thanks for sharing! 

Sebcesoir and Phat: I guy thank’s for your reply, the texture is a bit noisy cause my render is a bit poor but i your on a 2k map for now to make my test but I want to make my next step with 4 k map more details and no seam, Better shape for all of the form and the neck too. But really thank’s!
Lil’sister: Merci bien gros mon homme!! c debille la job que ta faite sur t perso, I impatien to look Assassin on my PS3 station!! Lache po!! heheh See ya!
Thank’s all!!!
~-----------------------------------------~
Steve Jubinville
Digital Sculptor
Hybride Technologie
…is knocking on the door! 

thank you for tutorial
O, holiest of holy awesome! 
That’s one heck of a shader and rig. How long did it take to render on what kind of machine? Is there a script to make those ambient light rig in xsi? (I know there’s one for maya)
This is probably one of the best render that ever reached a top row.
great work…!!!
congratulation for your work. Two question
1 - can you explain how export displacement map in zbrush3 and how aply in xsi 6?
2 - How you do to put light with the sphere like a dome gloal ilumination?
Sorry for my english thanks
Amazing work!
Hi again.
Thanks for your detailed worflow explanation :).
mathias
Have you mentione Displacement Exporter 3?
amazing!!
beautiful! love the eyes so much!
and big thanks for the workflow!
very nice work!!
thanks your tutorial.
Very, very nice work!
Anderson
Good work!