A cool setting that will tile curves in all axes,
in all axes , cool for wool etc and after you can just click on it , to change the wool type or other effect.
Like a torus knot curve (with UV tiling options)
A cool setting that will tile curves in all axes,
in all axes , cool for wool etc and after you can just click on it , to change the wool type or other effect.
Like a torus knot curve (with UV tiling options)
A save filter settings could be cool
With a preset line thickness ,this line slice wil slice up your model with your specifiations.
I was wondering if anyone else has this problem sometimes,
When in Noisemaker I sometimes have trouble selecting options,
When I rapidly hit my mousebutton I sometimes get a effect,
But sometimes nothing happens.
See Pic further pics are comming:
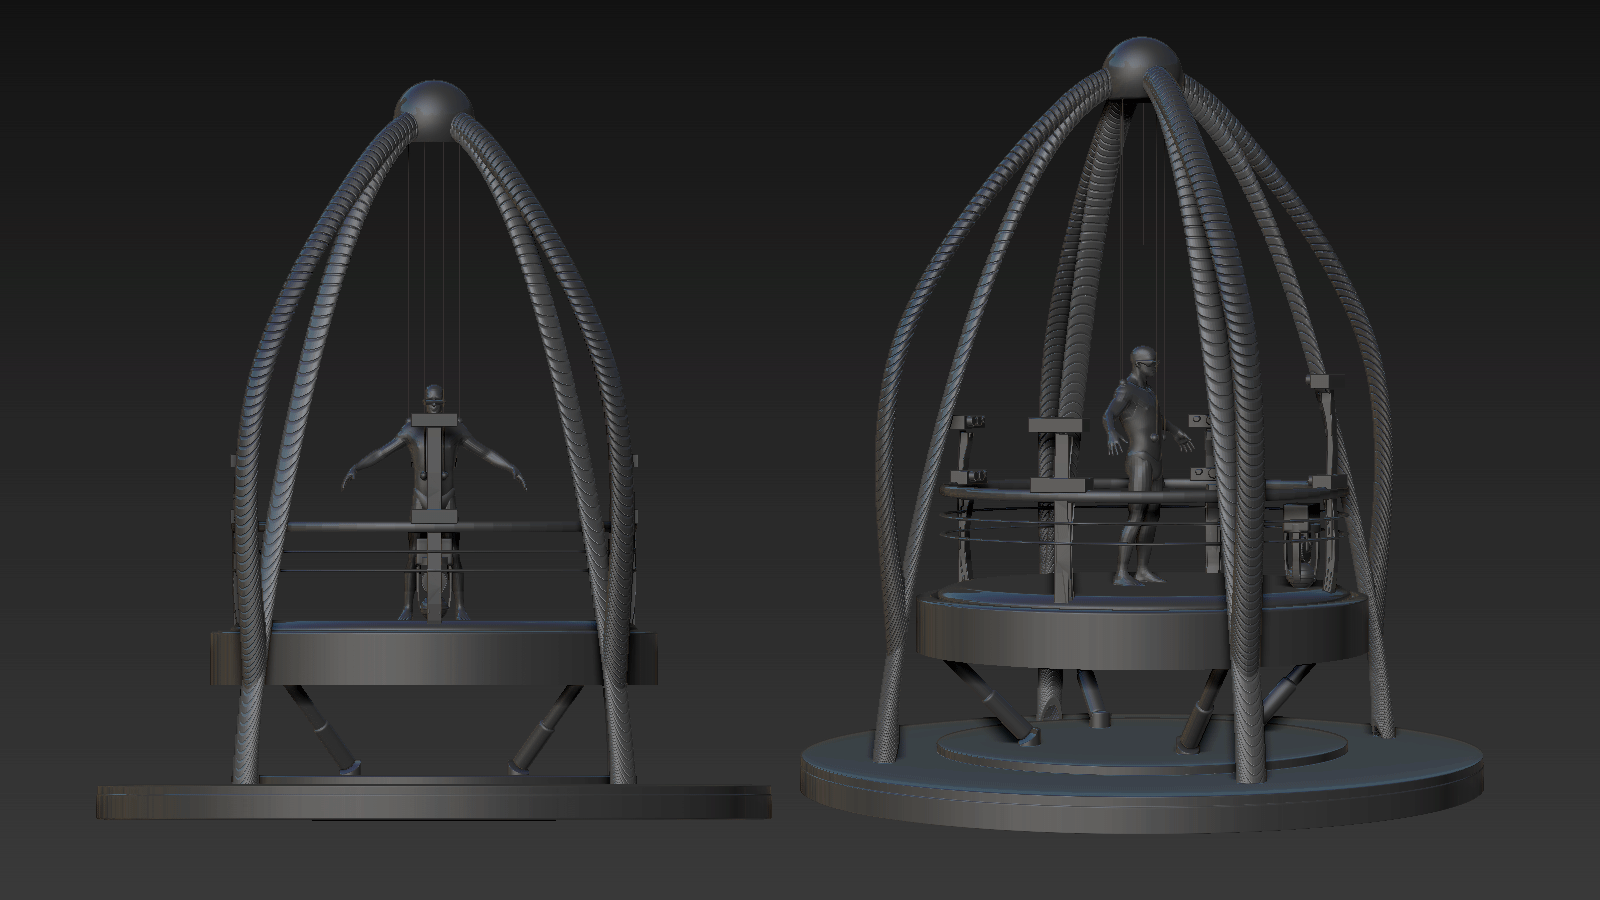
This setup will addept to your movement, so you will always stay centered in the middel
the drive units weels rotate 360 degree and will inverse in the walking direction.
Skin is in one piece and will collect in the bottom bucket.
The fly rig could be cool so you could jump, or have flying simulations.
the bottom hydraulic cilinders could be a cool addon ,so you have an incline 2 or decline or vibration.
Hope this make sence 
Now if only someone will make it for me…
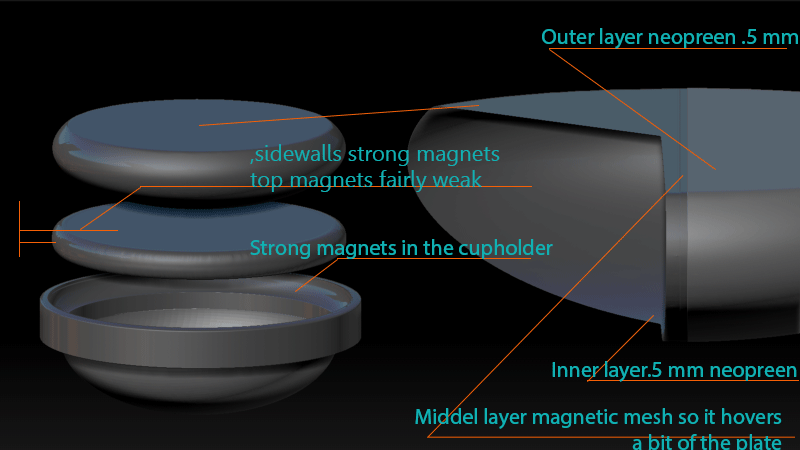
PS: Skin goes around the magnetic plate…
Also clearance between the walking plate and the cupholder needs 2 be big enough for the skin to move freely
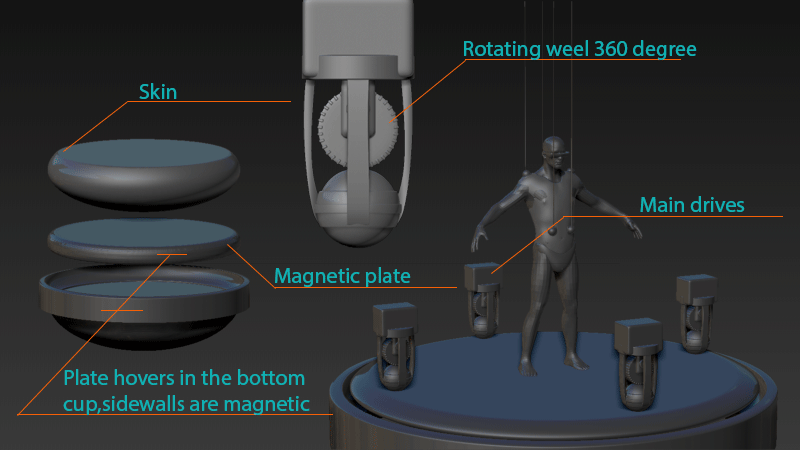
Gravity generators:
Pictures are comming.
Would be cool so it’s more adaptive,
So you don’t get errors, with a retopo build in it for trouble area’s.
Maybe with a new algorithm that deals with tri’s and five sided polygons, and converts then, so you could keep reconstructing.
Could be cool to have an polypaint option like this:
It lay´s polypaint on edgeloops, and takes curveture in account,
cool option when you just Z Remeshed your mesh.
With a falloff option and a graph,
and horizontal and vertical edgeloop options.
This brush uses Morph targets to morph a mesh on the curve and puts a swiping action on the normal of the curve,startpoint 100% morph,
At the end 0 % morph.
With some extra settings.
This put’s a record button on the 3D layer, when pressed this will do a recording session on your intensity slider (and the overdrive intensity slider).
So you could do a live animated morphing session.
I have something weird, dubble click doesn’t seem to work in my version of zbrush,
I have to do a 3 click to get brushes textures etc sometimes.
Wondering if anyone else this problem 2.
Lay these curves on your model ( like on a relaxed bodybuilder mesh),exactly on the muscle pulls,
With startpoint static en so forth when all this is done ,and you bind your mesh to the rig,
you can set what happens to the curves when the elongates en such. ( Like a slight Damian Standard with falloff options etc)
A option that will adapt to the camera so you could pefectly have 1 line on your camera normal.
See pic :
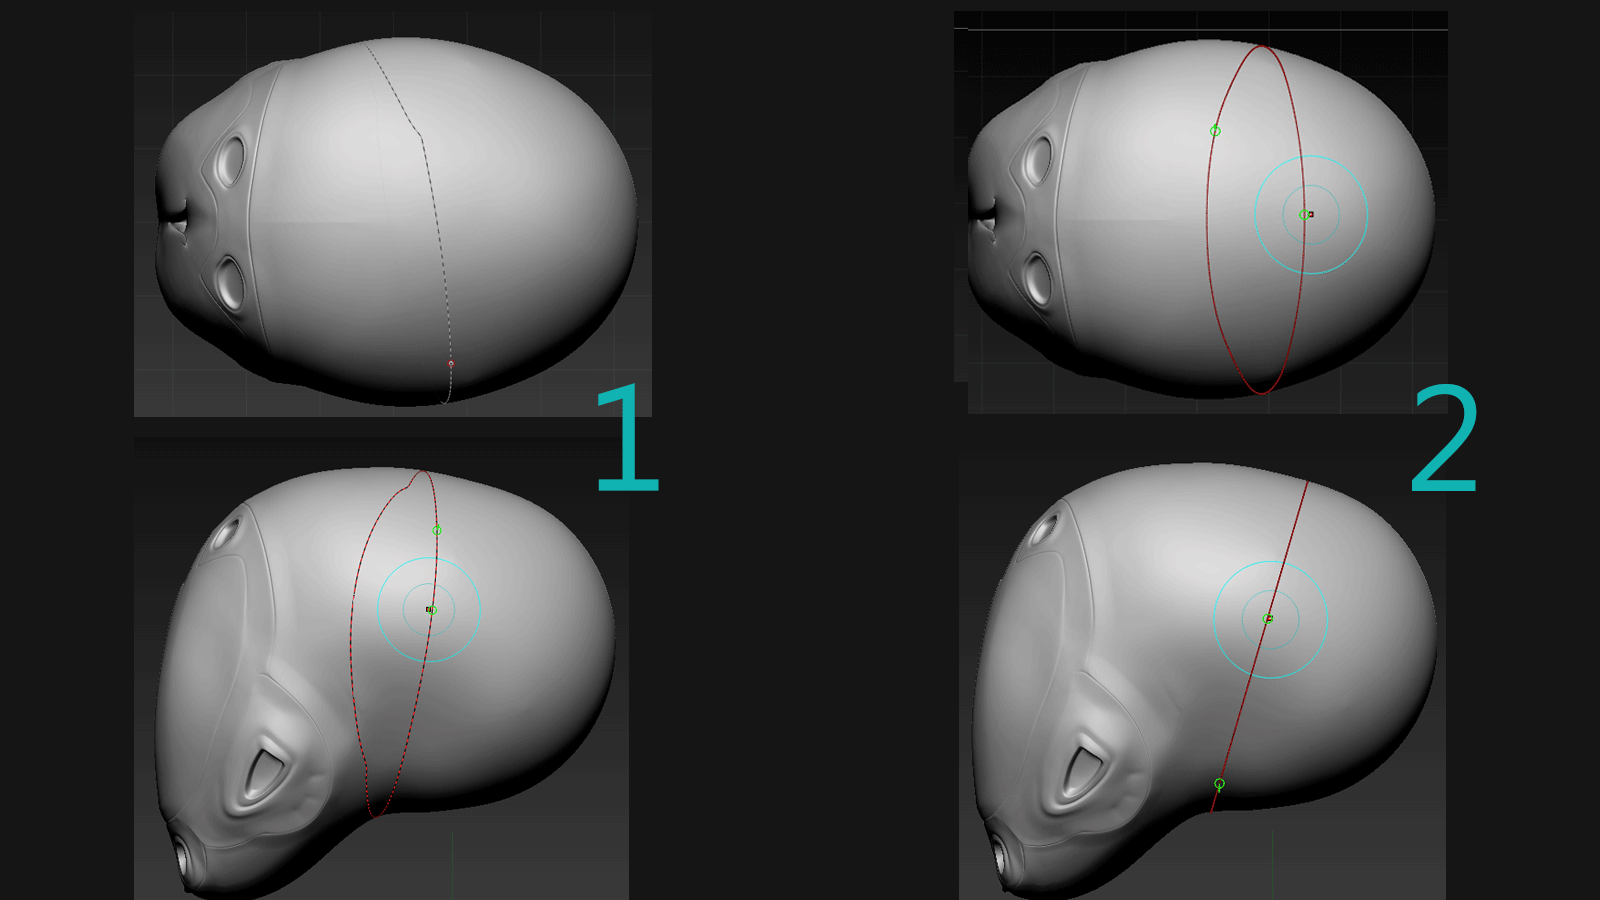
Version 1 is with symmetry off and shift selecting a curve loop.
Version 2 is made by slicing the mesh,isolating a part, and then frame mesh.
Would be nice if you can that same behaviour, when selecting a curveloop on your model.
So you get the same result, as seen in version 2.
When you create a curve on your model and shift dragging out on the canvas.
Especially when you have your model shift snapped to a axes.
||[TABLE=“width: 100%”]
|—|
[TR]
[TD=“class: midtext”]A box unified dimensions,
with a range of inner structures you can select from,
And some scale functions for it.
For when you are going to 3D Print your model.
So after getting the right scale,you could unify the model you were working on,
And position it in the box,
and then do a boolian operation, and a little skin thickness ,to get a nice result
ready to print.|
[/TD]
[/TR]
[/TABLE]
Could be cool to have some control over it,
Like camera distance etc.
And a split screen perhaps, 1 screen front view, other the free cam version.
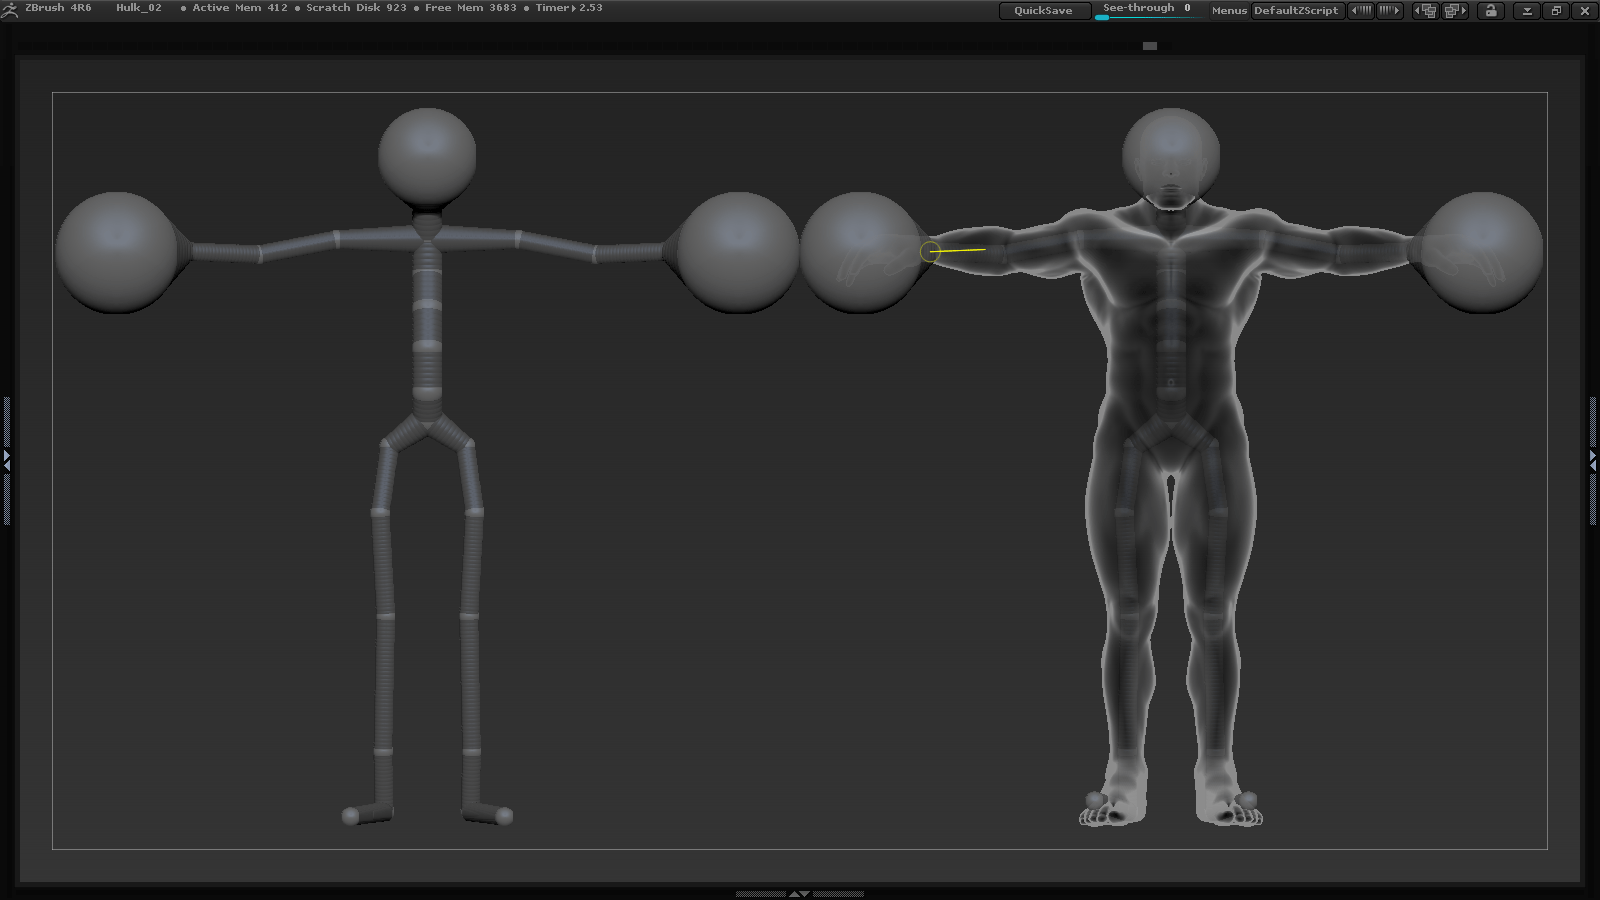
test
When you have your mesh and added some Z Spheres to it, and do a ghost transperancy,
Now if you SHIFT- S the rig and mesh it will only show the Z rig.
See Picture:
Could be nice if you could copy the state, it is in.
with ghost transparency state.
Could be cool to have more control ,over the mesh binds and a visual influence viewer(masking) of it
Maybe something like this select a zsphere go back to the model and the bind influence is shown as a mask
change the mask with falloff etc and that will be saved as a new bind.
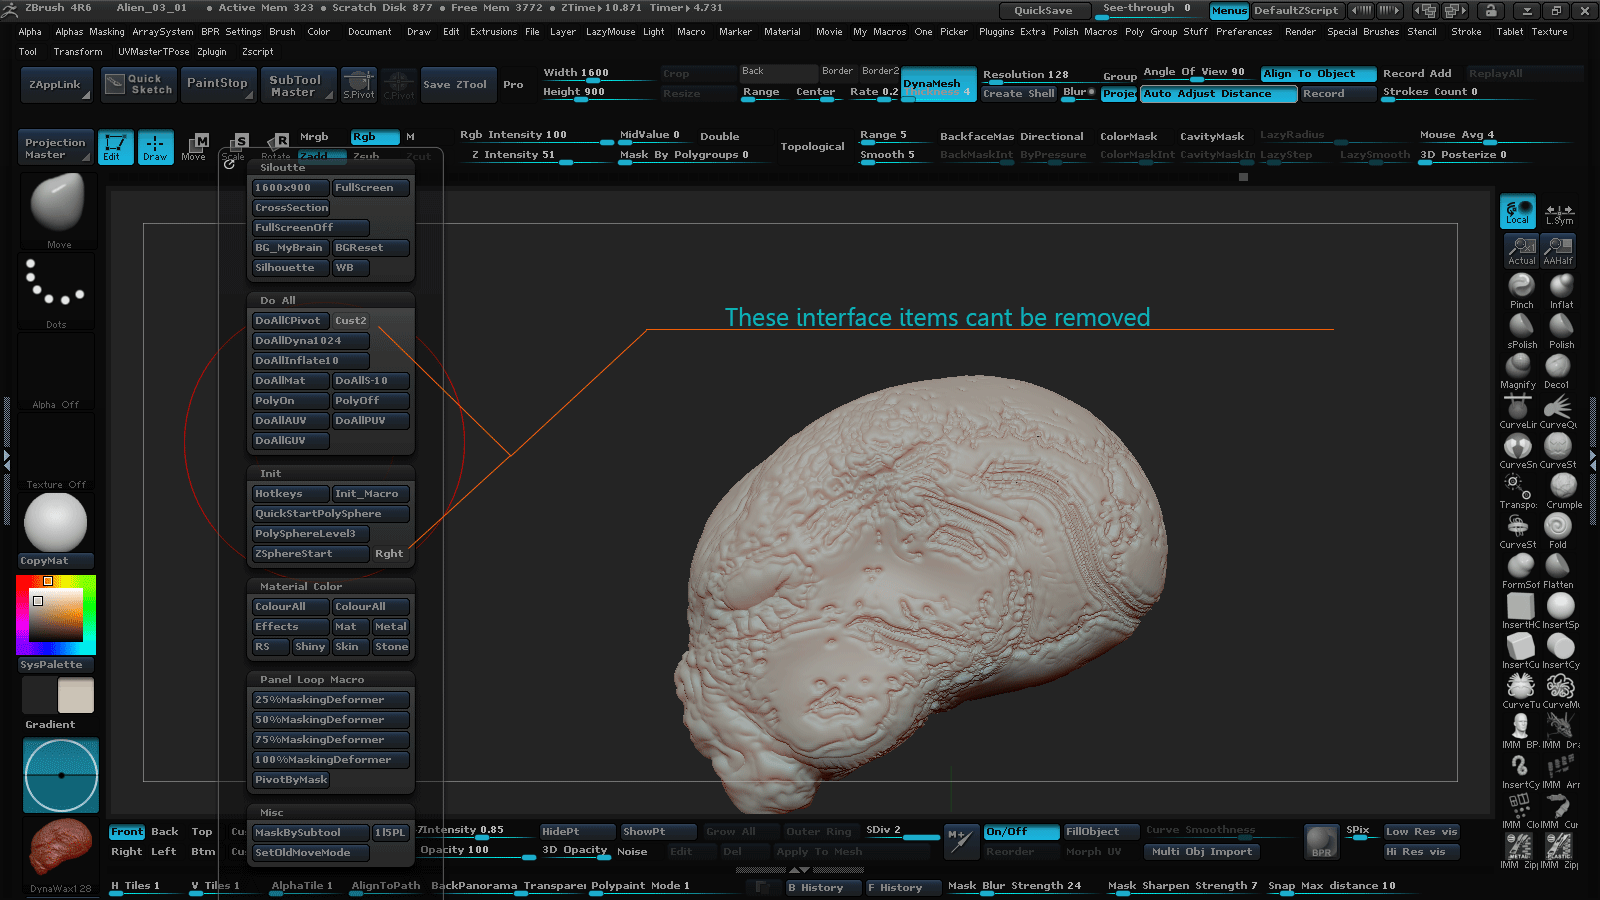
After getting my UI back and running for 4R6,
These UI items can’t be removed for some reason.
See picture:
With CTRL-ALT Dragging them out off the interface.
I have added some macro’s ,and did a update for 4R6 UI config.
There in my Dropbox folder.
Check the Masking Deformer macro’s, there fun,
You can change it, to your own settings if you want.
Also use ESC if you want to stop the macro if you like the result.
Or CTRL-Z to go a couple steps back.
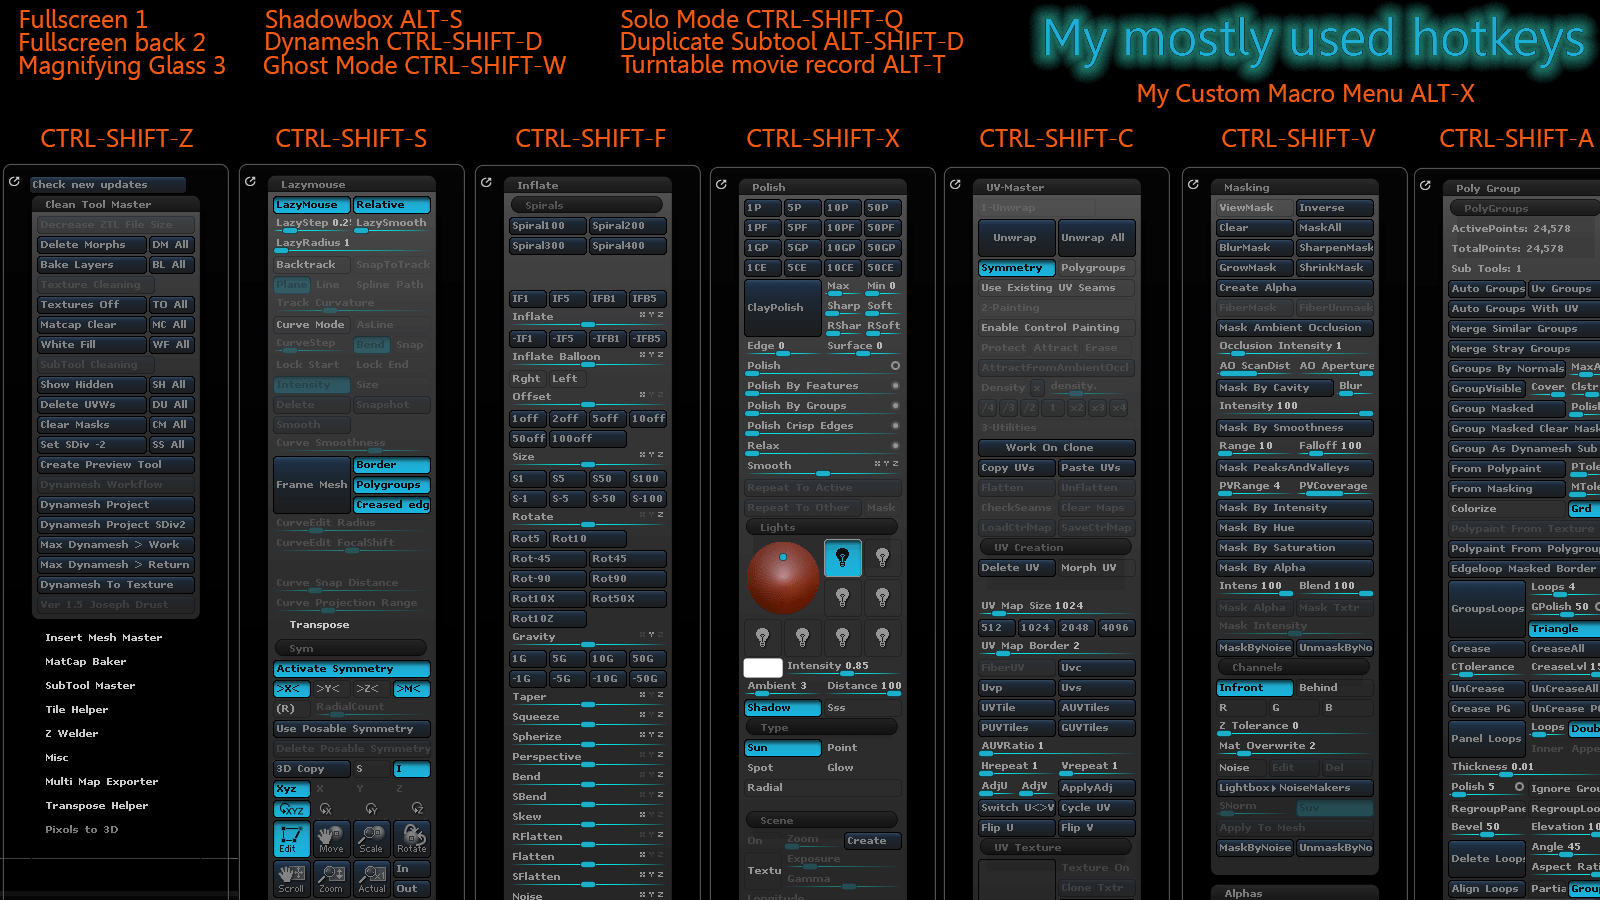
Here is a picture of the hotkey’s I use the most:
Ps: Install the macro’s and extra ZPluggs for the Custom UI to work.