ZBrushCentral

Setting up my model 3D printing? How to make joints in Zbrush?

Hello everyone!

First off let me thank you for taking the time to look at my problem. I really appreciate it!

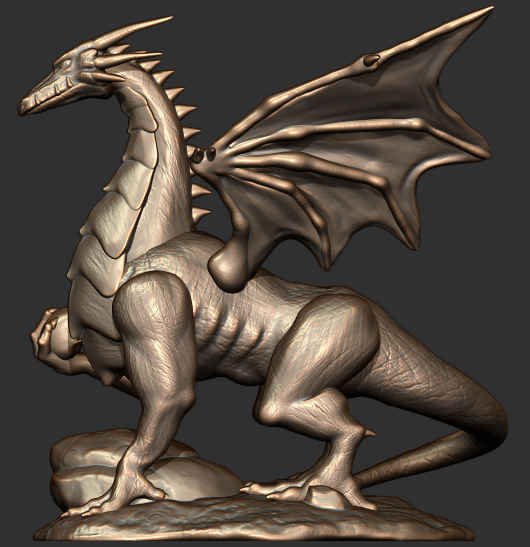
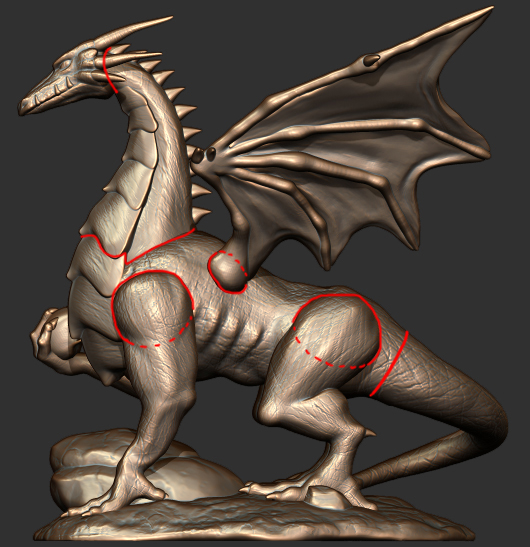
Here is my problem. I want to print my dragon in 3D. I made all the body parts into subtools; body, head, neck, legs, and arms. I need to slice the parts and add joints. How do I do that in ZBrush? I only know how to use ZBrush and I do not have other 3D programs like Maya.

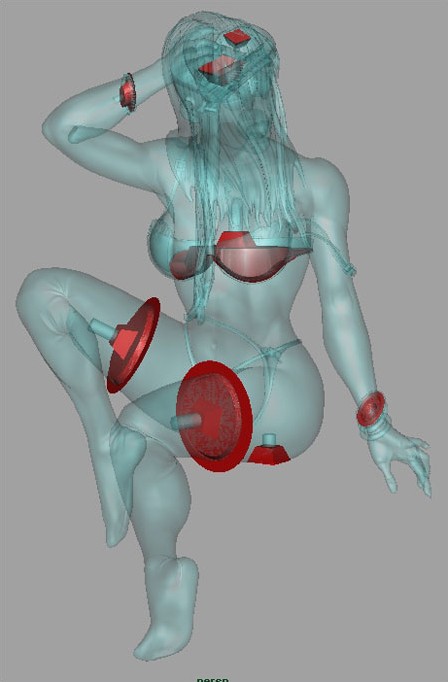
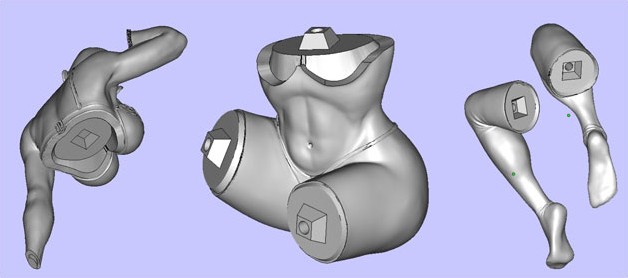
I was able to find a breakdown of this Mary Jane statue at http://www.3dtotal.com/index_tutorial_detailed.php?catDisplay=1&roPos=1&id=289&page=2#.VNPnPS4l18E. By Adam Ross. But you have to use Maya.

He is doing what I want to do in Maya. I want to do it in Zbrush. Any help would be great! Thank you

Attachments

289_tid_Fig07.jpg

289_tid_Fig08.jpg

Midnight_Dragon.jpg

Midnight_Dragon_Joints.jpg

man you’re going to need an expert to weigh in on this. i don’t think it’s possible.

the only thing i can think of is to try and make a joint separately, maybe using the matchmaker brush to try and get a tight fit between the two parts and then insert them into each body part by hand. but there’s no way to actually know if after printing whether the peg will be either too large or not snug enough to fit into the hole.

http://www.zbrushcentral.com/showthread.php?174566-Cuts-and-key-in-zbrush-4r4
http://vimeo.com/45043472
Have a look at how its done in 3DC**t then start nagging for it to be included in Zbrush5:D

man you’re going to need an expert to weigh in on this. i don’t think it’s possible.

the only thing i can think of is to try and make a joint separately, maybe using the matchmaker brush to try and get a tight fit between the two parts and then insert them into each body part by hand. but there’s no way to actually know if after printing whether the peg will be either too large or not snug enough to fit into the hole.

It’s definitely possible. It can be tricky but it can all be done in Zbrush. One thing to remember is the joints have to have some tolerance between them. You don’t want too much or it will be too lose and you don’t want it too tight or the joints might not fit into each other. The tolerance can also vary depending on what material your final model is in.

What size are you printing your dragon?

Why do you need joints? What’s the purpose of putting joints in your model?

There are a lot of different factors that go into it but you might be needlessly putting in joints you don’t need to. The model size, printer, material, usage (casting etc.) and other things help determine your workflow.

The company I work for makes resin statues and figurines. We are trying to learn the 3D printing process so we can make some test prints. The first model we are testing is this dragon. For us to make this dragon we need to make joints to put it together at the end.

This is the much simplified procedure to the link I posted earlier-I was going to do some pretty pictures but they aren’t needed.
First Dynamesh your Dragon-Turn off Blur -Turn on Projection- choose suitable resolution to preserve details.
Next using SliceBrush slice where you want your joints.
Open Subtools and Group Split your Dragon.
Pick a Subtool- any Subtool -Hide the others- Dynamesh it-This will close the hole made by the SliceBrush
Select InsertCube Brush -insert cube where you want your Plug.
Pick next Subtool and repeat- do this for every Subtool you want to have a Plug.
Pick a Subtool you want to receive a Plug and move it to the top of the Subtool list.
Pick the Subtool that fits the one you selected and move it directly underneath the top Subtool-Duplicate it
Select the Difference Icon on this Subtool -looks like a partial solar eclipse-
Hide all the other Subools leaving only the top two visible.
Select Group As DynaMesh Sub in the PolyGroups sub-palette.
In the Subtools palette select Merge Down.
Control drag to re Dynamesh the Subtools
If everything went well you should have a Plug shaped socket in your selected Subtool and the other Subtool will have disappeared-But you made a Duplicate.
Rinse and Repeat…
You can of course use any suitable insert mesh for your plug shape.
Remember that the plug will fit exactly into the socket -so in the real world will not fit without adjustment either in Zbrush or with sandpaper after printing.

The Subtraction part of the process is probably better explained here:
http://docs.pixologic.com/user-guide/3d-modeling/modeling-basics/creating-meshes/dynamesh/with-subtools/

Thanks for your help! I will give you suggestion a shot!

Hello Rageon75, does this methd work for your plugs?? Thanks.