Theses are fun and educational, looking forward to trying the new features, thanks!
What settings did you use for these. They are fantastic. In the crab video it looks like you seperated geometry to pull out some legs.
So much fun to watch!!
I tried to write down tips about Sculptris Pro. I guess,even a nobrainer needs some basic understanding. And some short sentences can explain the magic of long movies  Maybe you want to join?
http://www.zbrushcentral.com/showthread.php?211763-Sculptris-Pro-tips-tricks-amp-warnings
When I see these wonderful sculpts, there is one thing that is still unclear to me: do you remesh these Sculptris Pro meshes just like we are used to do with Dynameshes? I mean: the whole lot with lower res, projection etc…
( I am, by nature, more a quad that a tri lover)
@Mahlikus The Black - cheers! I do a test render inside ZBrush with a clay material towards the end of each sketch, but the final render is Keyshot.
@womball - Thanks! just the default settings for most of them. In a couple of the upcoming videos, I switch off the ‘Adaptive size’ of Sculptris Pro and used the SubDivide Size to ‘manually’ decide when to add more geometry, but is a super simple workflow. I also played with the UnDivide ratio in the Smooth Brush with ‘Use global’ off (Brush palette > Sculptris Pro) so that when I smooth the surface, I get bigger polygons… what you saw on the video of the Crab: you can keep smoothing until you ‘break’ apart the geometry (even with the default settings).
@Knacki - Thank you for putting that thread together, it’s going to be very helpful. I’m also putting together a guide to explain some of the new features and how I used them during the BETA testing time, but I’ll do my best to contribute to the thread if I can.
@Erik Heyninck - Sure, it depends on what you’d like to achieve. in the case of these little ‘aniballs’ I didn’t do any projection or retopo since I was practically erasing one sculpt and starting the next one on top. However, you can totally follow the process you described >>>> 3D concept with Sculptris Pro > retopo > subdivide > project, etc… In fact, Sculptris Pro can be enabled for the ‘ZProject’ brush, which is pretty cool. I used this trick to project the wrinkles and skin details on this model.
I’m loving these videos by the way. In the crab video when you smoothed the mesh to break off a piece of the model to create the limbs, it looks like you pieced portions of the limbs back together. Well, while I was testing out the Sculptris pro feature, I couldn’t get portions of separate objects to come back together to create one object. Is there something I’m missing or does Sculptris Pro allow you to bring 2 or more objects together to create 1 object piece that’s connected to each other? I hope my question makes sense…
Thanks
Hi @Pablender !
As I have said, I like very much your sculpts and I watch them every day!
I have a question for you: I have watched the video#6 many times, but I can’t understand how did you do those plaques on the back of the snail…I see that you mask some dots, smooth them all and then…you magically transform them in craters with a rock texture on the side…
I have tryed to replicate them with deformers, but…
Could you explain me (us) how to reach such a beautiful and fast effect?
Thanks in advance!
Super fun & inspiring - thanks for taking the time to make these  small_orange_diamond
 More great betaworks in your thread toosmall_orange_diamondsmall_orange_diamond
@selahpoetic - I believe there is no way to combine back two pieces of geometry with Sculptris pro. With the crab, I separated the pieces for the legs and create polygroups (with autogroup) to be able to select and mask them quickly. However, if you need to combine a separated mesh into one, you can always use Dynamesh. I hope that helps.
@xexex - Thanks! I’m glad you like the videos. with the snail spots, is actually very simple: 1. mask some dots, 2. invert mask, 3. use the smooth brush with Sculptris Pro and a smaller size to create more geometry, 4. blur the mask a bit, 5. use inflate to push the polygons on their normals. Once you create the basic ‘bumpy’ shape of the crater, you can play around with growing the mask and inflate/deflate a bit more, to tighten the polygons. The details are produced by the difference in tesselation at the edge between the masked and unmasked area. I hope this helps.
Wonderful , wonderful Pablo
The fact that you can work at that speed whilst playing all the musical instruments astounds me .
Looking forward to the geeky breakdowns - will you post them here or on your site?
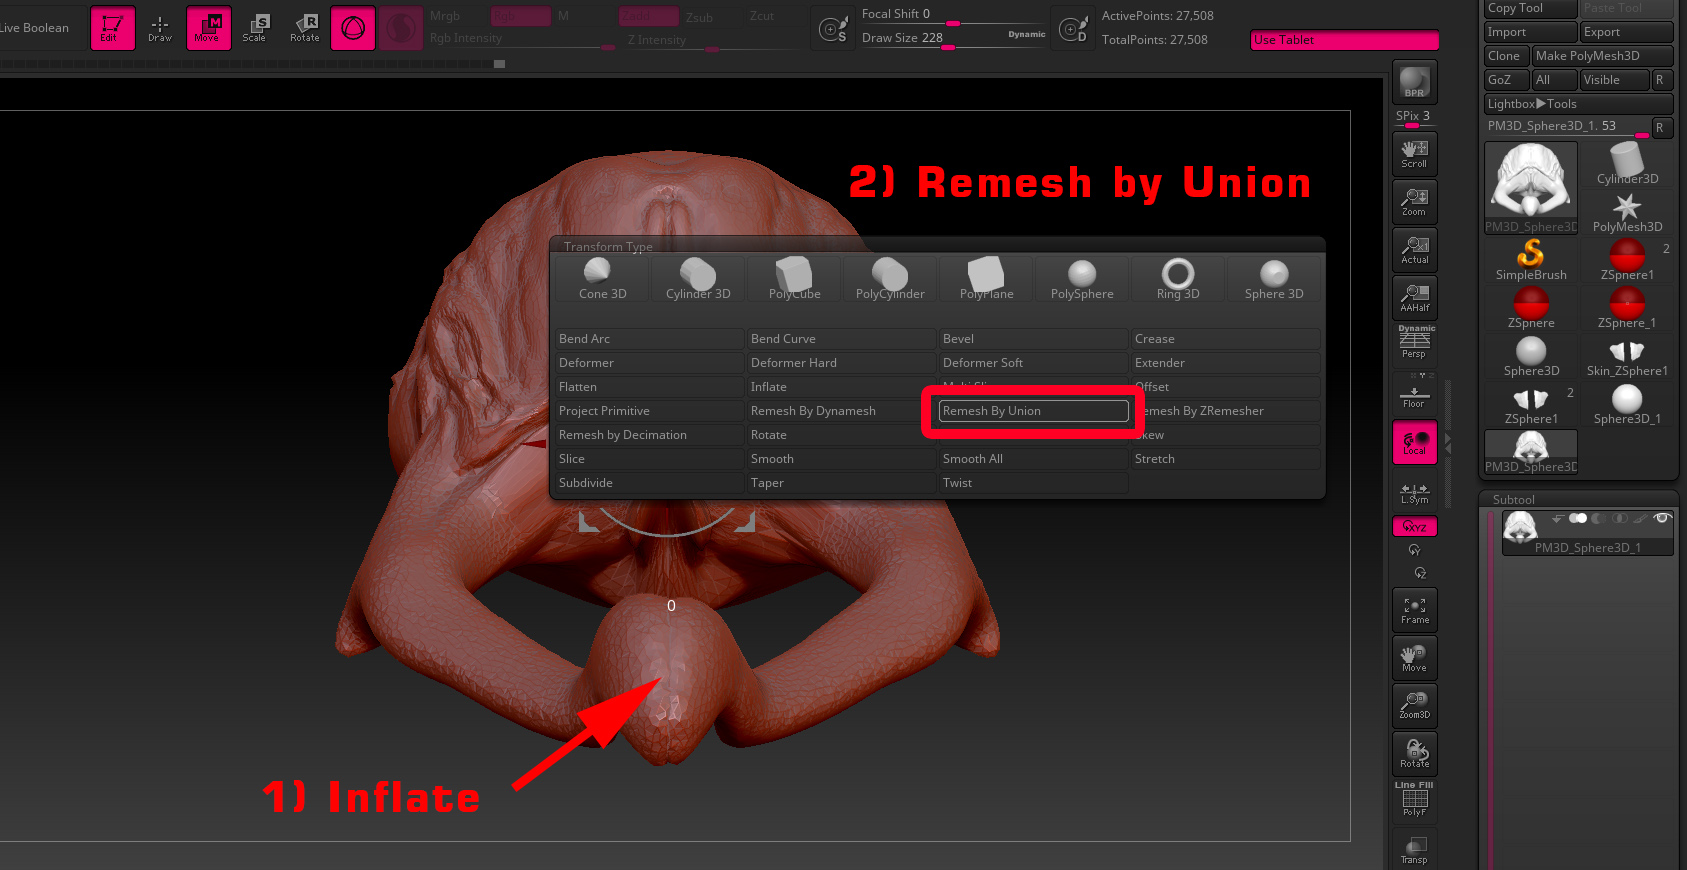
Not sure about Sculptris Pro but In ZB2018 “Remesh by Union” blends two shapes together.
- Snakehook2 the mesh close to each other,
- then inflate untill they overlap
- enter gizmo> Customize (gear icon)
- “Remesh by Union”
Attachments
Thanks a lot!!
I 've tried end it is a fast, simple and… amazing technique!!!
SculptrisPro feature is a Godsend!!! Amazing vids!
so funny!!
what reference/ conzepts do you use?
jerry
sadicusNot sure about Sculptris Pro but In ZB2018 “Remesh by Union” blends two shapes together.
- Snakehook2 the mesh close to each other,
- then inflate untill they overlap
- enter gizmo> Customize (gear icon)
- “Remesh by Union”
I forgot that was mentioned in one of the streams I saw. Thanks for the reminder. I will have to try that as well.
Thanks
selah
Hey @Pablo I noticed when watching these videos (which I have been watching quite frequently) that you add more geometry (or tessellation I should say) to the sculpted object BEFORE, you actually add any detail. and it looks as though it’s a subtle stroke that you apply just to get more geometry in the area’s you plan to add detail to later. Could you tell me how you’re doing that? what brush are you using to do that? Could it be any brush that works with Sculptris pro and you just turn down the Z intensity?
Thanks
Selah
10/10… Fantastic work Pablo (Pablander)
Wow - I just saw Pablanders wonderful page about zBrush2018.
Sculptris Pro and all other new features are most attractive and effective explained.
http://www.zbrushguides.com/zbrush-2018/
Almost a must. Thanks a lot for this, Pablo!
I hope you allow me to link again to our Sculptris Pro tips and tricks thread here on ZBC, where one can find additional information:
http://www.zbrushcentral.com/showthread.php?211763-Sculptris-Pro-tips-tricks-amp-warnings
Unfortunately, I can’t edit first post anymore to keep all information in first post.
@boozy floozie - hahah thanks mate! glad you like the videos. There isn’t much of a breakdown of these series other than maybe some more in-depth explanation of the steps or processes I use. I’ll make a quick guide with some tips and tricks for sure and it will be on the website but you can keep an eye on this thread and I’ll link to it here as well.
@azy noob - cheers. for reference I use a bunch of animal images, a few cartoon images to get an idea of what parts to exaggerate and liquify over the references photoshop to get some quick ideas of what to do.
@selahpoetic - yes that is very easy. I just took the smooth brush and removed the Z intensity completely (set the slider to 0). If you set up the smooth brush like that and enable Sculptris Pro, it’s like having a decimation / tessellation brush. it will only create polygons where you ‘smooth’ and the number of polygons will be determined by the SubDiv amount and the brush size. The reason why I use it sometimes (like in the videos) is to get a sharper mask… more polygons means a cleaner edge on the mas before I do anything with that mask. - Hope this helps!
@Wyattfox - Thanks so much! I appreciate it. I’m glad you like the series.
@Knacki - no worries mate! I’m glad you found it useful.
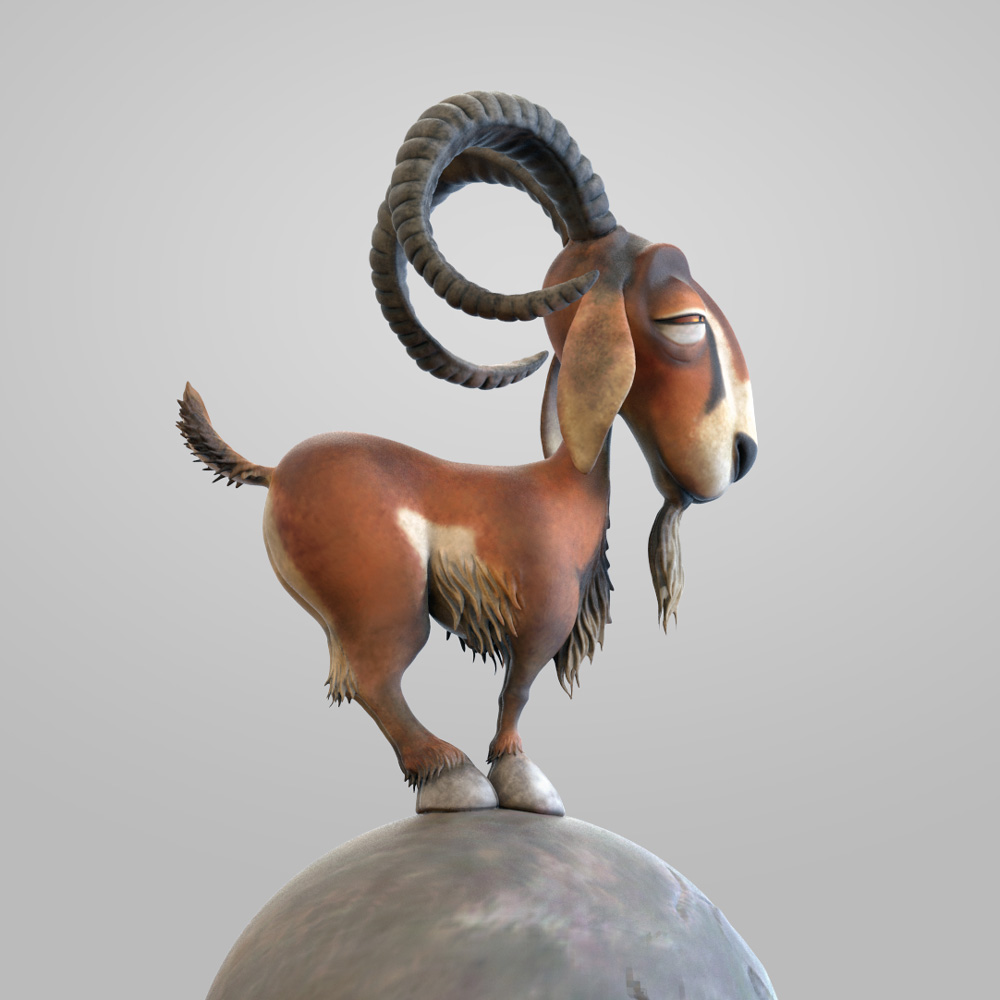
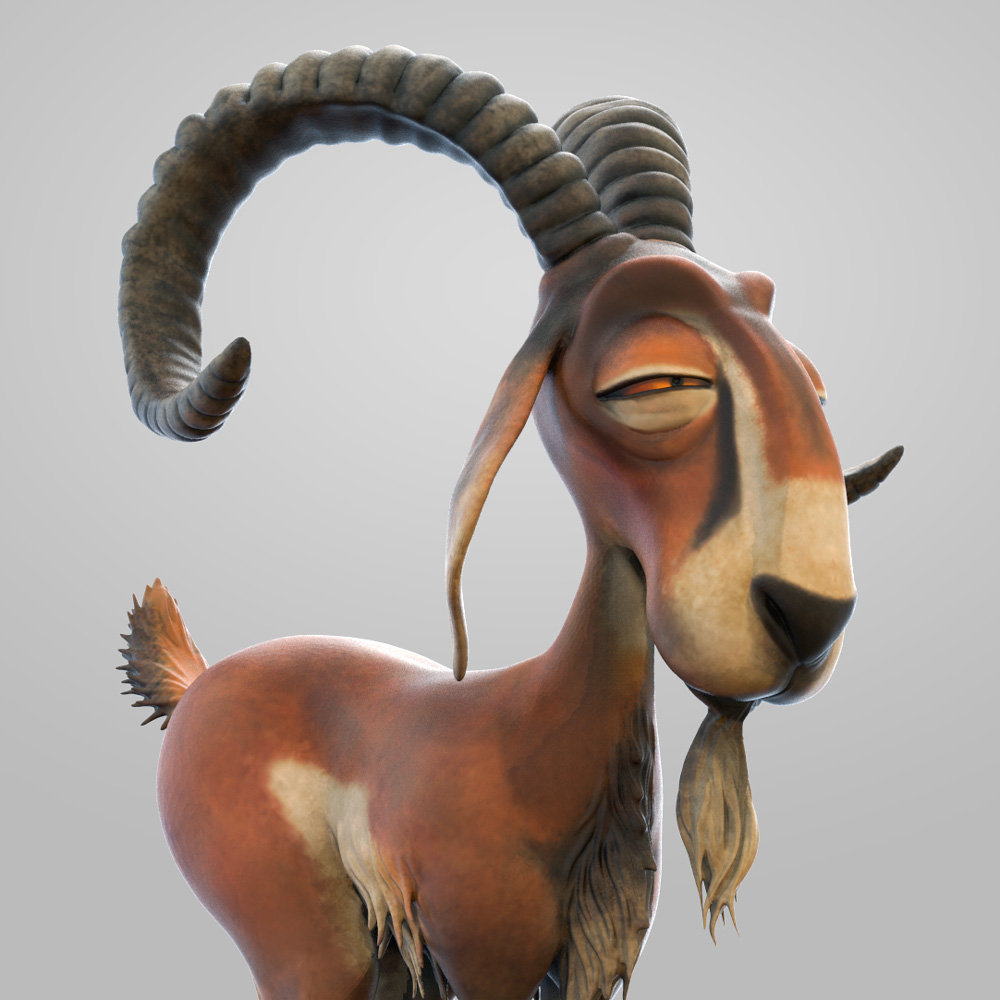
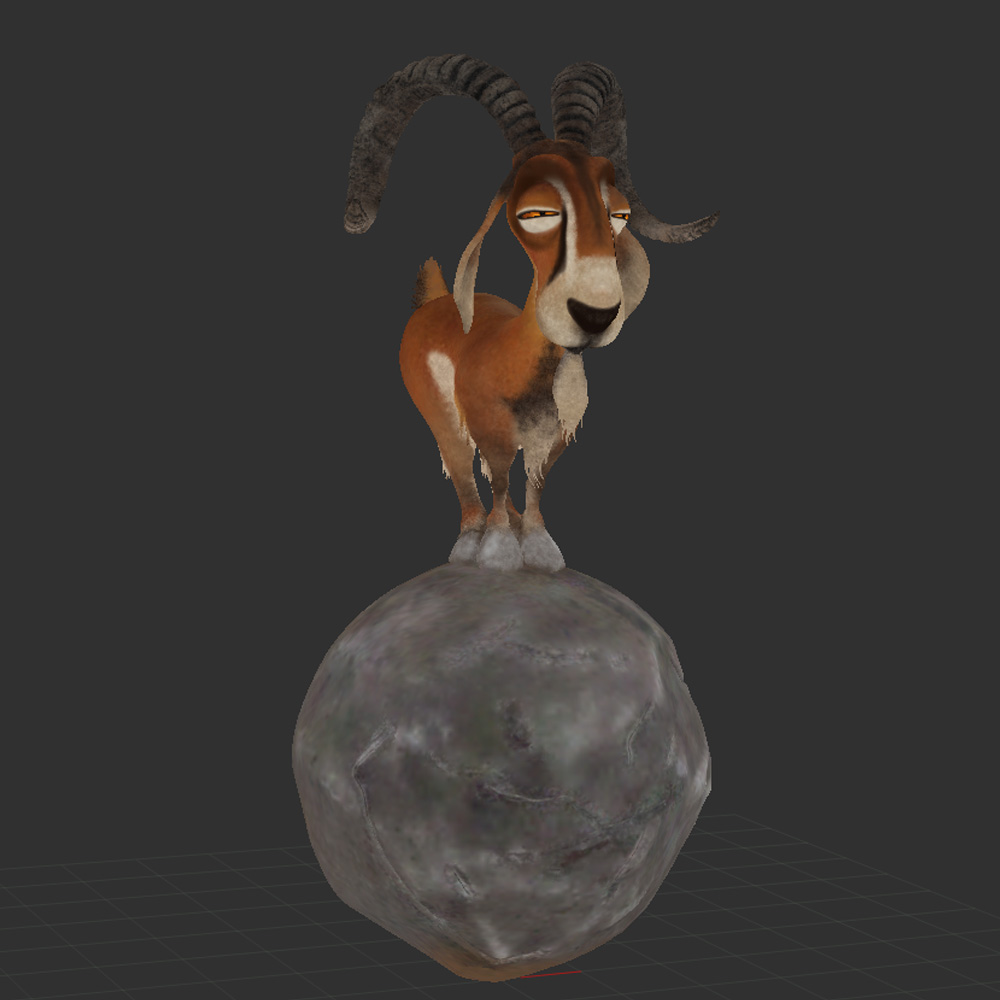
Hey guys, I hope this thread is still active. I did a quick ZBrush session today using Sculptris Pro and polypaint and I thought you might find it interesting since texturing and polypainting wasn’t part of the time-lapse series for the ‘animals on spheres’.
hope you guys like it!:
Time-lapse video HERE


Attachments
