Loving the progress, friend.
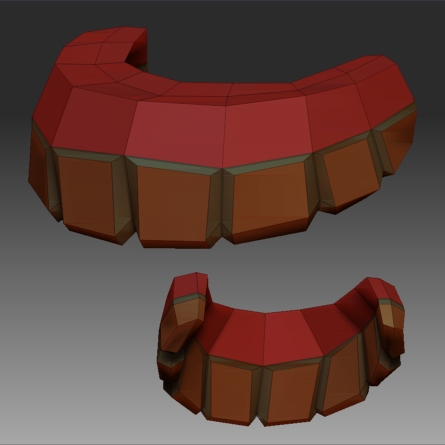
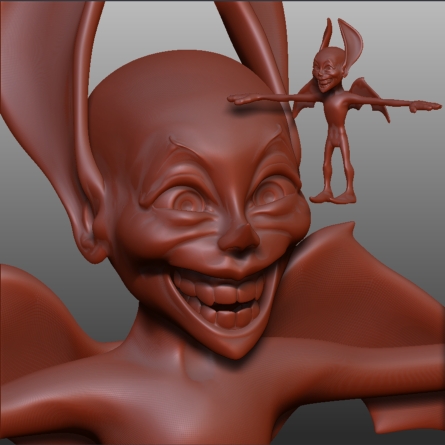
Bit by bit, little by little! Here are the teeth and eyes. I saw this great teeth edge looping technique in a thread I read today, but can’t now remember who’s it was. When I find it again I’ll post my thanks here.
Both eyes and teeth are made using copies of the moon ball z-sphere I made earlier.
Cheers,
R
Attachments
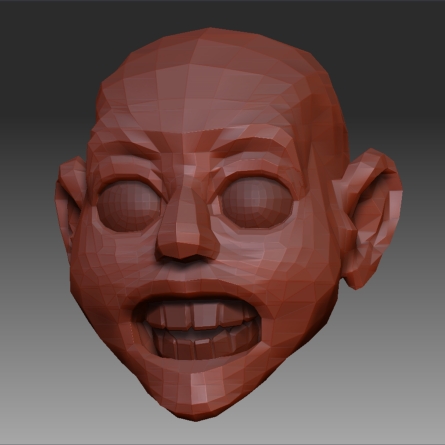
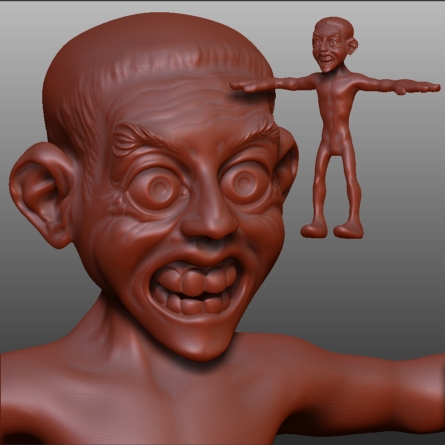
The result of having a bit of time at the weekend.
The meshes were subdivided to the fifth sub-D level and smoothed in places to remove pinching and uneven curves. Then I piled into the sculpting mainly with the Standard brush, with a J-shaped curve for the carved-in lines, Accurate Curves on; and the default curve, Accurate Curves off for building volumes.
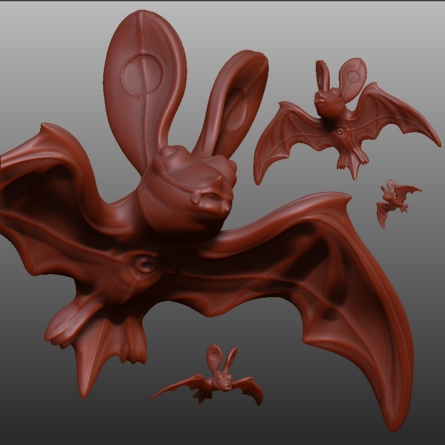
At times I would activate the Lazy Mouse; step of 0.5, radius of 15 and smoothing of zero. This was used a lot on the bat, where I wanted a precise, machined look.
The Move brush helped me shove the imp’s grin into place; and Pinch was employed to crisp up the gaps between the teeth.
The rubber bat is now in its final resting place in the composition, with its ears rotated out of the way of the string holding it up, thanks to the transpose tools.
I am having to resist flamboyant detail, because time is running out, but maybe this is a good thing, as it forces me to remain true to the boldness of the original concept.
R
Attachments
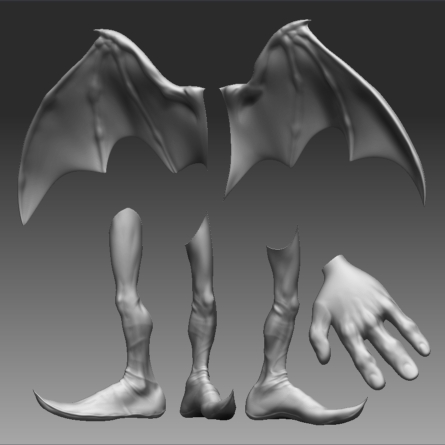
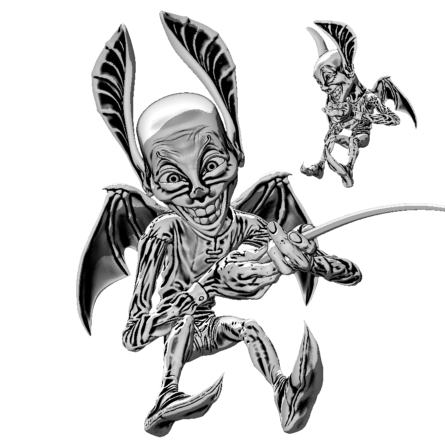
A small update. These belong to the imp. The wings were copied from the rubber bat and shoved behind the imp’s body. Wonderful liberties we can take with character modelling if we don’t have to see them all the way around!
R
I just wanted to let you know I love this idea, I’ve had my eye on this thread since the start of the comp.
It’s a great in concept, funny in design and a enough work to see through to the end of the contest.
It’s looking great, can’t wat to see some RGB on those sculpts soon. :D
Thanks Mark!
I’m actually thinking of rendering this as toon shaded monochrome, with spot colour red in the man’s mouth, but we’ll see…
R
Found it! The guy who’s modelling inspired my characters’ teeth is Tomasz Modzelewski. Thank you Zeet!
R
cool characters
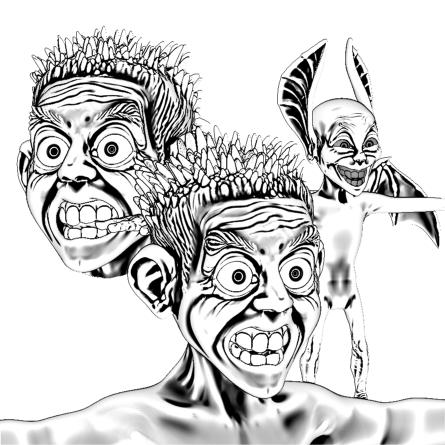
Spent an evening trying out the Matcap tech and the High Definition subdivision layers, neither of which new features I’ve had anything more than a cursory play with till now. I think there’s about 30 million polys in this image. HD is going to be invaluable to me not only in defining the man’s hair, but also in eradicating the poly lines you sometimes get on cavity shaded models.
I’ll have to push on with the sculpting tomorrow. Tonight was by no means a waste of time, but it has left me feeling happy about how this could all look in the end, but more anxious about completion.
R
Hey rory can you give a little more info on toon shading? I searched forum but no one really explains they do give the mats but no explanation found, I wanna go with a combination shader of realistic with a line… very cool shader by the way
This is an interesting technique, I’d be very interested in finding out a bit more about it.
Luigi and Mark, thank you!
I started out by following the process outlined in the ‘Birth’ tutorial on the Online Docs site at Pixologic’s home page.
I drew a sphere 3D onto the canvas and applied the Metal01 ordinary material to it. In the Modifiers palette I set Specular to zero, Reflectivity and Diffuse to 100, then opened the ReflectCurve and dragged the right hand curve point down to the bottom of the graph. Then I added another control point at about H0.13, V0.4, which gave me a nice dark rim all around the sphere.
With Quick edit off, I did a Best Render and grabbed a texture copy of the image with the MRGBZGrabber tool.
Selecting (an arbitrary choice) the MatCap2 material, I replaced the Material Texture Image with my render grab. Instantly this default MatCap material became the spitting image of my edited Metal01 material.
Drawing one of my sculpted meshes to the canvas with the new toon material in the current material slot, I then adjusted the mat’s Cavity Transition and Intensities A and B till I got a strong enough black line on the mesh. Making the background colour white and setting Background Gradient Rate to zero, I could then render a perfectly white page, with just the black linework visible.
Hope that helps!
R
Thank you 
that is one cool work flow for the toon shader, do you have to adjust the way you model to take advantage of the shader or do you think it will work with any model, very nice look.
Seems like any model should do. Can’t say for sure, as I’ve only just made the material…but I can’t see why not.
R
All your work here is looking very good and I think that’s the best toon shader I’ve ever seen on the forum.
The new updates. The tree and imp are done: now I just have to concentrate on the man.
The tree was knobbled by attacking it with the Inflate brush with a very high focal shift and using the spray stroke. This was followed by a short session with the Standard brush, J-shaped edit curve, to cut grooves and fissures into the bark. Finally I applied the Standard brush again, but this time with a bark pattern alpha which I’d generated from a digital photo of a tree trunk. I sculpted this on a new 3D layer, so that I could get just the right bark effect strength. Storing a morph target of the mesh with the bark modelling layer turned off allowed me to erase and soften the bark back to the underlying layer in places.
The imp was moved into position with the Transpose tools and then his sculpting was finished off using Posable symmetry where possible to save on time.
Cheers,
R
Attachments

That bat dude looks great! this is a brilliant way to render. The tree bark is also good. i have to say I am really looking forward to seeing this one complete!
Good job! :D
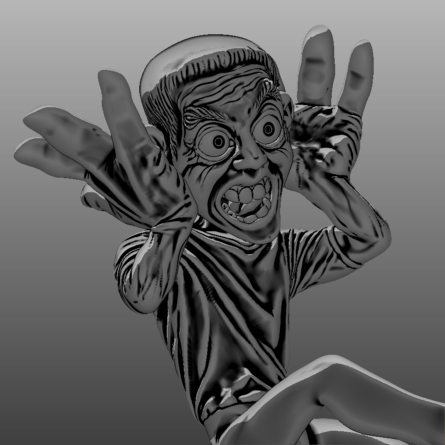
Loving the expressions! Really funny.
Fingers and below the belt yet to do, but the end is in sight! Got the T-shirt done tonight and will have a go at the unfinished hands in the morning.
I masked the T-shirt area polygons, reversed the mask and inflated it all to get the hems; then performed Standard brush crease work, with a spot of Pinch here and there.
R