ZBrushCentral

Rendering Zbrush Displacement Maps in Maya

Thanks TotalScore !

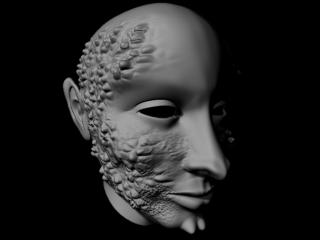
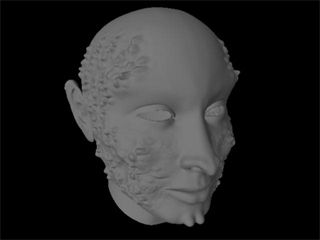
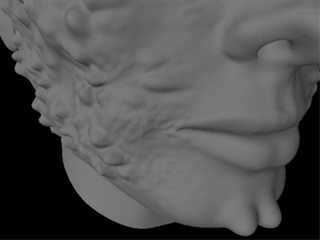
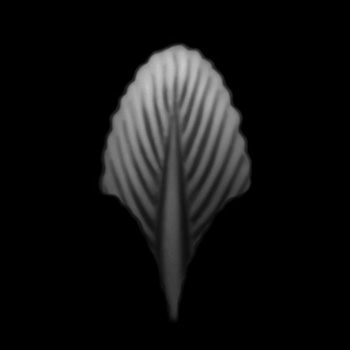
I used variations of the below painted feather as an alpha, which was designed to appear as though ‘carved’.
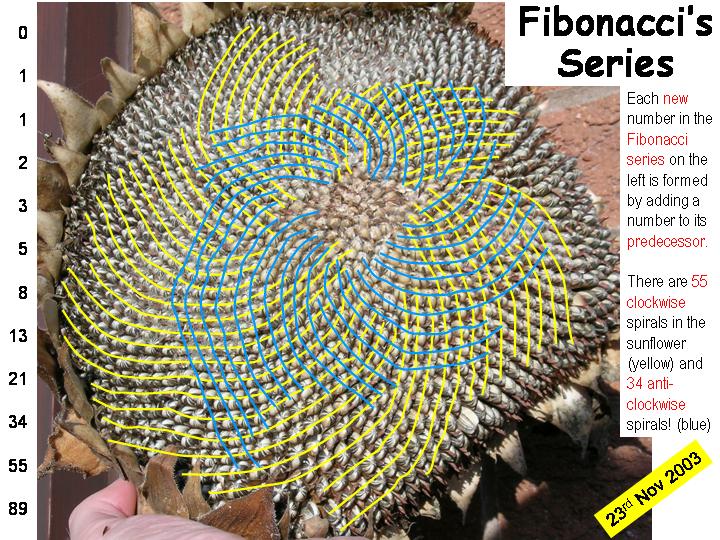
Then I arranged the feathers roughly according to the natural equation of the ‘Fibonacci series’ (see attached)…
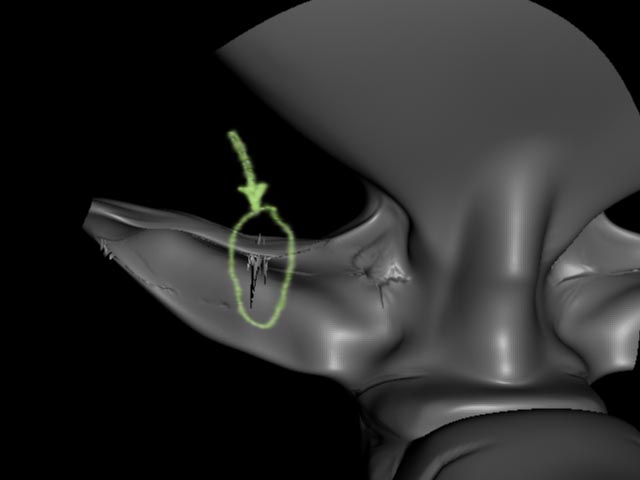
(Lastly, Iadded a few complimentary cracks to the ‘stem’ of the ivory to ‘damage’ the cane head a little)

Hope it helps :slight_smile:
Chris

Attachments

singleFeather.jpg

Fibonacci.jpg

Hi,

may be someone can help me with that. I exported a displacement map via displacement exporter (multi displacement 2) with the code: DE-LBEK-EAEAEA-R32

Unfortunately the result was terrible. The dispmap is black and white (instead of gray levels).

[dispmap.jpg](javascript:zb_insimg(‘33109’,‘dispmap.jpg’,1,0))

Does anyone know what I did wrong?

thanks

Atomicdog - when posting these problems please provide your plataform and system specs.

Are you on a mac? Can you redownload the plug-in from the site and try that? The first release exhibited this problem on the macs. Otherwise, we will have to look elsewhere for the problem. :slight_smile:

Ryan

yes, I am on a mac.

Thanks for the info, Ryan. You helped me a lot.

I downloaded the version D of the disp exporter plug-in here in the forum.

And it looks like it works with the newer version. I almost get the same result as in ZBrush, but unfortunately just almost. I followed the pix guide from Scott Spencer. I have the feeling that not all “bumps/hills” are high/large enough. the whole things looks still too smooth. I can’t see the fine details.

How can I tune up the whole thing to get a better result?

Would an additional bump map help? If so, how can I do that?

Im just using JS_Normalmapper myself but am a little stumped…

Im familiar with hypershade and connection editor…my problem is i dont know what type of shader to attach the mapper node to. The Mental Ray materials dont have a ‘normal camera’…default ones do, like a normal lambert, but that wont render any type of normal map in mental ray…

Also, i do need a 2d placement node attached to my normal map correct?

Thanks a lot, slow but getting there :slight_smile:

Attach the ‘Out Value’ of the JS_NormalMapper node to the ‘normal camera’
of the shading attributes node in the CE (the 2d placement node should be in
evidence automatically)
Can send you a network file if stuck :wink:

More info here:

http://forums.cgsociety.org/showthread.php?p=3513386#post3513386

Chris

Thanks Dude, extemely kind of you - thanks for helping everyone!

Yes thank you very much! Im not sure why but software and mental ray arent displying anything!..

I think i have it done correctly but no normals show up, and i am familiar with connection enditor… 2d placement > Normal map (default) > Js_normapper (as normal map) > Shader (connect out of JS to normal camera of shader)?

Shader looks black with speckles on it in the hypergraph, and hardware render is speckled with black (maybe that will trigger someone into figuring out what i have wrong :S)

ok. I’m almost there yet. The rendering works, but I have some distortions (see image in the circle).

I gotta explain something: I created the head by using ZSpheres and modeled it completly in ZBRush. Then I exported the level 1 mesh and rearranged the uv layout in maya. then back in zbrush. therefore is the mesh (wireframe) not very smooth and perfect. That’s why I only wanna talk about the distortion in the circle. the other distortions may be come from the uv seams. I tried to put the seams in the back area of the head. this is a image from the back. It was my first model in ZBrush and had no idea about the maya/ZBrush workflow. Therefore it is not a clear model, but I like it and wanna continue working on it.

[Alien_final01_dist.jpg]

any idea what I did wrong regarding the distortion?

It looks like projection master overshooting the edge of your geometry. Try using a stencil instead for the area you were going for.

It does not have to do with the displacement map???

mmhhh, … can I still repair somehow the current model?

I’m just replying to the last image you showed. Yes you can repair that. Just drop it down to the lowest level and use the brush to smooth until it’s gone. Then up the level, smooth again, up the level smooth again and repeat until you reach your highest level and the spikes are gone.

That sounds like a good fix for the problem :+1:
Anyone able to help me out with my question, about 5 posts back? heh keeps getting bumped by others incidents

Hi Jake,

Not sure if this has been answerd but for Mental Ray assign the Jsnormalmap to the out value of the shader. So you assign your normal map file to your JS normal map node and then Js Normal map to the shader via the out value.

I’ve also got a tip for you. When modelling in Zbrush dont worry about creating normal and displacement maps to test how it will look in maya just save a level 3 object from Zbrush and import this into maya (around 40K polys) and then you have a idea of how it looks. Saves on creating countless dis and normal maps, when your happy with the model then create a dis / normal map and happy rendering.

Cheers

Yes ive set it up that way, the normal map feeding as a normal map into the JS node, and the out of the JS node to the normal camera of the shader…and still nothing will render in either mental ray or software…thanks for helping but im not sure what im doing wrong! It seems so simple and i have tried it many times…

Thanks for the tip and that is helpful, but im doing this for a game design course, so i need to so the origional model with the normal maps on it to test it :S So far surface sampler is doing a good job on getting the detail…but for the life of me, cant get the simple 3 step shader to work! I get a render with speckled grey and black in hardware though (shader thumbnail is black with speckles on the lower part), does that mean its correctly assigned?

Thanks so much for trying to help

To view a normal map in hardware you will need to assign the normal map to a bump node and then select tangent normal from the attributes of the bump node. Then select Hardware acc from the panels to view in hardware mode. If you render in hardware it will be treated as a bump not normal, maya limitation.

Back to the main problem, have you downloaded the software JS normal map there are two one for mental ray and one for software. Also is there anything else connected to the shader like a displacement map or bump map? If you could post a image of the shader set up it could be useful.

Thanks for the help!

I attached an image of my shader network…i added the color map at the end which i have of course tried without…still…no normals show up in mental ray! I’m sure this is the mental ray one. However i have tried software several times in case. I have no idea what could go wrong in such a simple setup

Again thanks so much, would be nice to get rolling on this!

hey guys,

thanks to Scotts vid and pipeline pdf, ive had great results with rendering displacement in Maya. I even tested out my own model with very satisfying results for what i actually did. id just like to know a lil more about the maps that are created by ADE in zbrush. using MD2 resulted in zbrush creating 2 .tif files.
this:
MayaHead_Disp321001-D32.tif (64 MB)
and:
MayaHead_Disp321001-r32.tif (192 MB)

i was surprised by the size, tho u should note that i did want a 4k map. thru trial and error i figured out that i couldnt convert the …D32.tif tho once i converted the other it produced a .map file weighing in at 256 MB. can anyone explain what purpose the …D32.tif file serves and whether these file sizes are the norm when using ADE because i cant see how this would be acceptable if i was to try to animate displacement etc etc etc…

suffice to say the results were very good when using these ADE .tifs. just check 'em out.

Zbrush render:
ZbrushRender.jpg
please educate me as i wasnt able to find a post that addressed this
many thanks

Attachments

MayaRender3.06.jpg

MayaRenderClose.jpg

Hi.

I’ve watched this video and have gained a lot through it but I was wondering if I have the best version of it. I downloaded the large file (26) but the images are fuzzy to the point that I can’t read any of the text in any of the displayed apps (PhotoShop, Maya, ZBrush). If this is an artifact of the video, so be it. I was just curious if there was a version that was sharp and clear.

Thanks!

~S.~

Hi Snark,

Im glad the video helped some. I would reccomend using thre ZPipeline guide now though. I updated the information and added a lot more to it than was in the original vid.

You can download it from the links in my sigblock.

best,

S