ZBrushCentral

Rendering Zbrush Displacement Maps in Maya

Hello scott;

I been trying displacement maps for a few days now, still didnt get it working.
I have a few problems, lets see:

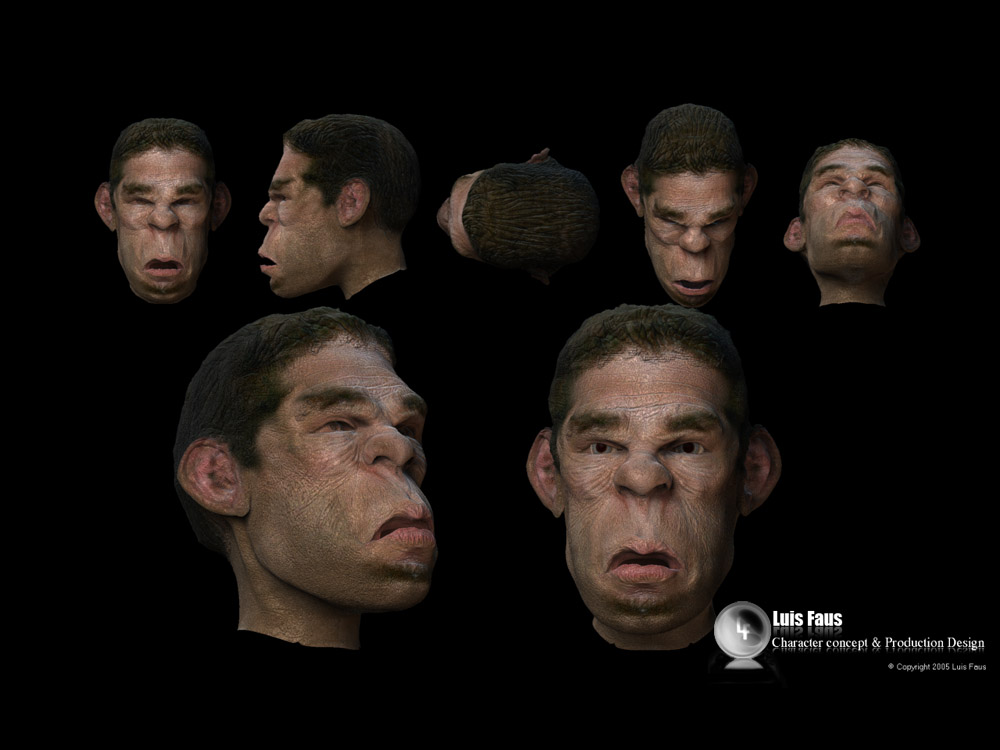
  • the mesh in low res that i export to maya its fine if i dont smooth it because if i do, i get holes in the mesh between the loops created in zbrush with zspheres ( i can see in maya really nicelly that my model its divided in sections like the ears mouth nose eyes and rest of the head)
    -if i do apply the disp map, looks to work fine but i get holes in the corners where the sections of the head are. ( ive tryed aswell unifying the mesh as one ddnt work either)
    -ive tryed to create a displacement map from the normal button in zbrush but it seems too high in bumps, and for the displacement zscript wont work to create one.
    -the zmapper its a really cool feature i learn it more or less how to use it, but still i dont understand what its is for , i dont know if its kinf of a displacement map and neither if its a bump map and dont know how to use it in maya.

The main fact its im studiying 3d animation but this kind of thing they dont teach us so i need to learn it by myself and its real complicated. And so, im still learning maya, but books wont tell you much either.

Thanks for take your time reading it.
Cordially

Luis faus

Hey Luis

The holes are because the verts arent welded. Weld them in Maya with edit polygons>>merg vertices

You said the MultiDisplace2 ZScript dosent work?> What happens? If your displacement is too strong from the normal tools>>displacement method of making a map then lower your alpha gain in Maya.

Zmapper is for normal maps not displacements. You can make diffuse cavity maps with it though… Both normal and diffuse maps are worth loking into. Search the forum and you will find a lot of very informative threads.

Hope that helps : )

S

ERrr
i must be stupid because it seems in your video so easy to do it.
about the holes well they dont show anymore, but i got the seams showing up as the image i post below. MR wont render my disp map. ive follow a tutorial in this post and i got a render after 15 minutes of a small region that was all the vertices going crazy and me going crazy too.
In zbrush all seems so beautifully nice :evil: :cry:

Attachments

looking at seams.jpg

ZBrush Document2.jpg

Hi,

Like Scott has more or less said in other threads,
Perhaps you did not have you obj import settings to False- hence the seperated verts.

hey DarK ZanatoS vbmenu_register(“postmenu_254001”, true); ,

If you havent yet check the ZPipeline Guide linked in my signature. It should help you get through some of the tricky stuff with displacement.
Good luck!

S

Thank you very much everybody - especially Scott! This is a great thread and great tutorial.

Hi,

Hoping someone can help. I am using a high level displacement map as a bump map via maya mental ray with the Alpha set to 2.2 etc and I can’t see any of the high level detail when rendering. I have tired using a normal map as the bump map and this seems to work but Im not sure if this is the best approach.

Thanks :slight_smile:

What were your settings in the bump2D node in Maya?

How did you go about extracting the displacement/bump map in Zbrush?

We need a little more info to give you a good answer…

Scott

Hi Scott,

I have 6 sub d levels in Zbrush I used a cage on level 4 and created a high freq displacement map using the MD2 plug in with the standard settings in your tute. I then deleted the higher levels, I went to sub d 1 created another displacement map for the medium freq. I converted them to the map file format and then assigned them to a shader network in maya.

The bump2d has the high level displacement map, with the colour balance 2.2 and -1.1 for the gain. Filtering is set to off and the bump2d node is set to bump and the bump value is 2.5. The bump node is linked to a Blinn shader via the bump map (standard).

The displacement map also has the filter off, same colour balance linked to displacement attribute via the Blinn. The mental ray approx editor is assigned to the model and those settings are Spatial, 4, 6 and 0.010, also the feature displacement is unchecked.

The medium details appear fine but I can’t see any of the bump detail, if I however link a normal map as a bump created from zmapper the details appear but are coarse in places.

Many Thanks. :+1:

hi…this is my first post…
i have a question (and request) about maya and zbrush integration (using Displacemap)
how we could use Blend shapes with this techniques…i mean Displacemap…
…and if possible…please make this tutorial PDF…i cant get a exact result… :qu:

Excellent…thanks for the vids ; j

THANK YOU , greate explanation, I really learn whit this:D

hey guys i realize my problem is confusing but i have no other options . here it is i use PC with Maya7 and 1GB RAM and ALOT of free disk space plus a 256 MB Nvidia Grafphics card. anyways m problem is that when i render a disp. map such as the one in the vid, the render window just stops. i know i is either too big for my rams but shouldnt it render anyways but with a looooooooooong time to finish. please help…thanks

TS

TotalScore - Are you talking about rendering in Maya or generating the displacement map? I got a little confused there. If you are talking about rendering in Maya: Maya’s renderers can run out of memory and then they will generate an error or crash. The larger your scene file, the more stuff in it, the larger your displacement map the more significant the problem.

Things that can help:
If using Mental Ray convert your displacement map to a .map file
or
use a lower sized displacement map (2k)

Hope that helps.

Ryan

The first thing I would do is watch the status of my Output Window in Maya.

For Mental Ray I would go to Render options-MR-Translation-export Verbosity-and change this to Progress messages or All. That way everything shoes up in your output window, should offer a clue to your problem.

Then I would make sure I have everything in order= Feature Displacement is off, etc. You could also try lower settings, such as 2048x2048 map and increase length settings on the MRDisplaceApprox1Tab(Approximation Editor).

I hope this Helps, also try rendering the full resolution model! I use a laptop with 2 gig, but I started with 1 and all displacements still worked fine! When will someone make a great mel script for Zbrush, I mean a good one with an options box for people who like different settings, but I guess its good to know how it works…

Oh oh also make sure your not using the default imported material created with the Zbrush OBJ, if thats part of your workflow.

Cheers and goodluck!

thanks guys. but the problem as i have encountered is in rendering. i know its a bug within the Alias programmin of maya because it used to happen to me with maya 2,4,5 and now 7. the thing is that for example: i have a low poly character right, then i convert it to a SubD. wel if that subD is too heavy, then maya will start the render but will stop with a dark blue screen (render window when render is in progress). it is weird and ANNOYING. i even tried it on other computers, still no luck. MAN i need a render farm beside me. there isnt ONE in this whole damn country. so even with no displacement and normal maps (no shaders either), there is no render. The surprizing thing is that my pc can render up to 2.5 million polys in like 3-5minutes but for a scene thats 15 MB and contains a heavy subD, it wont

if there is hope it lies within the BOXX pc (which i am going to purchase as soon asi can manage to save up a little):frowning:

Thanks loads for the tips guys.

sionara, TS

PS: how do you save/convert to a .map?

TotalScore:
Osaires at CGtalk says
“dont use imf_disp to save your file as a .map
you lose your depth info when you save to map with imf_disp.
use the imf_copy tool insted.”

Hezza at CGtalk says
"Make a batch file and copy the text between the two rows of ------------- into it.

Start

:convertfile
@IF %1 == “” GOTO end
imf_copy -p %1 “%~d1%~p1%~n1.map”
@SHIFT
@GOTO convertfile
:end
@ECHO.
@ECHO Done!
@pause


End

Alternatively just download the batch file from here

http://www.hezza.co.uk/files/convertfile.bat
(right click save-as)

Then alls you need to do is drag your image file onto the batch file and it’ll dump out a map file of it. This was posted by someone on the Zbrush Central forum (scott spencer i think but not 100%)"

I use the one recomended by Hezza.

I dont know your workflow, but I just converted a low poly-(actually fairly high 14,000 faces) to a sub D (25 edges per vertex and 50000facesmax) and it rendered in 0:06 with MR… whats too heavy of a subD? Are you talking about the maya software renderer-I avoid subD with software renders.
I guess your trying to render displacements with maya software renderer as well, I avoid that too.
But honestly your problem doesnt seem to be clear, I cant see the lack of you being able to render a displacement as a bug.
I hope this doesnt sound rude.
I would like to help, It just seems you have already decided its maya or hardware. More info would be great or you can send me a sample of your current disp render atempt and I could try!

Cheers!

rasamaya thanks a truckload for you interest in helping me with my problem and adressing other forums. i will provide you guys with a file as soon as i can because i have a physics test tomorow and i cant access my CG comp now. just one day. ill give you a sample or just a normal map and tell you what i did so it wouldnt render.

thanks loads man

TS

ok sorry for delay but i got a field trip tomorow to an island to do some experiments(i know u dont care) and i had to invent some sort of water pump. anyways here the procedure if youre interested in blocking the hell out of maya.

  1. create a poly sphere and smooth it to 10,000 polys (because the character i am doing is in high res)
  2. convert it to a subD
    3.apply this normal map
    you could try it without the normal map and see if it renders with you. if it does than there is some kind of curse on every computer i buy.:o

and the pic render is a test of the geometry in poly form at 240,000 polys with normal map applied.

Attachments

blackbackg.jpg

Hi, well instead of 10000 polys I did 25000 to be safe(made poly sphere-deleted history, then used poly subdivide tool), then I deleted history again, Converted poly to subD with a max of 250000 and 32 edges per vertex. I Deleted history again, to be extra safe and Rendered with MR. 5 seconds to render. Ha ha Total Score water marks! I succesfully rendered the normal map as a tangent space normal bump and we had a complete render after 6 seconds. No problems with MR rendering. I Rendered on HP pavilion zd8080 P4 w Hyper Threading 3.4Ghz 2gig ram XP media Edition and ATI Radeon x600 512MB. Note: I first created a sphere with 100x100 =10000 faces but that would not convert to subD. Not that it makes a huge difference, but you are running maya.exe in windows 2000 mode yes?