hi,
i did flip it again, but there was no improvement. 
I don’t know what I did wrong!
I exported the cage model (level 0). Can I use an exported object level 2 or 3 as well with the same map? or do I have to go down to 0 (cage) anyway?
hi,
i did flip it again, but there was no improvement.
I don’t know what I did wrong!
I exported the cage model (level 0). Can I use an exported object level 2 or 3 as well with the same map? or do I have to go down to 0 (cage) anyway?
You should be able to export the model at any subdivision level and use it with the same map.
Maybe you should try a really simple test of the map and model export procedure, like using a simple sphere as the model and just drawing raised numbers or letters on it. Then export the model and maps and see if they line up right in Maya.
I’m not sure what is going on with your model, but it is definitely a texture mis-alignment problem of some kind.
Clyde
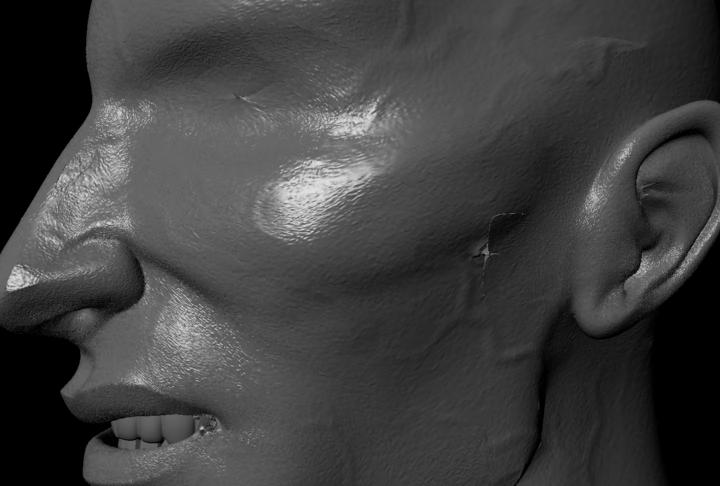
I’ve started a new project, a character from a book, and I’ve been trying to get the displacement to work on the head today. Unfortunately, I keep getting consistent result: The head displaces fairly decently, except every render yields a large degree of “noise” across the entire surface. There’s no reason for this noise… The edits I made in Zbrush were fairly general and I didn’t do much else but include veins running all over the face of the character. Does anyone know why this might be? I’ve included a picture of the Maya 6.5 mental-ray rendered displacement. Also, there are various irregularites… ugly black/white marks that are pretty obviously not displaced (at least accurately)… any help someone??
-Jonah Lobe
So, now I am a step further. I exported the displacement map without smooth uv turned on. The displacement map alignes now with the model. (alpha gain = 4) But I still miss detail. I played with some values without success. I increased alpha gain, but then everything was just thicker.
Has anyone an idea to get more detail?

Thanks for the tip, CD3D! I tried it first with a simple cube with some detail and saw that my displacement map of the alien head couldn’t be correct. so experimented a bit. At least I could align the disp. map. 
Hey Kangaroo,
Check the filter type on your file node. It usually defaults to Gaussian. Try some other filters here.
Scott
Atomic,
If you are missing details make sure your object is scaled up in Maya. Displacement is dependent on world scale so a good rule of thumb is to scale the head so the grid is almost completely inside the colume of the head. Then make sure your approximation settings aare high enough to accomidate the detail you want. Try Spatial min 4 max 6 length .001 and increase min if needed.
This should help puch your details from the map.
Also make absolutely sure you did not have color managment on in photoshop when you opened the map to flip it and do the RGB conversion.
Scott
Thanks Scott!
I changed it, but it haven’t had an impact on the rendered model. I also checked my color management and it is set off. And i did the the RGB conversion. I am totally  I think I got it almost, but it is still not the right model. What else can I do?
I realised that I can’t export the disp. map as tif or so. It only accepts psd. Even if I try to export it as tif it saves it as psd.
I’ve got some additional questions, may be someone has an answer:
Do you guys see a realistic use of Zbrush models for animations in Maya? For example, some blends for my alien head? If I export it as high polygon model, it has too many polygons (700 000) for my hardware to work with it. And the cage model is so far away from the real model. What do you guys think?
Why do you guys create a low mesh polygon model in Maya and then go to ZBrush and then back to Maya? Isn’t it mush faster to create the low mesh model mit ZSpheres and then modelling in Zbrush?
Thanks for any help!
I tried the head from Pixolator and it worked. Therefore, I know it is not my Mental Ray Settings. I tried it with a simple cube as well and didn’t work either. I think I do something wrong, when I create my displacement map in ZBrush. I used the explanation in the practical manual (the one for the phone).
Has someone please a better tutorial for creating displacement maps in ZBrush (which I can use in Maya)? That would be very helpful.
Thanks!!
Hey AtomicDog…
Are you exporting a PSD and using a PSD in Maya?? If so that is a big problem. Use a tiff or better yet convert the .tiff file to a .map file with “imf copy” a command line utility that comes with maya. Mentral Ray really hates tiff files especially those saved with compression on in Photoshop. Save as a tiff with no compression and convert with imf_copy -p “originalTextureName.tif” “newTexture.map”
Zbrush models are very useful in Maya especially with utilities like xyShrinkWrap. For antual animations you want to use a displaced mesh.
Personally I model in Maya because it gives me total control over my edgeflow and I feel that I can model faster there. Also, most industry pipelines are built around a mesh being generated in Maya (or xsi, LW, MAX etc) and then given to an artist to detail in zbrush. As time passes this may very well change. I was lucky to be able to work at a company that let me model in zbrush then use 3rd party tools to remesh my model for the setup crew.
I do know it is easier for setup artists to bind a mesh with specific edgeflow and a decent number of verts and again at this time it is easier to achive this in Maya than Zbrush. This is set to change with the new version of Zbrush though and Maya may very well become my rendering and mesh tweaking app while zbrush becomes the main tool for all phases of modeling (I hope)
Scott
Scott-
I tried different filtering techniques… they improved the problem, but they didn’t solve it… I ended up re-exporting my displacement file, and it seemed to solve the problem of the noise, but the small, nasty irregularities in my displacement remain. Any idea why this could be? I saw that you said that Mental Ray despises .tif files, and these were created using .tif files, could that be the problem?
Also, any advice whatsoever on getting into the computer animation industry? I just graduated college and I’ve been staying at home, working on this computer-modeling in order to create a demo reel. You don’t need to post a huge discussion about that on here, if you don’t want to. Hell, you don’t have to respond to that question at all, but if you have the time I’d love to hear the advice you have. If you get the chance, I’d love to get a few words of advice at: [email protected].
Thanks!
Jonah
(PS: Sorry, I know I’ve been talkin way too much already, but what advice would you have for doing all the small subtle edits to z-model texture for human skin?)
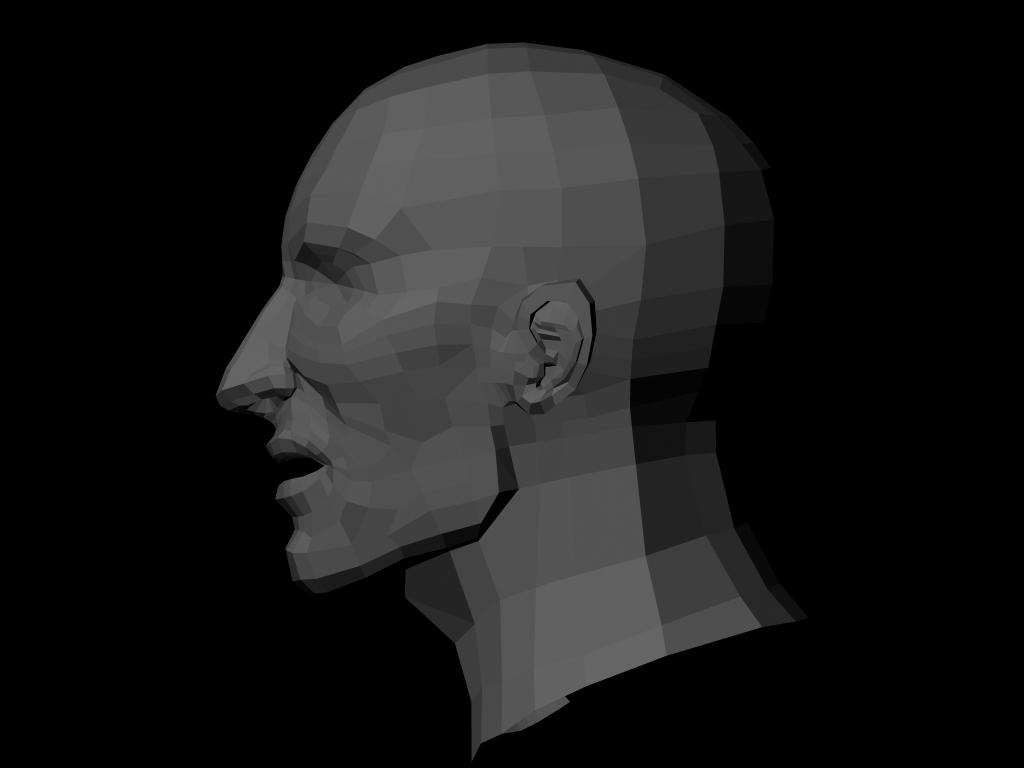
It looks like the creases in the mesh are problems with tesselation.
Can you post an image of your wireframe?
What are your min and max settings for the Subdivision Approximation? Do you have a displacement approximation on the mesh?
have you tried adding a smooth to the mesh before the render?
Scott
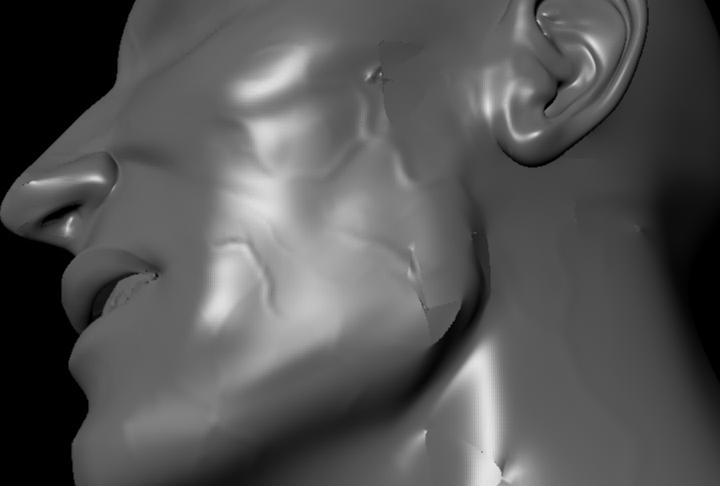
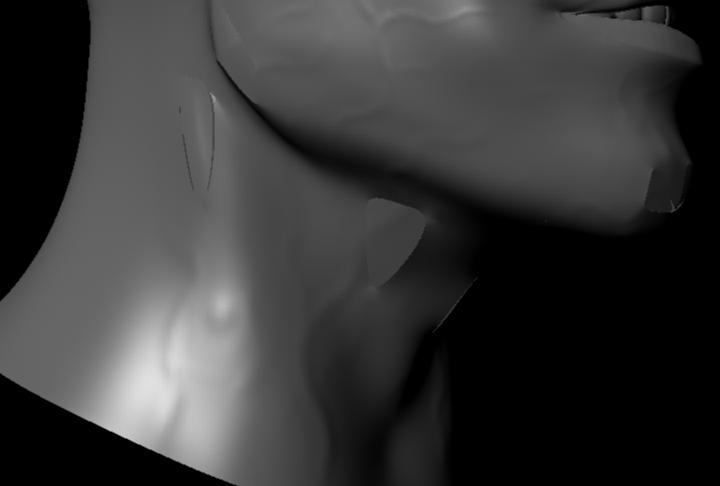
hey I couldn’t figure out how to render a wireframe image - which was frustrating cuz I know I’ve done it before - but I hardened all the normals and took a screenshot for you. It should provide the information you need.
I smoothed the normals/smoothed the polygon before I rendered. Definitely helps and makes a difference, but I still have these little irregularities.
The approximation editor information is comparable to your own recommended settings, pretty much identical.
I notice there are triangles in my mesh. Do you think this could be the root cause of all these ugly deformations?
Yep,
tris will do it. Tris are evil ugly things that eat babies.
I think that is the root of the problem there.
Scott
Scott, thanks for your explanation. I don’t use a psd file in maya. I convert it to a tif-file.(rgb, 16bit,…) I never used “imf copy” and don’t know how to use it.
I read in another threat that macintosh and mental ray are not really a good combination. May be, that is the reason…i don’t know.
I tried the head and sword example from pixolator. As I said, the head was ok, but the sword was not that successful. I could not get the detail in the handle, therefore I couldn’t get the same good results as others. Currently, I can’t see a chance to use the workflow between maya and zbrush. I loose too much detail in the model.
I tried so many things without success. I think, I’ll leave it for a while and may be later I get the right idea or realize what I did wrong.
Anyway, thanks for your help, Scott!
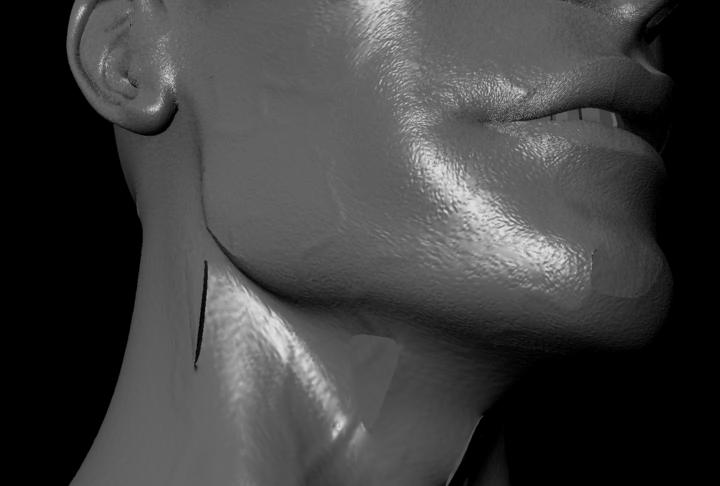
Okay, so I redid the model of the Myrdraal, and I’m much happier with it the second time around, and I’m pleased to announce for the first time that my displacement map has worked (at least 95%!) completely! I have one little problem that is confusing me a little, and I wanted to post that. You’ll notice on this guy’s mouth, the left side of it has a black line running along the upper lip and below the upper lip, kinda inside. I have posted pictures, and if anyone has any idea what those lines are and how I can fix it, that’d be great. I’m very excited, I’ve never come so close…!

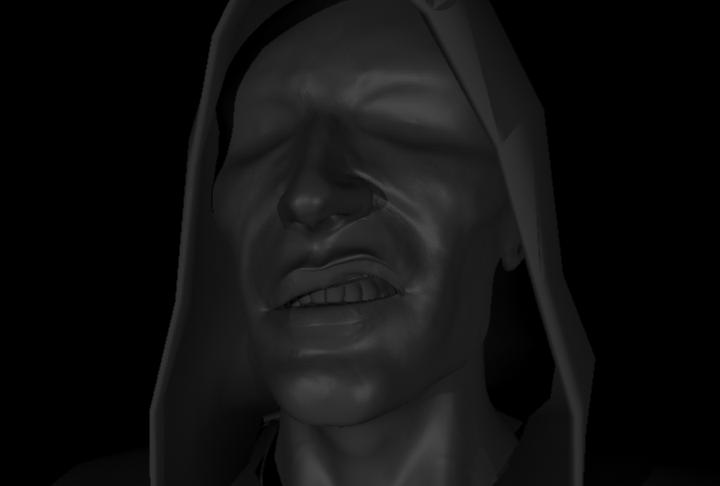
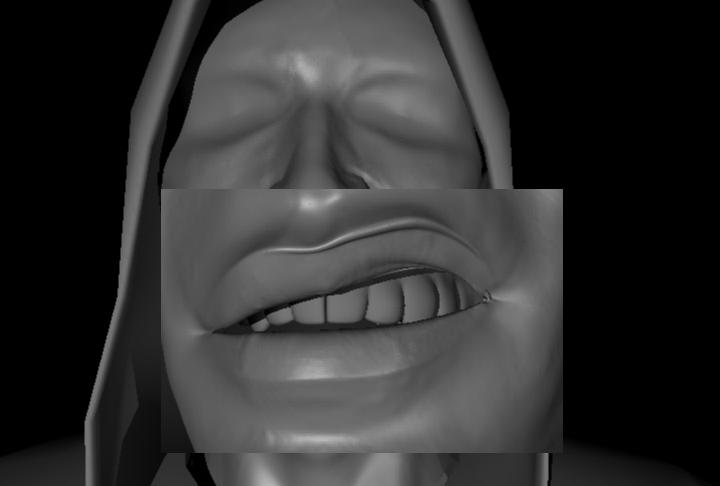
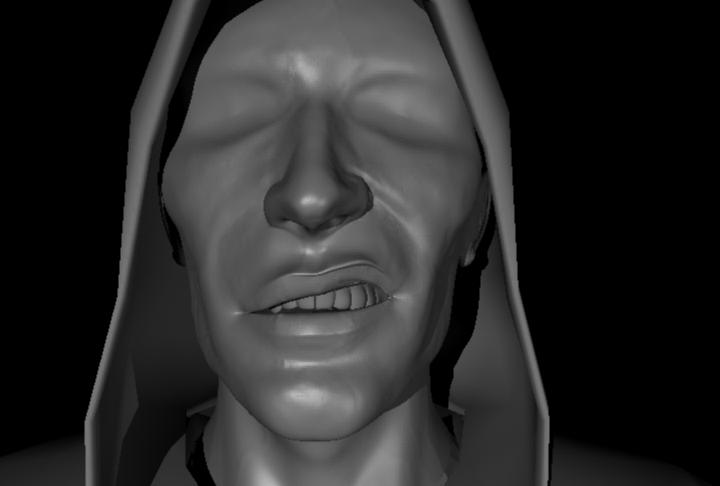
oh, it occurs to me that the dark line UNDER his upper lip is the shadow… yes, I’m smart, I promise… well, pretty smart. But I still don’t know what the upper-lip line is.
Jonah
hey, anyone have any idea what that could be? Scott?
could be pinching in the blendshape? Try doing a small camera animation around it to see.
S
hm, I aint usin blendshapes, unfortunately… this character will not be animatable (I’m trying to work on a demo reel, so I’m mainly just doing models)… any other ideas? I think it’s probably ok, it’s not too noticeable, I don’t think.
once again you have saved me alot of cash and time see im making a pegasus with a scene “All displacement maps” and see i have a deadline of the 12th to finish it but i got the project through my dad who said "if you really want to learn heres a start and he knows nothing about cgi so he said do this job for my client and you should be a pro by the time your done …
he tortures me but hey ive learned "partical systems displacement mapping terrain making and improved my sculpting 100 percent not to mention learning how to use that tricky subsurface scattering pluging hahah! …
anyway thanks a whole lot … this project will make my neice have a much better christmas cause ill be able to buy her the expensive stuff 