Thanks abbasi it worked , If I bump up the dis map detail I can see some fine lines but for what im using if for it looks good. I will post a pic shorlty.
Cheers
Thanks abbasi it worked, If I bump up the dis map detail I can see some fine lines but for what im using if for it looks good. I will post a pic shorlty.
Cheers
Just a reminder, if you’re using the MR approximation editor to handle the displacement, you want to make sure that the displacement settings in the object node are turned off. If you don’t, this usually ends up creating a multiple displacement on the same mesh, making it look bloated.
wolfbane - sometimes pelting tools doesn’t do a great job in unwrapping the uvs. Make sure that there are no uvs that are overlapping. And make sure the export options of your displacement are flipped on the V. Zbrush likes creating a texture map that is opposite of maya’s uv settings.
Thank you…! By offering such knowledge for free, you are helping tons of people! You rock dude…
sadfsdf
llego tarde 
the link large not found
LARGE 26 MEG QT
http://206.145.80.237/zbrush/zbcfiles/tutorial_large.zip
please upload - in other server
It’s because it’s linked to a different place.
Here’s the right link.
http://www.scottspencer.com/images/video/zTutorials/tutorial_large.zip
Thanks a lot for the updated link!
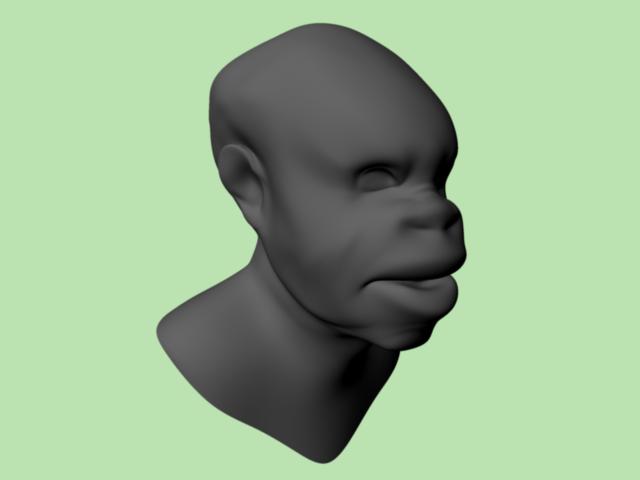
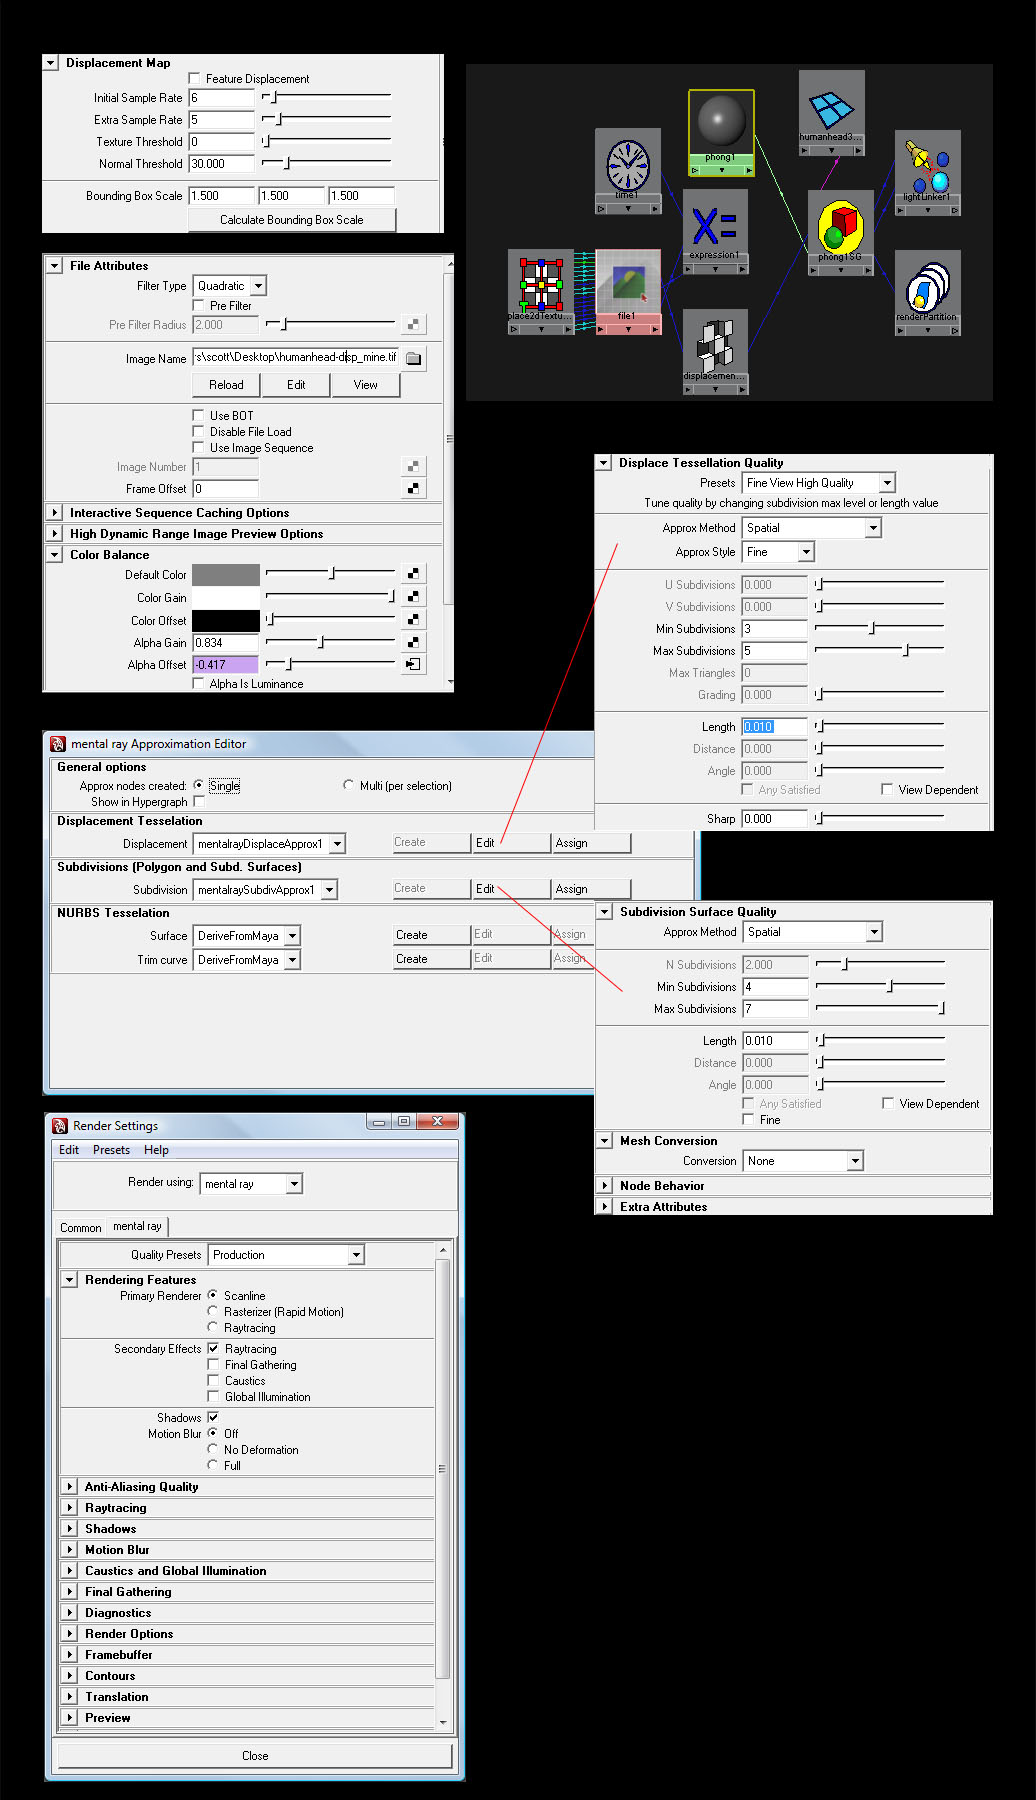
I’m wondering if anyone can help me with this. It seems that nothing I do works. I don’t think that Maya is even recognizing the displacement map. I have followed the tutorial Scott provided in the beginning of this thread EXACTLY and my results are nothing even close to what he and others have achieved. The Approximation Editor settings seem to work because the model is subdivided and smoothed out nicely but I get no displacement occurring, not really even a little bit of definition out of it. The simple render you see below is what I get with the settings you see in the other image. The render takes about 1.5 minutes (no lights or anything else in the scene) which should not take that long on my machine. See specs below:
My computer specifications are as follows:
OS: Windows Vista 64
RAM: 8GB
Video: Nvidia GeForce 1gb
CPU: Intel 3.0 Ghz Quad Core
Maya 2008 SP1 64 bit
I am also having these issues:
whenever I click the edit button for “Displacement Tesselation” in the Approximation Editor, the “Presets” keeps defaulting back to ‘Custom’ instead of retaining ‘Fine View High Quality’.
You will notice that in the images for settings below, I am using the 0.834 alpha gain provided in the other thread for displacement maps for external renderers. I tried using Scotts alpha gain of 10 and 12 but all it does is really bloat the head to an extreme amount which is why I am using the 0.834 which gives me what you see in the rendered image below. I realize I will need to play around with these numbers but nothing I enter gives any better result than what you see.
I also disconnected the displacement node from the model and I get the exact same result as what you see. Which tells me Maya isn’t even pulling in the displacement in the first place or something. Am I missing a setting somewhere?
Any insight as to what could be causing this would be greatly appreciated. I am working a character and am trying to apply these methods to it which weren’t working either, which lead me to this tutorial, so I tried it and I still get the same results, NOTHING.
I’m also wondering this, I have seen a lot of tutorials using displacement and normal mapping together, however, if you can achieve this level of displacement (once I get mine working correctly) do you really need to do normal mapping as well?
Thanks!
really if displacement maps are confusing try a simple test.
Poly plane with a black and white image assigned to the disp node.
Add your approx node, tune settings and render
Now you should be able to get the idea behind the different settings after some play.
ZB really automates the process of generating maps.
I can’t underline enough that the alpha gain and alpha offset numbers are a RATIO.
tip: a bump node can be set to tangent normal instead of a straight bump.
also the mia material will allow for two bumps plus a displacement.
Thanks Morph!
Shortly after posting, I got it to work. I found another thread that said to turn on the “Use Maya-style alpha detection on file textures” inside the Maya Settings and Preferences under the Rendering section. Anyway I turned it one and now I’m getting displacement. I’m still trying to fine tune though.
I noticed something else though, it seems that when I use the color map generated from zbrush, I get a lot of seems and it doesn’t seem that the texture really matches the mesh anymore. If I don’t do any approximation and simply use a normal map to generate my definition, then the color map displays as it should. Is there something else that needs to be done to the color map when using displacement?
Hope this makes sense.
Thanks!
sounds like uvs are getting smoothed.
-you might need to re-create your model with SUV checked in zb.
or
-try not using disp tess only subd approx
without seeing your scene its hard to tell
i use Zbrush 3.1 and maya 2008. i do step by step like Scott for 32bit map but at render time i have no displacement. i think something is wrong about my dis maps as they’re very washed out and low contrast almost entierly 50% gray and a very weaked fantom of grays.
thanx
Hi great tutorial. I am using the displacement to change the silhouette of my character and using a separate bump map for the wrinkles and pores of my character. I have got the displacement working great but when i attach a bump map to the bump node it doesn’t come through correctly.It looks like its kinda under the displacement map. is there anything i need to be aware of to get it working. Cheers
I had a similiar problem with my bumpmaps…
Try Turning off export ccmesh using this mel:
addAttr -ln “miExportCCMesh” -at bool mentalraySubdivApprox1;
Also does anyone know what could be causing my alpha gain and offset values to have to be set so high? If I render my 32 bit displacement map at 1.0 and -0.5 (using zbrush 3.5r) in maya I get no detail on my model but I do get a tiny bit of silhouette change. When I crank my alpha gain and offset to 100.0 and -50.0 I get a good render with all the detail.
I’m confused 
So i think i may have had a break though with the displacement maps issue. In the tutorial by scott spencer, He says that ALL displacement maps that are create in zbrush will work if you enter 2.2 in the alpha gain and -1.1 in the alpha offset in ur displacement node in maya. But i found this is not true with my project. It was causing my object to be far over displaced and blown out. You just need to find out the range you need for your object . In my case it was .006 in the alpha gain and -.003 in the alpha offset. I have worked on afew more objects and it seems that the alpha offset is all ways half the amount of the alpha gain , then u just need to stick a negative sign in front of the alpha offset. Also if you create a displacement map and set it in your displacement palette in zbrush then send it to maya using Goz, it will have everything set up for you in maya including ur nodes. If you check the settings you will also find what i said about the alpha offset is all ways half the amount of the alpha gain , then u just needing to stick a negative sign in front of it, to be true. I find that you still have to set up the approximation editor in mental ray on ur own. I am finally able to get some great results. Let me know if i have given any false info. Cause i am still learning. Also is there a difference between 32bit and 32float??
The tutorial is for previous versions of ZBrush, as I mentioned on your youtube post. Also, 2.2 -1.1 is for 32 bit Float (in previous versions). The maps have scale baked in so the alpha gain and offset can be constants. This does NOT apply to 16 bit maps.
And yes, your alpha offset is always 1/2 AlphaGain * -1. I have mel posted in the tutorial on 16bit on how to automate this setting.
so i followed all of your instruction, And I am getting much better results. I made sure to input the MEL script and it did improve my results, but its not perfect I have attched a pic so you can see what I am working with. Any ideas? I am currently working with zbrush 4 and MAYA 2010. [attach=262096]Sign test pt2_displacement_error4.jpg[/attach]

well it looks like the breakage was corrected by running the script… what other issues do you have with the render? Details can be improved by adjusting subdivision approximation.
stretching can be corrected with better UVs
S
Im getting the detail i want. But the coners of my sign are suppose to be 90 angles. If you compare these pics to the ones I sent in my last post, You can see how the displacement is pinching and rounding out my coners. I don’t know why this is happenning?


