ZBrushCentral

Rendering ZBrush Displacement-Maps In External Renderers (May 9th: 2nd file added)

I know this thread is kinda dead…but oh so useful…

Just want to extend my thanks to all for this…and especially to Mangriff for finally opening my eyes to what I was doing wrong for the Max render…

I was changing the output settings for the map…which I didnt need to touch at all…just make sure that luminance was set to .5…worked like a charm.

After playing with the file for an hour i just couldnt get good results, anyone outhere has a .c4d file that is 9.5 that I can download so I can compare settings?

that worked

Hi. Everyone, I just downloaded the files yesterday, this is my first result, need some advice on lighting, this was rendered with Maya Mental Ray followin the tutorial by Mr Scott Spencer. I tried to add some lights for a better view of the bumps but no results came to better the default lights. So… advice or examples are most welcomePixolator Head2.jpg

Hey zaknafein99, looking real good. You may want to adjust your camera focal length to be 70mm (at least 50 you could even go to 100) and set up a single light to rake across the surface.
it looks like you have the detail in there, a light at say 5 o clock would help you see better. Setting up raytracing on the light helps too but it also increases render times substantially. You can even turn on final gather in the Renger Globals for the real soft even lighting a lot of people’s examples have. The rhino in my user gallery was rendered with final gather. The human anatomy study was lights with raytracing on.

Check out the new displacement exporter plugin that came out. It makes this whole process a million times easier!

Scott

Thanks, that was very helpfull, i’ll give it a try ando post my results.

Added 2 directional lights, 1 to each side, the one on the left side of the face set to an intensity of 0.250, the other is standard. Changed the material to a blinn shader with little specularity, so the details show better. Rendered with Mental Ray, Final Gather on (I didn’t see any difference with FG turned off, sure i did something wrong).

Pixolator%20Head3-mediano

Attachments

Pixolator Head3-mediano.jpg

Nice topic! A lot to learn, so here my results:

I try it on Max 6 scanline, Vray1.09 and Mentalray3.3, max default displacement mod and VrayDisplacMod:

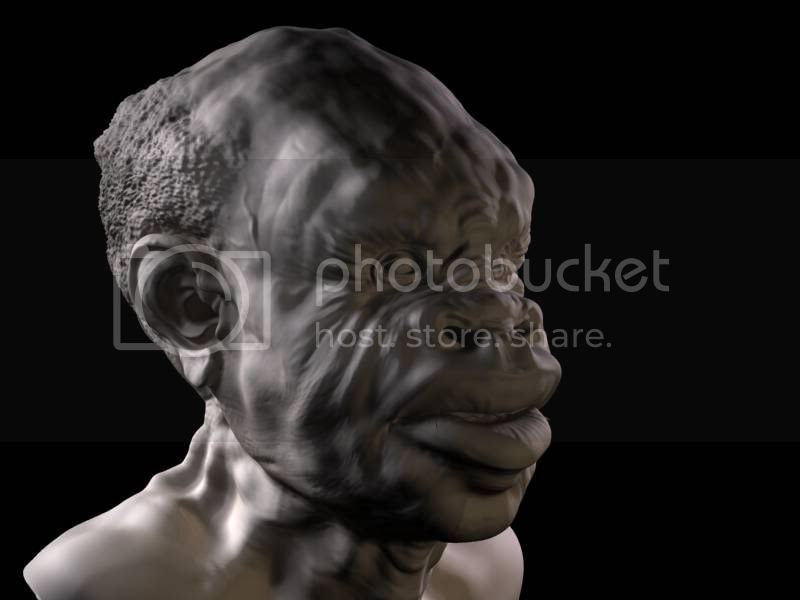
1st Max6 - Vray displacement 2D: 61sec. - a bit blured

2nd Max6 - Vray displacement 3D: 13min - best result on skin details

workflow:
import .OBJ into Max (unit=meter)
check normals and unify
aply meshsmooth set in >2 interations
aply VrayDisplacementMod= 3D mapping
amount 0.012
shift -0.006
map - texmap Uangle=180
map - blur=0.01
set lights and material
render!

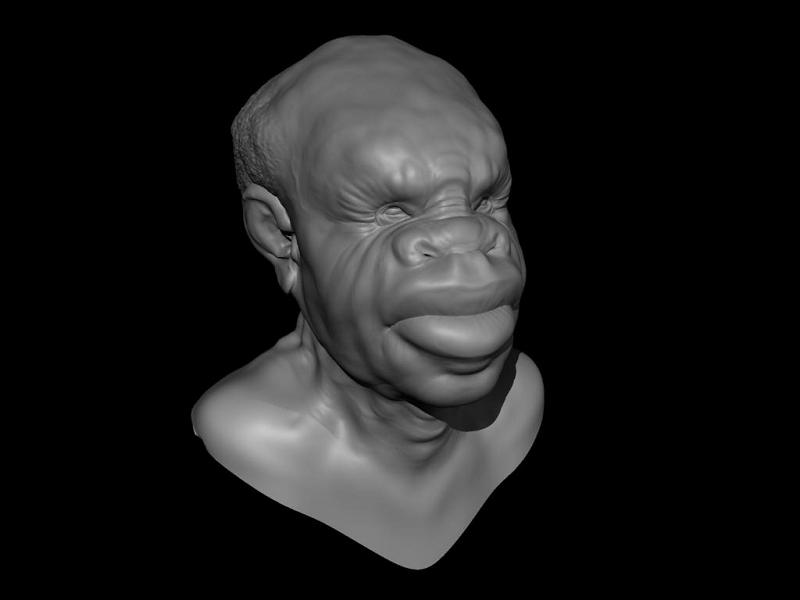
3rd Max6 - max displacement and Vray render: 31sec. - blured
Msmoth in 4 interations
displac strenght=0.018 (even strong, skin details dont come clearly…)

worst with scanline render - 14sec
and MentalRay render - 43sec; both with that pattern around neck, and in same way, without clear skin details.

Although this looks sort of cool-I’m poretty sure turtle should render better than this:lol:

Is anyone else having a nightmare rendering disp maps in turtle 2 (for Maya)? As you cna see above even if following the guide over at the illumainate labs site things a re going a bit pear shaped.

http://www.illuminatelabs.com/tutorials/displacement/displacement.html

Seems like no matter what I do I can never get diosp maps to work in maya, it seems like everyone else doesdn’t have any problems…maybe I’m cursed:o

Wayne…
pixolatorHead-OOps.jpg

Have you tried Scott Spencer’s manual? It seems like you’re alpha gain is way off and that you’re mesh’s scale isn’t matching up.

click here

Try that and see what happens. He also has an old vid tutorial on his site that you can download.

Scott’s site

Rock on,

I’ve tried both thanks, so far today I’ve been at this for 5 hours straight. 5 hours for a damn displacement map in Turtle! I got it working fine in mental ray a good while back but will it hell do the same in Turtle 2.

Wayne…

In your previous post you said you had trouble getting displacements to work in maya:

“Seems like no matter what I do I can never get diosp maps to work in maya,”
[color=DimGray]
[color=DimGray]So I thought that you’d never gotten the process down at all. Kind of a learn to crawl before you walk type of deal was what I was thinking. If you hadn’t gotten it to work in Maya at all then go back to the beginning and start with the basics. It’s usually something small that you miss.

Rock on and good luck,

Darth,
I can’t seem to get Turtle to do displace maps either.
Every other part of Turtle rendering such as global illum and final gather is easy and produces brilliant results.
MentalRay does a much better job with displacement maps but takes quite a bit longer.
Let me know if you have any results. I followed their tuts and didn’t get good results. I think the problem is in the Apha Gain settings. Using MentalRay a value of 1 always seems to work regardless of settings in Zbrush.
I’ll experiment tonight and screen grab settings to show you results./Odhinn

I feel I should clarify as I’m no longer steaming mad ot displacement maps lol. The only time displacemtn has worked for me in maya has been using the pixolator head and sword, anything I’ve made myself always comes out like this. well OK maybe not quite as bad as this better never right. The pixolator models worked fine in mental ray, I just don’t see why they won’t work in Turtle when it’s supposed to be simple to render Zbrush maps directly.

I really can’t belive how much trouble I’ve been having. My only thought is that the guide by illumanate labs is for the earlier version of Turtle (the one with ILRdisplace, version 2 doesn’t have that) and so doesn’t work by that method.

It seems to be a p[roblem with it using the disp map as an alpha channel, that would explain the holes in the mesh on the rendered image. I’ll let you know if i have any luck and post my own settings as soon as i’m able to. (currently have my 6 month old son on my knee :slight_smile: ).

Wayne…

Darth-

This may be a silly question but is your displacement map orientated the right way? Try vertically flipping it again. What is most odd to me is that it is not uniformily inaccurate but wildly and oddly fractured which is not what should be happening.

Best,

r

That did occur to me as well, so I tried a one flipped in the other direction just in case I’d messed up. So I know it’s not that, in fact I’ve tried probably every combination over the 5 hour session today. However I have came accross something intersting that I’m not sure could cause this or not. Up till a few days ago I was using Photoshop CS1 with color managment turned off, now I’m using CS2 I thought I’d check that I had indeed turned it off, to my suprise there’s no option to turn off color managment! If there is it’s well hidden!

To test this I downloaded the pixolator head again and went for a mental ray render which normally works, although I do find it fiddly. But guess what? The same happened as before, so although I’m following everything to the letter from the guides and tut’s available something is fundementally wrong. If it’s CS2 I’ll be livid! It seems crazy if I have to instrall an earlier version just to RGB the disp map…lol

Wayne…

Darth -
To access the color management in CS 2, you have to go to Color Settings. Then in click the More Options button the right. This will get you the Off option. :slight_smile:

r

Thanks mate you are an absolute lifesaver…well if I have time tonight I’ll try again, wish me luck or the whole sodding pc is getting thrown out the window:lol:

Wayne…

Okay, after much waffling I finally went ahead and bought Renderman for Maya, and I love it! Here a couple of test renders using the old Pixolator head. I ended up having to multiple the alpha depth facter by 10. So, the AG value was 8.34; and -4.17 for the Alpha Offset value.

AWESOME results!

I want to get that plugin myself but, well $$ is tight and we render in MR at work : ) Oh its SOOO fast though!

Keep in mind maps you make with the ADE most likely wont need that multiplier when you render.

Keep us posted on your other results!

S