Mangriff-
That looks great. How did you do it?
Jaime
Mangriff-
That looks great. How did you do it?
Jaime
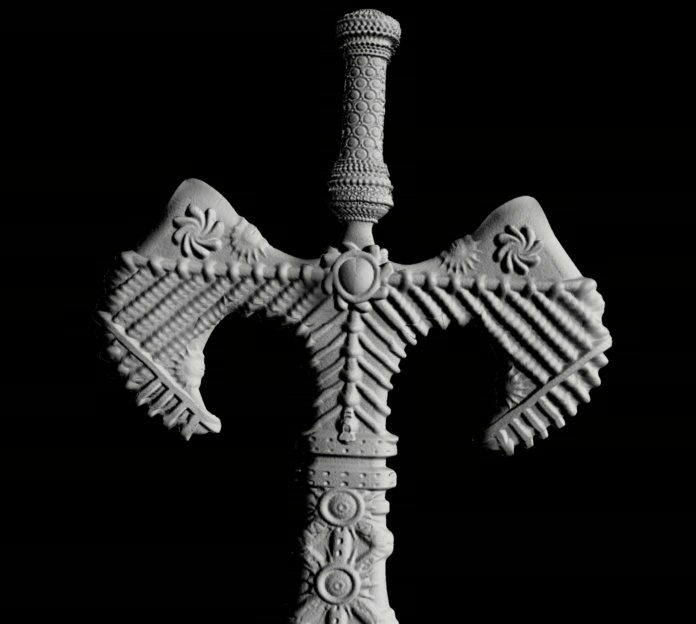
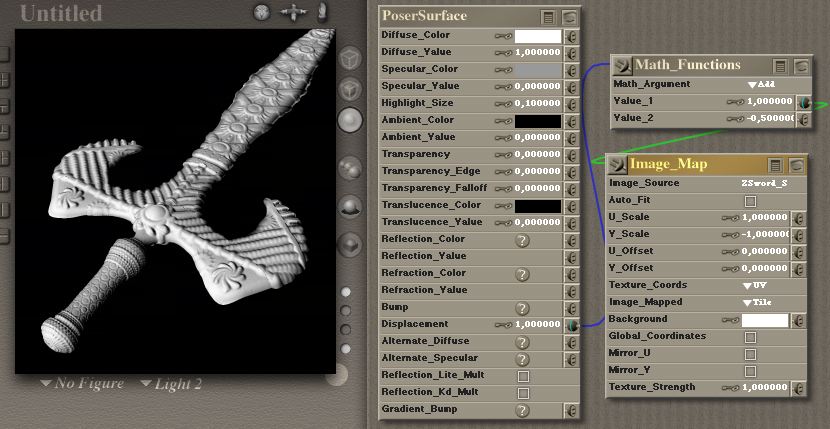
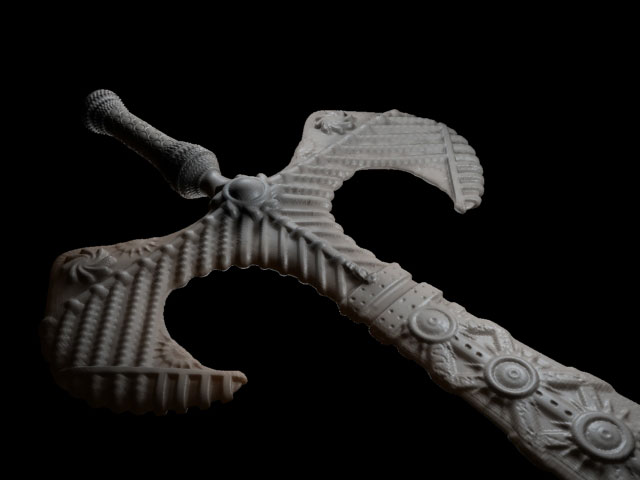
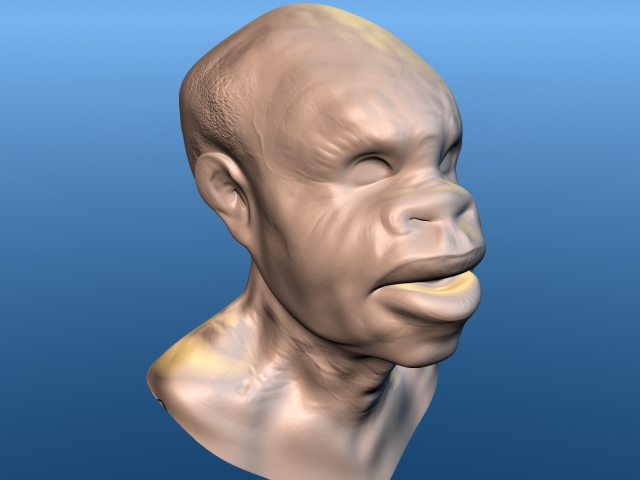
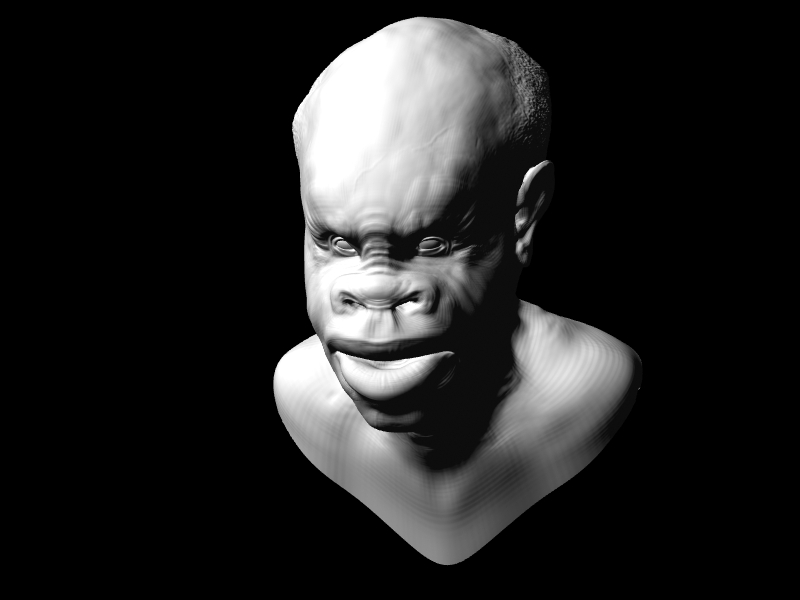
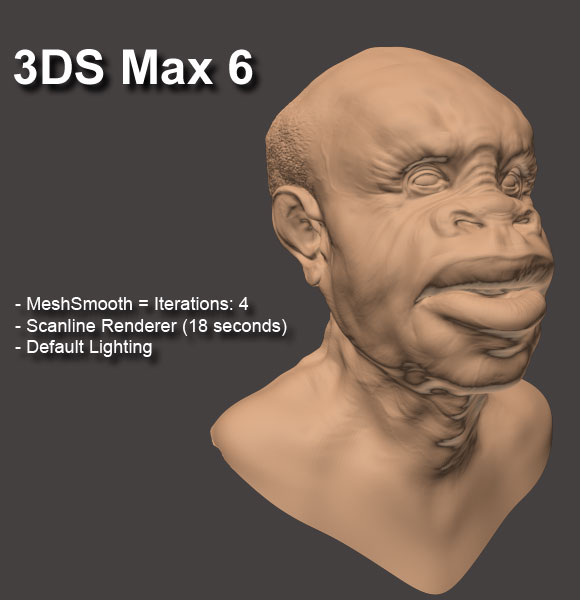
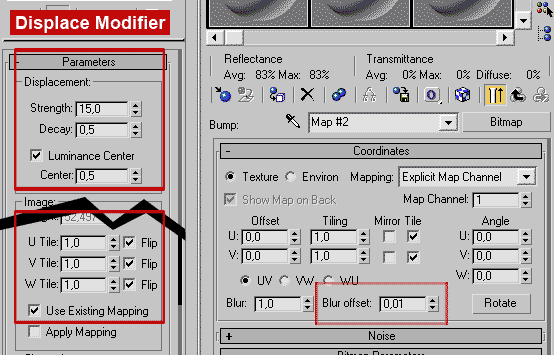
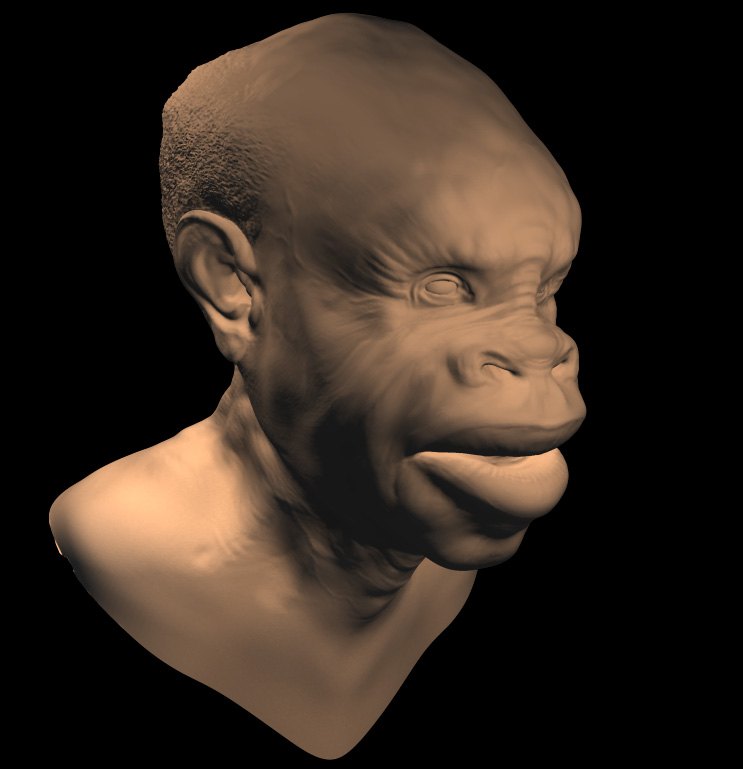
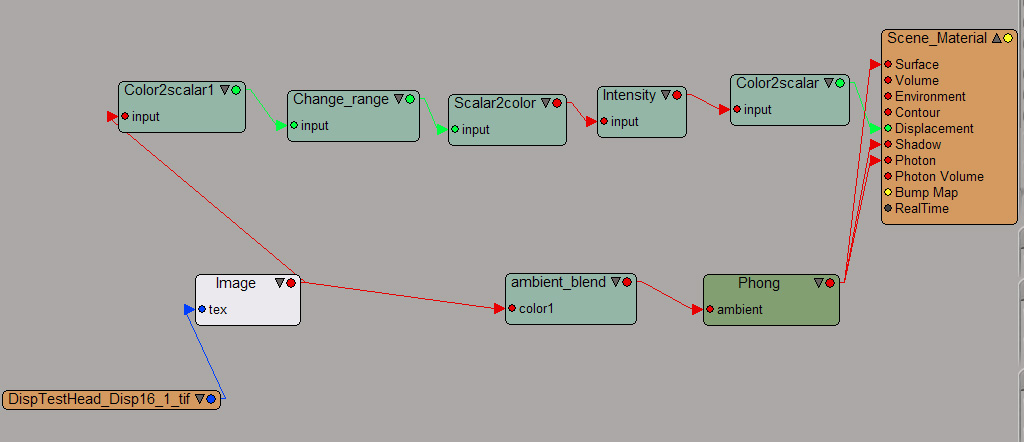
First things first. DISABLE displacement in the render dialog! Everytime i forget about that the system crashes and poop pours out of every drive like a toilet rebelion. But seriously i got the best results both in control and results using the modifiers only. So import the mesh. Add turbo smooth with the iterations in the render so that the view port isn’t bogged down with the smoothing. You can put on like 1 or 2 iters in the viewport just to see and judge how it’s all going, and then put like 4 or if you can 5 in the render dialog for the final deal. Open the material editor and apply an open material to the mesh. In the material’s displacement map import the tif file. You can import the file in any map slot because we are not using the displacement of the actual material, but we need to adjust the tiling so you can’t just load in the image as an image. If you want you can just change the material slot to be a 2d map only and reference that, but since i figure you would want to a “3d” material on the guy anyway eventually it works to just bring it in the in displacement slot (that is the use after all). ANYWAY, change the V tiling to -1 instead of 1. because the map is flipped around the V axis. Now the map is ready to be applied to the mesh. Next you add the displace modifier in the stack and adjust the strength spinner. Make sure you turn on the luminance center and leave it at .5 (this makes it so that the mesh doesn’t inflate completely and basically sets 50% grey to be the default condition, so white will protrude and black will recess which is what we want). under image, choose “MAP” and when the map chooser pops up find the image in the MTL Editor “browse from” choice. This uses the map that we inverted along the V for the displacement. The mesh should deform, if not then you may need to up the strength a bit. That’s it. I made a morph target to show that the low poly version can be used to deform the high poly form for animation or posing. Lighting is just a couple omni lights that i rigged in the traditional 3 pt lighting theory. That’s about it i think, let me know if something doesn’t make sense and/or if this works for you! Later
Don’t know if anyone has posted this combination yet:
Poser 5/OS X, GUV export.
Note that you can load the 16 bit TIFF directly in P5’s material room, what’s needed is a math node to substract 0.5 form the displacement.
mangriff i agree with you that is a good way to do the displace, the good thing is that u can use that way with brazil or whatever render you are using…the bad thing is that when u are using that way to do the displace it will work with “small” objects, by small I mean with not a lot of poligons, but once you try with a full model, and u put the iterations at 4 or 5 probably it will crash max at the render time…at least is the problem that i have and i cannot figure out how to solve…this happens because the application runs out of memory, even with 1 gb…if u find the solution please let me know 
Software : 3DS Max 7 + Mental Ray
Shader : SSS Fast Skin Material
Rendering Time : 0:03:05
Software : 3DS Max 7 + Mental Ray
Shader : SSS Fast Skin Material
Rendering Time : 0:02:21
I can’t make it work under Maya 6 ,i’m s0 sad:( is there a comprehensive tutorial about displacement with zmaps except the one in the manual because it didn’t work:(
rendered uding Lightwave 8. render time was 10.5 seconds.
metamesh You may very well be right. I’ve been able to get really high res mesh during render and keep the viewport mesh down using the turbosmooth trick. It’s important to push the low res model as low as possible without losing the displacement capability. You are right about the method being limited though. This method is not true “sub-pixel” or 16 bit displacement as far as i know. So you can’t really jump up to like 5 or more levels of Sub-D. That is one of the aspects i am fighting currently. I think that if you combined this method of displacement with a high quality normal map though, the lack of edge detail would be sooo minimal and the surface details would be brought out by the normal map. (in thoery) unfortunately, im having all kinds of issues generating normal maps in zbrush for max. Such as… seem issues, flipped colors in areas, and so on and so forth. WOULD SOMEONE PLEASE TELL ME A CORRECT POST OR METHOD TO MAKE NORMAL MAPS FOR MAX. Im not yelling, just catching attention excuse me. I can show you more displacement trials if you wish, perfecting displacements has been my recent project. Good luck to everyone attempting this test. Laters.
based on the tutorial by mangriff.(thx;))
the settings are similar, with the exception of keeping the default map uv-tiling values.

Fingerman, could you post your settings for the material and for mental ray displacement? I’m dying for getting those results…
here is my test…
i am quite satisfied since it took me ages to figure out how to do it…but thanks to my teacher gattomanzo, my boy drummer and a fellow italian zbrush user smilegrafix (grazie a tutti!), the dirty work was finally done.
i converted the texture in photoshop to rgb 16 bit, and although some say that 16 bit doesn’t work, to me it seems fine.
here is a picture of the rendering and my render tree. i increased my alpha to 4,834 (from a starting value of 0,834).
for the rest on my change range i put 1, 0, -1, 1.
if anyone who uses xsi needs more explainations i’d be glad to help 
mangriff vbmenu_register(“postmenu_193992”, true); thanks for your settings! the trick was to turn off displacement!! If not max also crashes to me!
Since I haven’t seen many brazil renders here is mine with a skin shader and any map used in the material.
It would be nice if people had a resume of the best way to render displacements in each software  Just an idea
Bye!!
UOPS! I forgot! Redered in 27 seconds P IV, 1GB RAM, ati radeon 9600 pro
bye!
No images to post. Thanks for this thread Pixolator, it has really helped me understand displacement maps.
For those of you using 3ds Max I found that with a standard Displace modifier and a Turbo Smooth at 4 render iterations the Scanline renderer rendered the fastest with 11 secs, Mental Ray with 22 secs and Vray with 27 secs (vray took longer than 27 secs with a Turbo Smooth at 2 and a Vray Displacement Mod achieving a slightly lower quality render, Vray mod uses adaptive Subs achieving more detail but not completely smoothing the basic mesh). All renderers were default settings at 640x480 on an athlon 2500 with 1gb ram.
Zbrush has accelerated my 3d development at least 10x
1:11sec to render in Mental Ray with Skin shader and one light. Mesh with Turbo Smooth 4 render iterations and Displace mod.
Rendered with VRay and PPT, 5000 subdivs, 2 raytraced lights, GI.
![]()
The small grips on the shoulders can be fixed if subdivs are increased to 10000 and leave it to calculate some more minutes. Here is a test /head45/ where I left it while I was on lunch.

3dsmax7
I just tried it in Max with MR, and altough its slow and uber memory expensive, the results are very cool, I just wished the MR
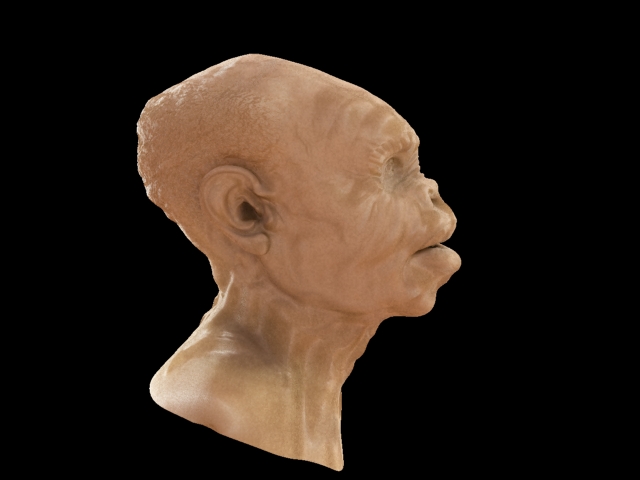
Needed to test how I shall configure exported displacement maps from Zbrush, this is the resault.
Vray for render