ya know- i had thought of that, but considering that when i fire up 4r2, everything is fine.
another thing i noticed was, when sizing up and down your brush size, if the red circle is touching the mesh, it’s flickers alot… and the speed at which you do it seems very reduced from the previous versions.
if you size it up and down off the mesh, it’s a very smooth scaling, with no stuttering whatsoever, albeit still slow.
it seems like some sort of performance issue i’m having with 4r4. just can’t think of what it could be.
i’d really like to think it’s a setting somewhere that i haven’t stumbled across yet…
thanks for input, though!
Are you on R4 or the latest R4P2?
I’m new to ZBrush and just got started. When I hit “New” on the LightBox menu ZBrush crashes. Just updated from 4R4 to 4R4.P2 but the problem remaines.
i7 Q720 @ 1.60 GHz
4,00 GB RAM
Windows 7 64-bit
Attachments
i’m on 4R4 p2.
mac osx 10.6.8, 12 gigs of ram, 2.93 ghz quadcore.
i typically have next to nothing else running when i’m zbrushing, especially now (don’t know if that helps matters or not).
i’ve also noticed that the effect of the lag is intensified with higher polycount meshes and when symmetry is turned on.
i’ve updated the tablet driver as well, to no avail.
i’m inclined to believe the problem is rooted somewhere within 4R4 (i don’t know if P2 has anything to do with it, as i upgraded as soon as i installed) as like i mentioned, considering it doesn’t have this effect when running 4r2. that version was the most stable for me by far, hence why i took so long to upgrade.
that and i’m kinda superstitious. i had a few projects going in 4r2 for work that i wanted to finish before i upgraded, in case there was an issue with working on older files in the newer version.
It seems that the transpose smart mask tool is broken. Ctrl + dragging the transpose line results in the normal transpose mask functionality instead of smart masking. See attached image. … I wasn’t able to find anything regarding this matter in the forums. Does anyone else have this problem or am I the only one?
Attachments
Same here. Win 7, Maya 2009 (64bit). UVs with Maya->GoZ->Z does not break if you use just “Automatic mapping” in Maya. But they do so after some UV editing in Maya.
I can’t save Curve Modifiers with the brush.
4.4 The zoom, rotate and move functions are not working right. Pressing Alt and draging from the edge or screen is not moving the model. Likewise the other two functions are also not working like they should.
I should add that the shift and Ctrl keys also don’t work for the appropriate command when dragging on screen.
Excellent, it works now. Thank you.
Why is it that when perspective is turned on, the insert cylinder brush provides a good cylinder, but when it is off, the cylinder provided is wonky?
I’ve included two image examples.


The first shows two cylinders inserted into a cube when perspective was turned off.
The second shows two cylinders inserted into a cube when perspective was turned on.
In both cases, the InsertCylinder brush was used with default settings.
What on earth is happening, and can it be fixed?
Hi,
I already had this issue, even wrote to support. Because this strange behavior still shows up for reasons only the program might understand  (if it not happens because of me slow working …), I thought to ask around and look for help.
OK, nothing fancy going on, model is at 11 million polygons, still enough RAM and scratch.
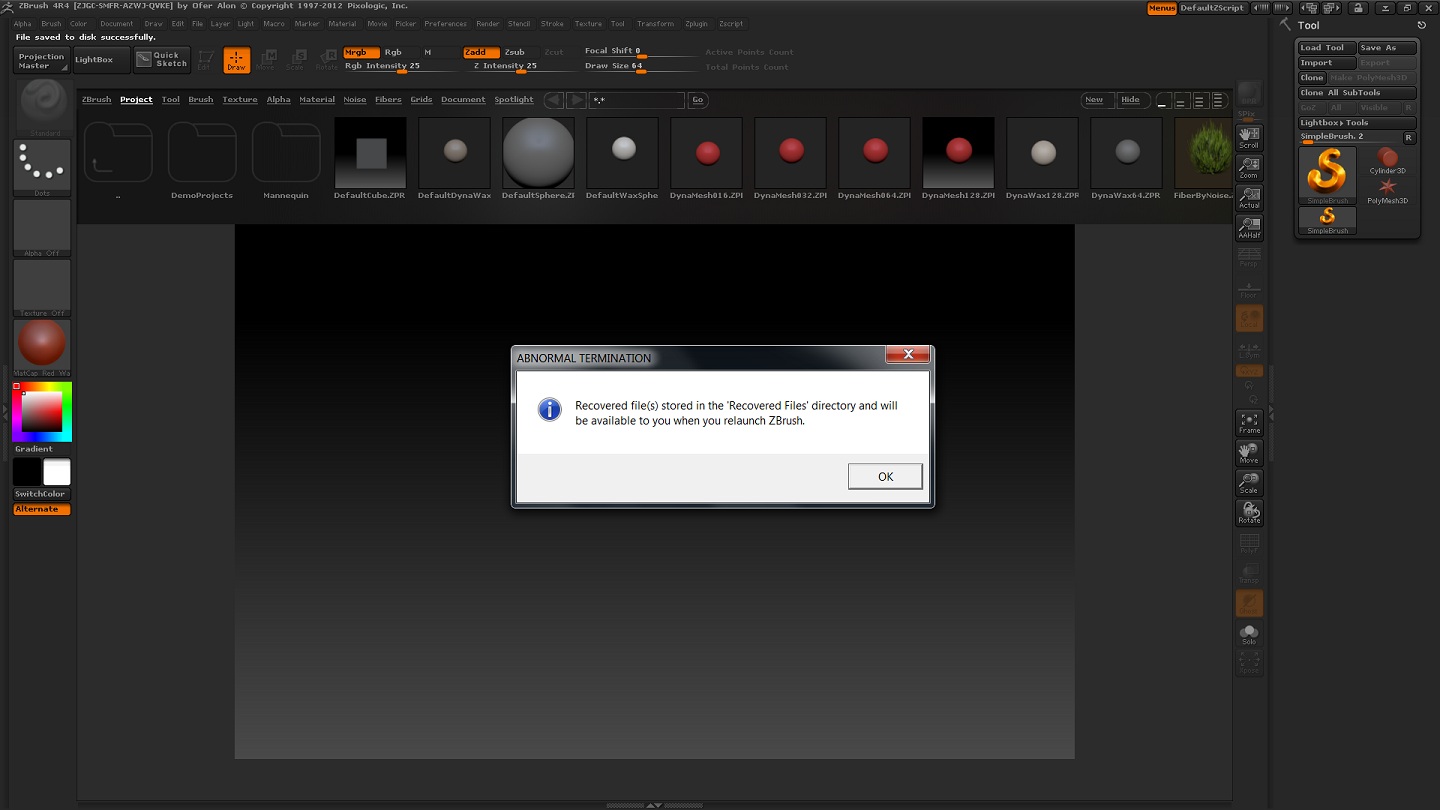
During an attempt to save off the WIP I get this message box.
Going “cancel” the WIP is saved.
If I want - after that - to save off the project: the message box comes along, again.
The project is saved.
Tried talking to the program to make working less boring for it - no use, thing keeps coming back, looks like:

And yes: please, ignore the “model”, did not post anything in years - you see why :).
Any information and/or help >>>> thank you VERY much!
EDIT
forgot to mention:
Windows 7 64
i7-2600K @3.4GHz
16 GB RAM
NVIDIA GeForce GTX 580
Wacom Intuos
ZBrush mostly the only program running, when it is running
Hya everyone,
Hya ZBer!!!
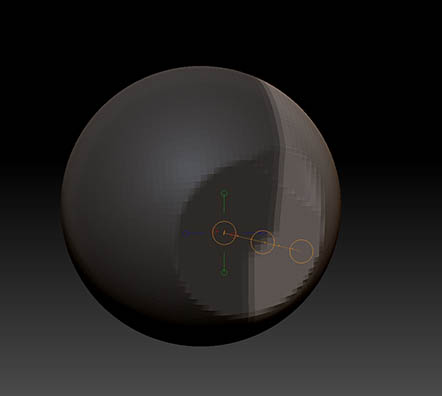
I’m having trouble using insert brushes as a negative, they turn invisible and the object I am trying to draw them onto becomes a flat pixelated thing with no detail making placement just about impossible as I cant see what I am doing.
I cannot post examples of the drawing process as I cant hit alt print screen while I am holding down alt and drawing the insert brush but I can supply what it looks like after its drawn, you can only see the INSIDE of the insert brush.
Both sides of this problem are causing me no end of trouble…
Anyhow here is the picture of what it looks like before remeshing, its useless except in perhaps some very odd cases:

This is not a feature is it?
If so, how to I kill it to death?
Cheers and thanks!!!
Mealea
Hi again everyone, Hya ZBer!!!
That was quick huh?
I’m curious about what the InsertH brushes are, what they are for and why I can find no mention of them anywhere (I have searched the PDF files and ZBC).
Anyhow I just thought I would ask as the number of brushes I never use and have no clue about is climbing all the time.
Actually is it possible to remove the brushes installed by default? I have no use for things like trains made by someone else and I hate guns so those would be two right off… (not that the train is not very nice, it is, I just don’t need it)
Cheers!
Mealea
Hi Mealea,
re: post #72…That bothers me too, so I just turn on ‘Double’ in Tool>Display Properties.
re: post #73…That is the new way of adding inserts without having to use Dynamesh. IMO…this is cool.
here’s an example…
- Draw a sphere and make it a PM3D.
- Draw a circular mask on it, and , in Tool>Polygroups, click ‘Group Masked’. Turn on Polyframe (Shift+F) then Ctrl+drag on canvas to clear the mask.
- Select the ‘InsertHCylinder’ brush and, with your cursor on the new polygroup you just created, draw the insert so it just fits inside the new polygroup.
Now Ctrl+drag on the canvas twice…
@ Mealea
Re: the insert mesh…you can use any mesh that has an open end on it like the InsertHCylinder. Watch Insert ‘Mesh Replacement Creature Part 3 of 4’ in the Digital Sculpting > Insert Mesh series.
Using Double:
I should have thought of that!!! GAHHHHHH!!! Thankyou!
And for the Hinsert thing:
Oh my god and holy crap that is so bloody cool…
I watched those and a lot of it went over my head and I suspect I missed the Hinsert bit…
Luckily I saved them all so I don’t have to download them again!
This is amazing stuff, suddenly I’m suspicious of my idea to chuck the train.
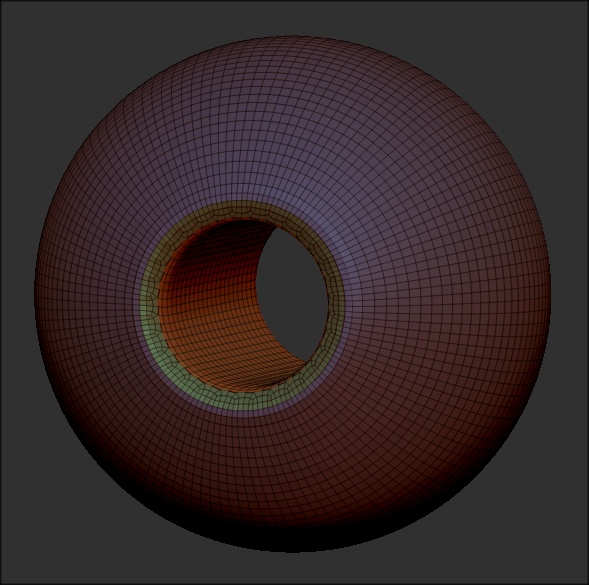
Also I discovered that if you make two masks but only use one Hinsert you can make a tunnel from one part to the other…
EDIT: This makes a weird mesh, sort of mobius strip like…
Thank you so much ZBer, I have something new to mess with!!!
No problem Mealea! 
If you have an insert cylinder that’s open on both ends and place it so it is just inside the sphere, then you can make hole.
oh wow…
This is so cool.
GRIN!