You are right, but with LCD on a laptop you have a max screen resolution. Higher resolution force you to have a bigger desktop than you’r screen, on most laptop.
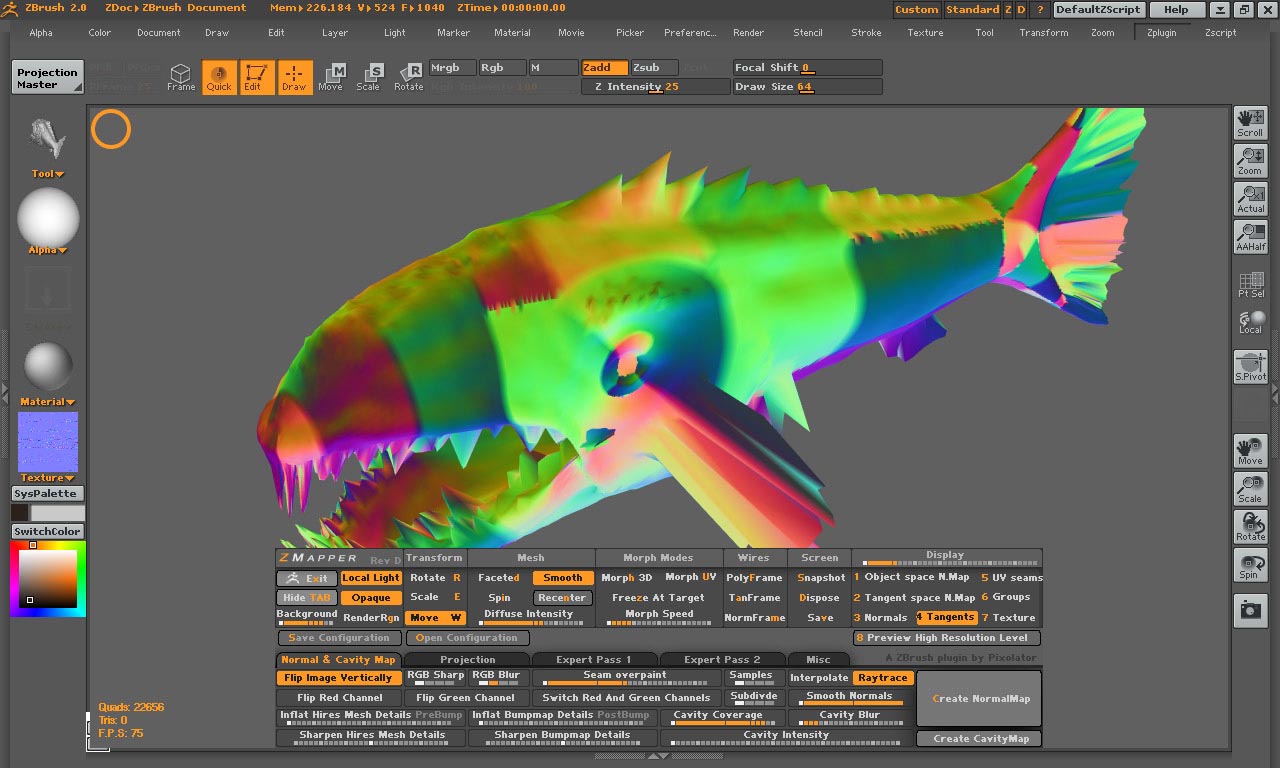
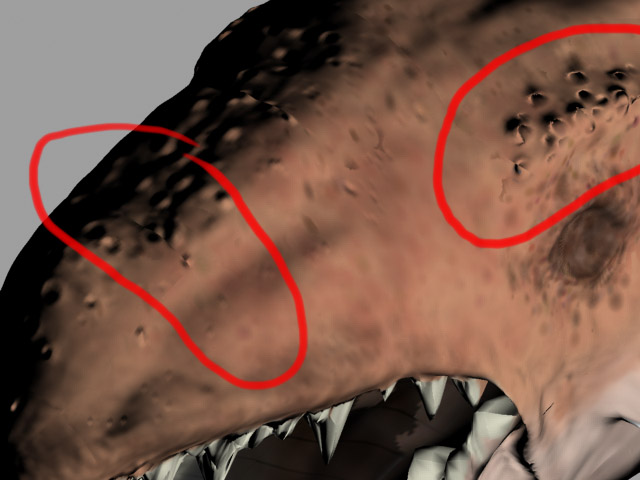
I have a problem. Im getting weird holes or big pock marks on my model in zmapper, but if i use the displacement exporter to turn out a normal map in dont get those errors? Can anyone help?

Increase your Max Scan Distance in the Misc tab. That will fix you up. 
r
That did the trick. Your the man! Thanks for your help.
Hello, I am having issues with exporting ZBrush model to OBJ then to Torque DTS file. Using ZBrush ZMapper it looks like my UVs have gone crazy. Model lost his legs and face has exploded mesh. How do you fix the messed up UVs? My model was showing black lines in it and holes thru the mesh. Here are the files.
In Zmapper, DTS and ZBrush normals. I read thru the zmapper manual, but couldnt find this help. Any help from anybody would be much appreciated!! Sorry for so many images, just trying to explain it is hard!
Attachments


Hello, so I’ve been messing around with zbrush at work and I have a model I created in 3dmax, zbrushed it up and then after forgetting to UV the head properly I uved it in 3dmax. Following the video tutorial for zMapper I go to the lowest subdivision, go to zMapper, capture mesh, exit zMapper, clone mesh, delete higher, reimport model with new UVs, go back to Zmapper and if I click create projected map, Zbrush crashes.
I’ve searched this thread and all I found was a problem where people were deleting hidden not deleting higher subdiv.
Any help please? I’m going crazy!
Eric
I want to get smooth normalmap by Zmapper , and use it in Maya.
Please help.
It is quick rather than the way calculated using Zmapper calculates by Transfer Maps inside Maya.
In Maya , I assign the Normalmap to a lambert-shader through the 2d-bumpmap-node with the settings set to " tangent space normals".
I see the sharpened edge when the model is illuminated in the light.
I want to know the right setup of Zmapper.
Details of work:
1.I make the low poly model (the edge is all soft )in Maya , and OBJ export.
2.In Zbrush,I import that model and divide to SDiv 7 and St Morph , and sculpt with Std ,Morph and Smooth.
3.I set SDiv 1, and start Zmapper.
4.I use Maya_TangentSpaceNode_BestQuality(from  ZmapperCustomConfigurations ) and turn on the “Flip greenChannel”.
5.I Click “Create Normal map”.
6.I export the texture.
7.In Maya , I assign the Normalmap to a lambert-shader.
8.I find the hard edge. I create non crease model , but the ploblem does not changed.
Platform:WIN XP pro2002 service pack 2
Application:Maya8(hardware viewport),Zbrush
System spec:Pentium4 3.00GHz/2.00 GB RAM
free disk space on the ZBrush drive:220GB
Attachments

While on the subject… Does anyone have Zmapper settings for max 9 or maya 8? Tried searching with no luck. Thanks
Hi,
Attachments
I had a quick question. I ended up following the quick tutorial dealing with the ogre example for zmapper and when I brought my tool into the app and attempted to generate the normal map it ended up looking exactly as if I had run the uvcheck on the model: Basically really blocky with black crosshatching in the polys. I was wondering what could be causing this. It should be noted that the tool had a morph target stored for the original low poly model prior to sculpting.
I’m using max8 as my rendering app, I have winXP SP2 and a little over 20 free gigs of space on my zb drive. Not that most of this matters since I can’t even generate the normal map. I was also wondering how I can apply a 512x512 blank texture I had created in the texture pallette to my mesh, as well…don’t want to waste too much space on the normal map, as it were.
Hi all, especially Aurick!
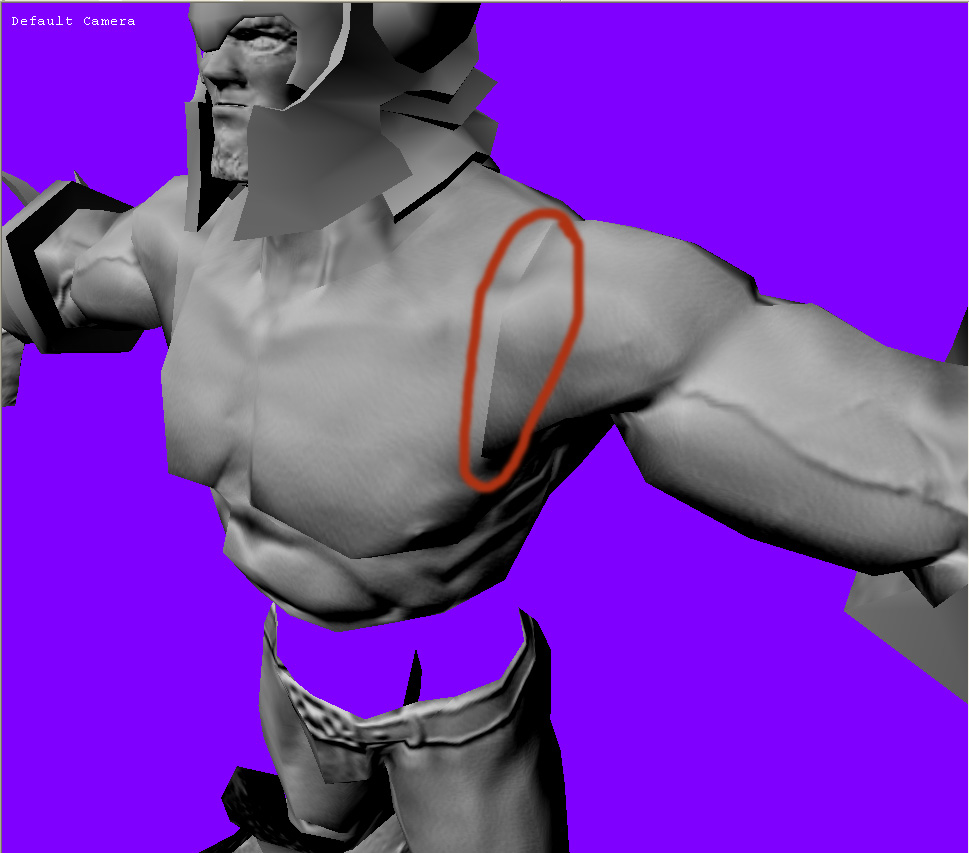
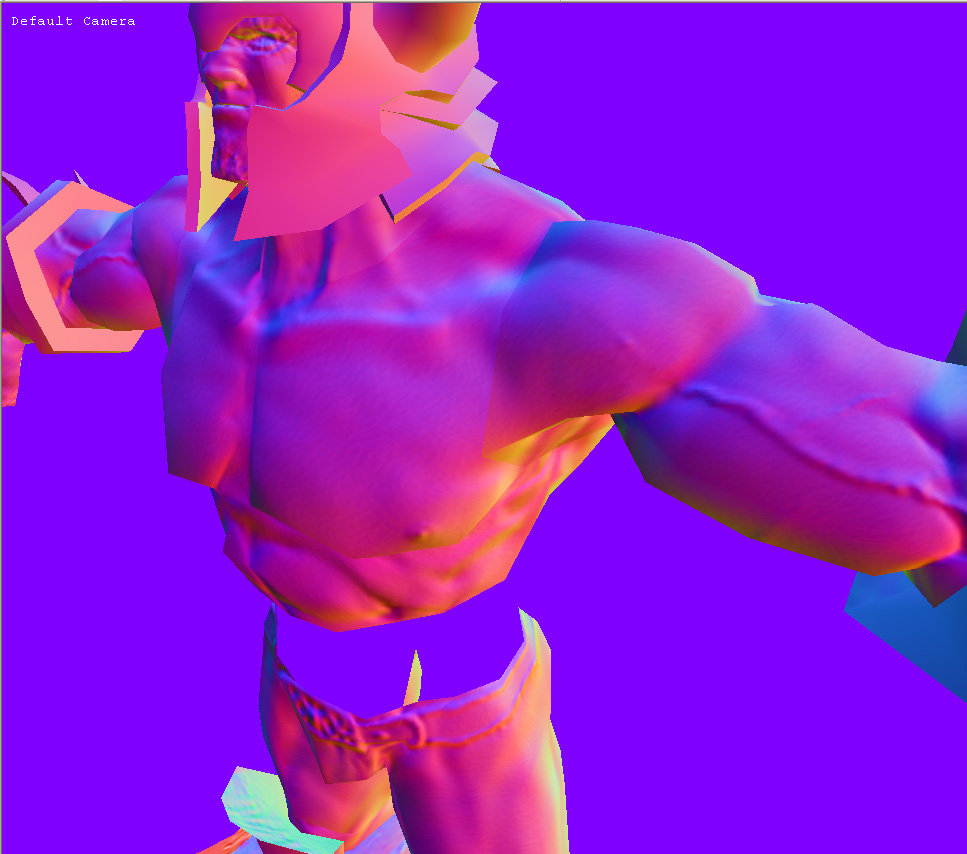
I have a question regarding the seams that I’m getting across the boundary lines of my original ZSpheres. I used Zspheres to create the original model but converted this to a PM3D with an adaptive skin. I went through the normal routine of adding detail at progressively higher subdivisions until I got everything I wanted. I intend to use the model for animating so I deleted all the subD’s below 20 thousand polys and followed the Zmapper guide to the “T” to create a normal map. Everything seems to be fine except that it looks like every other grouping of polygons from the original Zsphere has its normals flipped. I tried Auto Groups and Group Visible to try and remove the groupings, and they seem to be gone inside Zmapper when I click on Groups, but the tangent space still shows these groupings. I am using the 3DSmax 8 tangent space best quality setting. I also tried presmoothing normals on UV seams and Group seams and it didn’t seem to make a difference. How do I reset the normals and get rid of the seams???
I’m running on a PC with XP sp2, 3DS Max 8.0 Commercial, Intel Pentium 4 3.2 Ghz , 2 Gigs RAM.
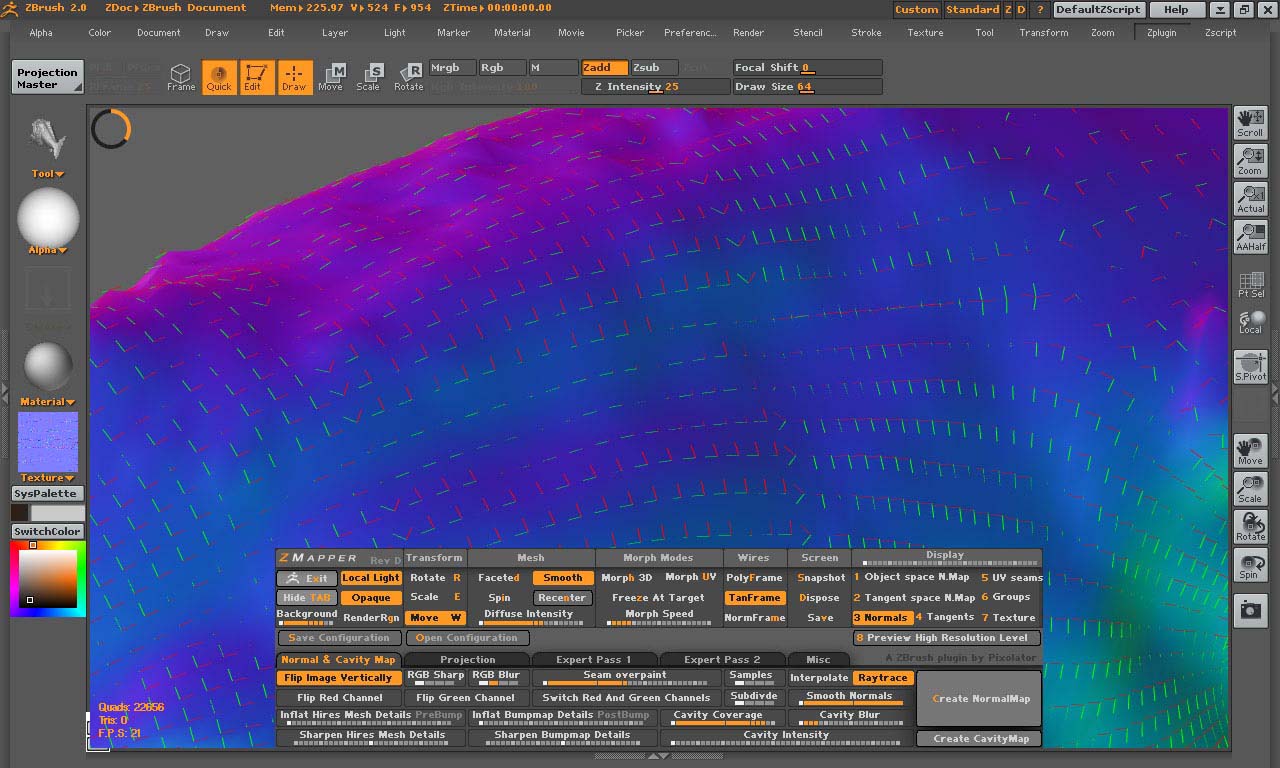
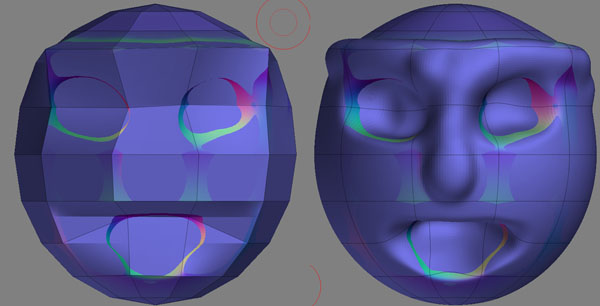
The first image shows the normals inside of Zmapper.
The second image shows the tangents in Zmapper.
The third image is rendered inside of 3DSmax 8 with mental ray and shows the bumps reversing their direction across the seam.
P.S. By the way, why does the preset flip the green channel? This gives me bad results so I change it back.
Attachments
The front of armor belongs group A and the bottom belongs another group B.
When lowering the value of “on group seam” and raising the value of “sample”,
I could get best texture.thank you.
I can’t seem to figure out why this is happening. Please help
Attachments
Hi,
Really sorry if this overlaps with issues already covered here, I’ve made my way through as much of this thread as I can and haven’t come across anything to fix my problem.
I`m using the “Maya7_surfaceSampler_TangentSpace_Best_v2” preset to try and get a normal map to preview in maya’s viewport (I’m using Maya 8.5), with limited success. The map itself comes out fine, but there are issues with visible seams, and I can’t work out what the seams actually correlate to.
For example, one arm has visible seams and the other doesn’t, although both are geometrically identical, and have the same uvs (by which I mean the uvs are the same shape, not that they overlap).
I’ve tried tinkering with a few of the zmapper problems, but have only succeeded in making matters worse by making all the seams visible…
Any help would be very much appreciated, hopefully the attached picture illustrates the problem adequately.

Have you tried an actual render? Many viewports show seams that do not appear in the render itself.
Hi Aurick,
Thanks very much for the response. Unfortunately, the seams are just as visible in the renders (attempted with maya hardware and mental ray).
I’ve stuck up a picture of the map to see if that could shed any light on the matter. The seam you can see in the previous picture corresponds with the seam between the arm in the bottom right corner of the map and the upper right hand part of the torso in the top right of the image
Cheers

Fixed! Turns out the arm uvs were reversed and that resulted in a seam.
I’m sure that fix is in this thread somewhere already, so sorry about that.
Hi,
I have a similar problem, yet almost more so. I have a char in which the upper body is unwrapped cylindrically, but the legs share the same uv space from left to right. In other words, both leg uv’s overlap each other perfectly in the texture space - so one side only needs to be textured with the mormal map and diffuse.
I noticed some people inversed the uv’s to fix the seam, but I want to keep the same overall uv placement and diffuse texture, (new to Max), how do I execute this?
My problem is, when using zmapper with the 3dsMax 8 tang Space Best Quality plugin, I still have the normals inverting itself on the right leg (left leg was base for  overlapped normal, uv unwrap and texture). There are seams that show and have an inverted normal and texture …
Here is the image of what is going on (screen captures from 3dsMax9). Perhaps I do not know what are the proper settings to use in Zmapper? I would greatly appreciate a step-by-step instruction, on what settings to use in Zmapper for 3dsMax9/Zbrush2.
(I have posted this yesterday, somewhere else)
hi,
the problem that i have is that i really dont know how to use zmapper and i am currently looking for a tutorial, do you perhaps now where i could get one?
i designed a cat in zbrush, made it alll nice. but when i use guv and auv it screws up my uv maps and when i import it into maya it just doesnt work.
platform = pc
os = xp sp2
application = maya 8.5
system = 2.4 core2duo, 2gb ram, free disk space 18.3 gb.
please help me, im so frustrated.
kind regards
Luke Carelsen
I’m not sure if this is the appropriate place to bring this up, and if it isn’t, please let me know, but there appears to be no PDF file of any sort bundled with the download, nor any tutorials. Is this normal, or is there a separate place where I can download these things?