Sleepwalker,
Yeah all that it is laying out your Uvs in differnt regions so the head is 0-1 and the neck is in 0-2 body in 0-3 and so on, so now when you bring your mesh into Z brush you can do 2 things with this set up,
- you can create auto UV groups and now manage your mesh’s visibility based on each UV group
- you can use the Multidisplacement plugin to generate a high res displacement map for EACH UV GROUP, which is really the key thing that is important here.
Jerfoo,
I am working on putting together a comprehensive tutorial for this entire process, but I can outline it for you real quick, if you are still unclear on anything then hopefully I have the fully explained process up sometime this week.
-
bring your mesh into Zbrush with uv’s laid out into different UV zones based on how many 2k,4k,or even 8K maps you think you will need, so if you want a 2k map for the head then put the head UV’s in 0-1, and another 2k map for the body then put the body uv’s in 0-2 uv range and so on, now when you use the multidisplace exporter you will get a map for each UV region.
-
sculpt your entire character to the max limit Z brush will allow(save a master file of your character at this point) now based on your different UV groups save off a tool for each part of the body based on the uv’s ( if you have all the head uv’s in a uv group then this will be easy just hide everything but the head and mask all then delete hidden ( very important to keep some polys from the next UV space so they dont pull apart at this point, you can refer back earlier in this thread for mor details on that) also- when you mask all that you want to keep and delete hidden I have found that if you go all the way up to your highest division level and mask that then go back down to your lowest and delete hidden you wont loose any detail, I havnt tried it by masking at Lvl 1 and deleting for a while but I think you loose some of the higher lvl detail if you do that, but maybe not-
-
now you can load up each tool and further subDivide it and get all the detial you need, you will still need to you use the multiDisplace exporter with the maya keycode that Scott provided earlier for all of this, so now you will get a map for lets say your head and the another map for like the first couple rows of polys on your neck ( cuase you included those polys into the new tool right!) this is good for 2 reasons, first, it keeps you from getting a seam between the 2 uv areas, and second if you want to paint detail across that seam onto the next map then you can, once you create those maps you’ll get a partial map of you detial for the neck where you crossed the uv line, so now when you load up your neck tool to keep working on you will be able to load that map up into Zbrush as a displacement map and apply it to that tool and see your detail so you can countinue without any seams or detail discontinuity, this is kind of a tricky step but I believe it can be done, so Ill put more detail on that later.
-
so now you have all your tools all sculpted out and you are ready to put all these awesome displacement maps on your model in Maya, so you do 2 things-
A. get all your displacement maps that you have created with the multidisplacement pluging and convert them to .Map files like Scott was saying with the command line imf_copy oldtifffilename.tiff newcoolMapfilename.map so now you have awesome 32 bit .map files which mental ray for maya likes and renders faster!! SO now that you have all these maps you just apply them to all the different coresponding shader in Maya, so for your Head Dismap, put it on a shader called head and assign it to the polys that are the head, and so on-
B. The other thing I do which should have actually been step one, is I export all the final tools at lvl 2 as a .obj file and then I load all those up into maya and reassemble them by combining all of them and welding all the verts at the seams together. the reason is becuase once you have sculpted your original mesh that you had in brought in from maya, the goemetry has moved around alot based on what you sculpted and I have found I get the best results when I used the new updated state of the mesh to generate my displacement maps ( alot of people say to save a morph target but that never gets me as close to the final product I want, the goal is to reproduce your final sculpt right?) and the reason for exporting the lvl2 geometry instead of lvl one is that lvl 2 is more shaped like your final sculpt and will render JUST LIKE YOUR high res sculpt, I have tried LVL 1 and it never is as close,
now there are some things you have to know about exporting LVL 2, its based on some things,
- your lvl one mesh is pretty low poly, like say 1000-5000 polys, cuase when you export lvl 2 back into Maya you could be looking at upwards of a 20,000 poly mesh which is still workable with an animation rig and stuff, acutally some things like muscle simulation its better to have more polys cuase you get better control, but thats a different topic all together,
- be sure and create all your displacement maps from LVL 2 instead of LVL 1 for obviouse reasons, now apply the mental ray SubD approximation node to your mesh and render away.
also another good reason for using lvl2 is that if for some reason you wanted to include a couple triangles in your original mesh they will all be quads now:) and mental rays subDapprox node like that a lot, you can do it with triangles but I dont reccomend it.
I know this is a lot of info and reallly should be documented more clearly but this is a walk through of my current workflow on the matter, I will publish a more thorough document as I come closer to completeing my current project and clearly outline the entire process so that there is no confusion.
later hope this helps Jerfoo-
P.S. I didnt proof read this so there could be mad type o’s and stuff 
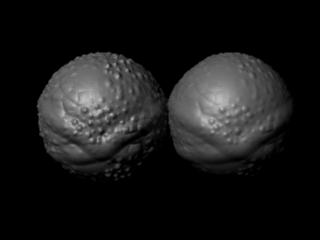

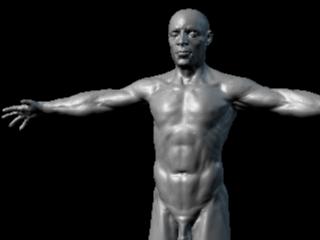
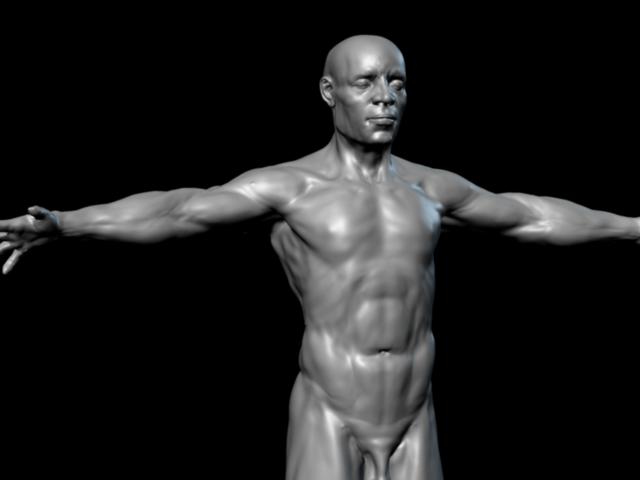

 (after 4 million polys so the magic number i use is about 3900 polys in the cage. I’ve worked with models up to 7.5 million or so but it was horribly slow and felt like i was walking on egg shells with every move.
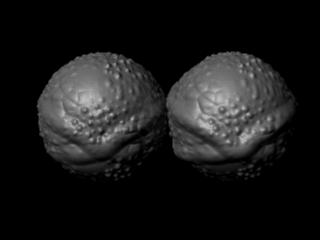