Hi there
as a pensioner I just cannot pick this up maybe I’am out of my depth here can anyone out there put the above into a pdf for me as I can follow tutorials in a written fashion.Thanking you all just the same.partick.
Hi Ryan
what software did you use for the Head and the UVs if I had the head and uvs then I probally could do the exercise.
Thank you Bas for script I followed it quite easily by opening zscript palette slowed it down and got help notices.Is this the same as Ryans the one I cannot do.partick
muTe - You can certainly edit your 3d model but I understand you want your texture to continue to be projected as you sculpt. You could use Reference Image 2 to establish your photo as a background plane and then set the transperancy slider to let you see the image behind it.
You can access it here: http://www.zbrushcentral.com/zbc/showthread.php?t=38313
Patrick - I understand your desire for a pdf version. Right now I do not have one available. Though some of the information may be available on our wiki at www.zbrush.info. 
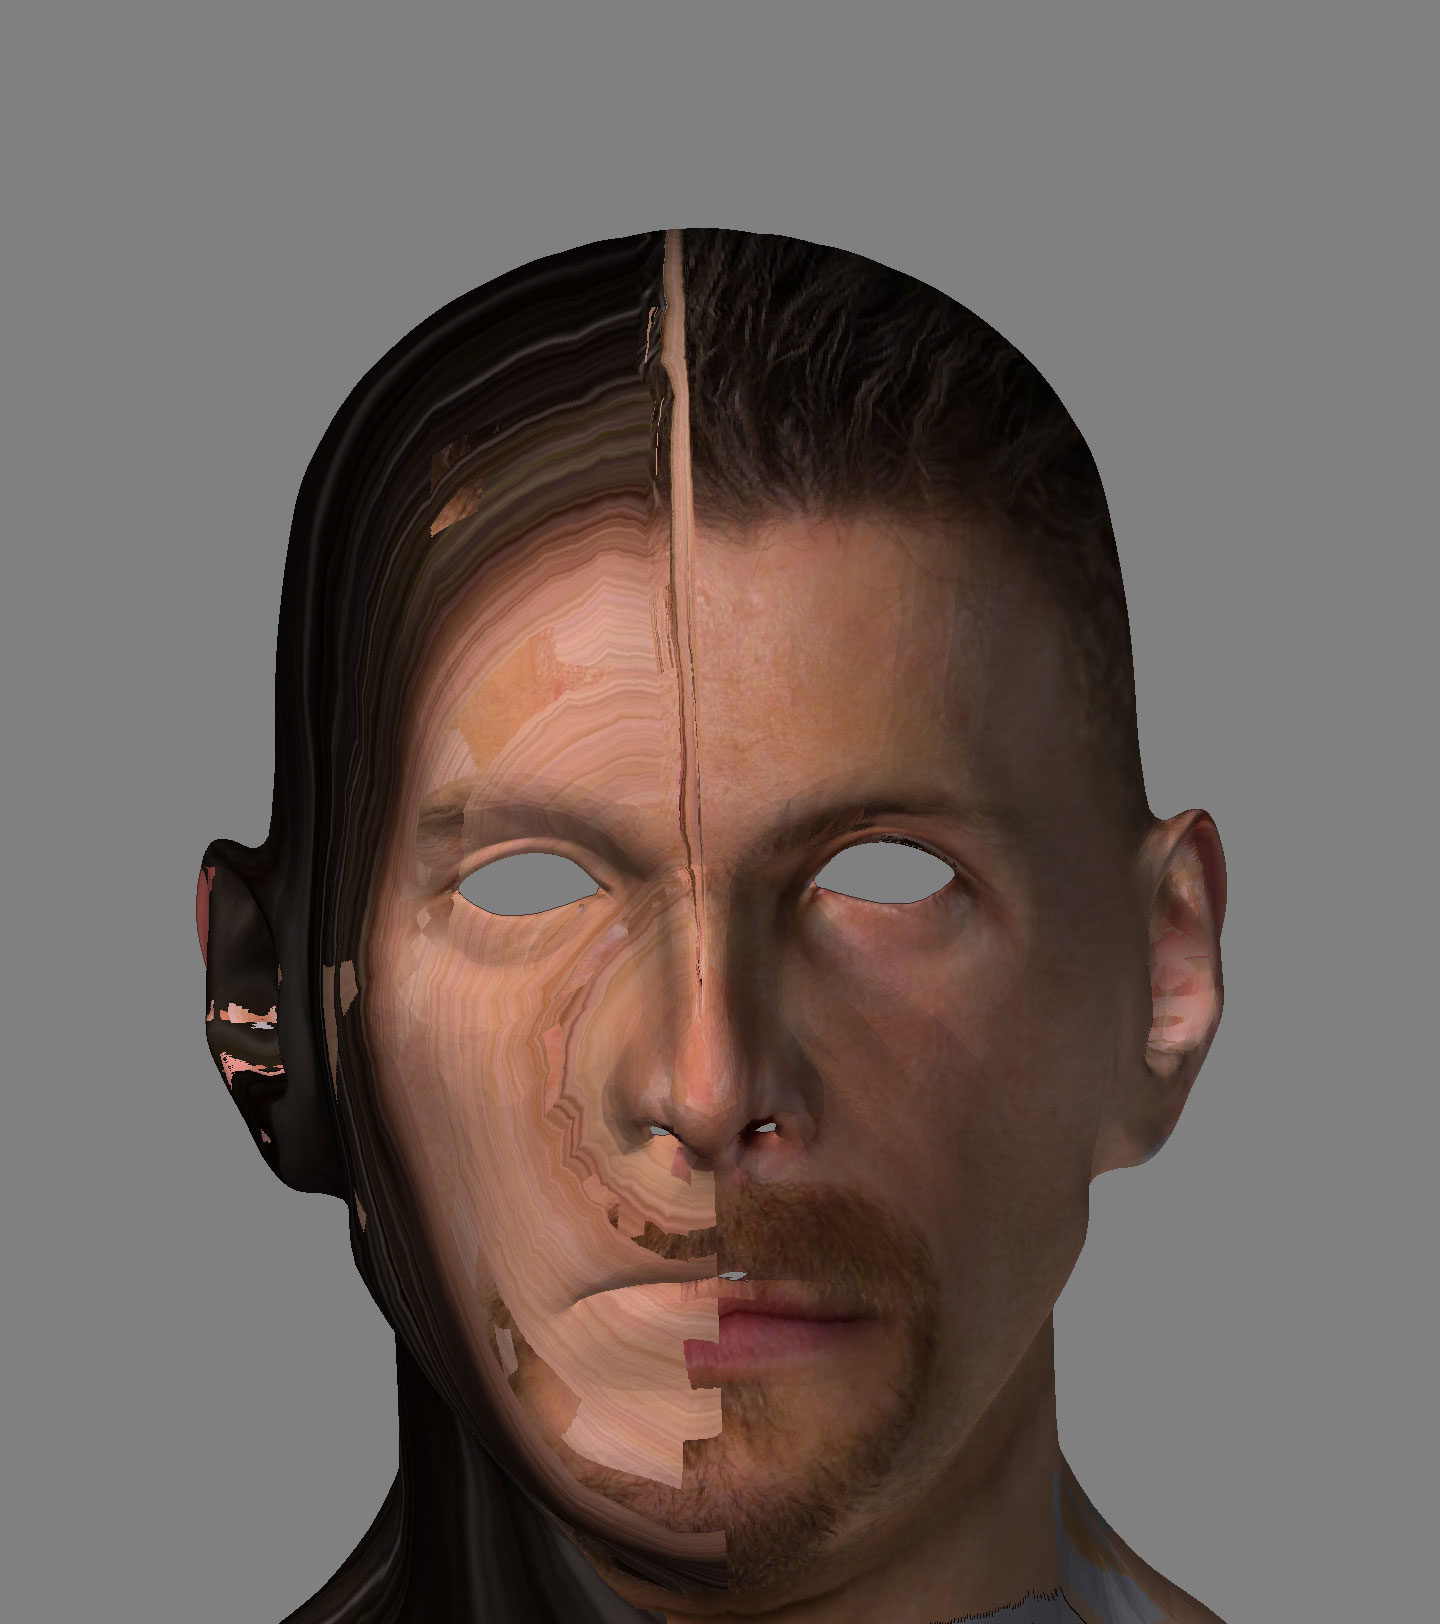
This model and its UVs were done in XSI.
Thanks for the script Baz!
r
Hi Ryan
i’am back again as the Tutorial shows how easy you can do it I have decided to call time on it and leave it to you Experts ,as i’am to thick to grasp it all I noticed you had UV maps in texture palette so maybe thats my problem as it doe’s not say anything about UVs.partick
very helpfulvery helpfulthanks a lot
Hi there
in reponse to thank you very much, when I have to go to the Library to use internet so when I saw Ryans tutorial I downloaded it,on trying same I did not know I needed image plane or texturlibrary so back to Library where i’am allowed 15 minutes or an hour depending on how many people where waiting.I could not get it to work I needed power of 2 so tried again no luck back to forum and found out that I had to select plane tool in order to select the texture still no luck back again I saved in wavefront in c4d and flipped head in preferences but what I got was upside down back again found out i needed Riptide flipped UVs still could not get it to work called time on it.Twodays ago I tried again still the same could not get image like Ryan doe’s but this time after edit and move instead of destroying mesh as I was doing I went into texture palatte and used the imagesize slider I moved it to 50% and back to 98 99% and this gave me the image where I increased brush size got eyes where they should be also nose and mouth ,I shut computer down and went back to it day after and repeated imagesize slider and got it to work I do not know if this is the answer but I finally got it to work.Before the thank you very much know the circumstances before tou start throwing the stones.It took me weeks back and forth where someone at home would take an hour.I thank Ryan and marcus and also Zbrush for making it possible I can do the same thing in Bodypaint but get a better result in zbrush it has taking a lot of back and forward to library but you cannot ride a bycycle without a chain I would still like to know how it works and maybe I would know how to fix it.Thank you all for your patience.
Hihi
This thread has answered my previous issue; was having problems with my Uvs, so downloaded UVmapper and made my own  Promblem solved!
The only problem I have now. is when im in Projection Master and trying to move the texture around, the plane gridlines come up instead. I understand this is because Im not selecting any verticies…
But, anywhere I click, the gridline pops up. I`ve tried subdividing the texture plane, but it only makes the gridlines smaller.
Any suggestions?
Doomeduserr -
In the transform menu turn Dots off.
r
great tutorial. This helps save a ton of time.
for us with a mac, who don’t yet have zmapper, and are brand spanking new to this whole 3d stuff. But I guess in the long run it has made me want to learn how to UV map so I can use this most awesome tutorial.
I have a problem with this,
How can i solve this problem?
Attachments
thank’s Ryan, great tutorial!
i tried this tutorial, about texturing whith image plane,
and i still whith a big problem, maybe you can help me,
in my example,i don’t have a three quarter view image,
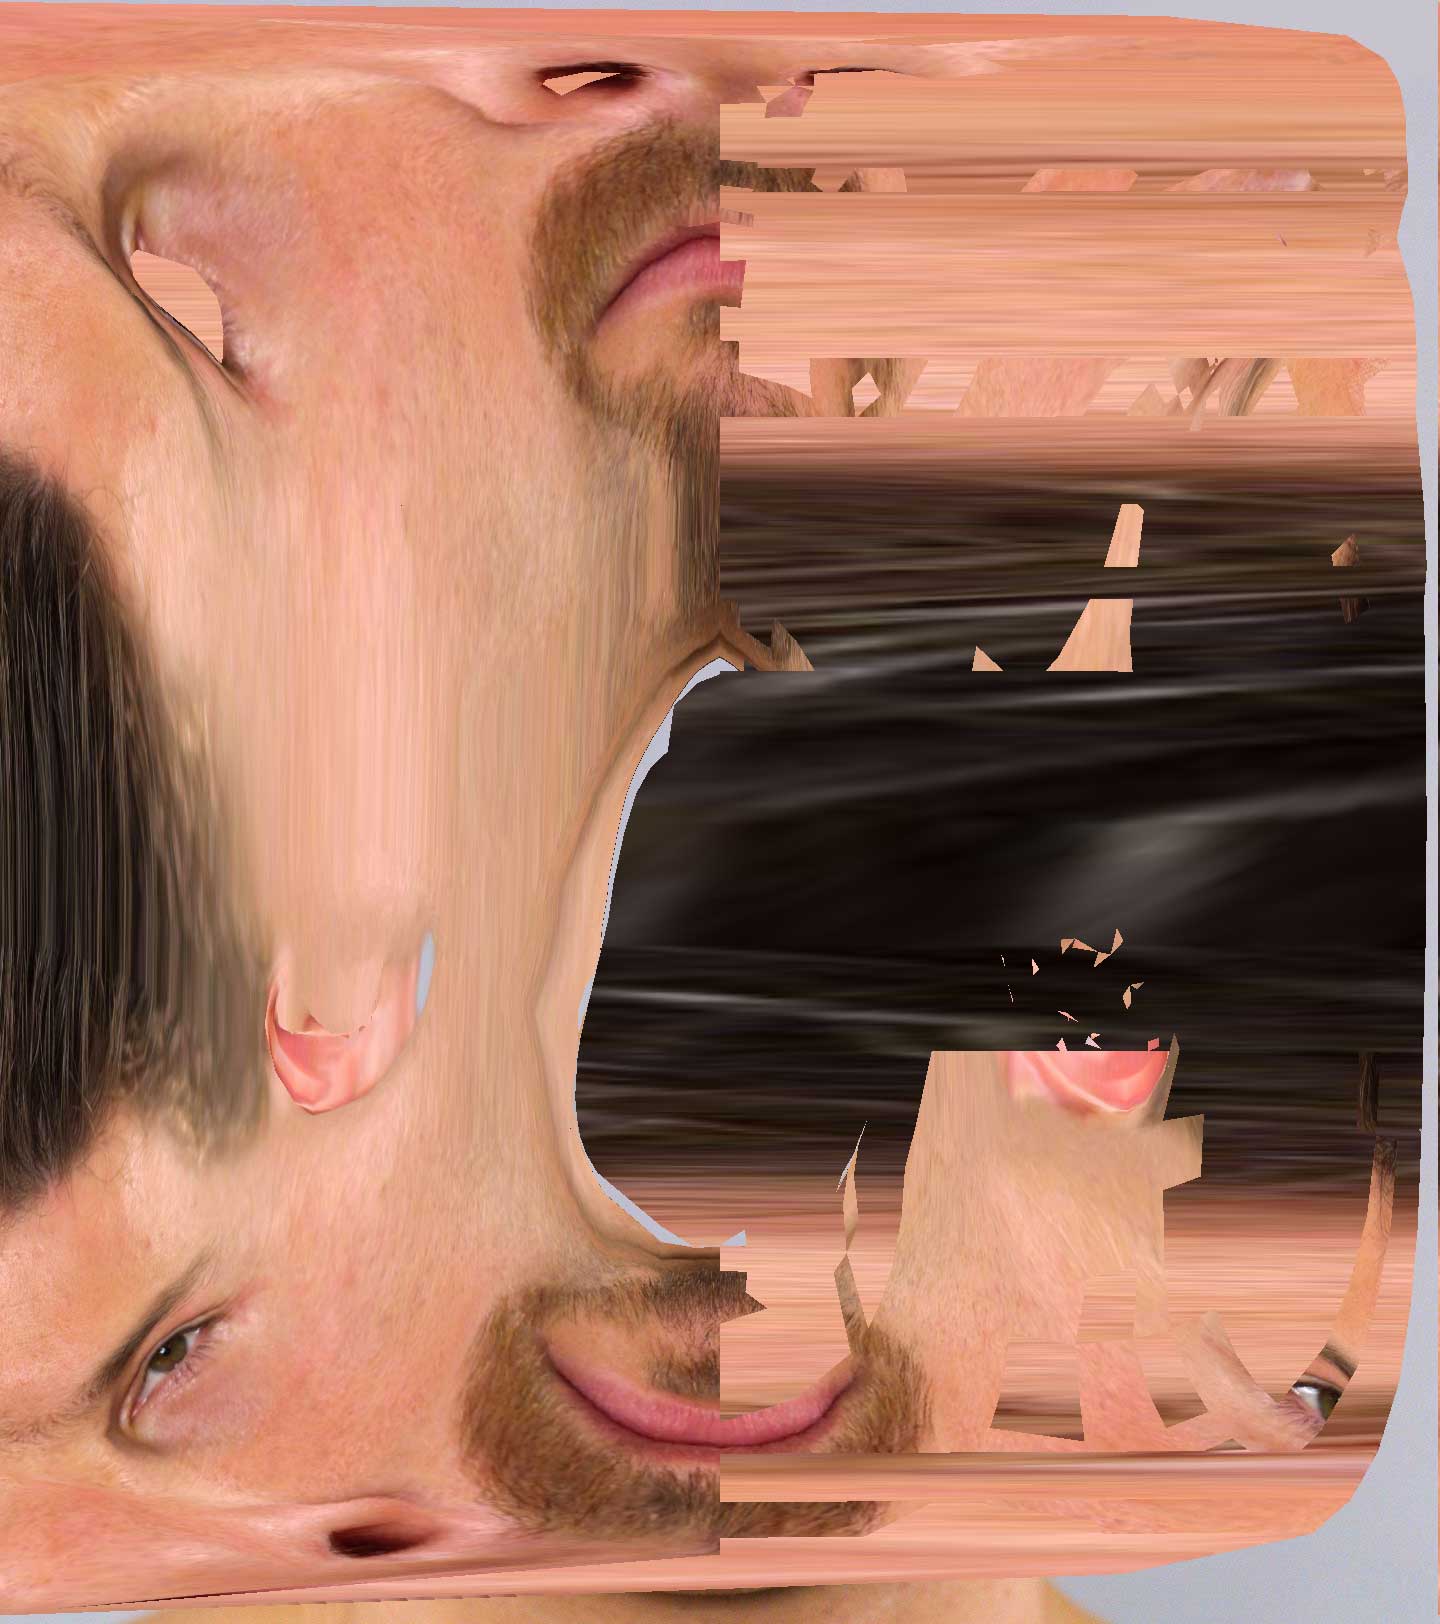
so, i flipped the side image in photoshop, and i cloned the texture beetween
each steps, but the other side i did before, is destroyed and twisted…
and very bad seams…
why?
Good tutorials !
it looks to me that your uvs are messed up (overlapping) how did you do them? if you didnt need to edit the uvs in a 2d package you could just use tile uvs in zbrush, but i recently followed this tutorial and you need to piece the projections together. what i think you need to do then is export your lowest sub division into max or some other 3d package and do your uv layout in their and then import it back to zbrush for it to update your uvs, its fairly easy to make and check your uvs in max. thats what i used and iv just finished the texture process today with it working fine. if you search for “exploding mesh” in the main forum their is a link to a thread where i wrote down the process i took to do this to ensure the mesh doesnt explode when you re-import it to zbrush (as stated on that post i dont take credit for that, theirs two other very clever guys on the post who sorted it). also if your new to uv layout google a guy called “eric masouwski, organic modeling”, hes got a great tutorial for the basic concept. hope this helps
i strongly recommend you check the explode mesh link as this will save you a lot of trouble
p.s im a noob so their may be a better way to sort this
this tut looks great! i was wondering if you guys can help me out. Im having trouble when i get to a certain step…
i turn on projection master and i can’t seem to select the texture anymore. The docked texture palette becomes grayed out.
i then try to run the image plane script. since i couldn’t select the texture in the previous step, it brings up a navigation window asking me to select which file i want to choose. after choosing the file i get a message saying:
ZScript Note: Interface item could not be found.
Alpha:Brush00
in…
[IPress,Alpha:Brush00]
am i missing a step?
running zbrush 3.1 thanks!
Great tutorial!
Im having the same prob as SagaAP2 though with the Texturepalette being grayed out and unusable after dropping my mesh in projection master. Im also running Zbrush 3.1
Thank you very much! I use this and modeling with photo ref tutorial all the time.
I have one quesion. When I “pickup” on projection master, texture created always goes 1024x1024.
Is there anyway to keep it to original size? In the tutorial, your texture stays original size which seems to be 2848 x 3122. Then you change it to 4096 and clone it and exported it to psd.
Thank you in advance
Hi there,
i dont know what it is, and it also may rather belong to the thread regarding the plugin Image plane, so, i am sorry if i post something here which belonges somwhere else.
I follow the steps of the tut, and all works fine, till i have to use Image plane. As soon as i try to use it, it tells me that it is missing Alpha 00. My alphas in ZB 3.1 start with 01. Could it be, that this is just because of bad numbering?
Best regards,
Heiner
Please no more problems, they are working on a Mac-release!
I am sorry, i just asked a question, i thought thats what a forum is good for. And i am sorry for the problem, i did not invent it, or make it up and rather would have it working and not posting stoopid questions.
Again, sorry …
Heiner
(somehow still clueless)