Beautiful work
I have not seen the movie
but the picture is very beautiful and of high quality
when I grow up I want to make works as nice as yours
bravo!!!bravo!!! plas, plas, plas, with both hands!!!
nice stuff.
i did almost the same thing, although i only reed about the movie, but didn’t see it yet.
only i made my base model in c4d and merged them in zbrush. (i don’t know how i should do boolean operations in c4d)
grtz p
and thnx for another great explanation.
nice, but how you do the light effect of the inside?
is that zbrush too?
grtz p
The space station looks gorgeous! Must admit to preferring the first version, before it start to take on the Geiger-esque/Gutalin style, but that glowing inner ring force-field is really gorgeous
in the latest one
Haven’t seen the movie yet, but I’m looking forward to it as the story kind of reminds me a little of the old manga Battle Angel Alita
Congrats on your 100th page… that means I still have 70 pages to sift through to discover all these interesting twists and turns you’ve been experimenting with in ZB 
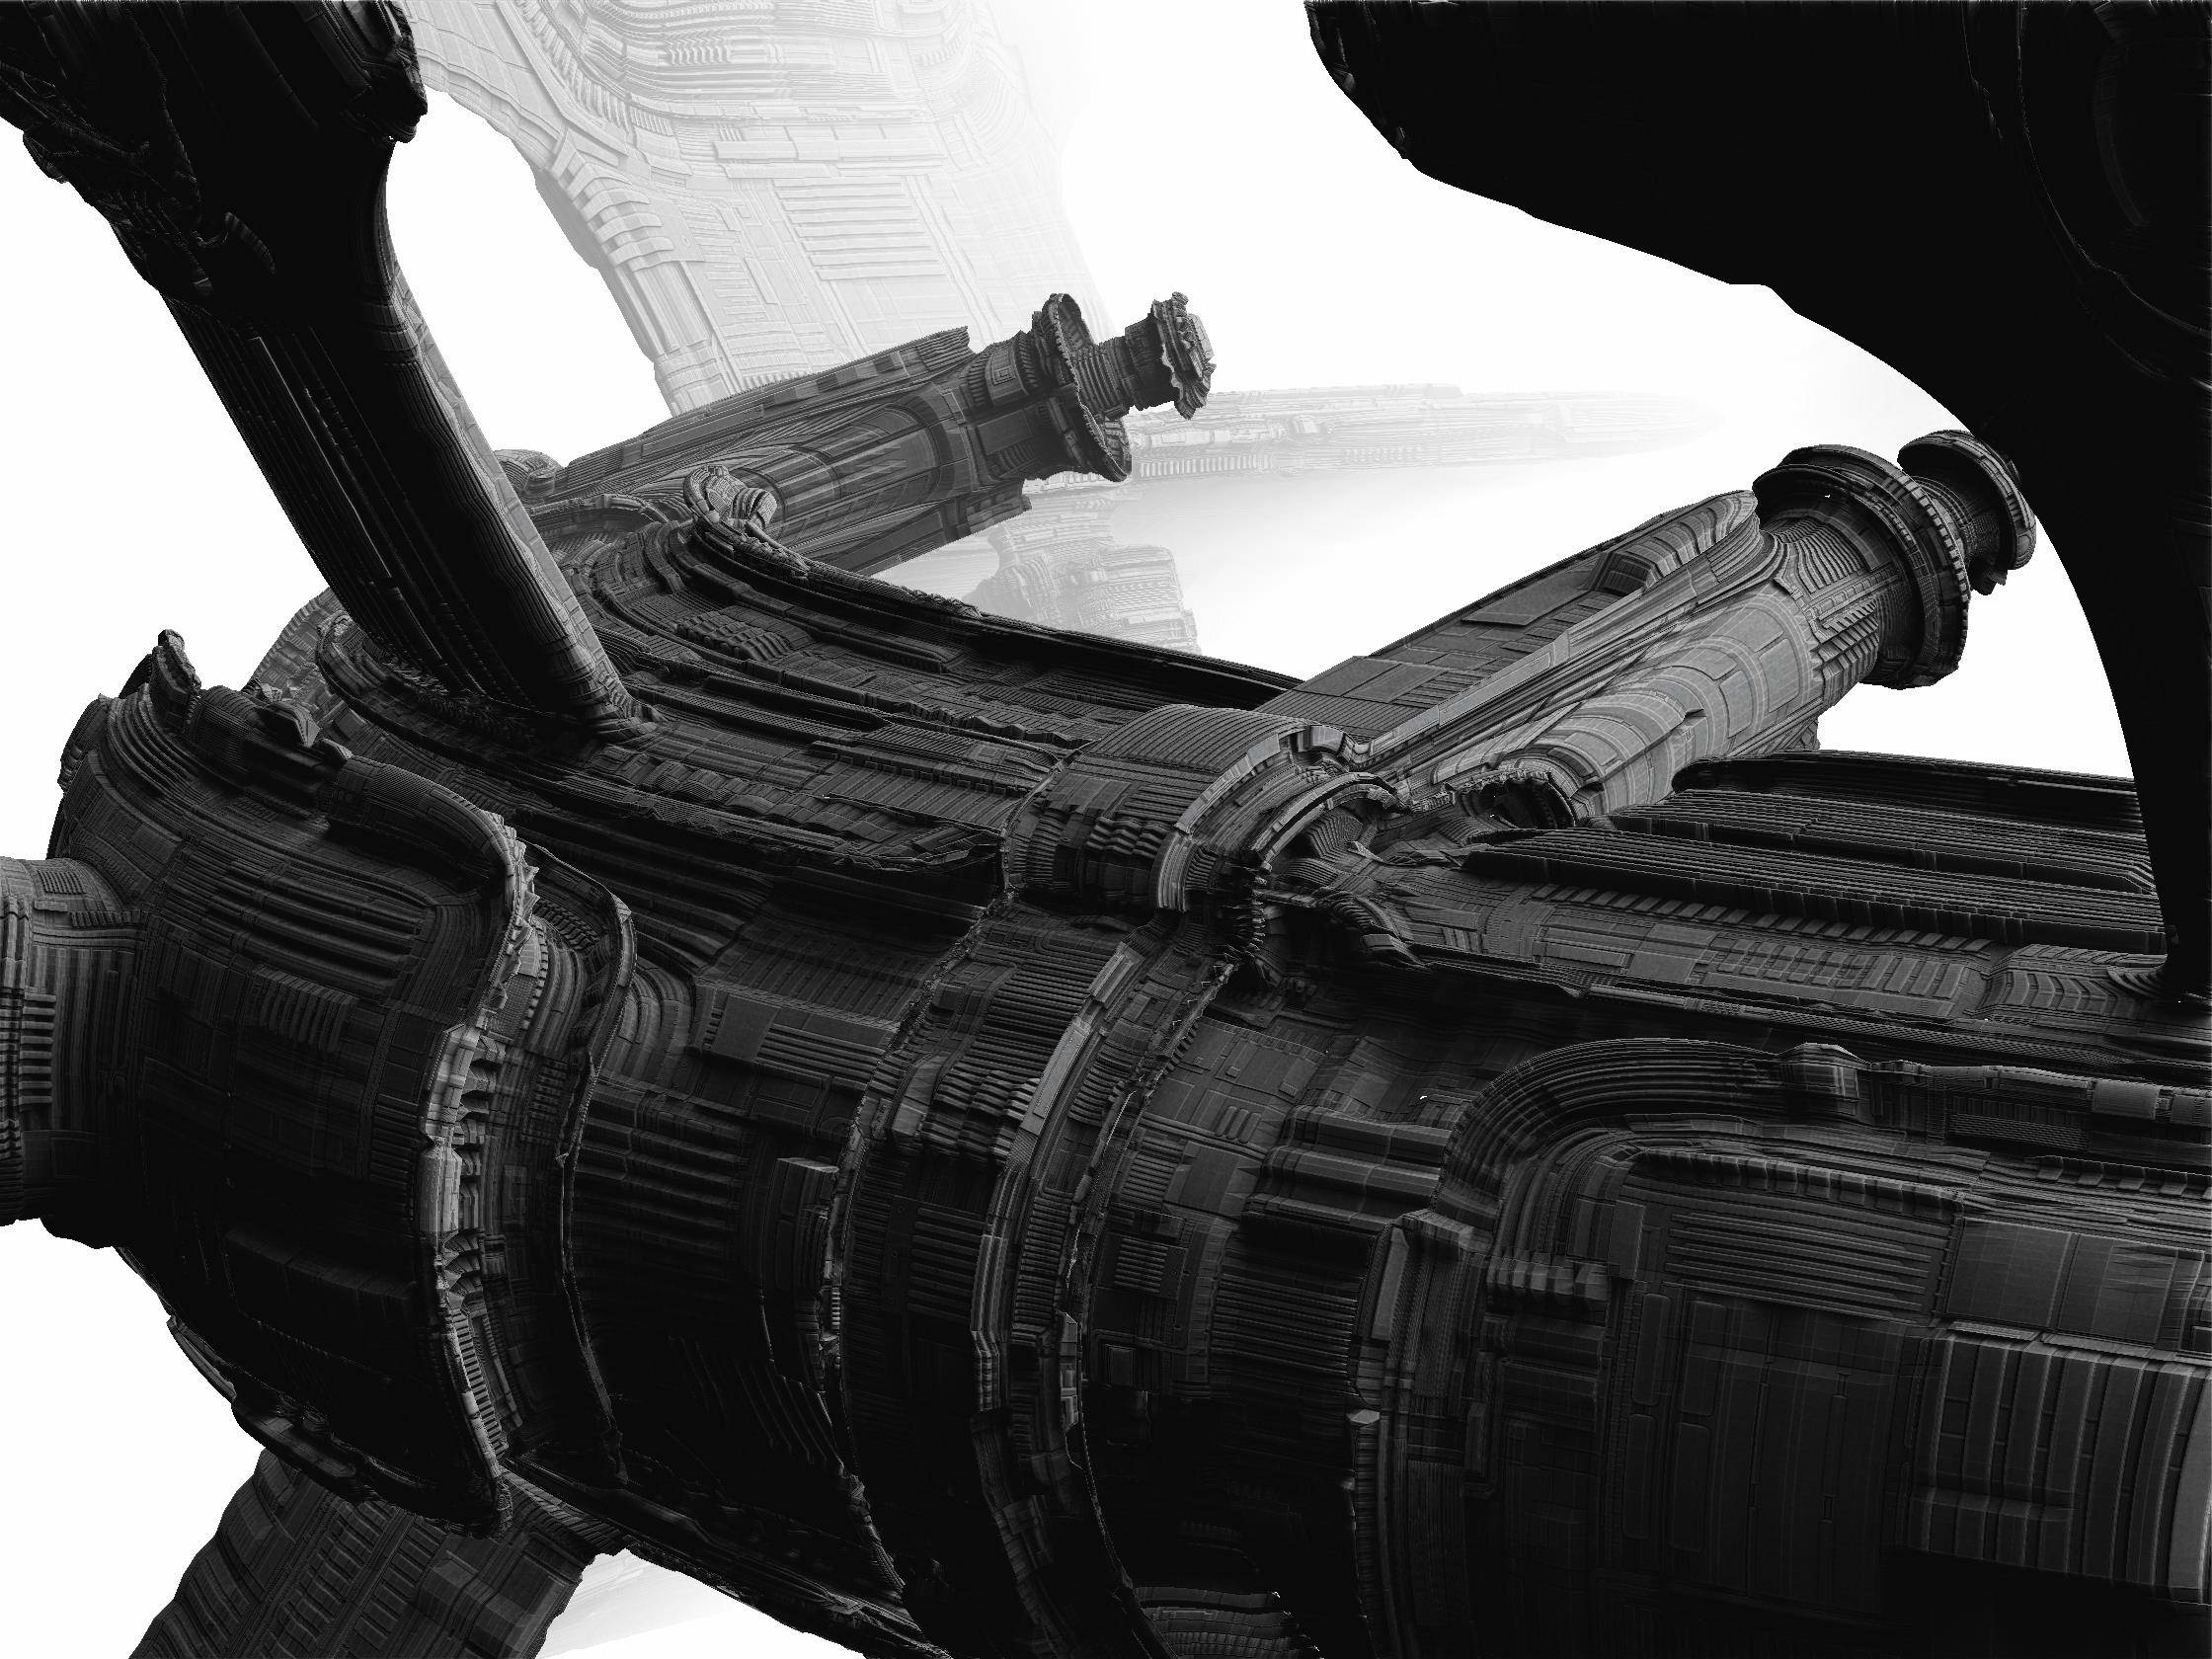
Close Ups are sort of neat, there is a lot of detail, Michalis used a microscope to create his displacement maps.
Attachments
The closeup is incredible MealeaYing,
Is there any way that those jet/exhaust ports could be smother. The displacement is simply making them look beat up IMO.
Other than that -the last render is breathtaking.
Greg Malick
Hawaii
Holy …! That is such a madness!
Simply epic!
Ciao,
TM
wow,
I mean, WOW!!!
Do you know how to control the value of displacement in particular areas? You know what I mean, on some thin edges areas for instance.
how you get the depth between white and black?
wow, really nice render again.
@PFC666 propably with the dephtmap (inverted) from the bpr renderpasses.
grtz p
didn’t you compose the image (the renderpasses) in another software?
oh my, than it’s just rendered in zbrush??
i think i do it all wrong,
grtz p
Do you know how to control the value of displacement in particular areas? You know what I mean, on some thin edges areas for instance.
I ask once more. LOL
No? Well, just an idea, what about smoothly mask areas before applying the displacements?
Or… my next experiment, what about masking by alpha, then apply another displ map on these areas?
OOOH!
I thought you meant the slider thingy…
I just tried masking and it doesn’t seem to do anything at all…
Putting different UV mappings on different polygroups is possible though…
hmmmmm…
I think I will try that now…
Oh Mealea, I didn’t know this. Thank YOU!.
We can UV unwrap only the visible group (or groups).
There are more: Under adjust (UV panel) AdjU-AdjV, meaning you can move the UV island to place it exactly where you like on the Texture map.
Now, this is a more advanced UV editing. Still not a powerful UV editor (like in blender) but it will perfectly fit in out needs.
A possible workflow, to have manual seams on GUV unwrapping could be:
Sculpt in dynamesh,
Z remesh
Select (by lasso) a few loops, creating a kind of grid on the mesh. These are hidden now. Auto groups.
Now we can easily select parts of the mesh and GUV unwrap them. AdjustU or V. (and apply adj)
BTW, Mealea, and other loopers, LOL
If you apply GUVs separately for every group, you don’t need Hrepeat etc, you don’t even need to export and re import the obj. Apply displacements and see.
Also simply banging on ApplyADJ seems to do random stuff so you can hit it over and over and its always different!
Does it?
Every time you ask zbrsuh to applyADJ, it moves the UV island by the value you entered.
On the other hand, I had some difficulties when I asked for PUV on a visible part (a polygroup) and GUVs for another visible group. It discards what I’m asking, it seems so. What am I missing here?
how you get the depth between white and black? in the post 1499
Mealea, this “applyADJ” is not random. However, I agree with you on this. The ZB UI leads to random results easily. It is its nature I guess. LOL
On the other hand, we’re a little random souls here, so no complains from me.
Thanks, MEALOOPS !!!:D;)