ZBrushCentral

Now Im having fun

HAHAHAHA!!!
I refuse to answer that question on the grounds that I shouldn’t have to tell you what you were doing last night.
But thanks!

Thanks David!
Those are the same thing actually… well the same base object, I was screwing about with using the hair tools on a dynamesh object (very fun by the way and seriously different, these tools remind me a LOT of Sculptris brushes)
Anyhow they are just different masking and hair settings… I like the last one too but the top one is actually more interesting in a way.

And now here is Voodoo CupCake:

CupCakeGetsNewSkin.jpg

Attachments

CupCakeGetsNewSkin.jpg

The Priest made a bunch of seriously neat mechanical brushes that are available here:
http://www.zbrushcentral.com/showthread.php?165793-ThePriest-Free-Mesh-In-style-brushes
Thank you Priest!!!

They inspired me to try something new and for me sort of counter intuitive, this took less than 1/2 hour, its low rez but I can make it at MUCH higher rez and the details would be more crisp.
I did not use The Priest’s brushes in this but was simply inspired to see if I could make my own based on what his look like.
Now I can do this:

4r2b.jpg

Attachments

4r2b.jpg

And a pre colombian art came from this experiment.
Goood!
A little texture painting and a jungle foliage around. :wink:

These are looking good! As michalis said … All you need is a jungle and them borrow a beast or two from spirit dreamer, you are in business! :lol:

Cheers, David :smiley:

Wow! These last ones are really great!
Pretty interesting style, people will remember that mate!
Cheers and best regards,
Kenny

@Michalis:
Thanks!
That was part of the idea with this, and your idea of Jungle stuff is a good one, I know how I can do that too I think… Im going to start need to dig into Blender again very very soon.
GRIN!!!

@David:
Thanks!
That gives me some neat ideas… Pre-Colombian and mechanical.
I think Im going to make a tutorial for this stuff its amazingly easy…
Its also good for 2.5D and I will have a quickie example of that up in a moment.

@Kenny:
Thank you very much!

Ok… here some more, this stuff is amazingly easy to do and I will try to make a sort of tutorial on it soon:

4r2bwall2.5D.jpg
PodThingerisim2.jpg
PodThingerisim3.jpg
ThisISALotOfFun.jpg

And a fuzzy thing:

PuffyThing.jpg
PuffyThing2.jpg
PuffyThingOtherSide.jpg

Attachments

4r2bwall2.5D.jpg

PodThingerisim2.jpg

PodThingerisim3.jpg

ThisISALotOfFun.jpg

PuffyThing.jpg

PuffyThing2.jpg

PuffyThingOtherSide.jpg

Wow mealea! I especially love the hard edge mesh insert work… Really awesome! Looking forward to the tutorials! :lol: Cheers, David :smiley:

hehehe! thanks!
Personally I like the fuzzy stuff, but thats me.
That big one was 18.434 million polygons, my computer didn’t like it much!
The tutorial is going to be in two bits I think.
The first bit will be text describing step by step how to do this stuff (its seriously easy).
the second bit will be a video, hopefully with music, that is actually very hard for some stupid reason.
I had a little free video editor on my old Macintosh IIFX that could fit quicktime movies to sound under system 7, this crap with that being this hard to do now irritates me to no end.

Anyhow heres another one of these thingys, they are rather fun to make!

BEEDEEBEEDEEBEEDEEFarOutBuck-2.jpgThisGuyAgain.jpgWallthingy.jpgBEEDEEBEEDEEBEEDEEFarOutBuck.jpg

Attachments

BEEDEEBEEDEEBEEDEEFarOutBuck.jpg

BEEDEEBEEDEEBEEDEEFarOutBuck-2.jpg

ThisGuyAgain.jpg

Wallthingy.jpg

This is very cool:

~

SM-SeamlessFurThingyFromInnerFur.jpg

SM-SeamlessFurThingyFromInnerFur3.jpg

5Monsters1.jpg

5Monsters3.jpg

BubblePod.jpgBubblePod2.jpgBubblePod3.jpgBubblePod4-Fur.jpgBubblePod5-Fur-CompoundEyes.jpgAnotherOne.jpg

Attachments

5Monsters1.jpg

5Monsters3.jpg

AnotherOne.jpg

BubblePod.jpg

BubblePod2.jpg

BubblePod3.jpg

BubblePod4-Fur.jpg

BubblePod5-Fur-CompoundEyes.jpg

SM-SeamlessFurThingyFromInnerFur.jpg

SM-SeamlessFurThingyFromInnerFur3.jpg

Hi Mealea, Cool new work, I especially love the ones that look like Art Deco paper weights! cheers, David :smiley:

Hi Mealea

Just been looking at this thread and i really love the stuff with Fiber Mesh, but most of all i like the mechanical hard edged thing with legs, very nice indeed… :smiley:

Was this done with ShadowBox or some other procedure ?

J

hehehe!!!
Thanks David!
I like those too, I had a lot of fun making them. They are the result of another thread (which I’m annoyed to say I lost) where someone was trying to use curve tube brushes to make vines.
It didn’t work, but at least I learned how to make those little thingys!

WOW!
You like my stuff?? NEAT!
I love yours!
I did not use Shadow Box at all (I have never had any luck with it, it crashes me constantly). After seeing what you do with Shadow Box I spent a few weeks restarting ZBrush and being frustrated.
Mostly I used the mesh insert brushes, the Inflate slider in the deformation pallet (with masking) and a little bit of the transpose tools (and a bit of masking), specifically move as the others do totally random stuff.
Also I had symmetry turned on using radial at various levels like 4 and 8 if I remember correctly.
I’m going to draw up a couple of tutorials for making things like that one a step by step in text and the other a video, its just taking a while as the new ZBrush is not behaving on my computer and is nearly impossible to keep running.

Cheers and thanks you guys!
Mealea

Heres some more of that stuff from above…
The first tutorial for this is going slowly due to random problems introduced by 4r2b but I’m getting the hang of not using some things (like the frame button) so it should be along soon.

MoreThenOneMoreLikeThreeFromAbove.jpg

MoreThenOne.jpg

MoreThenOneMoreLikeThree.jpg

Attachments

MoreThenOneMoreLikeThreeFromAbove.jpg

MoreThenOneMoreLikeThree.jpg

MoreThenOne.jpg

Wow … I love these Mealea! The first two look like some steampunk Coat of Arms! :lol: All the best, David :smiley:

That’s some awesome stuff there Mealea. You’ve been busy. :+1:small_orange_diamond:D:+1:

This is fun and that is important, its more fun because its easy.
Right off I’m going to say one thing:
It looks like a lot of steps, it is not.
Take your time and dont worry, once you get going your only problem will be the number of polygons your computer can cope with.
I promise.

I have found (so far) no need for more then the cylinder, cube and sphere Mesh Insert brushes, and naturally I am too lazy to make my own as of yet but the amusing thing is that all of these little creations are going to become bigger creations and then mesh insert brushes them selves. Like how The Priest has been making those amazing things he makes, only mine suck and his are spiffy. (Check out his stuff, its awesome)
Not only can you use these thing as subtools, Mesh Insert Brush’s or stand alone objects you can use them as 2.5D brushes and make things that would have had otherwise had trillions or even hundreds of trillions of polygons.

Also look here for some fantastic examples of what can be done with this stuff:
http://www.zbrushcentral.com/showthread.php?165963&p=927559&viewfull=1#post927559

Ok To set things up to make this possible:

  1. Make a sphere using Sphere3D from the Tool Pallet. As you draw it hold down SHIFT to align it nicely (optional, you can do this later too).
  2. Hit the Edit Button at the top of the screen.
  3. Make the sphere a PolyMesh3D Object by hitting the Make PolyMesh 3D Button in the Tool Pallet.
  4. Open the Geometry Sub Pallet on the right and next to the Dynamesh Button set Blur to 0 (zero).
  5. Turn on Dynamesh (leave it at 128 for now so things stay nice and quick).
  6. Turn on the Floor by hitting the Floor Button on the right.
  7. Make sure perspective is OFF.
  8. Open the Transform Menu and hit Activate Symmetry.
  9. Set symmetry to Y (and turn off X).
  10. Again in the Transform Menu turn on Radial by hitting the R Button and set its slider to something like 8 if its not there already.
  11. Rotate your view so you are looking down on your sphere.

Ok, that believe it or not was step one.
Zbrush sometimes needs a lot of preparation depending on what you are doing with it.
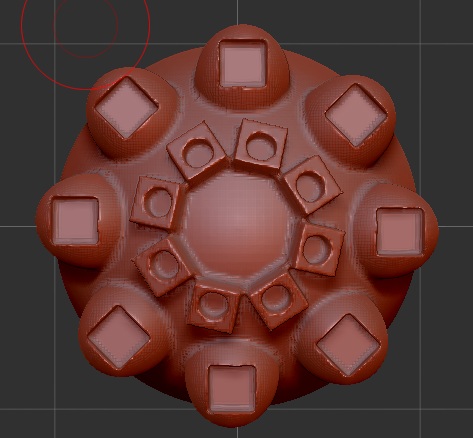
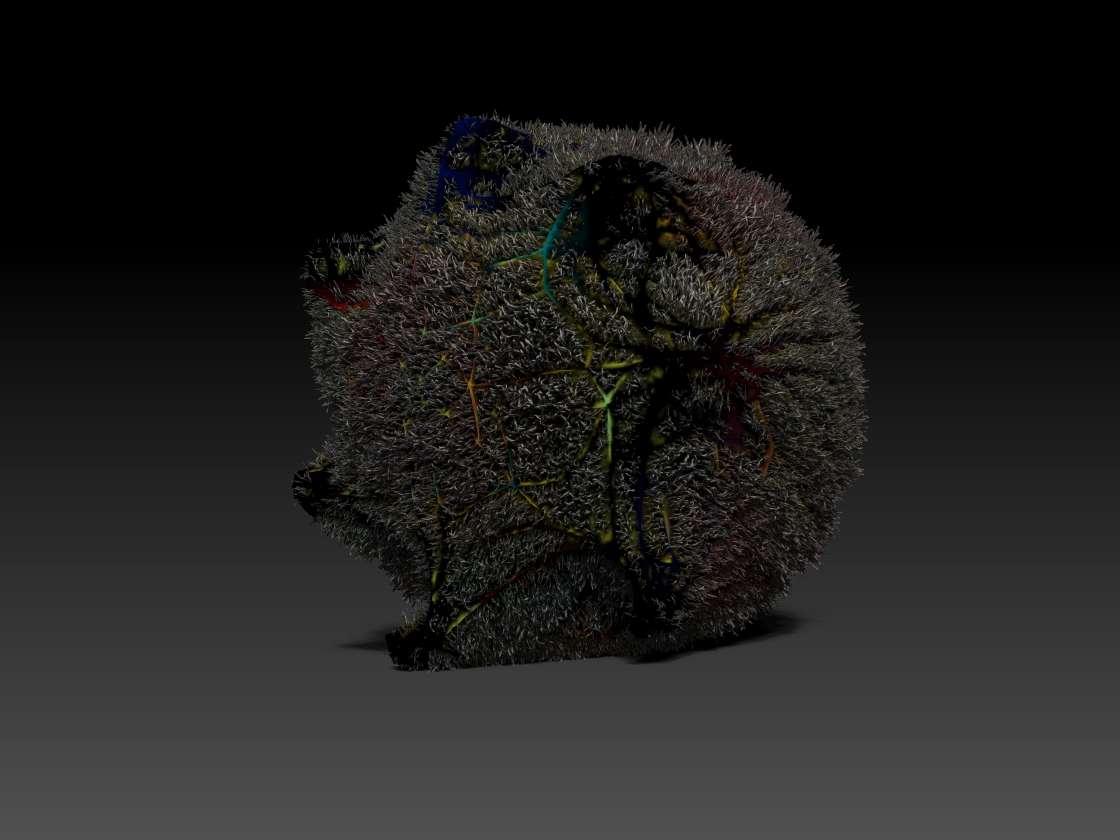
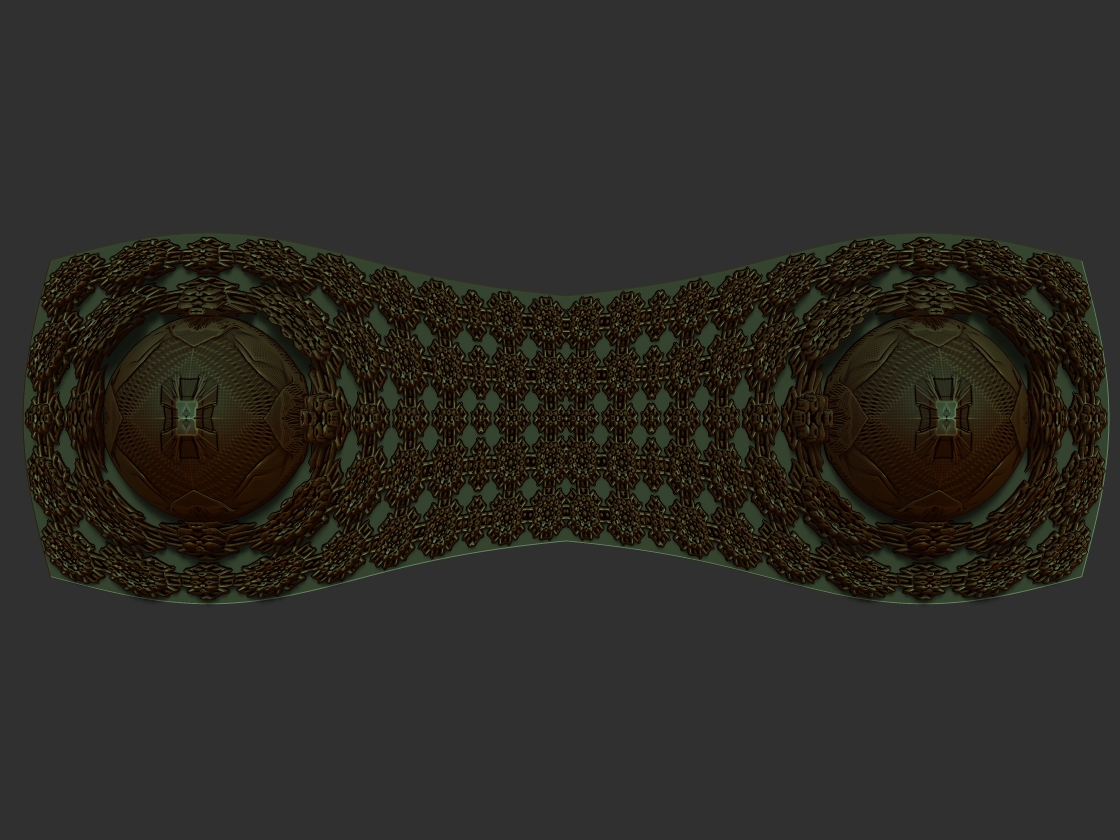
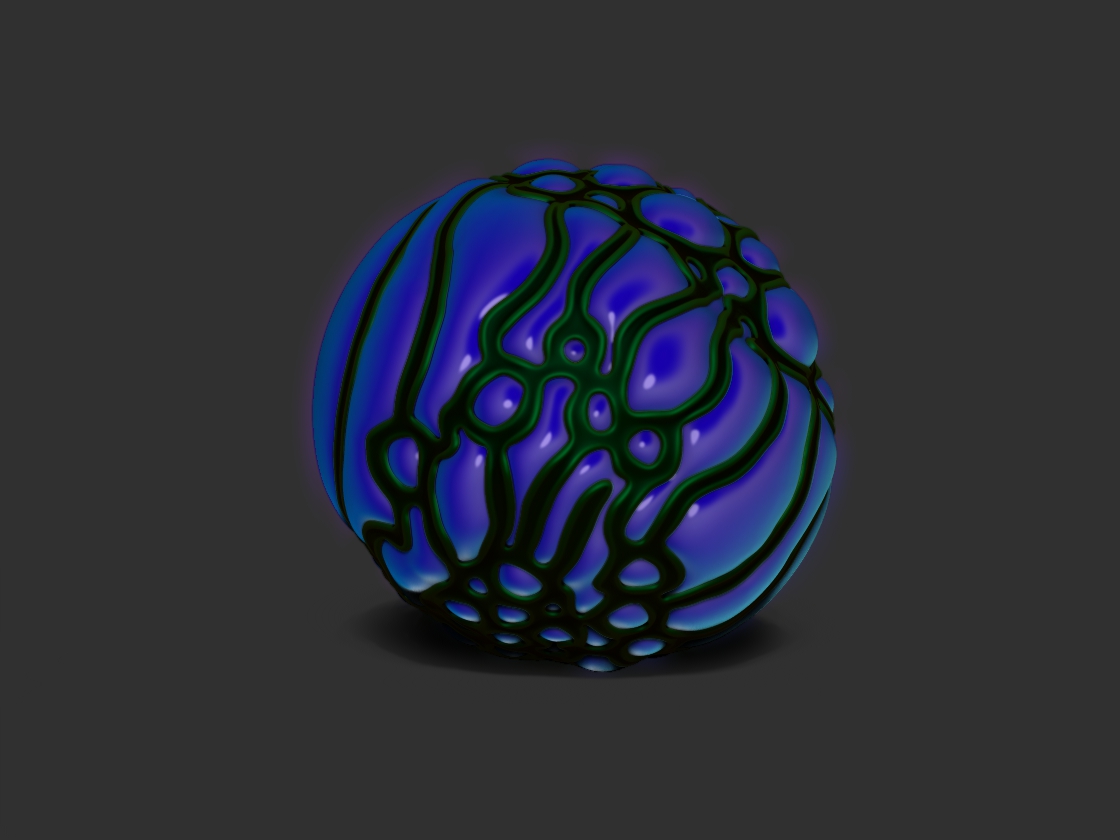
If you move your cursor over the sphere it should look something like this:

If it does not look like this I recommend panic, panic gets stuff done in a hurry and has been keeping people from being eaten for millions of years.
Actually I recommend screwing with it till it looks right.

Now we get to the part where we make things and have some fun.

So:

  1. In the Brush Pallet on the left select any of the following: Insert Sphere, Insert Cube, or Insert Cylinder. Any one will do nicely.
  2. Move your cursor over the sphere and click and drag till you have a nice new object with copies of it self sticking out of the sphere.
  3. Hold the Control Key and Click and Drag OUTSIDE the object TWICE ("Remesh" (Once removes the mask, the second updates the Dynamesh)).
  4. Now hold down the Alt Key and place your mouse over your new bit and make another object.
  5. Hold The Control Key and Click and drag OUTSIDE the object TWICE again. It SHOULD make a hole this time right?
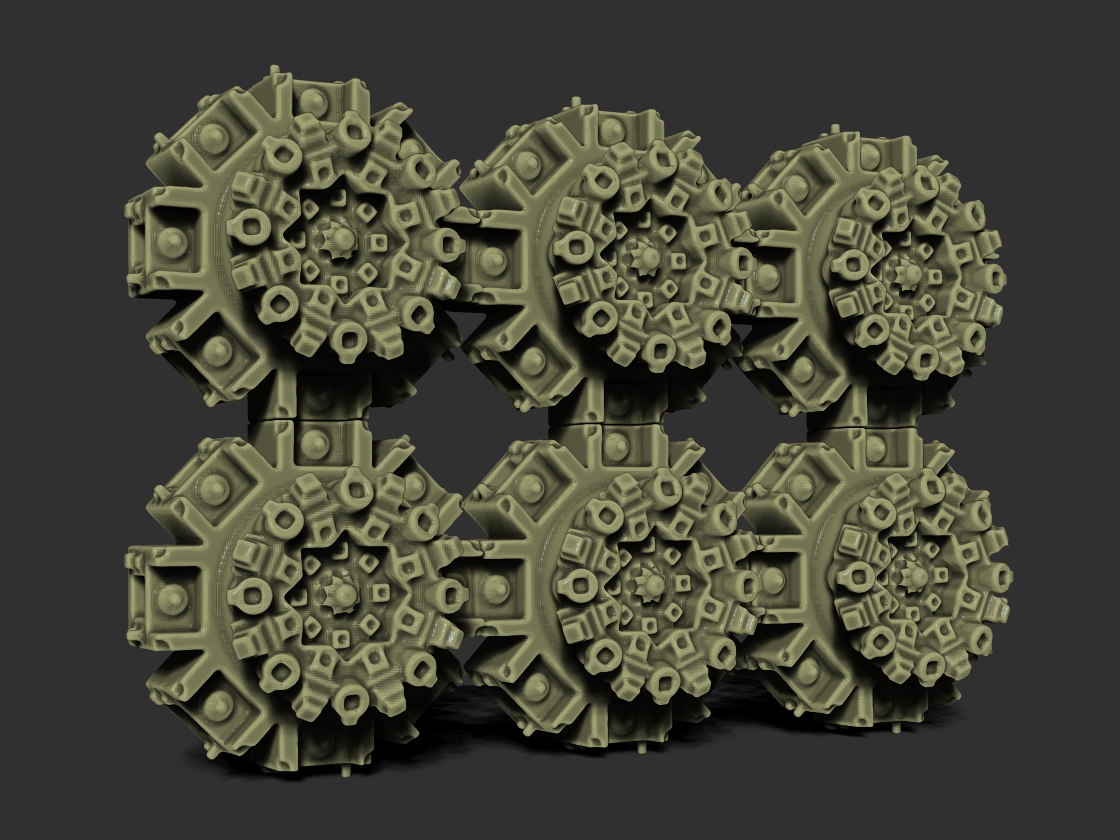
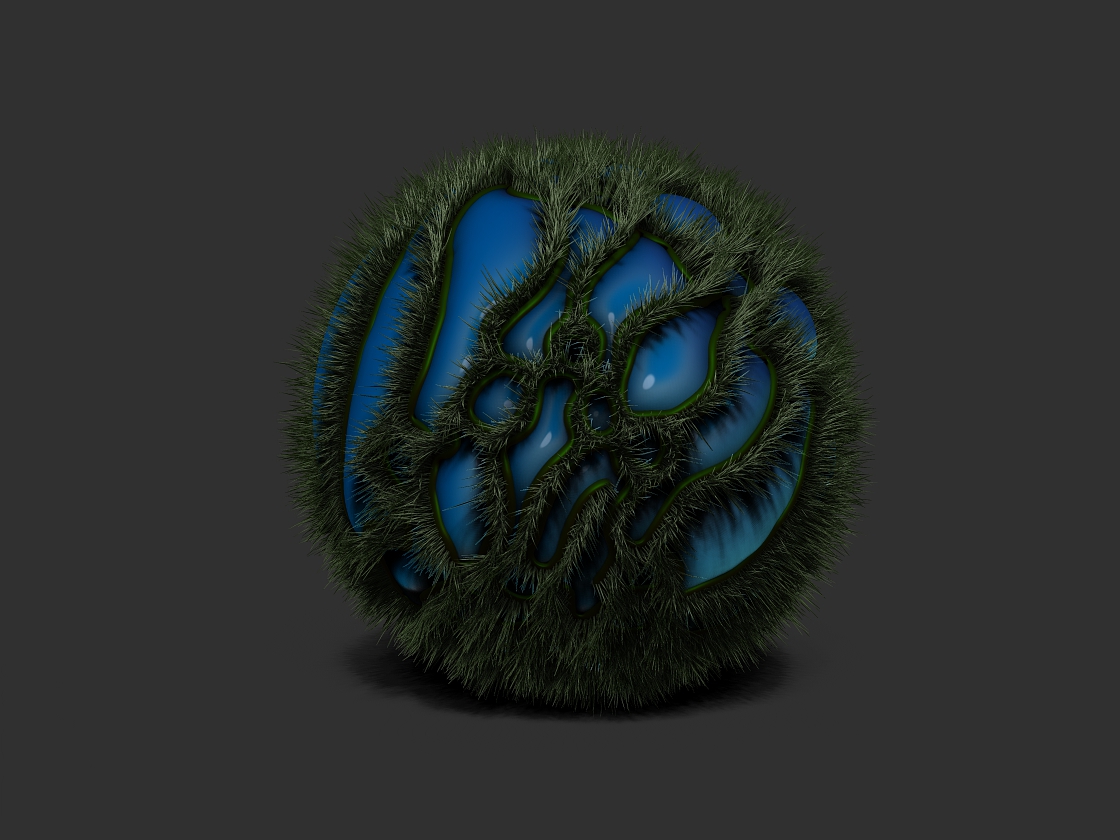
  6. Change Insert Brushes and do this again and again till you have a complex looking object.

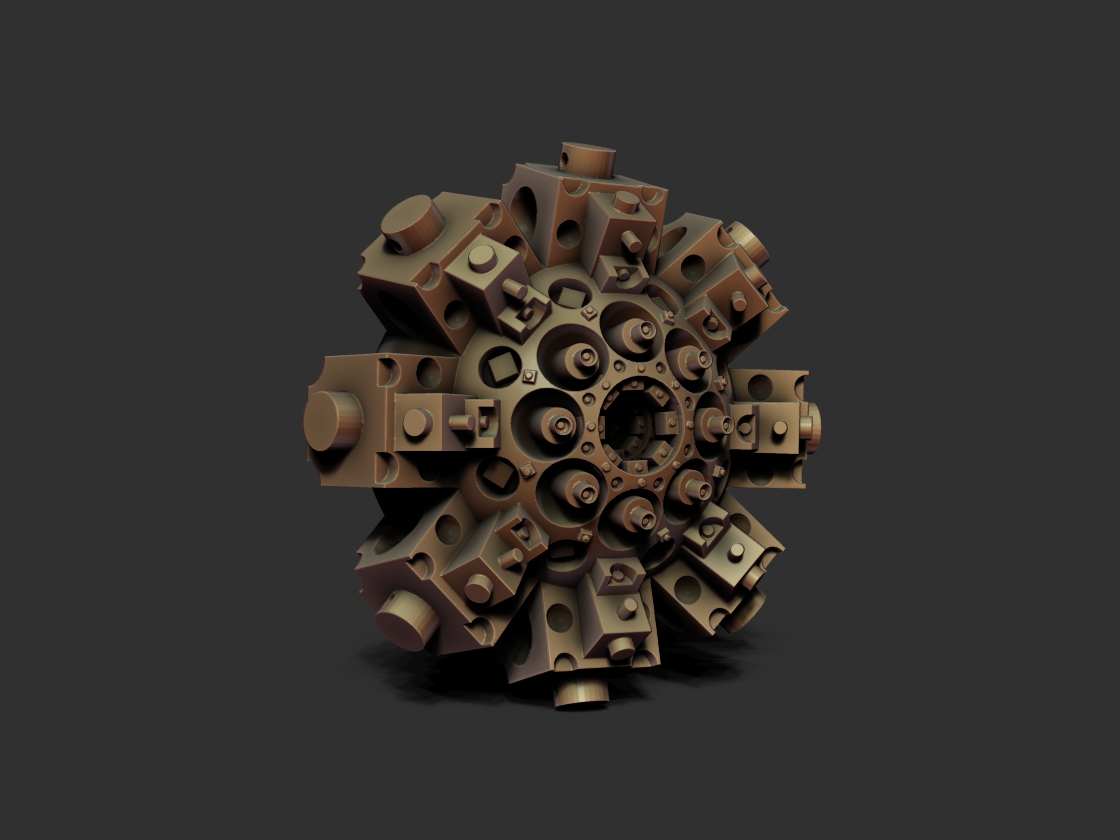
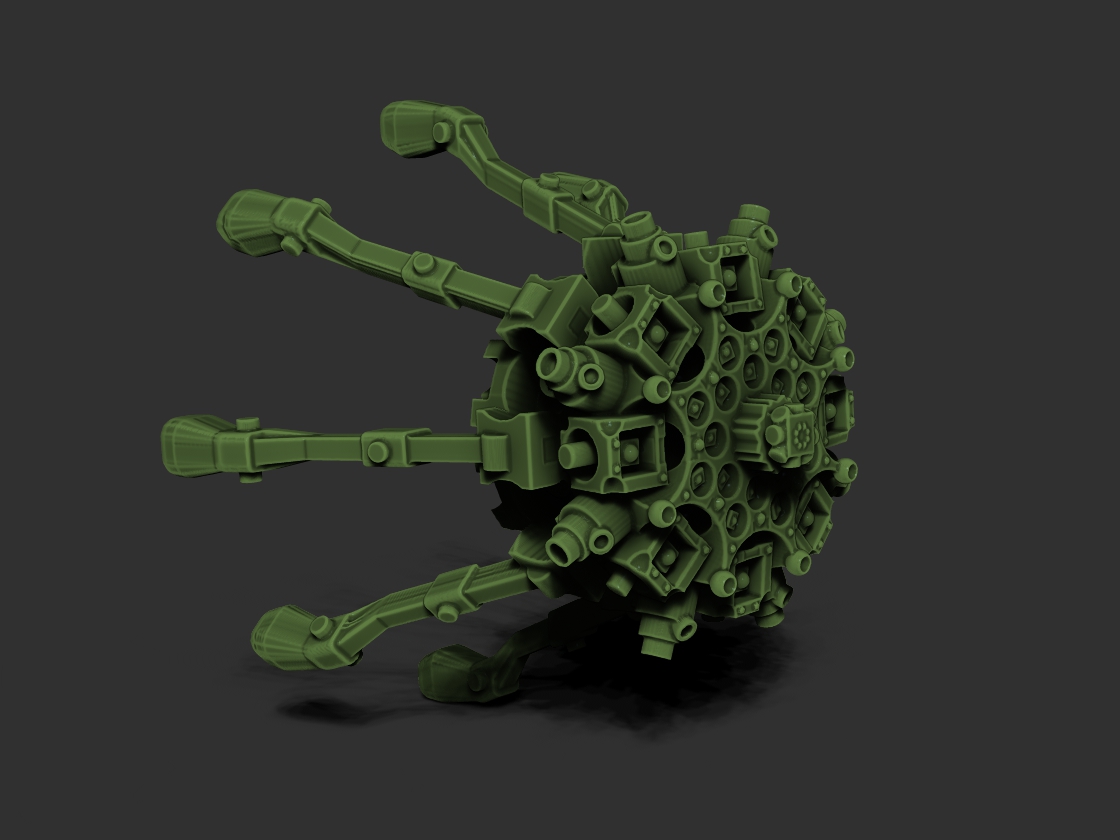
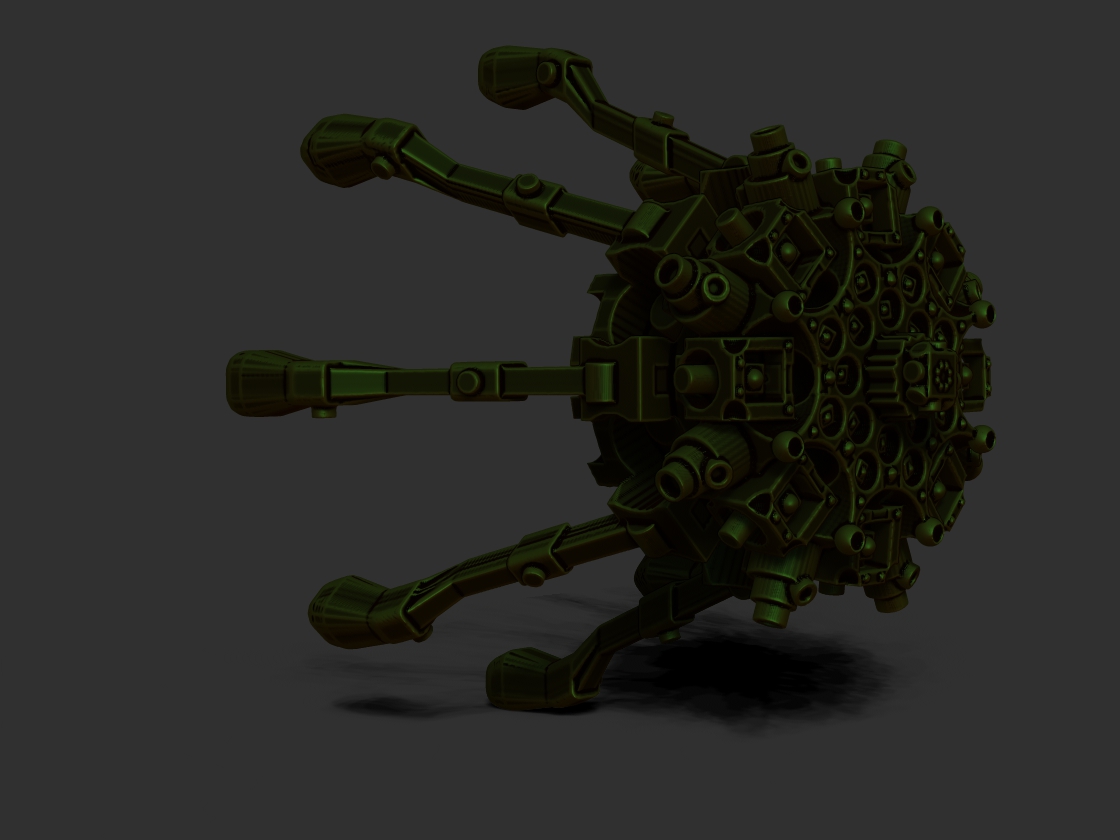
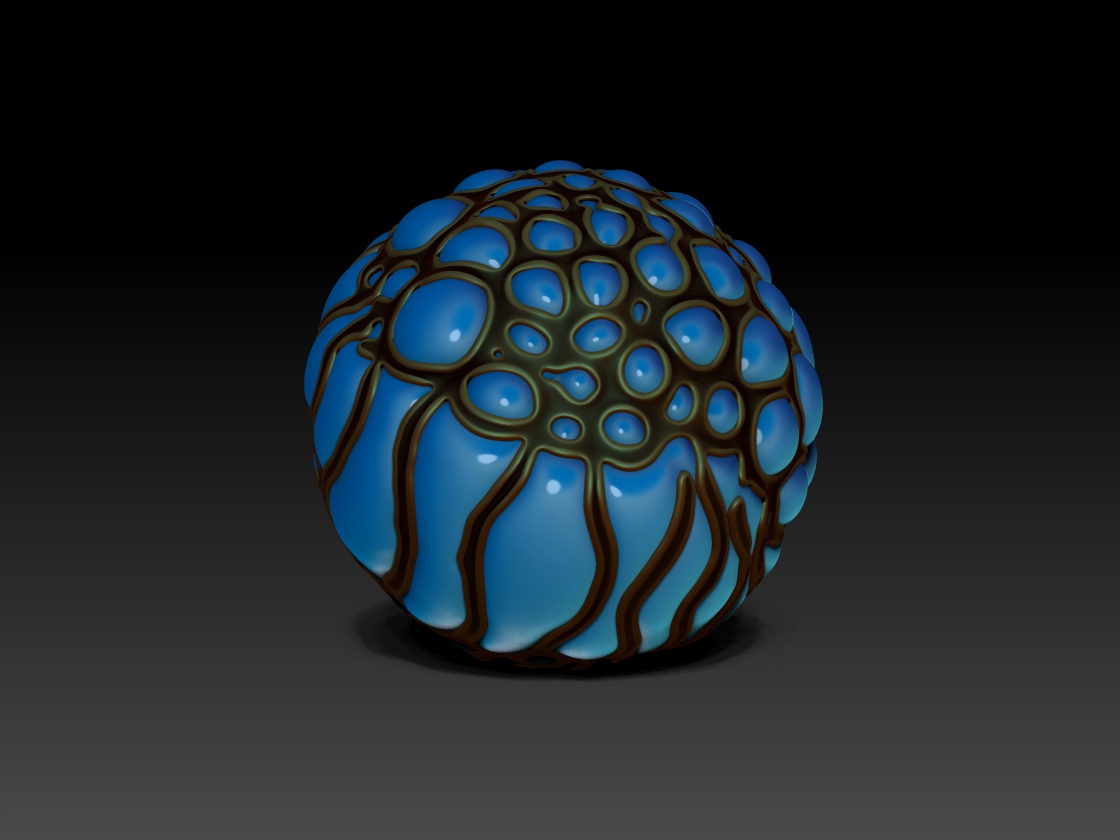
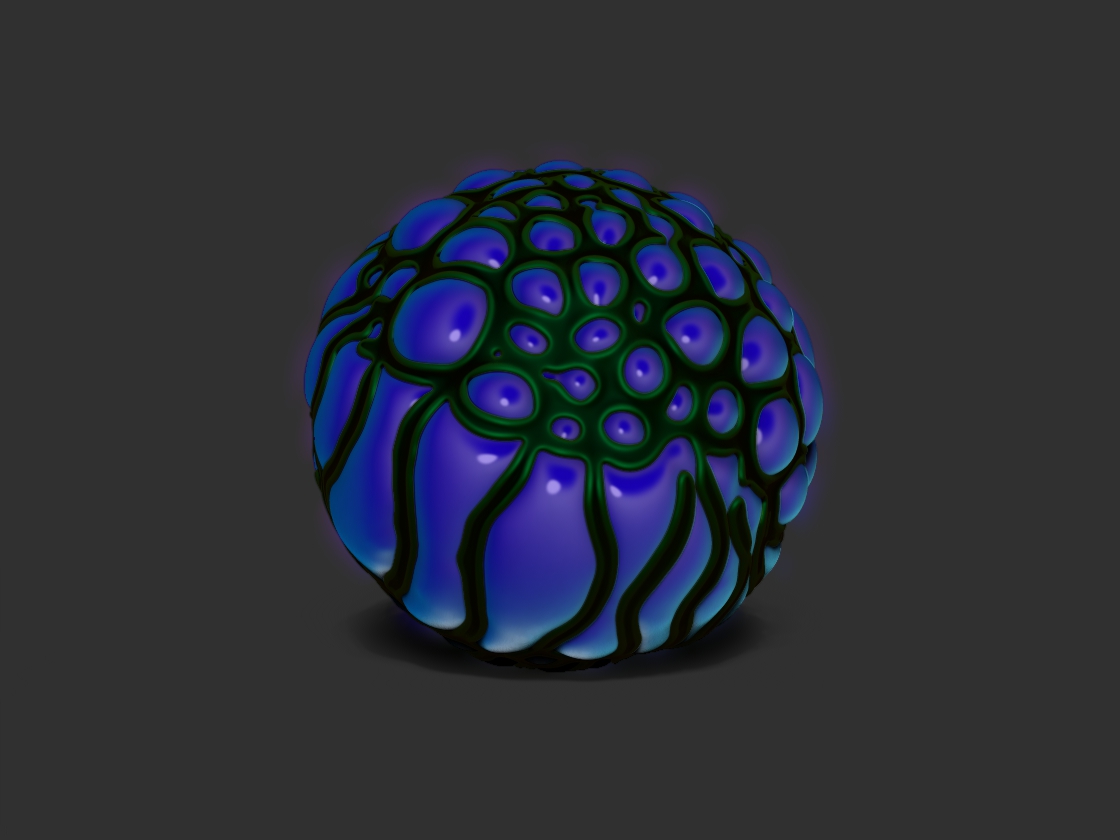
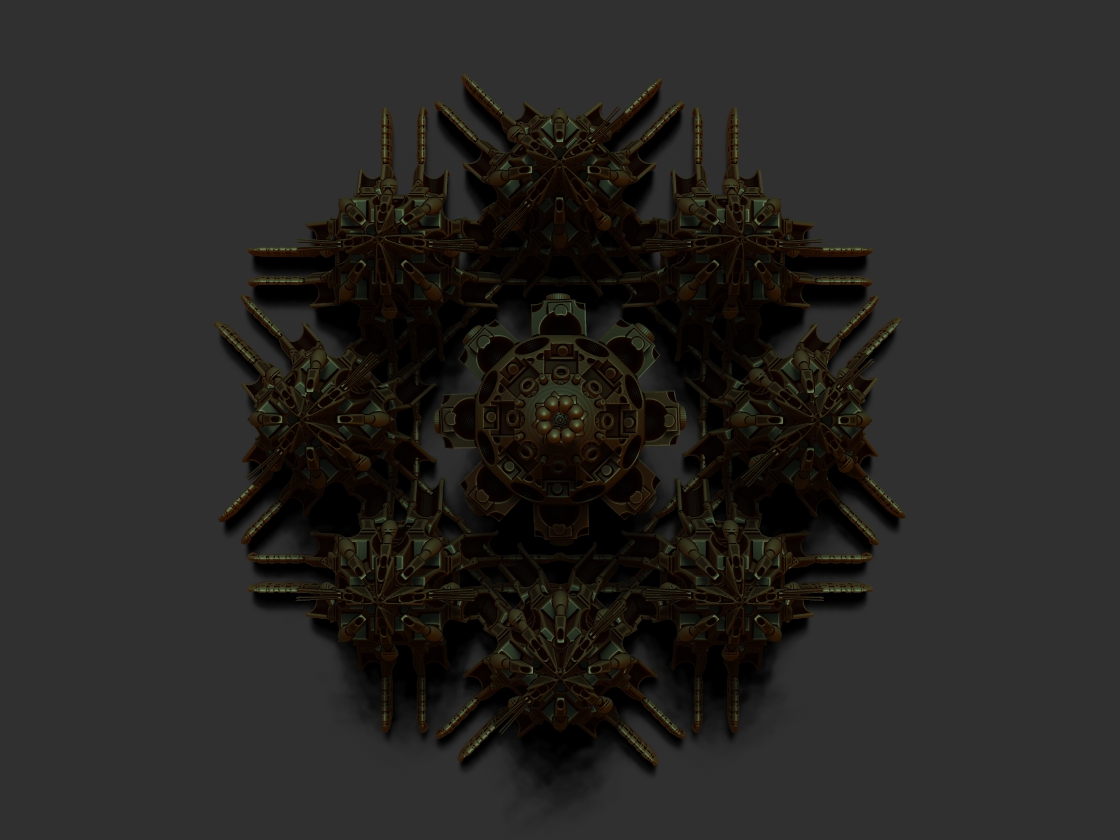
You should have something that looks a bit like this:

Figure-2.jpg

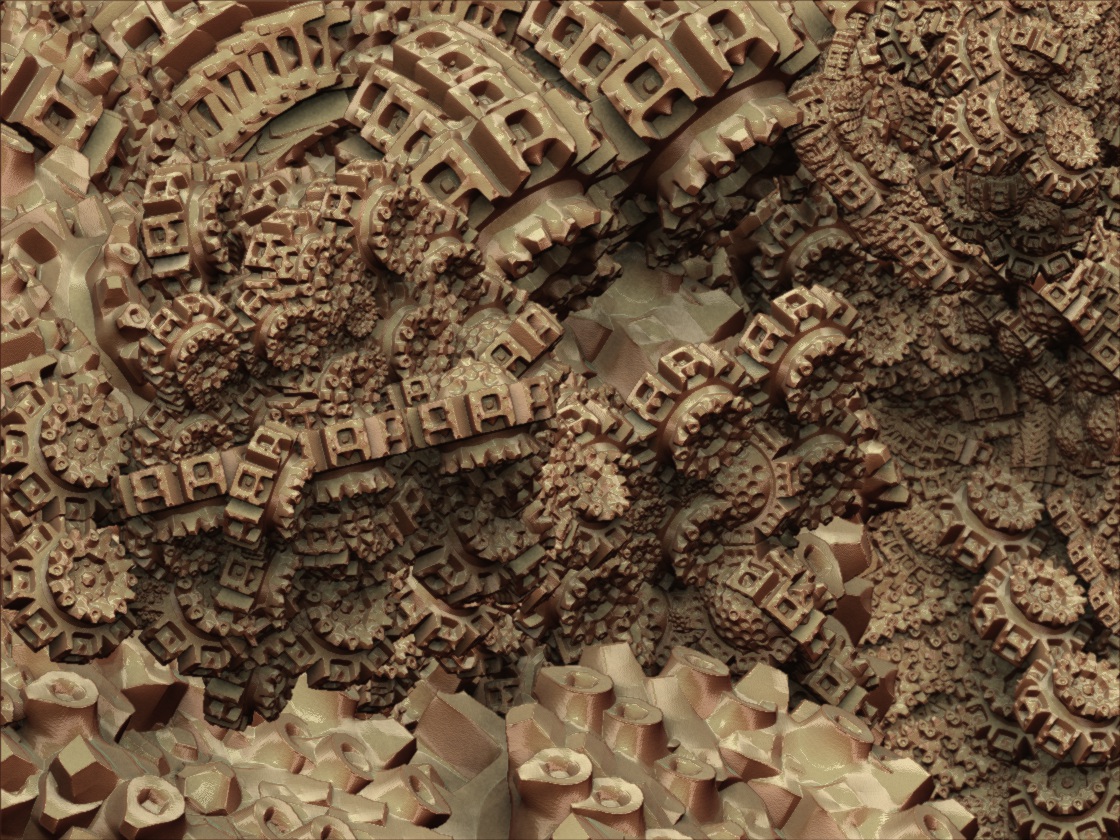
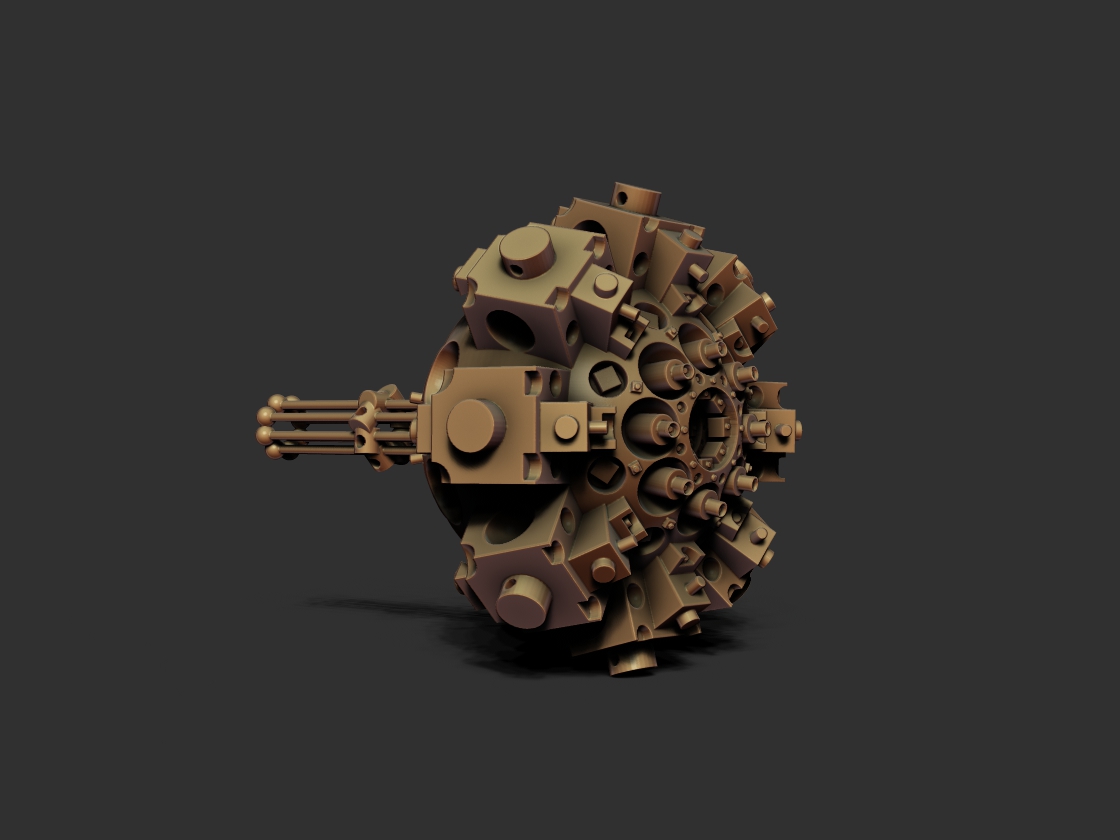
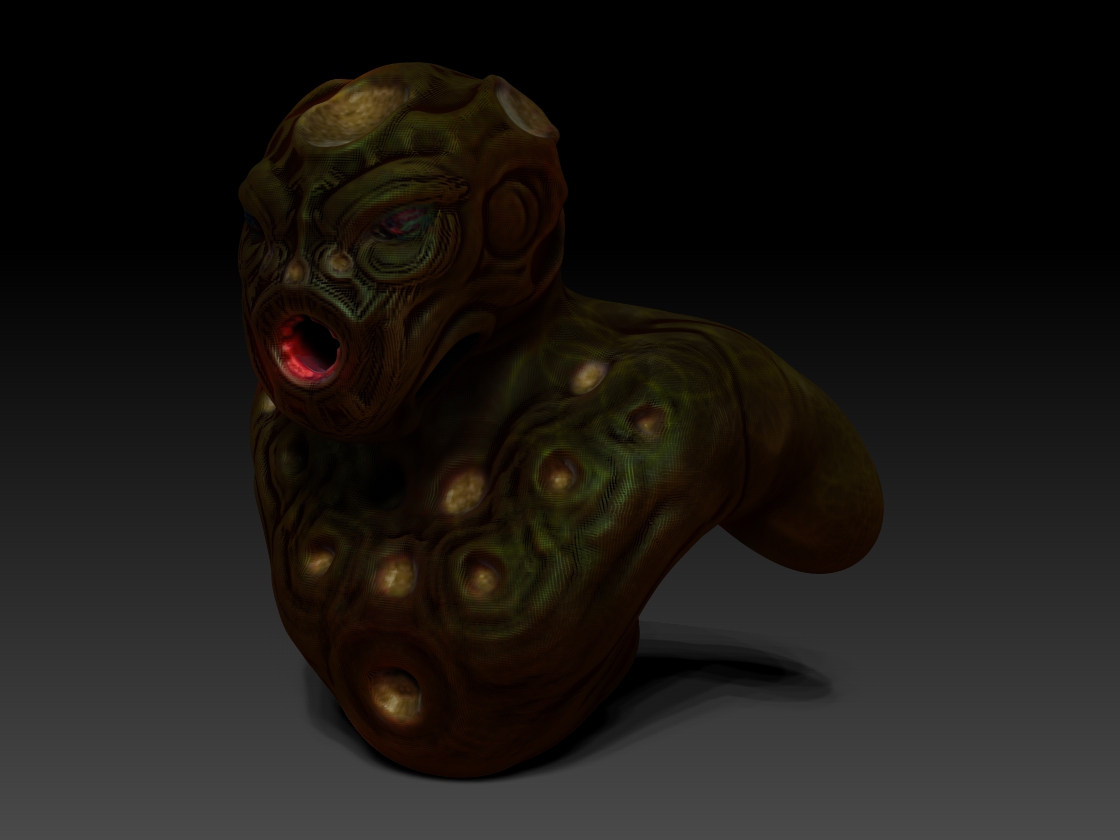
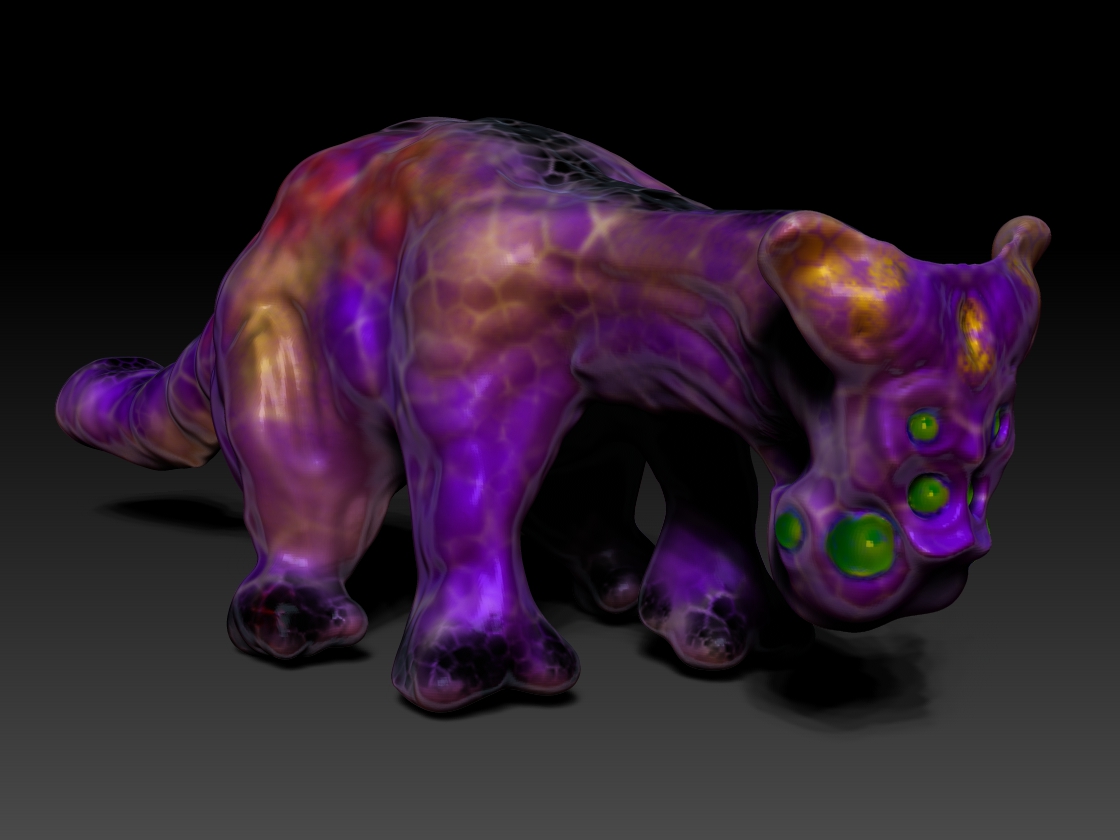
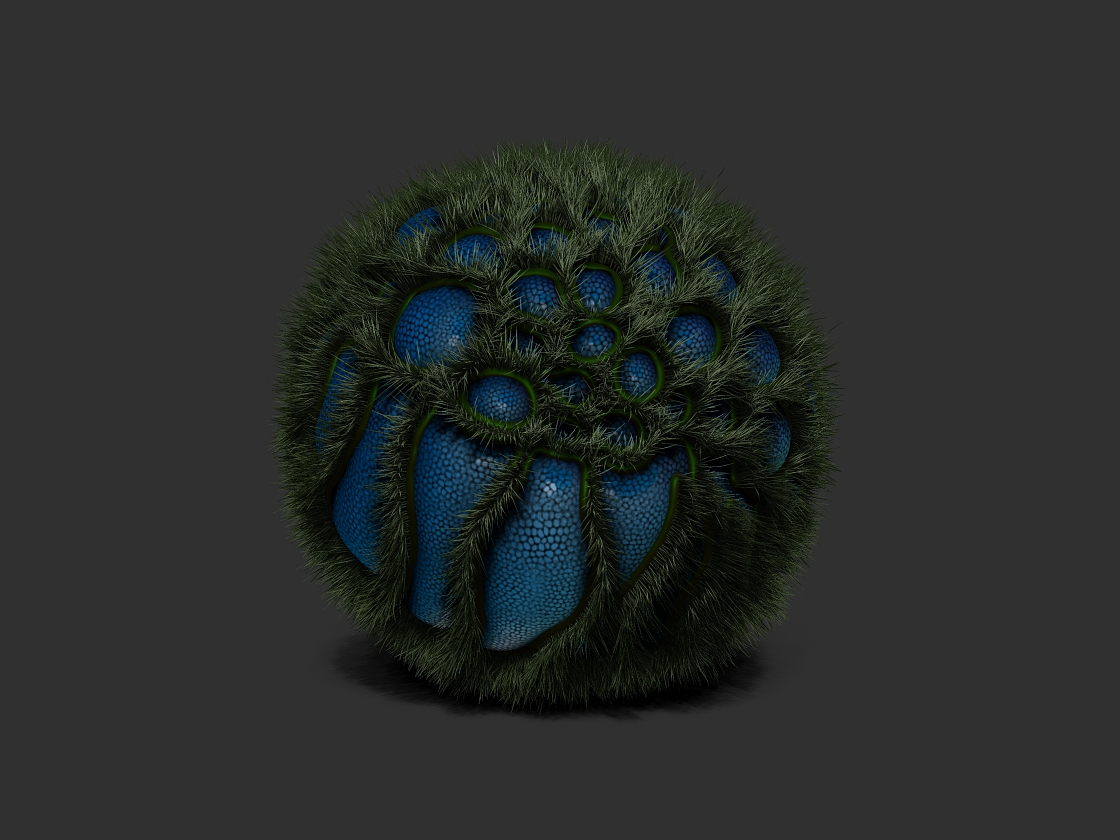
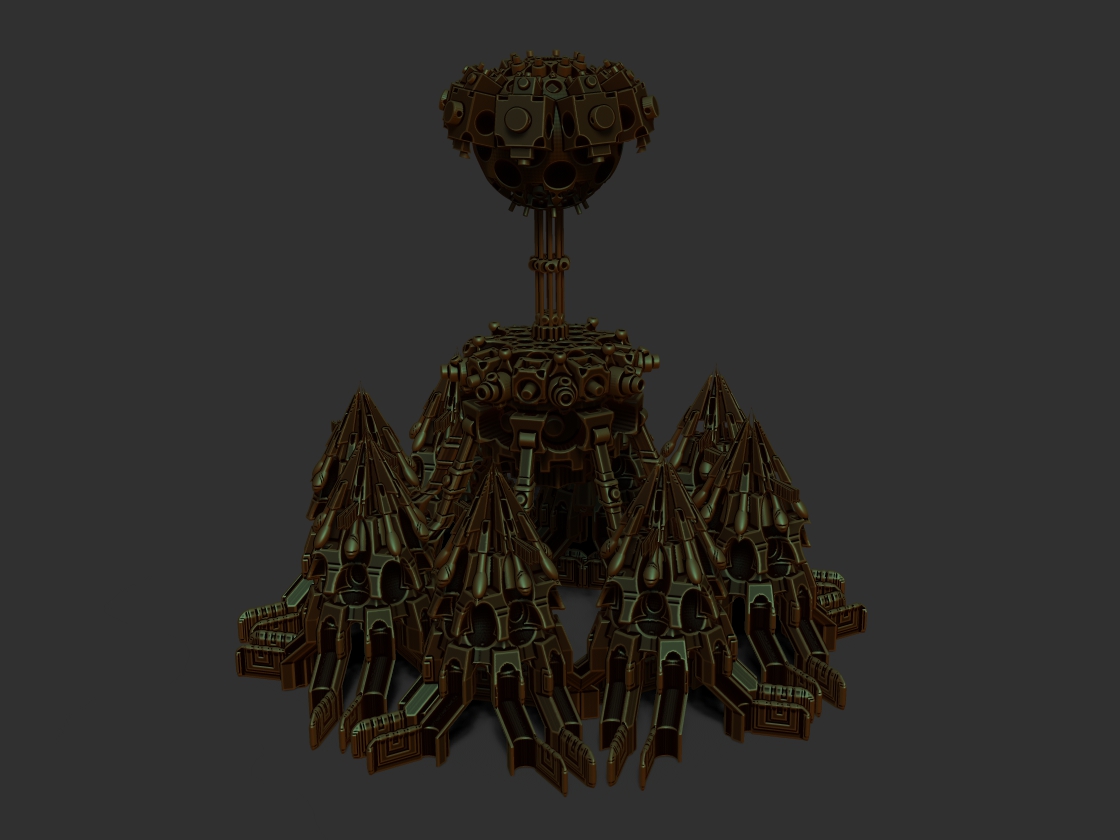
Or perhaps if you are adventurous; something wildly different and far more complex, Like the inside of your bellybutton but with less lint.

You can do the draw part multiple times with various brushes, so for example you can add a cube and place a sphere on top of it and then do the Remesh part again or even make dozens of inserts and then Remesh. I have not found much of a limit to this.
Mixing add and subtract seems flaky, I would steer away from that (as in: insert a sphere, then holding ALT remove a cube from it and THEN Remesh. This can cause problems.), sometimes it works however but I cant recommend it.

Basically the thing to do here is play around. Its fun.
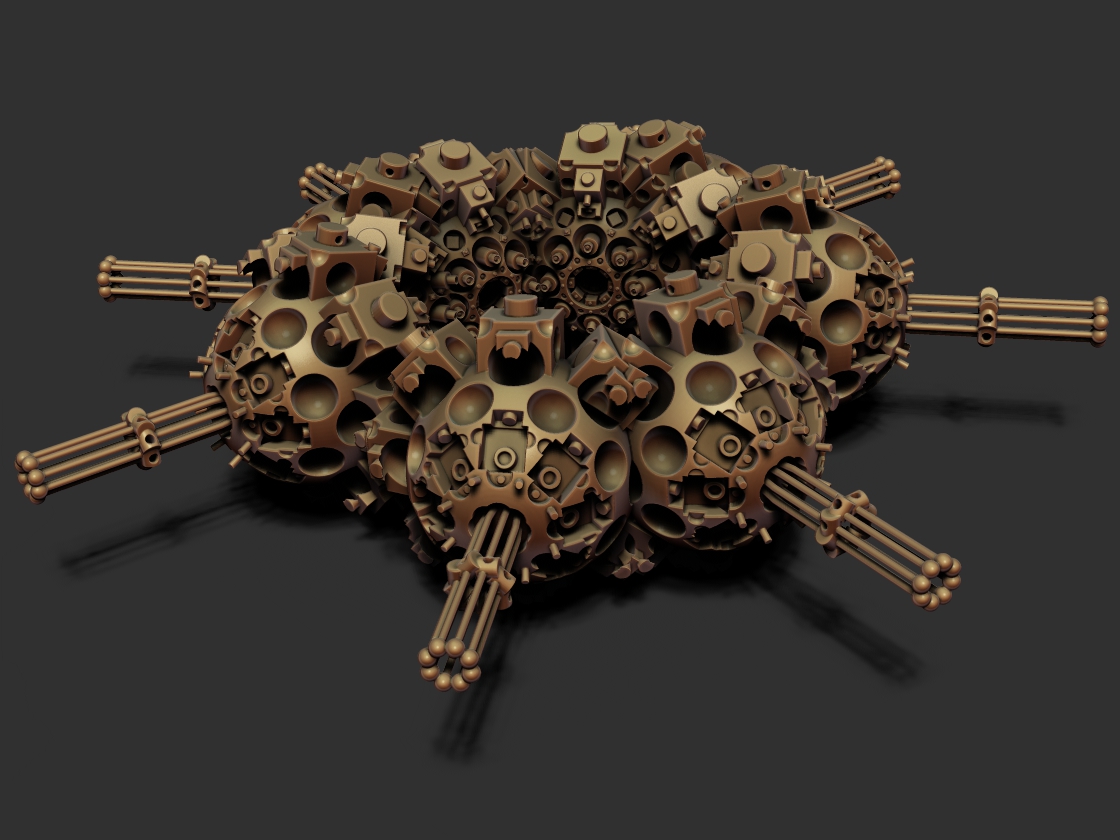
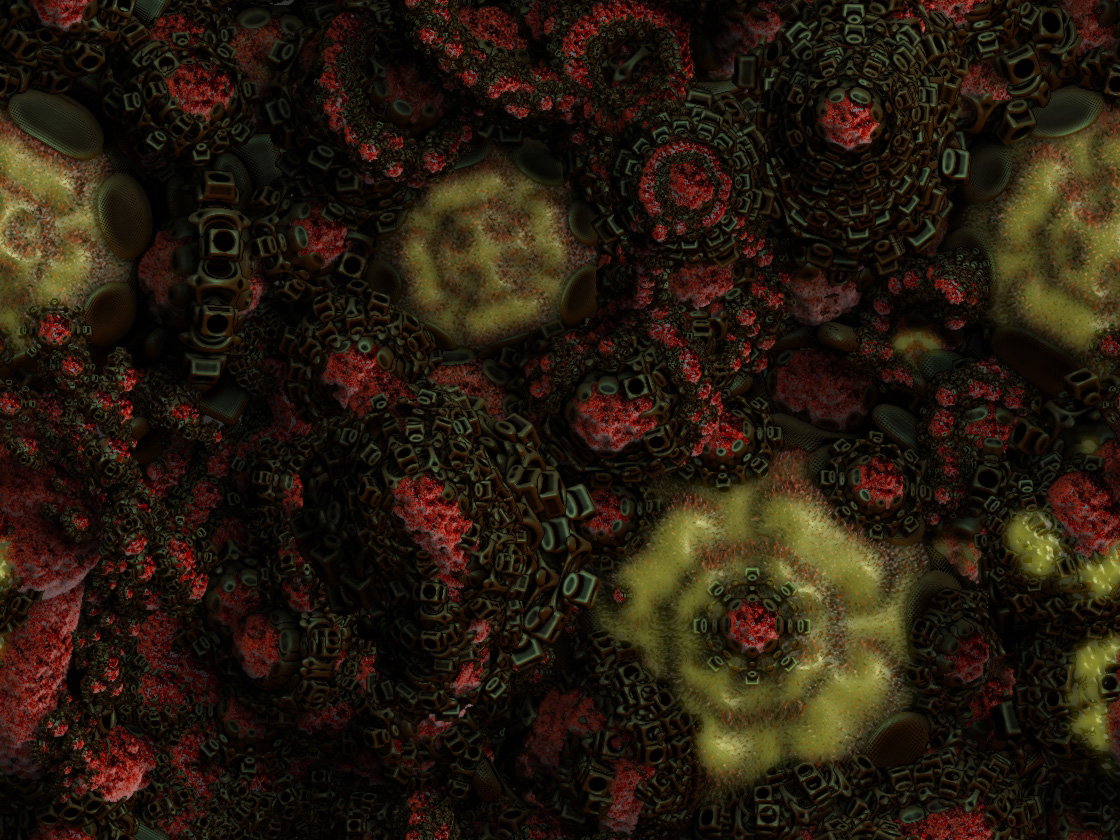
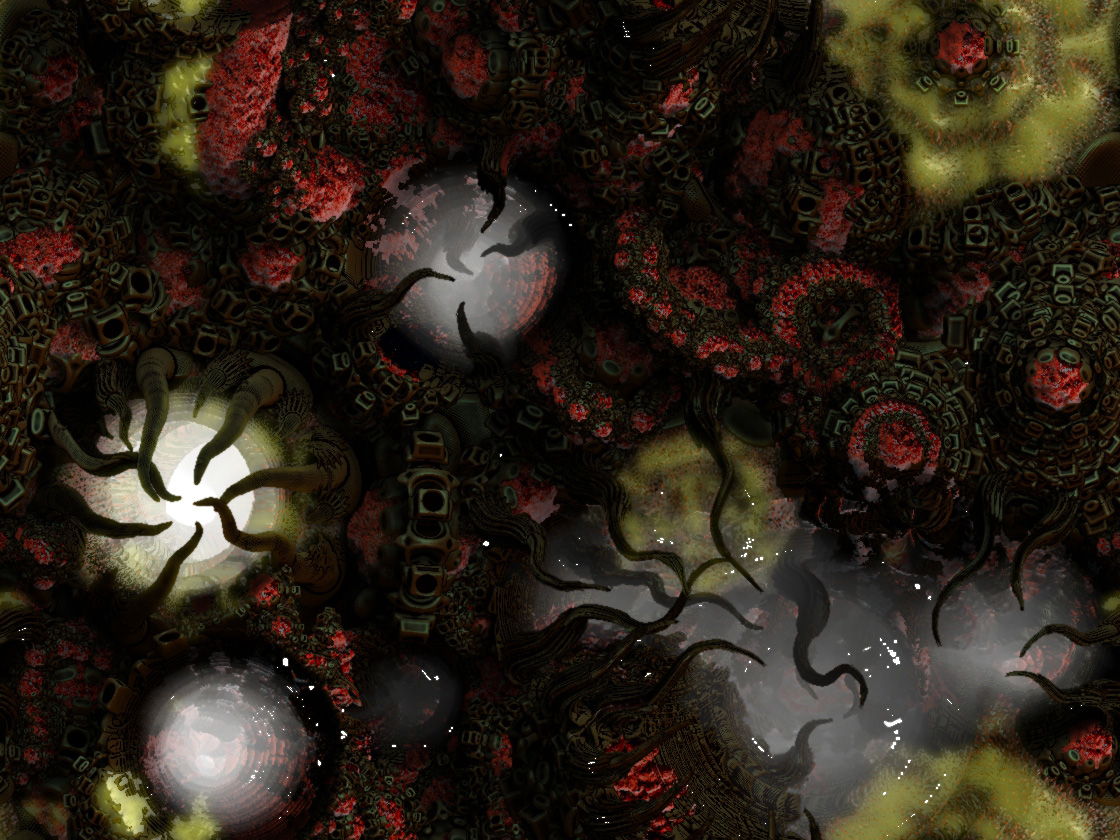
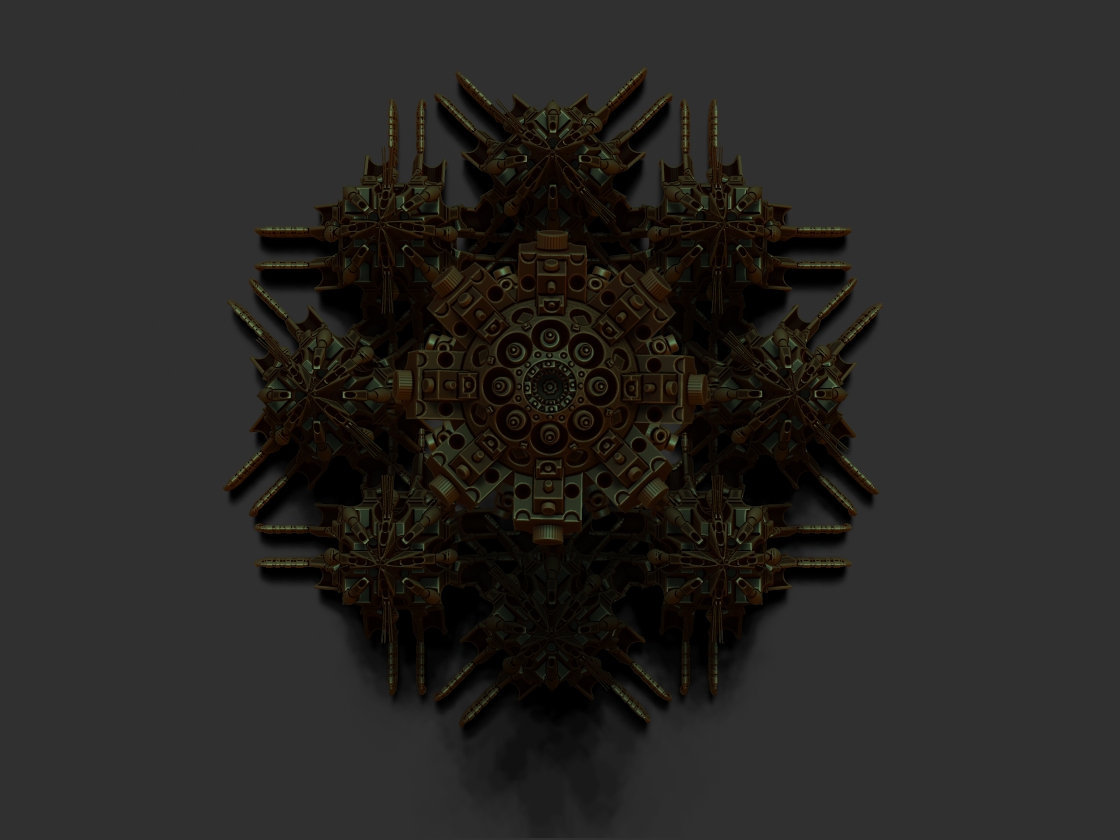
Start large and just keep zooming in and adding detail till either you have what you want or you can zoom in for what seems like forever to people who dont know whats going on.

The next part of this tutorial (I have to save this now or ZBC will “expire its token”) will have a quick video, it will describe using these things with the subtool pallet, deformation pallet and how to use Mirror and Weld to make GIGANTIC things that devour all of your ram and make your processor smell like molten thermal cement. Also how to grab chunks with the masking tools and make more of them, like adding legs to something that has too many legs already.
Sound good? I thought so!

And now I’m going to go have a drink.

Hi ZBER!!!
You’re right! I have been exceedingly busy!
You made this possible you know, in my opinion you should not have to work for a living, you already make other peoples lives easier and more fun with all the work you do here.

Thanks David!
Sorry I didn’t see this, I was typing up that last bit of stuff (the tutorial I promised, at least part one anyway)…
Coat of arms huh? hmmmmm
And now I’m going (as I think I mentioned) to have a drink!

Cheers!!!

Snap008 2012-02-12, 00_39.jpg

Really nice tutorial on the insert brushes…I have a different question though ( how did you make your colored globes )

Thanks Blue Ferret!!!
Those are easy and a lot of fun, they just take a bit of screwing about to get parts of them right.
Once again it looks like a lot of steps but its not as bad as it seems.
The idea for this came from something Tyrellcorp was doing with the CurveTube Brush.
The original stuff is here:
http://www.zbrushcentral.com/showthread.php?161537-ZBrush-4R2-ZClassroom-Movies-Updated-to-include-17-Movies/page16
And his finished (I think) result is here:
http://www.zbrushcentral.com/showthread.php?165210-CurveTube-Brush-Cont&p=930255#post930255
Thanks Tyrellcorp!!!

Basically you should be able to do that with any object but starting with a sphere seems sort of a good idea to start off…

So:

  • Make a Sphere3D.
  • PolyMesh3d it.
  • Then either bludgeon it with the Divide Button In the Geometry Pallet or turn it into DynaMesh.
  • Now draw masking (Hold down control and draw, smallish brush size) on it so that it forms shapes you like, thats where the other part comes from (The part that is not blue).

Something like this maybe:

Masking.jpg

Now:

  • Open the Deformation Pallet and play around a bit with Inflate Balloon, try around 20 to 35 (avoid ones like Size, they usually crash ZBrush).

You should wind up with something sort of like this:
InflateBaloon.jpg

  • When you have something you like (accounting for a new object filling in the grooves somewhat) open the Subtool Pallet.
  • Find the Extract Button, Next to it you will see three slider thingys set Thick to 0.0013 (yah I know...).
  • Leave E Smt and S Smt (smoothers) alone, in theory they should be peachy.
  • Hit the Extract button.
  • If you like how it looks (and it will change soon and be smoother and thicker) hit the Accept Button at the bottom next to Extract.
  • You should now have a new SubTool. (You can do this a bunch of times with different settings later if its not coming out how you like.)
  • Select your new Subtool in (obviously) the Subtool Pallet.
  • Hit GroupLoops in the Geometry Pallet. This button has changed, its not as awesome as it used to be and I dont know why. Its still good though. (it also gets rid of unneeded masking on the subtool)
  • Now in the Deformation Pallet screw around with Inflate somewhere between 20 and 40 giver or take.
  • You should see some nasty looking artifacts, dont worry about those.
  • In the Deformation Pallet push the Relax Slider all the way over to the right (100).
  • Poof! No more nasty artifacts.

Before Relax and WITH nasty artifacts:
BeforeRelax.jpg

After Relax with out nasty artifacts:
AfterRelax.jpg

Now its just a matter of giving them materials.
I used two that I made my self a while ago, they are actually uploaded someplace in this thread but I forget where. (I will find them if anyone wants and put a link here, just yell at me ok?)
If you look you will notice that your original object still has its mask, this is good, keep it but if it gets ugly use the Masking Pallet to hide it by turning off View Mask. This allows you to keep screwing about like I did with the FiberMesh stuff.
You can also use it for painting like with the one with all the dots or do more extractions and even invert your mask and make extractions from the bubbly parts of the original Sphere.

And here it is:

Tada.jpg

Sorry about the image sizes changing like that, I am using MS Paint for cropping, its still the quickest thing going and I haven’t got photoshop.

I hope this stuff is helpful!

Cheers! And thanks again Blue Ferret for the idea of making this!
Mealea

PS: This is not healthy:

PeachyEggBristlePod.jpg