Moni-Poroni, undoz, GregStrangis, Lil’sister, joebount,
Etcher, eof3D, Remib, euge, cherub_rock, KillahPriest,
thanks a lot guys!!
a few people asked for a tutorial on my lighting setup. it is pretty easy and has good results
so here is a final render with editing and some maya screenshots.
ill try to explain the best i can.
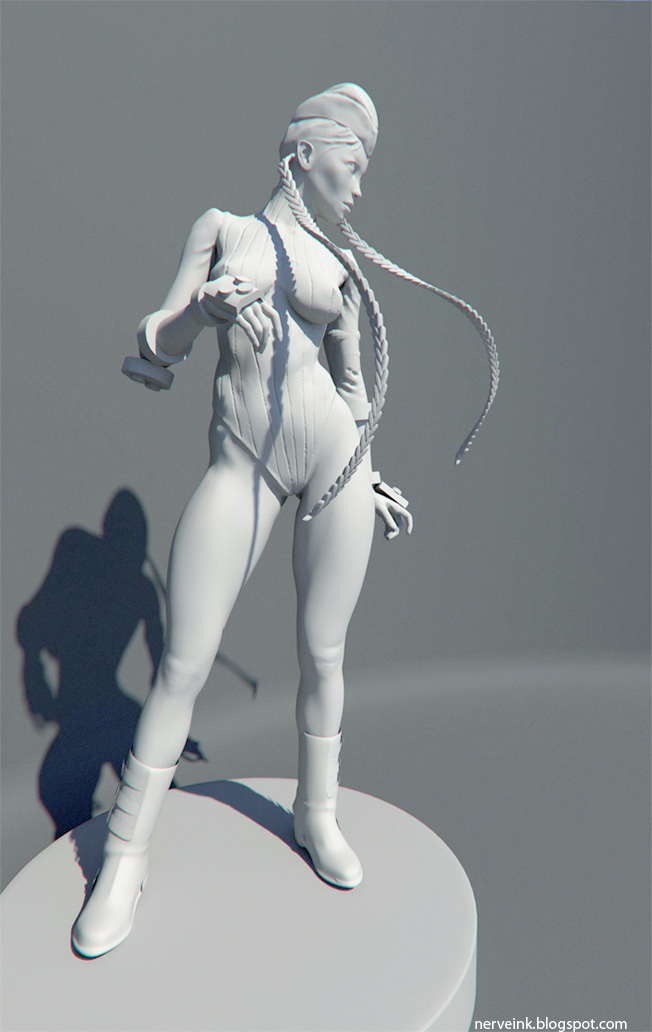
[attach=183901]CAMMY-copy.jpg[/attach]
here is the final image after editing in photoshop cs
[attach=183902]Untitled-3.jpg[/attach]
after i set up my scene i apply a lambert shader to the model and the base. the back ground is a cylinder wich also has a lambert shader applied to it and has an edgeloop at the bottom. the cylinder also has been smoothed. the top has been cut and half of the cylinder has been cut to let the light come thru.
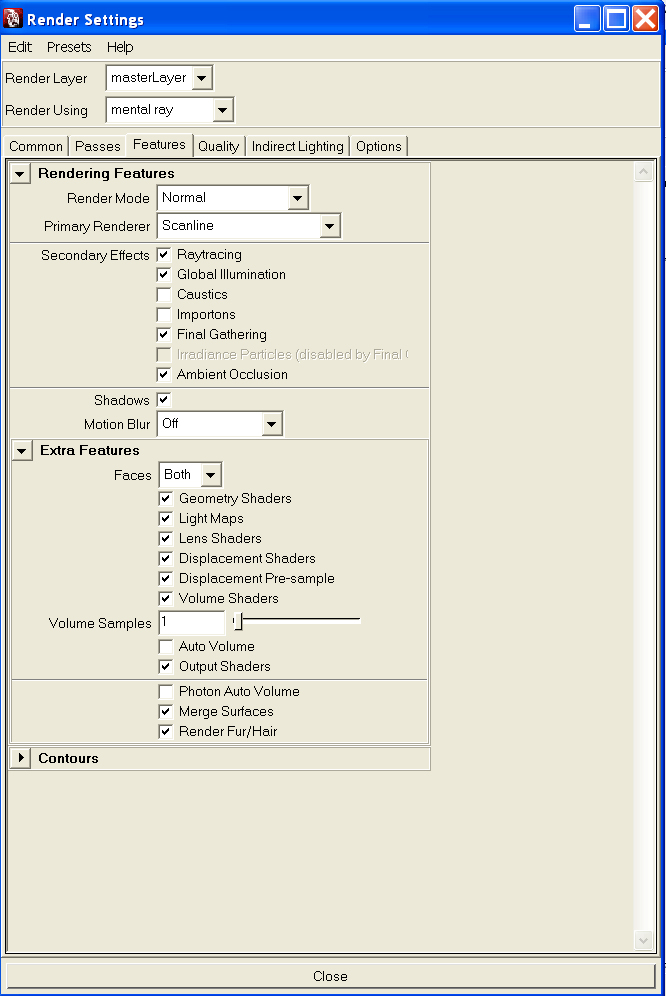
so after all that stuff is set i go render settings and change the renderer to mental ray by going to “render using” and selecting mental ray. if you dont have it you need to go to window/ settings/prefences and then plug-in manager. you will see it says mayatomr. just click load and auto load.
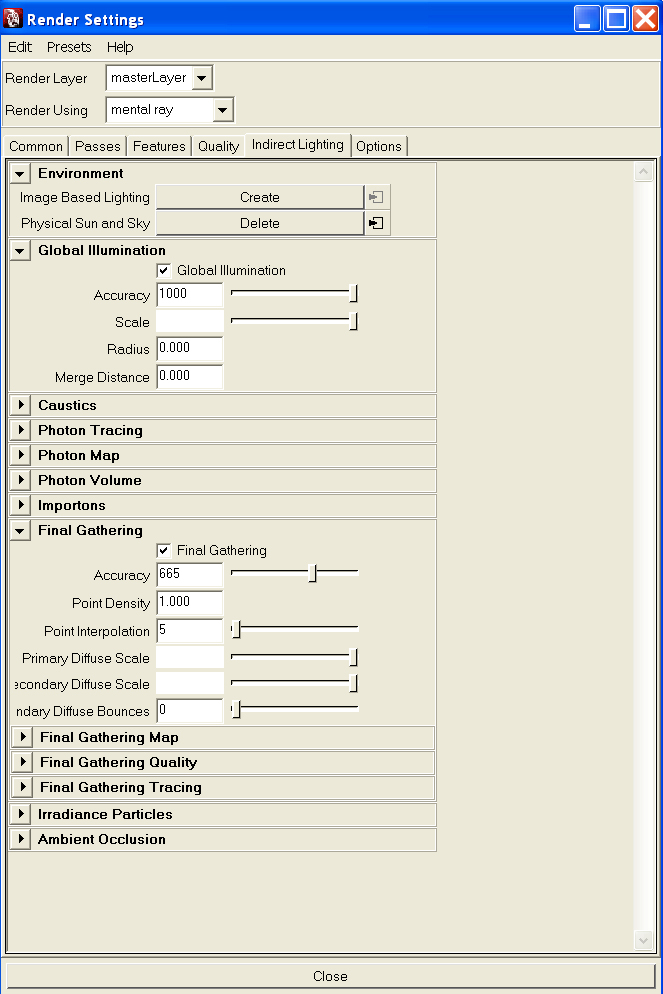
so when you are done with that you need to go to indirect lighting and click “create” next to the physical sun and sky option. you will know it works if you see delete next to physical sun and sky.
once the physical sun is activated click on the global illumination option and set the accuracy to your liking. I also activate final gather and keep the accuracy not to high.
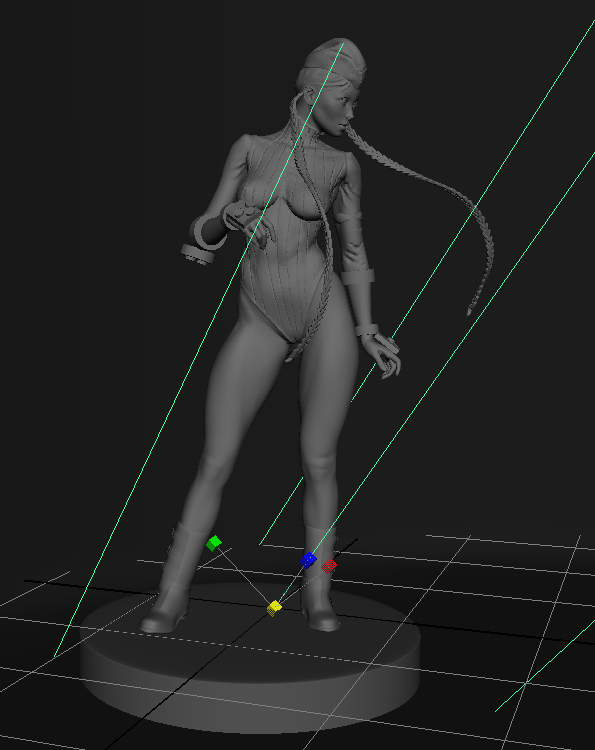
the sun ray icon will show in the middle of the grid and it is pretty small. i dont think it will affect anything if you scale the sun ray icon in the view port but it does make a big difference in what direction the sun is pointing.
[attach=183903]Untitled-2.jpg[/attach]
here is a screen grab of the light setup. only one light was used wich was activated by selecting the physical sun and sky option within the render settings. the direction of the light is critical in getting good results. if you place it at a wrong angle the light will not show the details that good.
i always make sure that the light is pointing down towards the front of the model to get a good mid day lighting. you can do some experiments by moving the light at different angles to get different results.
the most important thing to keep in mind here is that i used the lambert shader and created the light by selecting physical sun and sky option.
then adjust the direction of the light accordingly.
[attach=183904]Untitled-4.jpg[/attach]
here are my settings in this tab.
in the common tab i made the image about 4000 pixels wide and 8500 pixels hi.
also made the resolution at about 300 dpi.
i hope this helps. if you guys have any questions feel free to ask.
Attachments


 Keep up your work man, much inspiring
 ). The Hellknight sculpt is great!