Man, I love the volumes on this. The quality of your work top notch.
You have a neat rendering and modeling setup there.
I like your sketchbook a lot, nerveink! You have a lot of great models!

Moni-Poroni, undoz, GregStrangis, Lil’sister, joebount,
Etcher, eof3D, Remib, euge, cherub_rock, KillahPriest,
thanks a lot guys!!
a few people asked for a tutorial on my lighting setup. it is pretty easy and has good results
so here is a final render with editing and some maya screenshots.
ill try to explain the best i can.
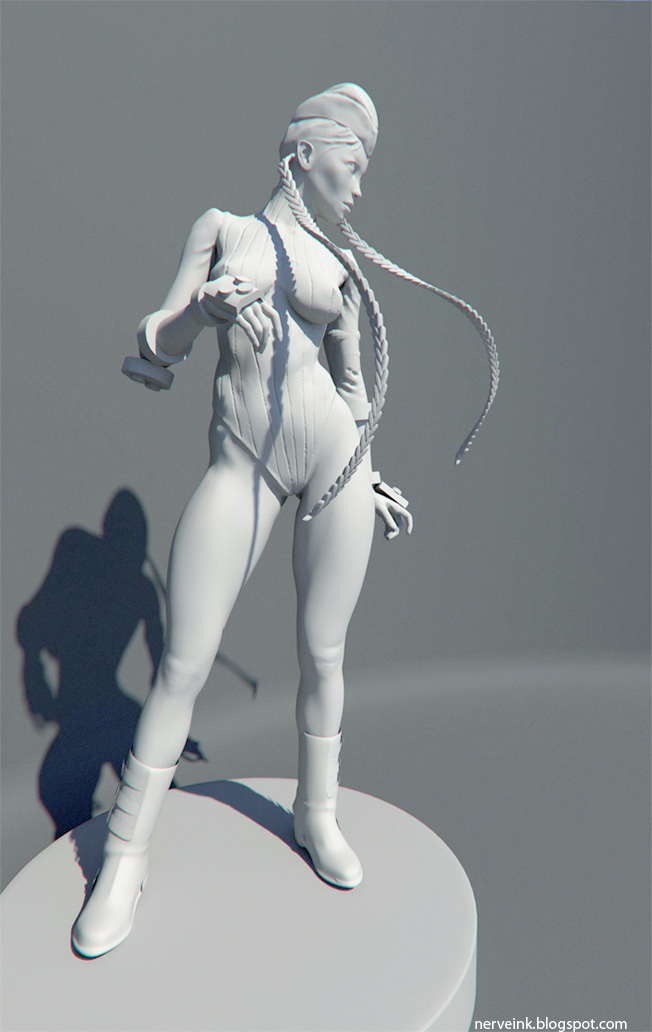
[attach=183901]CAMMY-copy.jpg[/attach]
here is the final image after editing in photoshop cs
[attach=183902]Untitled-3.jpg[/attach]
after i set up my scene i apply a lambert shader to the model and the base. the back ground is a cylinder wich also has a lambert shader applied to it and has an edgeloop at the bottom. the cylinder also has been smoothed. the top has been cut and half of the cylinder has been cut to let the light come thru.
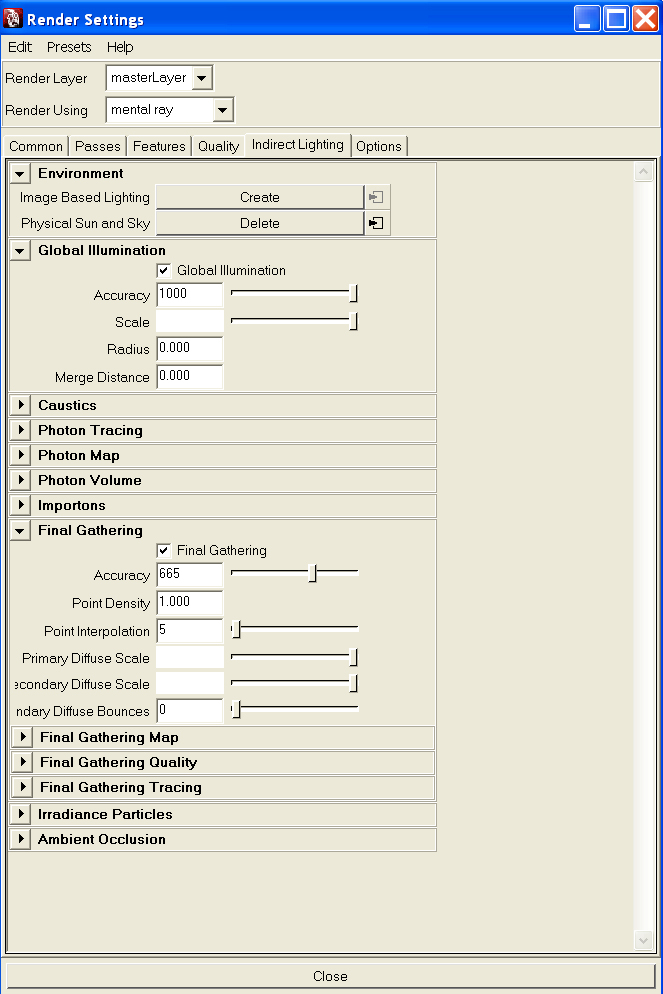
so after all that stuff is set i go render settings and change the renderer to mental ray by going to “render using” and selecting mental ray. if you dont have it you need to go to window/ settings/prefences and then plug-in manager. you will see it says mayatomr. just click load and auto load.
so when you are done with that you need to go to indirect lighting and click “create” next to the physical sun and sky option. you will know it works if you see delete next to physical sun and sky.
once the physical sun is activated click on the global illumination option and set the accuracy to your liking. I also activate final gather and keep the accuracy not to high.
the sun ray icon will show in the middle of the grid and it is pretty small. i dont think it will affect anything if you scale the sun ray icon in the view port but it does make a big difference in what direction the sun is pointing.
[attach=183903]Untitled-2.jpg[/attach]
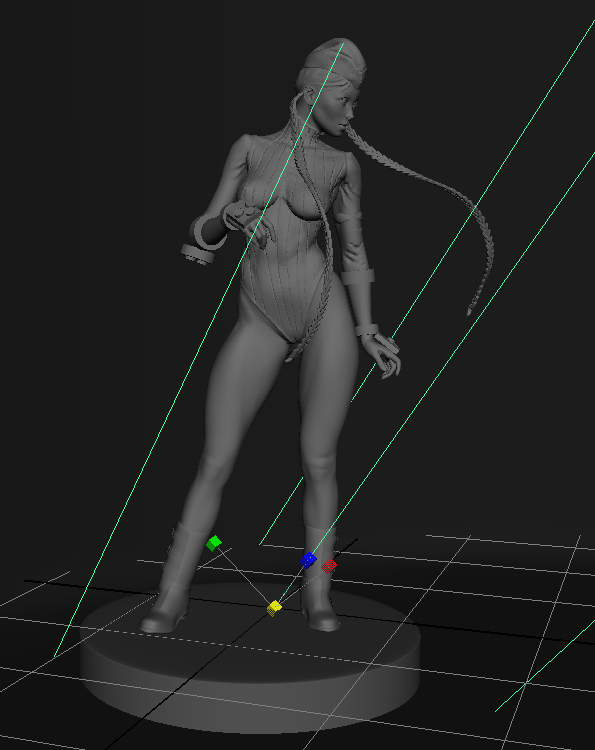
here is a screen grab of the light setup. only one light was used wich was activated by selecting the physical sun and sky option within the render settings. the direction of the light is critical in getting good results. if you place it at a wrong angle the light will not show the details that good.
i always make sure that the light is pointing down towards the front of the model to get a good mid day lighting. you can do some experiments by moving the light at different angles to get different results.
the most important thing to keep in mind here is that i used the lambert shader and created the light by selecting physical sun and sky option.
then adjust the direction of the light accordingly.
[attach=183904]Untitled-4.jpg[/attach]
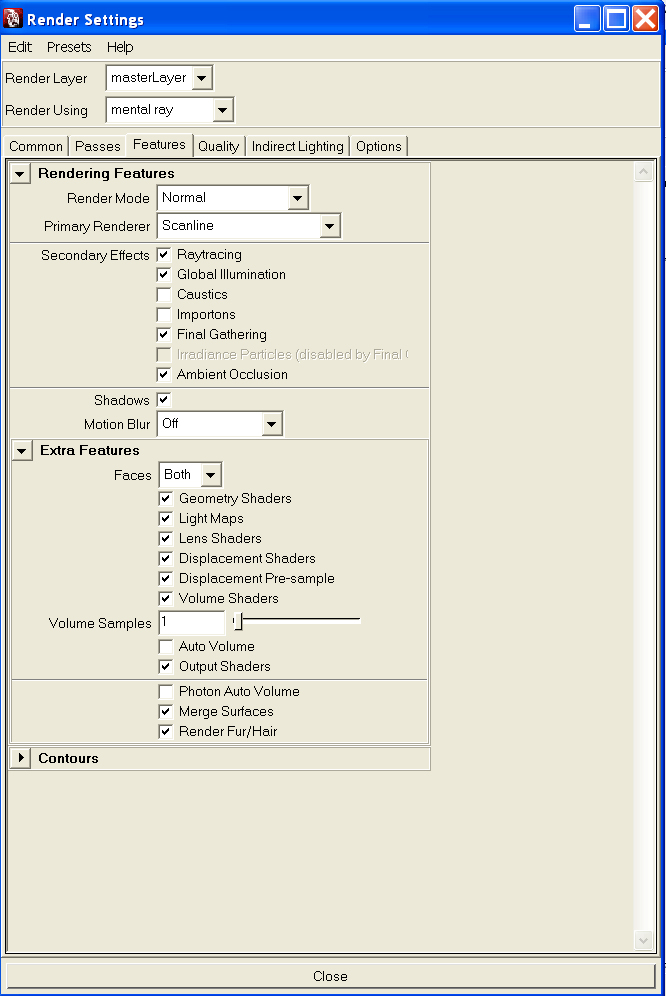
here are my settings in this tab.
in the common tab i made the image about 4000 pixels wide and 8500 pixels hi.
also made the resolution at about 300 dpi.
i hope this helps. if you guys have any questions feel free to ask.
Attachments
thanks for sharing mate!
Thanks a lot for sharing your li8ing setup
I like this set up but what do you do if you want to tone down the over brightness if you are getting blown out renders?
Thanks for the rendering tips 
After messing around with it a bunch, I found out how to adjust the lighting.
After creating and positioning the physical sun, go into your hypershade menu. (Windows > Rendering Editors > Hypershade). Then go into the utilities tab at the top and select the mia_exposure_simple node. These attributes effect the lighting from the sun.
pedestal
offset for the entire range (darken or lighten the absolute black)
gain
multiplication factor.
knee
value above which the range should be compressed
compression
compression ratio to squash the range that is compressed
gamma
gamma correction
Start of with the gain setting. If your render is to dark, increase its value. If it’s too bright, lower the gain. You should aim to have the dark- and mid-tones rendered properly. You highlights may still be overexposed.
The increase the Compression setting to compress the highlights within the visible color range. Settings of up to 50 may be necessary. Increase the value in steps of 5-10 and make test renderings.
When very high compression settings are needed (>30), you may consider lowering the Knee value a bit. Decrease in steps of 0.05. Don’t go below 0.5.
Finally you can use the Gamma to tone down your image (1.8) or make it more vivid (2.2 or even 2.4).
Also I just found this to clarify further.
The operation of this tone mapper is very simple. It does not refer to real physical luminance values in any way. It simply takes the high dynamic range color and perform these operations in order:
- pedestal is added to the color.
- The color components are then multiplied with gain.
- The resulting colors are checked if they are above the knee value.
- If they are, they are “squashed” by the compression ratio compression
- Finally, gamma correction with gamma is performed.
That’s the theory. What is the practical use of these parameters?
Changing pedestal equates to tweaking the “black level”. A positive value will add some light so even the blackest black will become slightly gray. A negative value will subtract some light and allows “crushing the blacks” for a more contrasty artistic effect.
gain is the “brightness knob”. This is the main point where the high dynamic range values are converted to low dynamic range values. For example: if one knows the approximate range of color intensities goes between 0 and 10, this value should then be approximately 0.1 to get this range into the desired 0-1 range.
However, the whole point of tone mapping is not to blindly linearly scale the range down. Simply setting it to 0.1 most likely yields a dark and boring image. A much more likely value is 0.15 or even 0.2. But a value of 0.2 will map our 0-to-10 range to 0 to 2… what to do about that stuff above 1.0?
That’s where the compression comes in. The knee level is the point where the over-brights begin to be “squashed”. Since this is applied after the gain, it should be in the range of 0.0 to 1.0. A good useful range is 0.5 to 0.75.
Assume we set it to 0.75. This means any color that (after having pedestal added and multiplied by gain) that comes out above 0.75 will be “compressed”. If compression is 0.0 there is no compression. At a compression value of 5.0 the squashing is fairly strong.
Finally, the resulting “squashed” color is gamma-corrected for the output device (computer screen etc.)
Hope that helps.
your welcome guys. glad i was able to help.
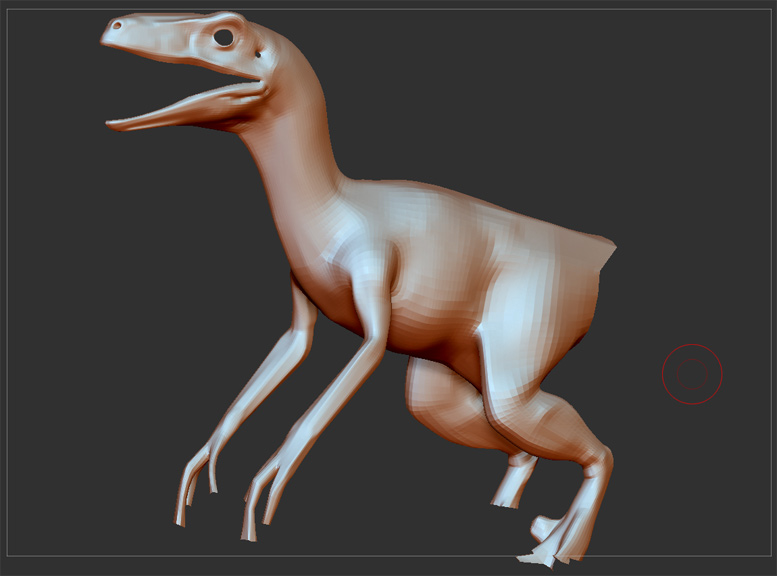
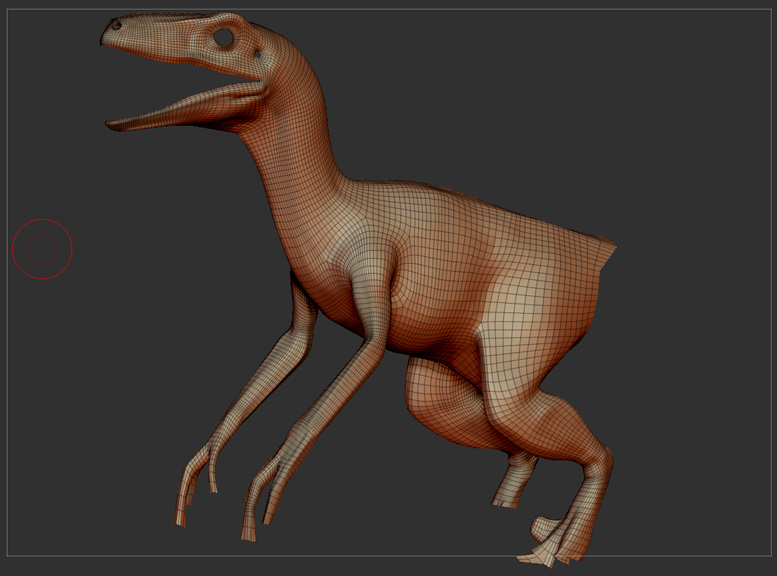
i started working on this project a few weeks back but i have been going back and forth between real life and other projects. this model i am showing is special because it is made entirely of quads. I do not have any formal training other than gnomon vids and youtube videos so for me this is really cool that i was able to make this model with relativley decent poly flow.
my goal is to make a really good base for posing, sculpting and rendering.
i also plan on submitting this to the turn table gallery once it is finished.
right now all i need to do is finish the hands, feet and tail. also the mouth and thats pretty much it for modeling.im so glad that uv master came out cause i would have a hell of a time unwraping this.
lemme know what you guys think
Attachments
wht a skech buk man…uff!!! …too mch inspiration…
great stuff
I kept soldier in my folder reference
A great sketchbook you have, very inspiring. Thanks for sharing.
hello freinds!!! Its been a long time without post!!!
I have been REALLY busy with other projects and personal things but I just wanted to post a quick doodle to breathe some life back into my sketchbook 
I would love to hear some comments or critique!!
See ya!

Attachments

Well done last one. Dynamic forms. I like this. *5
So freaking good…how did you start the base mesh? ZSphere’s???
great stuff here,like you works ,keep updating more:)
Hello freinds. It has been a few years since I have posted anything!!! Maybe I shouldstart posting again??
I wanted to share with you guys a model Ive been working on. Most of it was done with nurbs but there are some very complex organic parts that were sculpted using zbrush.
will post some vids later 


Amazing job! Nurbs? Rhino or Max?