ZBrushCentral

Make it look real (With mental ray)

So it took me a while to get a result I’m happy with.

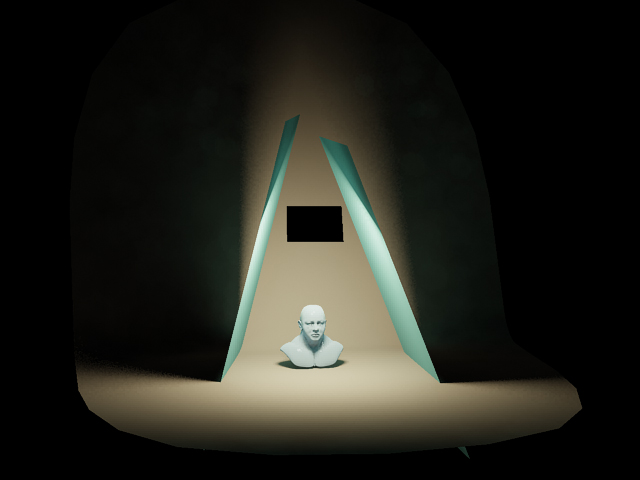
The light seems really intense; do I need to adapt a linear workflow to get the correct lighting? Or maybe just need more adjusting on my exposure_photographic? My shaders are dark but they shouldn’t be that dark.

Plus my light seems a bit farther then yours… are you working at a certain scale?

I think the only thing I did different between my light setup and yours is connect a blackbody to the whitepoint of the mia_exposure_photographic. Creates ether a warmer or cooler feel. (in images)

I noticed in your last render you had spec’s on the right side of the image. Is that intentional or is that FG points? If its not intentional and they are FG points; you can go under final gather then final gather quality and change filter to 1 and that should negate those rough FG points.

If your render times are big (mine are ok… about 2:33) you can always specify a FG map. Same location but under “Final Gather Map” render one and then change the rebuild to off. This is good for turn arounds with the camera.

Have you messed around at all with Area/Portal lights and then hooked up to a blackbody. I was pretty happy with the results and you can get smoother FG calculations. But a thread on CGsociety today was talking about how a Portal light focuses it’s light incorrectly. Just wondering your thoughts. :slight_smile:

Thanks so much for taking the time to explain your process it has really helped me out, and it was alot of fun.
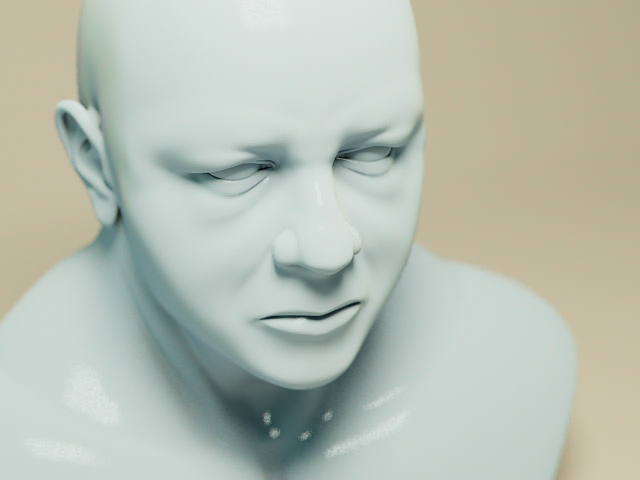
Front Shot:
[LightingTest_001.jpg]LightSetup.jpg

Attachments

Warm_LightTest.jpg

Cool_LightTest.jpg

Thanks everyone and thanks for the comments

@ 2manylayers: Sorry, I’m not max user, but the workflow doesn’t change a lot… still it’s mental ray

@ Sadicus: I don´t use a 32 bit displacement map because I only intend to enhance the silouethe of the sculpt in the render, the normal maps give the final pass of detail.

@ mrguy:

“do I need to adapt a linear workflow to get the correct lighting?”

The .455 framebuffer tweak is called -Linear workflow-

“are you working at a certain scale?”

Just the default scale exported by zBrush, The settings in the lights and the size can change in every scene/sculpt

  • Whitepont -
    The mib_ilum_cie and the mib_blackbody are intended for a photorealistic and visualy plausible spectrum of light’s color based on temperature… you should not plug them in the whitepoint.

Whitepoint tells mental ray wich color should be adjusted to white (for example a yelowish light turns to white light) just like in the digital cameras

  • Big render times-
    Old pc (3 or 4 years ago…)

“Have you messed around at all with Area/Portal lights and then hooked up to a blackbody”

Portal lights are used for architectural design, inteded for light projection from the environment to the scene, the area light’s light shape is what can be used for this kind of lighting, though the blackbody or ilum_cie is a good workflow, you can achieve the same results changing the color of your lights

“I noticed in your last render you had spec’s on the right side of the image”

The gorilla render is not mine, it’s Mighty reg’s work posted here, and yes,

The specs are because FG finds a super-bright spot, the filter just ignores those super-bright zones when rendering

Hey ISK thanks for responding.

Linear workflow - Optimally I would need to render out in .exr’s to follow a correct linear work flow… and then continue the process to Nuke?

Whitepoint - Interesting I’ll remember not to do that.

Portal lights - Yeah Primary I’ve used them for lighting rooms with physical sun and sky. But as I went further into learning them I found a few videos where people sued the portal light as a main light… like what you would do with an are light + physical light node.

Monkey Render - haha yeah i read that after i posted sorry. :smiley:

So what the solution to getting correct diffuse colors when rendering? It doesnt seem right that i need to make my color darker just so the scene isnt blown out… any thoughts?

oh snap

thanks for this imma try it out

MrGuy - You can plug a gamma correction node for each maya color, but It’s really boring, it’s better to tweak your colors with an IPR render, and yes, they need to be a lot darker to be rendered correctly (Maya’s gamma issues)

About the exr file, you should render a 32 bit image, with a 1.00 gamma in the framebuffer, because the 32 bit images have a 2.2 native gamma. (Changing the gamma in the framebuffer would result in an ugly-milky 4.4 gamma)

Hi Isk,

A gamma correct node for a color or a texture? I would think that Maya’s default color system would be fine… i guess not?

Tweaking with IPR doesn’t help with the fact that if you make a texture map in photoshop it just doesn’t look correct with physically correct light.

Rendering in 1.0 avoids the need for gamma correct nodes for each texture right?

ISK; I just want to thank you again for taking the time to explain these things. I know this is a Zbrush Forum but you’ve really helped me out. I’m just now starting to get into Linear Workflows and physically correct lighting.

This is an awesome tutorial, but I have a question.
What are the specs of your computers? Apparently I need a new one or it’s just a limitation of boot camp.

I have a 2.6ghz macbook pro with 4gb of ram and a geforce 9600m running Windows7

ZBrush runs well, but I can barely open anything in Maya without my computer grinding to a halt.

Are you importing the high res mesh from zbrush?

Yes, how should I go about doing this? I’m very new to Maya.

This seems pretty high res http://www.zbrushcentral.com/showpost.php?p=671351&postcount=61

You can always try decimating your sculpt using the Decimation master and then importing it back to maya. Your computer specs are pretty decent. Most of my work while I’m away from home is done on the same machine as yours.

All the best.

Hasan

Thanks, that’s a great tool, but the decimation master .zip located here http://www.pixologic.com/zbrush/downloadcenter/zplugins/ doesn’t have the decimationmasterdata folder so I can’t get it working

El render me esta saliendo completamente blanco. Me puedes explicar que estoy haciendo mal? Muchas gracias amigo. Te salio con madre el render que hiciste.

can you make a setup like this for renderman?

A very fine tutorial!

Could you answer a question for me please?

Why is it you store a morph target at the highest subdivision level before map generation??

"Generating the normal maps and displacement maps is really quick in 3.5 r3, simply saving a morph target in the highest subd level and presisng the “create disp map” or “create normal map”.

Thank you

James

@ Demilich: Sorry for the late reply but… ajusta los parametros de la luz o de la camara… si tu luz es demasiado fuerte quema la escena

@ wolf57: I’ll try the renderman for maya and upload some setup.
@jimeeh: As far as i know that will tell zbrush the subd level from wich it will generate the maps

“As far as i know that will tell zbrush the subd level from wich it will generate the maps”
This ‘morph target’ operation doesn’t seem to make any difference, displacement maps should be from first to the higher subdivision level. Then you choose the third for example level and get normals from this one. Thats all. But I also export normals from lower sub levels as well, you never know what model will be in front or to the background. But these are the basic principals. A great tutorial here, once again. :+1:

When I render with my camera everything goes black.
Any idea?

good tutorial! thx man.
cheers!

@ rohtie : Try adjusting the cm2 factor in the lens shader

ISK-86, I’ve been a huge fan of this thread, it’s really helped me out quite a bit along with the tut from Ryan Kingslien which is right in the same vein. It’s a huge help.

The only that has been driving me crazy is that I don’t know how to setup my Mia_Material (although I’m using Mia_Material_x, and I’d like to use eventually Mia_Material_x_Passes).

I saw that you wrote something about plugging in your normals into the Standard Bump. I’m only using a displacement map, and I have been looking everywhere trying to figure this out- how do I use a displacement with Mia_Material_x?! I realize that’s probably a very noob thing to ask, but I have looked all over for the answer. I’m not sure how to create the displacement node, and where even I should be plugging it into.

I want to take an exported .ma from Zbrush and bring it into Maya, then rewire all the displacement stuff from the Blinn that it gives me and plug it into a Mia_Material_x. Would you be kind enough to help walk me through that a little or at least point me to a good tut for it?

Either way, this thread has been a huge help, and I love it!

Thanks,
Cory